How to use multifunctional teeth to create new dentures
How proper denture selection ensures affordability and functionality


Denture patients often ask for cost-effective solutions that simultaneously offer individual esthetics and proper function. Practitioners desire simple and reproducible setups that accomplish efficient workflows and offer their patients economical solutions without any issues. In order to fulfill all these expectations, choosing the right denture teeth is essential. In this case report, denturist and dental technician Daniel Lavrin (London, England) demonstrates how VITA Multifunctional Teeth (VITA MFT, VITA Zahnfabrik, Bad Säckingen, Germany) can be used to create new dentures in the upper and lower jaw.
Clinical situation
A 52-year-old male patient presented in the clinic with a fractured upper denture. During his first clinical visit, it became obvious that the old dentures had extreme functional deficits, including poor esthetics. The denture in the lower jaw presented with missing teeth in regions 22 and 27 (in the lower cuspids), after the extraction of the patient’s natural teeth. No occlusal contacts on the right molars or a general substantial loss of the vertical dimension were visible. The Class III setup didn’t offer functionality and stability. The denture teeth were severely abraded and looked dull. The patient didn’t use his lower denture because it didn’t offer stability when he talked or chewed. The upper and lower alveolar ridge presented signs of atrophy, resulting from extractions and a missing load. It was determined to rehabilitate the patient with new dentures. The goal was to switch the bite to Class I in normal occlusion and to give the patient functional security. Denture fit and comfort as well as esthetics needed to be re-established.
Trending article: The top 5 techniques of 2018


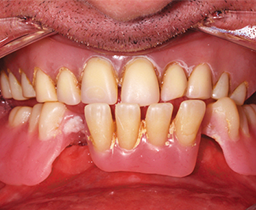
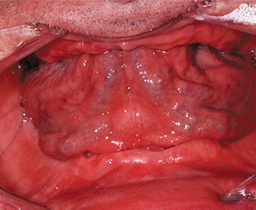

Fig. 1 Fig. 2
Clinical pre-treatment
Alginate impressions were taken and anatomical models fabricated to create individual trays. The mucodynamic impression on the tray rim took place with rigid Impression Compound (Kerr Dental, Biberach, Germany). In a second step, the bony anatomy was molded with low viscosity A-silicone using Virtual Light Body (Ivoclar Vivadent, Schaan, Liechtenstein). Master models were poured out and light-cured plates with a wax bite block were fabricated on them. The intraoral bite registration in centric position was realized with the A-silicone CADbite (Ivoclar Vivadent). The articulation of the master models was configured according to the bite registration, followed by the creation of the wax try-in.
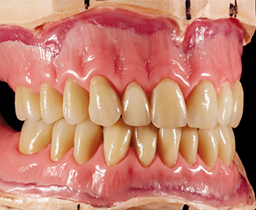


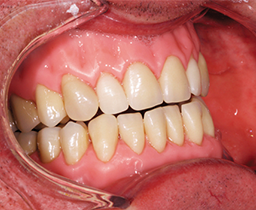
Fig. 3 Fig. 4
Set-up and try-in
The set-up took place with VITA Multifunctional Teeth. The anterior teeth were chosen in accordance with the patient. In the esthetic zone, different shades were used to increase individuality. Due to the natural tooth axis and coordinated angle characteristics, the front teeth could be matched quickly.

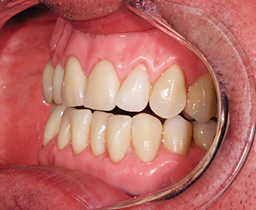
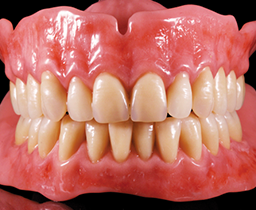

Fig. 5 Fig. 6
The occlusal design of VITA MFT Posterior offered an easy and reliable centric with buccal contacts during the set-up. The lingualized occlusion provided optimized denture stability. Extreme care was taken during the wax-up for the full contour of the anatomical gingiva. Based on the clinical situation, the bite registration was taken with the set-up during try-in in order to check static and dynamic occlusion in the articulator.

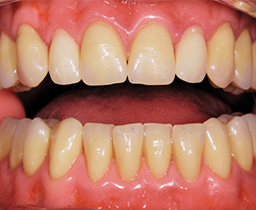
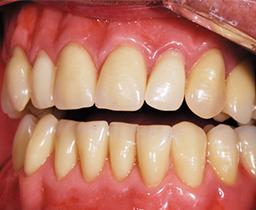

Fig. 7 Fig. 8
Finalization and outcome
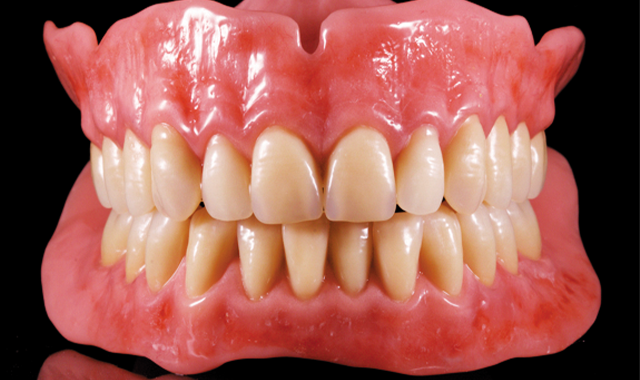
The final set-up was duplicated with hydrocolloid for flasking and transferred into polymer with the auto-polymerizing and pourable Castdon Resin (Dreve Dentamid, Unna, Germany). To establish an individual and lifelike gingival architecture, internal colors of the DentureArt System (Dreve Dentamid) were applied into the flask before the pouring technique took place. After the polymerization, excess sprue, bubbles and small defects were removed with a rotating instrument. Polishing was conducted with pumice and shine on a polishing wheel. A handpiece and a bristle brush were used to finish the teeth around their necks and margins. The functional aspect of switching from a Class III to a Class I bite was successful. The optimized fit of the new dentures provided stability and comfort, the esthetic zone presented an excellent esthetic play of light and colors, and the patient was extremely satisfied with his new economical rehabilitations.

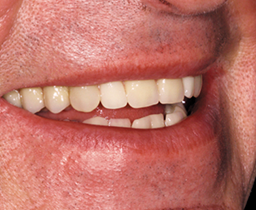
Fig. 9