How to complete a dual-layered, direct-bonded smile rehab in 7 steps
Learn how to rehab patients' smiles with this case study using Tokuyama's Estelite Omega Composite
Learn how to rehab patients' smiles with this case study using Tokuyama's Estelite Omega Composite


Until recently, Tokuyama’s staple product, Estelite Sigma Quick, has been my “go-to” for delicate assignments such as converting a peg lateral incisor to a full sized tooth without being noticed. Most recently, Tokuyama has collaborated with Dr. Newton Fahl, Jr. in developing an expanded composite system based on the Estelite family of composites, called Estelite Omega.


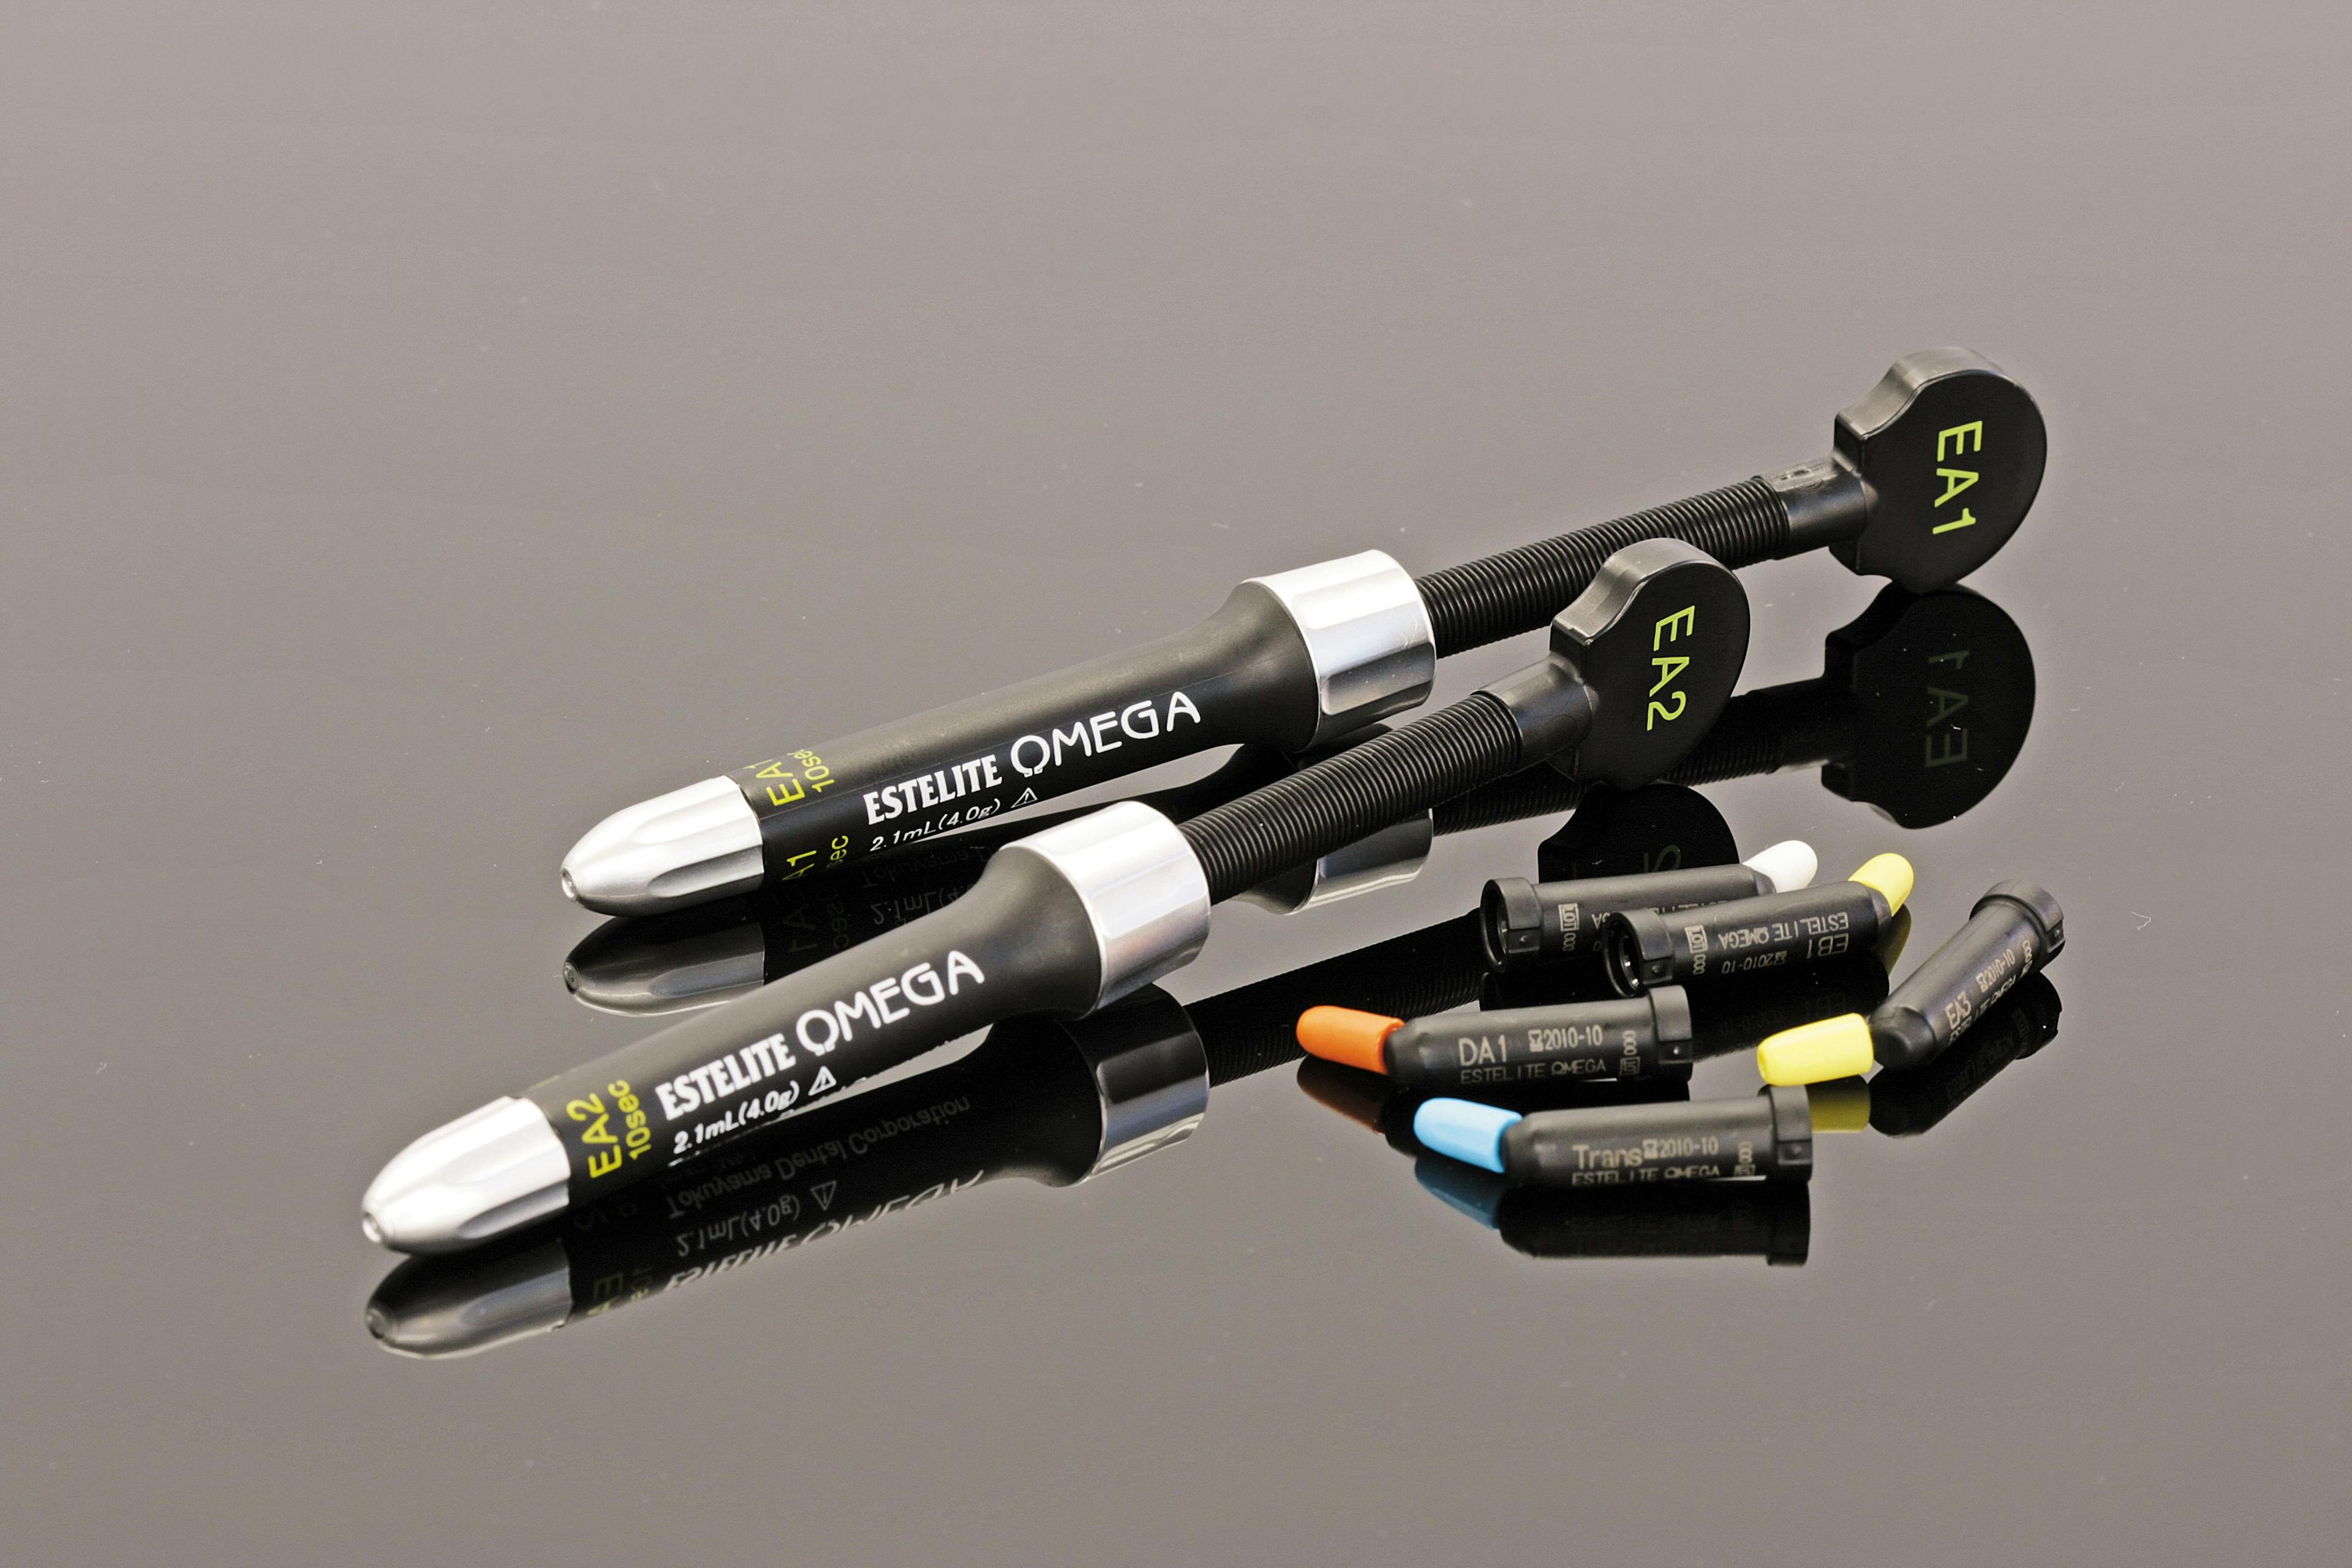
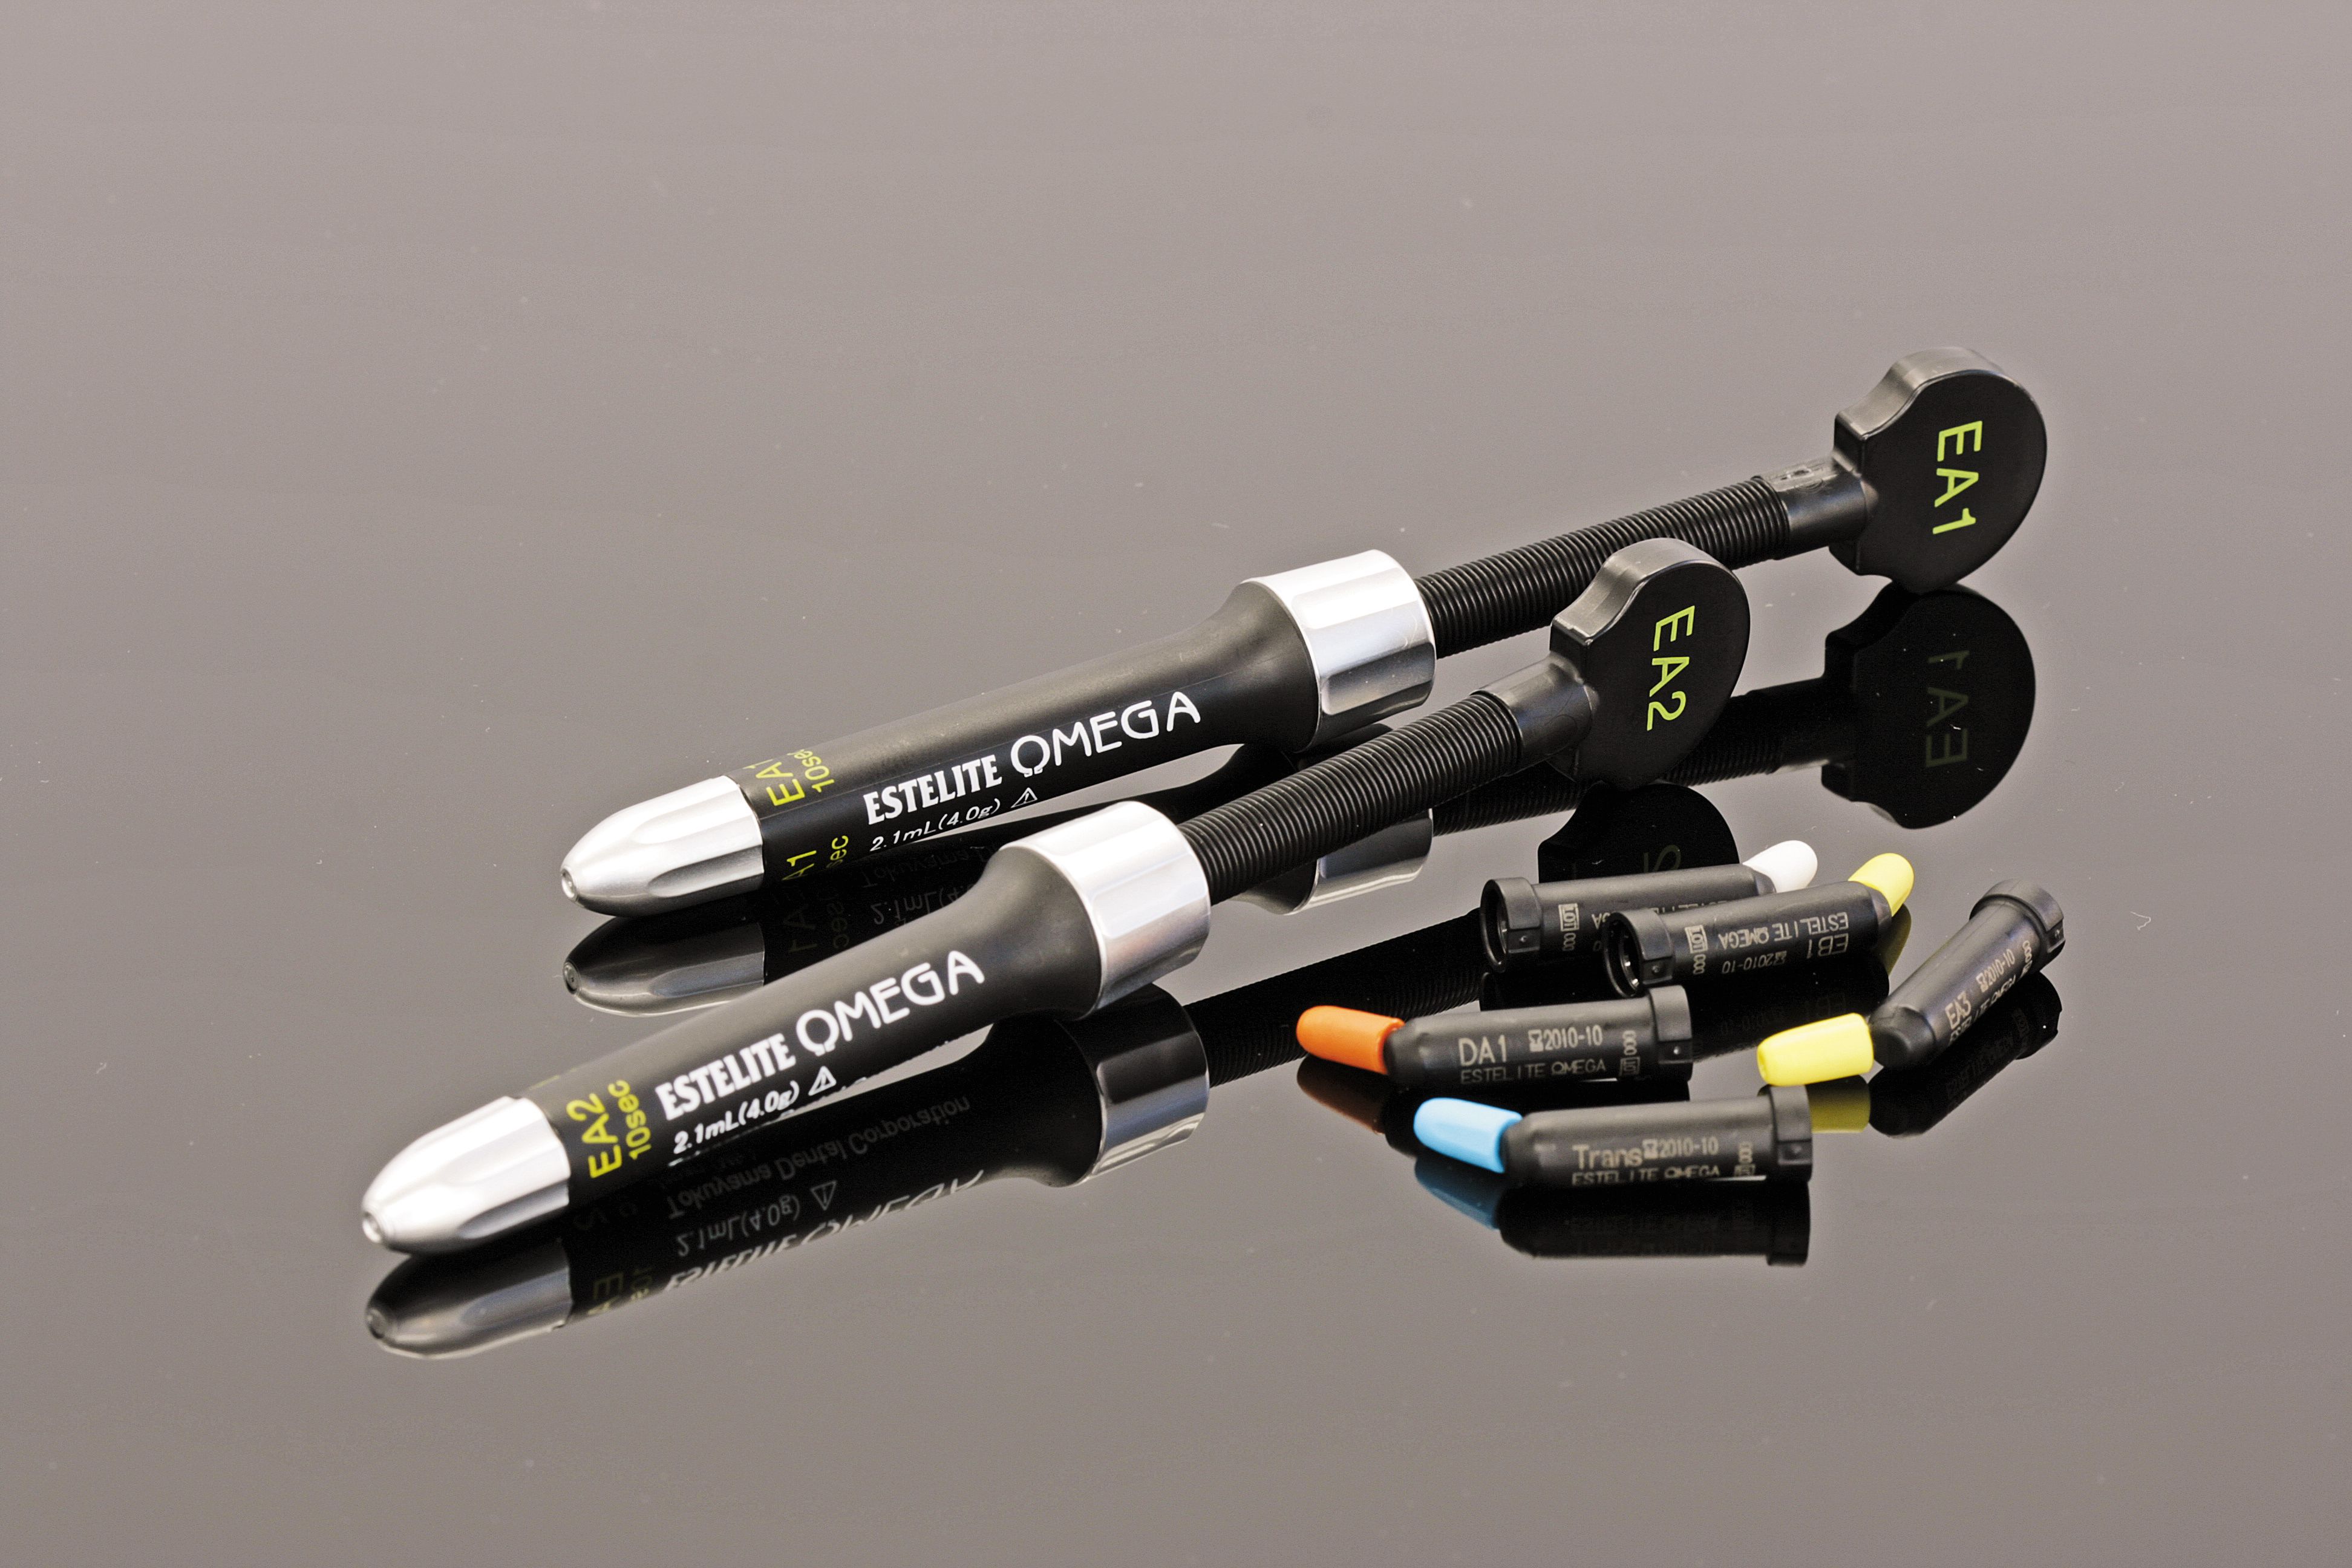
While Estelite Omega handles and polishes similarly to Estelite Sigma Quick it features an expanded and enhanced shade set that empowers the dentist to recreate nature. The visual similarities to actual enamel and dentin need to be seen to be appreciated. Shades include three dentin shades (DA1, DA2, DA3); four body enamel shades (EA1, EA2, EA3 and EB1-the nomenclature makes it obvious); two enamel effect shades (Trans and Milky white); and two bleach shades (BL1 and BL2), for a total of 11 shades.
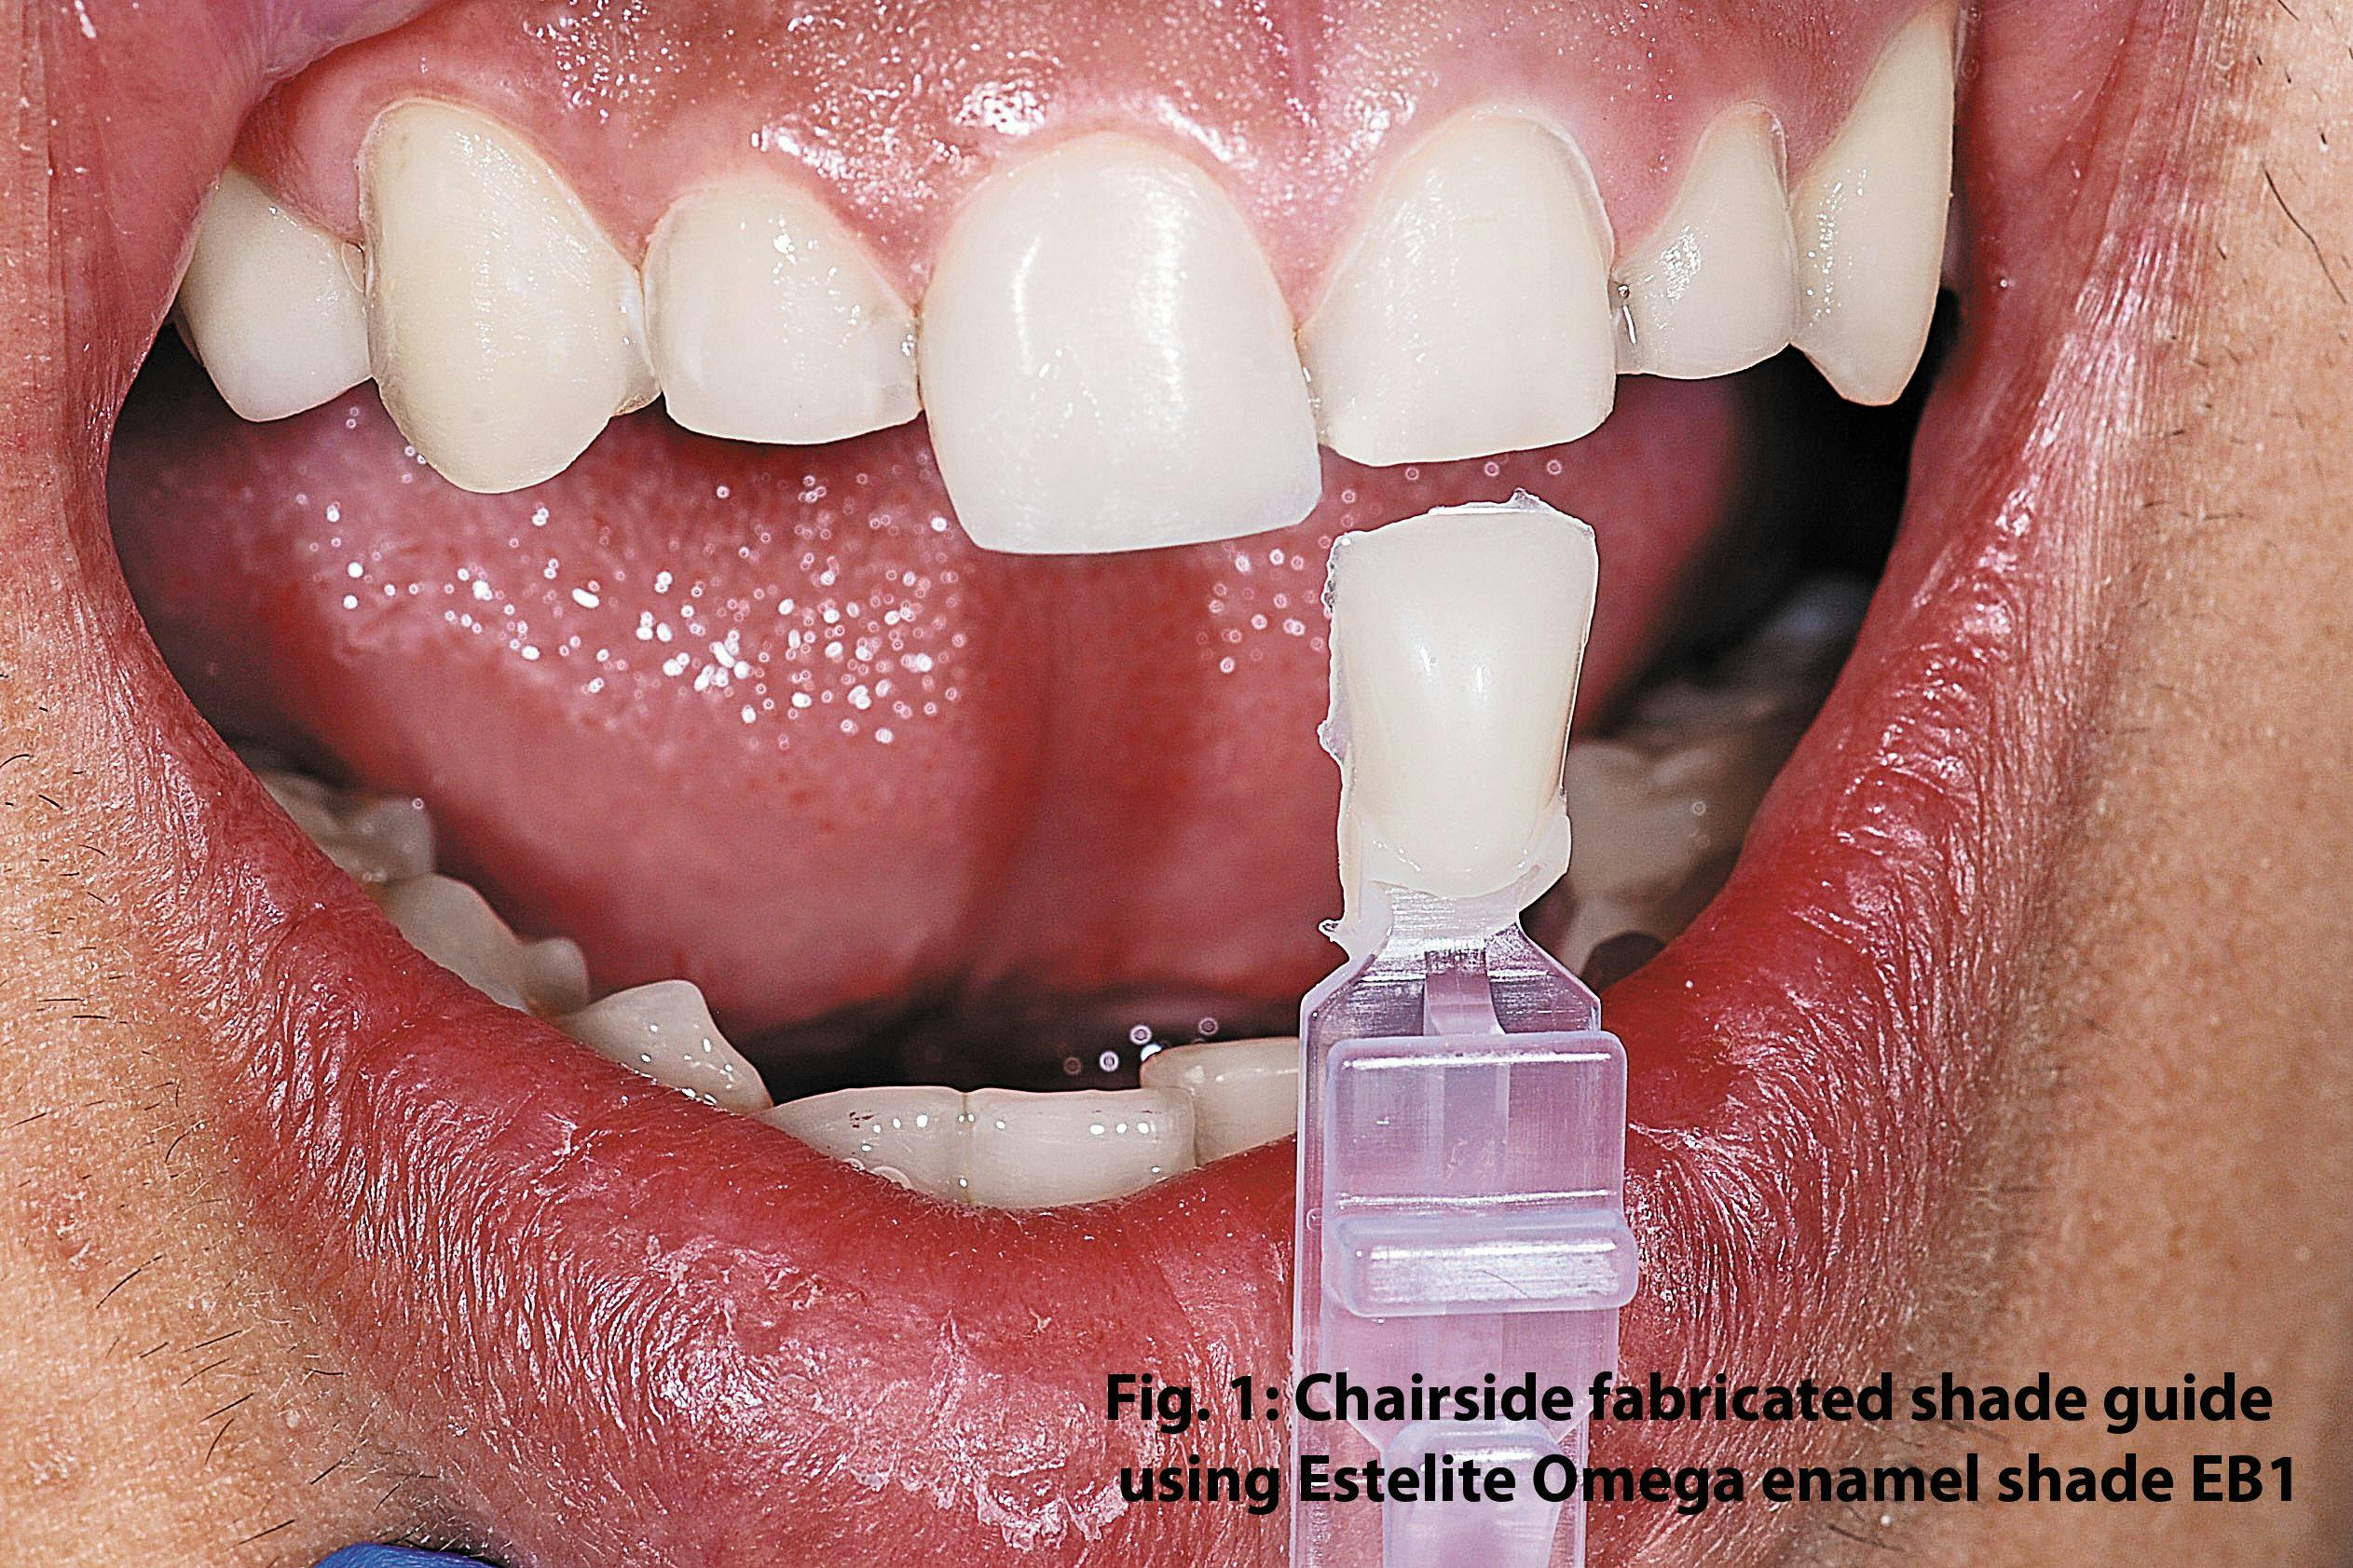
Tokuyama also offers the Estelite Color Kit to complement the composite system. It features flowable paint-on colors and opaquers for those wishing to characterize beneath the surface of the enamel effect layers. Estelite Omega takes a distinctly different approach to its shade guide. The operator is provided with blank shade tab handles and a mold for both the enamel and dentin shades with which to fabricate a working shade guide from the composite contained in the Omega kit (Fig. 1: click to enlarge).
Case report
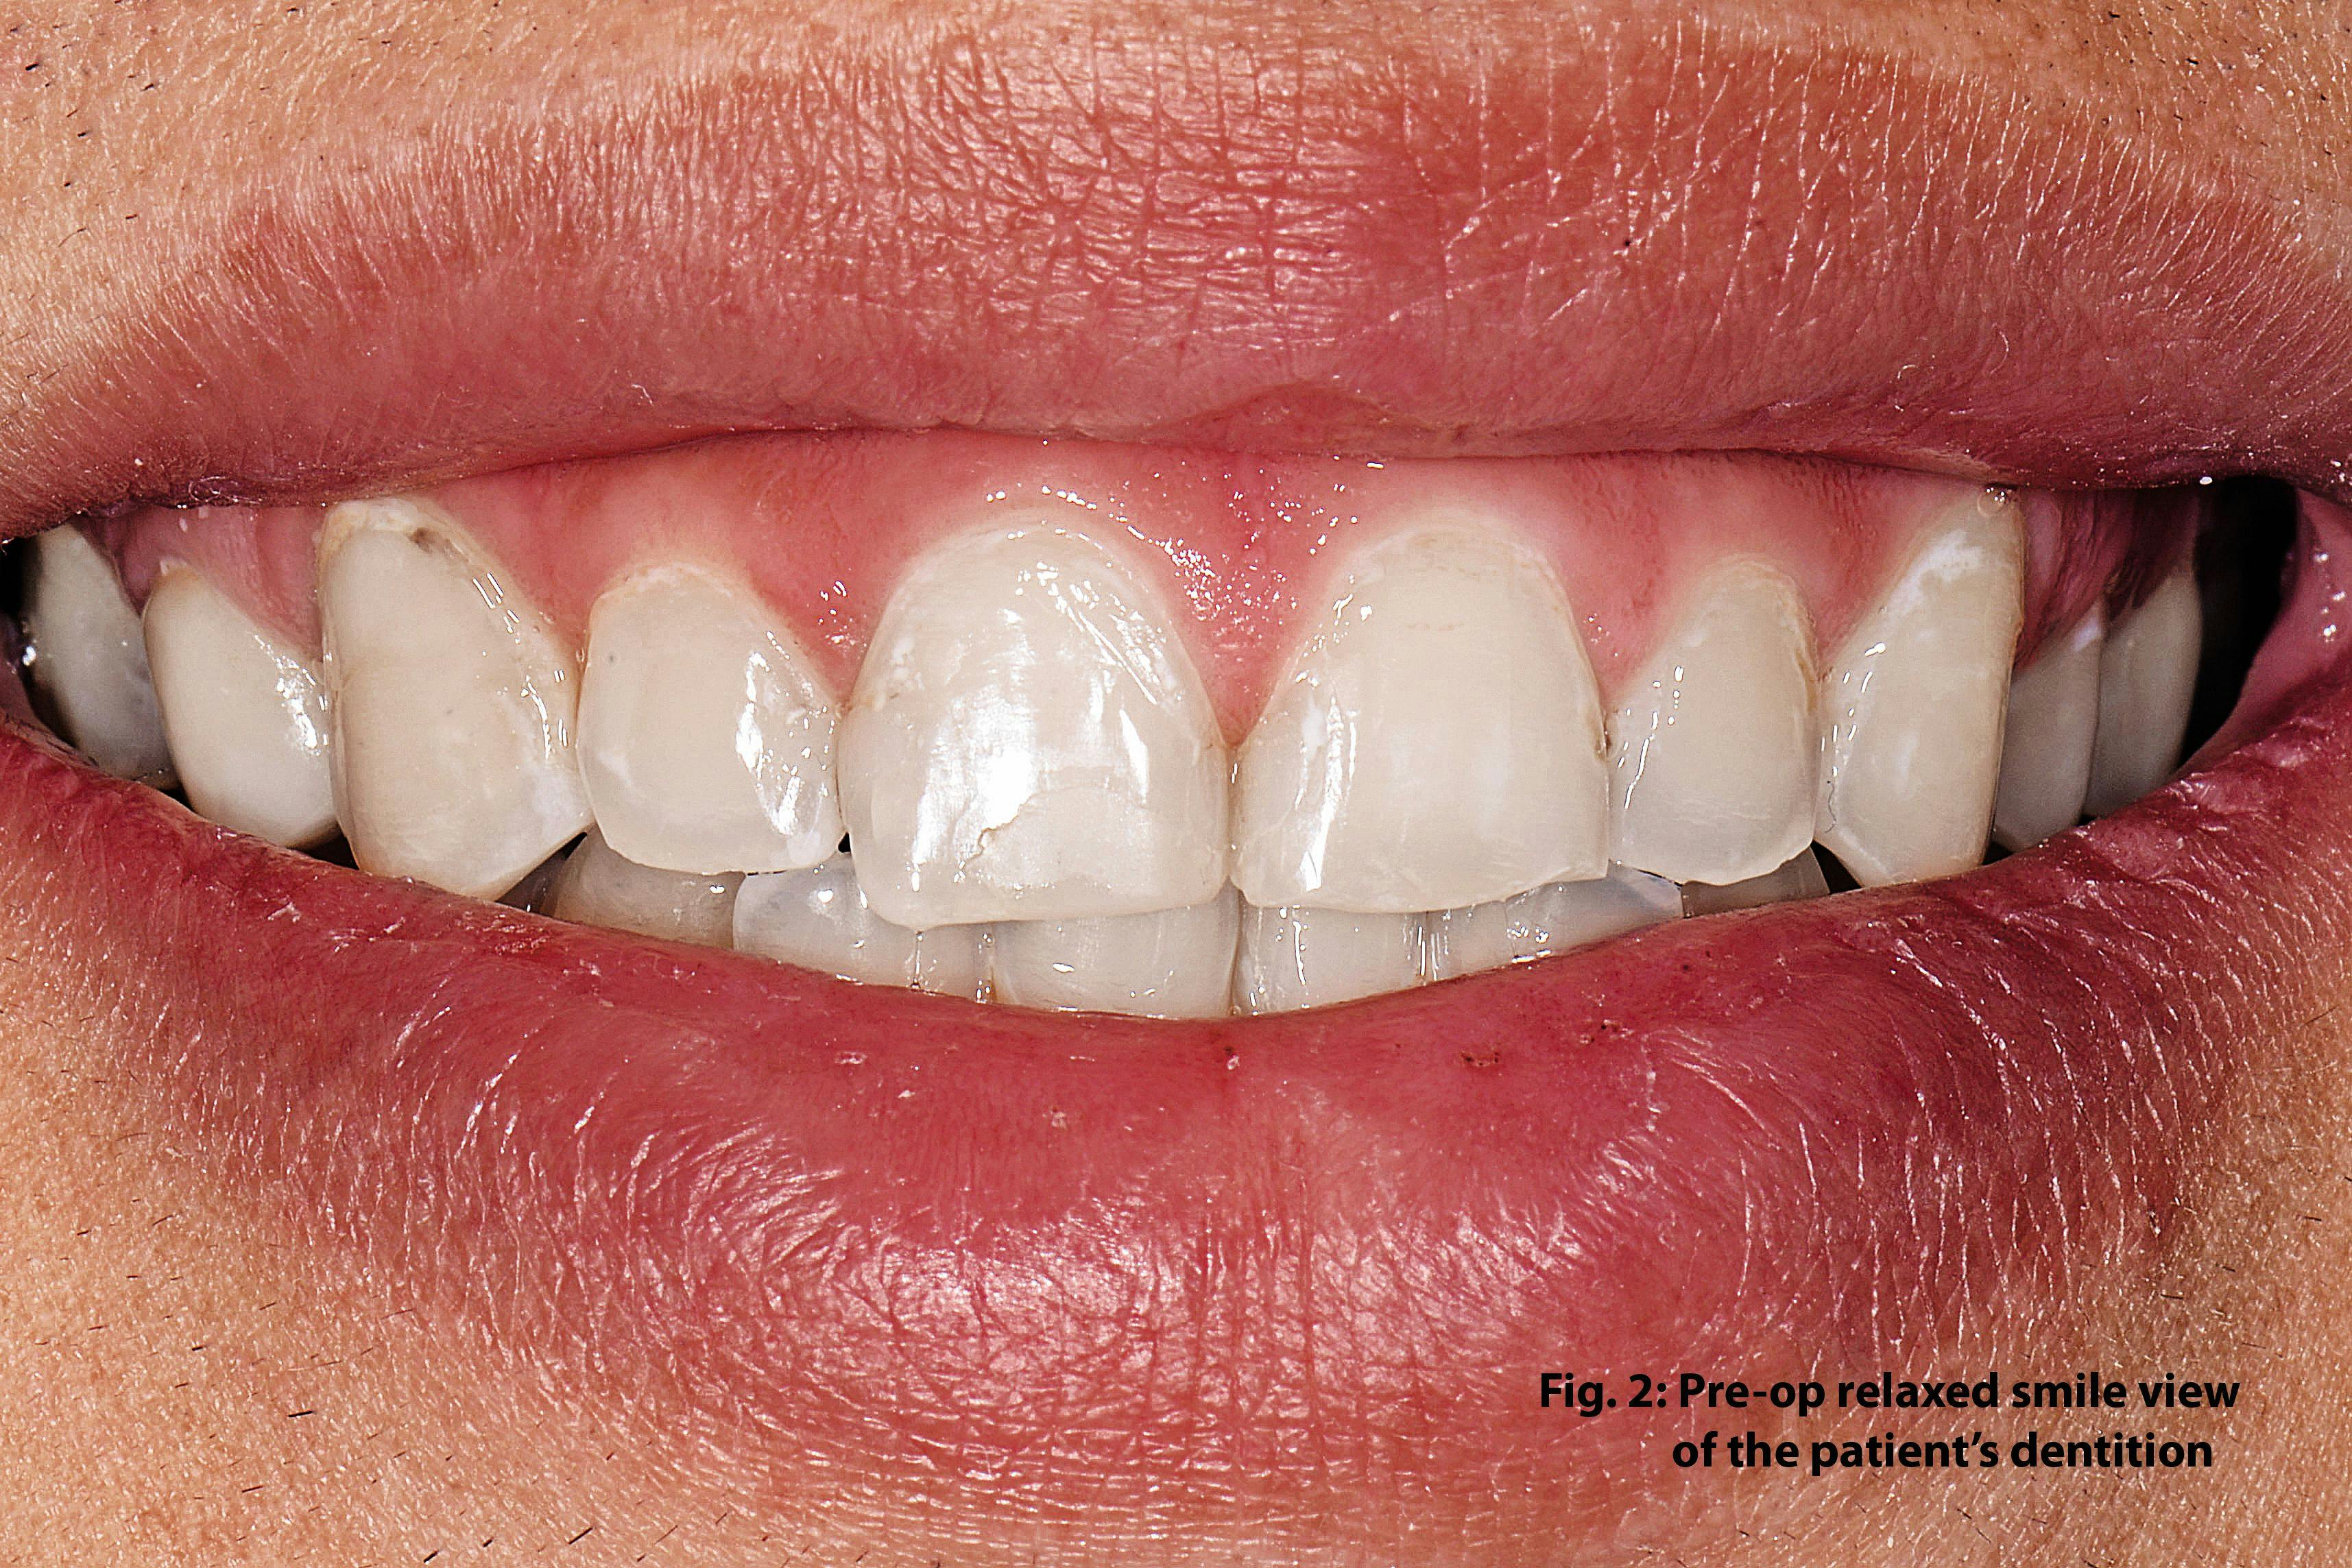
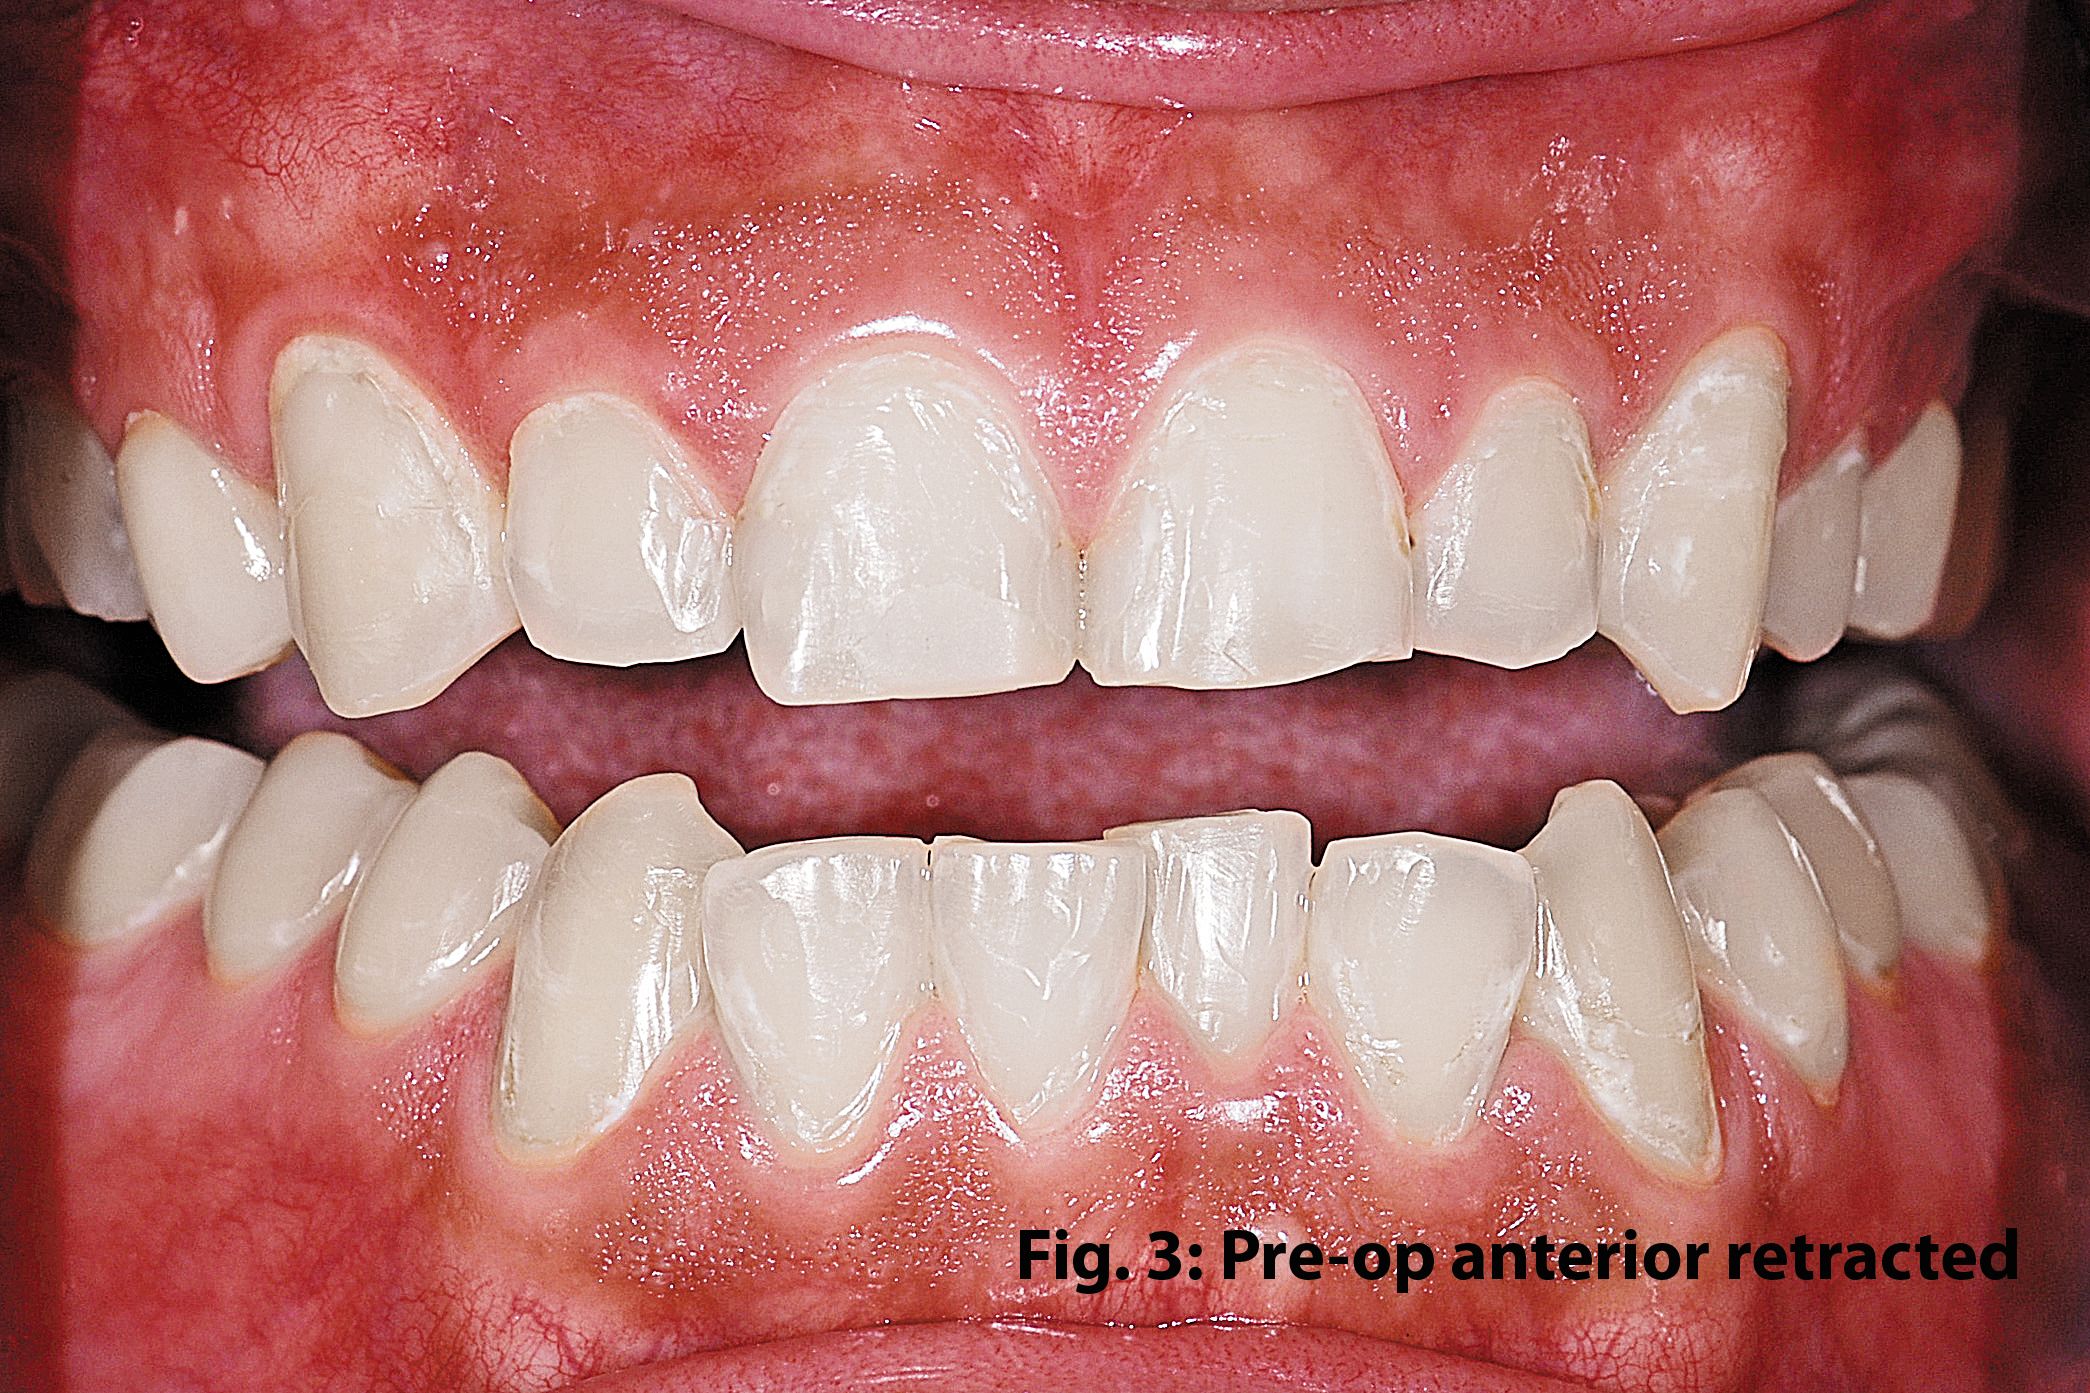
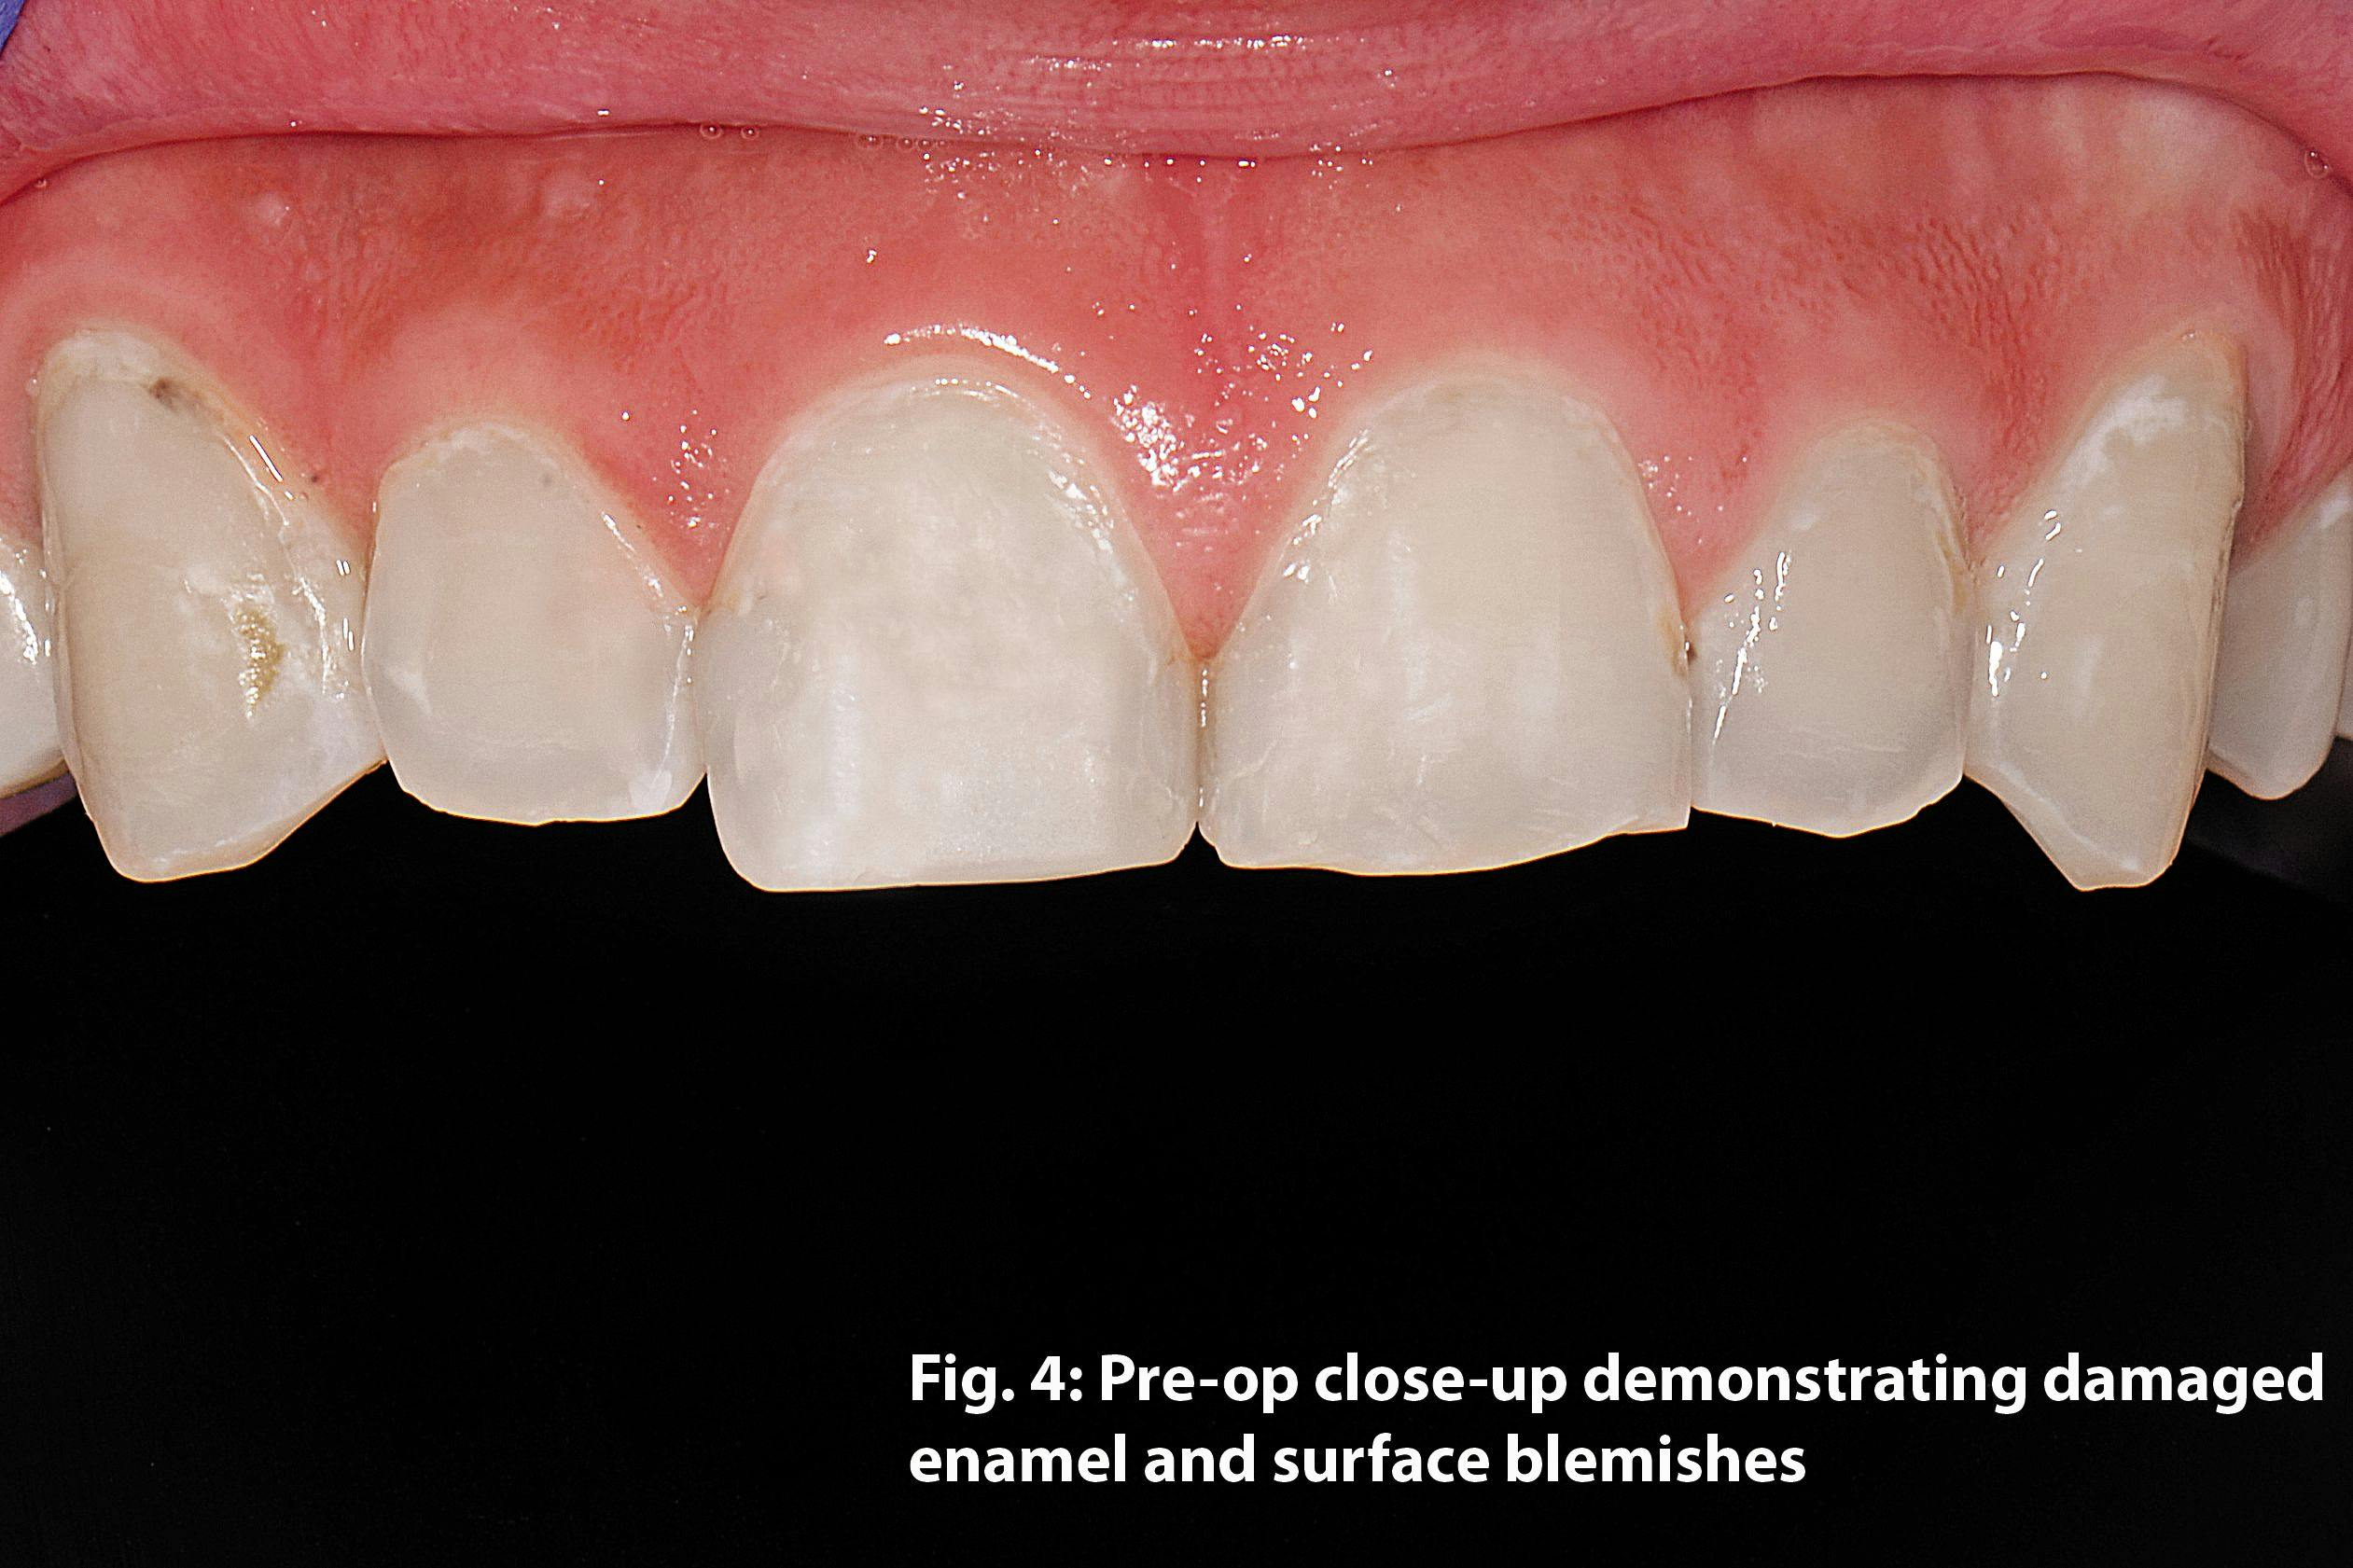
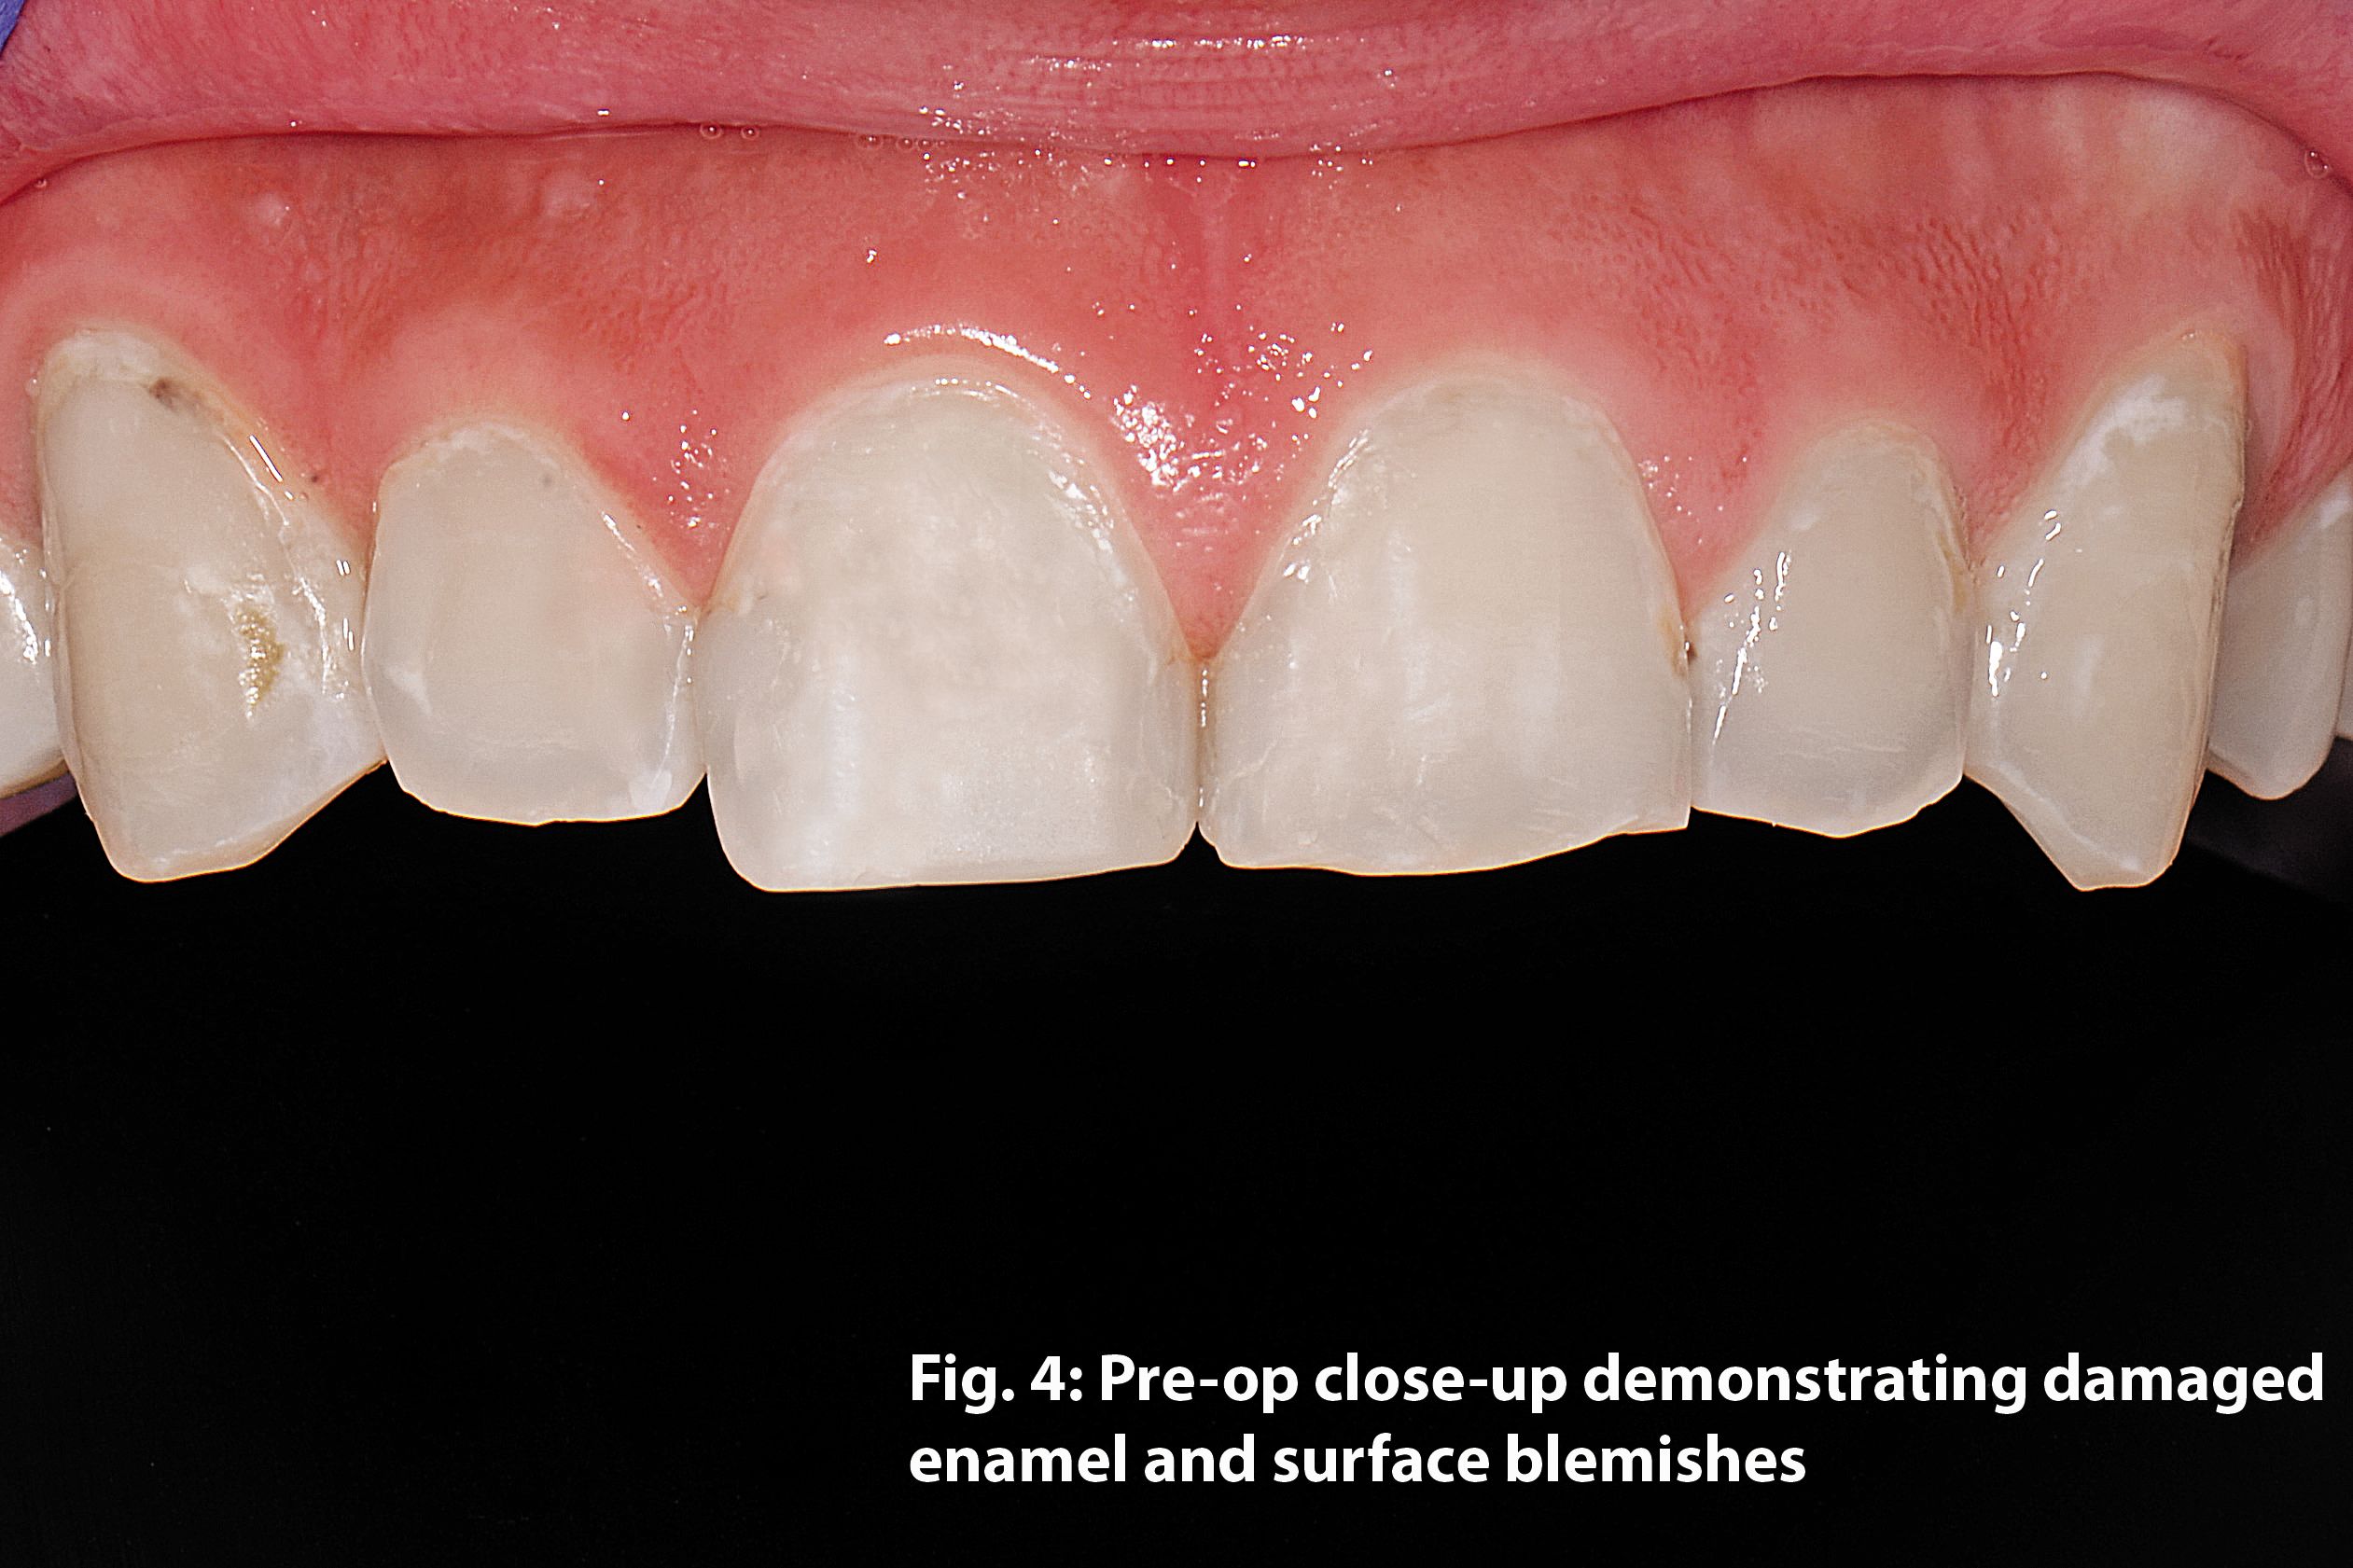
This case presentation is a prototypical canine to canine rehab with a bicuspid bonding added on tooth No. 12. Tooth No. 5 had previously been crowned and was thus left out of the mix. The patient’s smile suffered in appearance owing to the effects of bruxism, blemishes left by surface caries and a less than desirable yellow coloration (Figs. 2-4: click to enlarge).


Step 1: Because the patient’s dentition was structurally intact and its shade wasn’t far from where we desired it to be, I elected to use a Type 1 layering approach involving just two shades from the Omega kit; the Body Enamel shade EB1 and the Milky White Enamel Effect shade as a “top-cover.” This approach necessitated the least amount of tooth structure removal and managed to pop the color up enough to subtly brighten the patient’s smile.
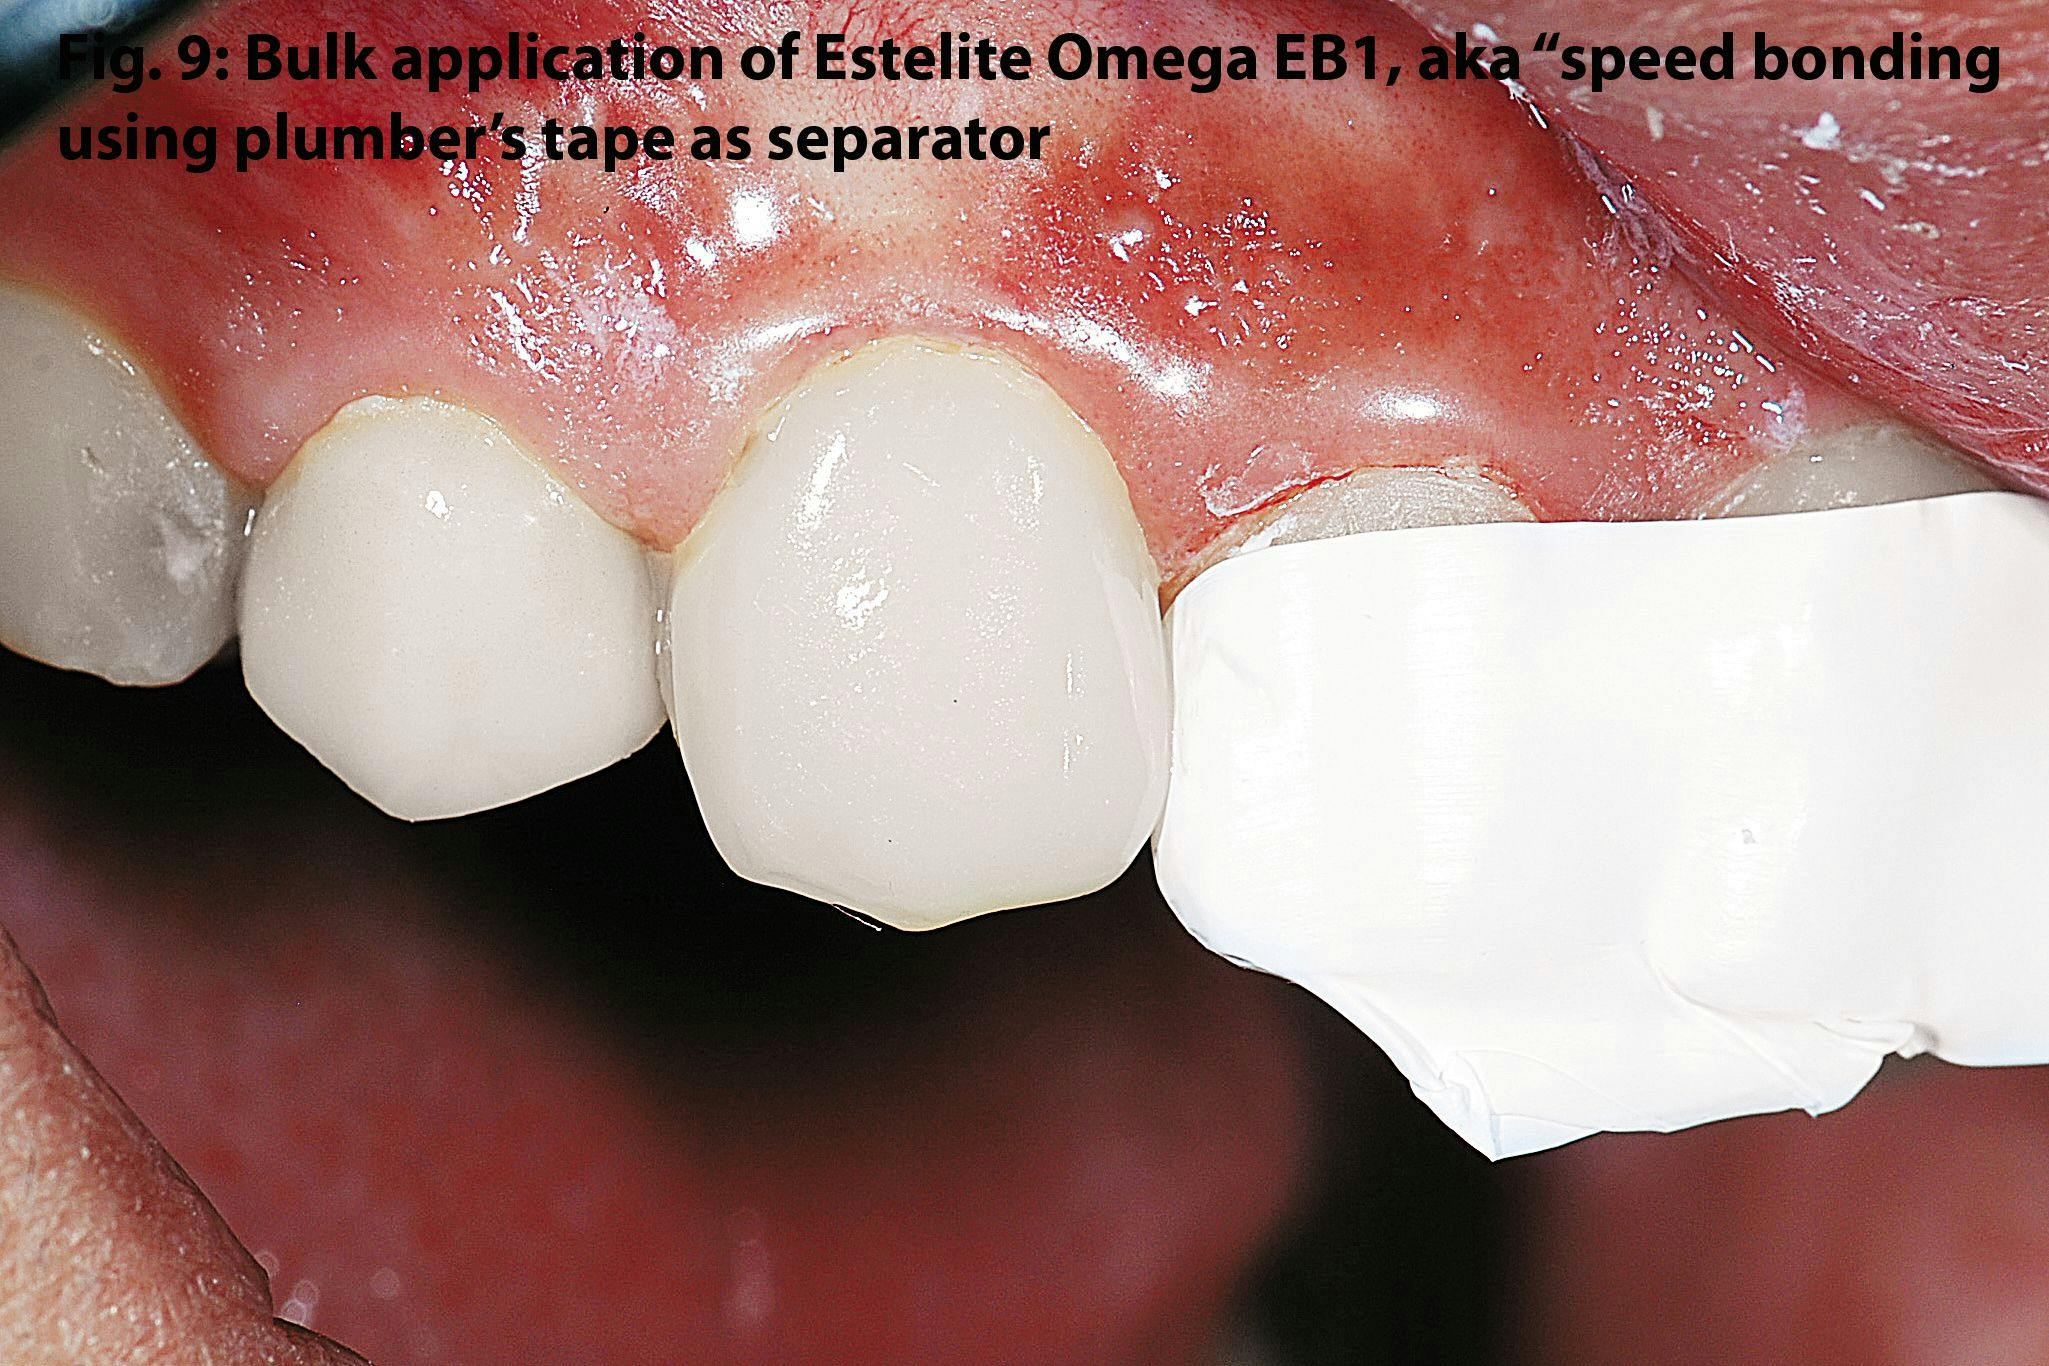
Estelite Omega lends itself to what I call “speed-bonding.” Speed bonding refers to applying a bulk amount of composite to the tooth surface such that the entire tooth form is created from a single application of the primary shade of composite. The shape created is subsequently cut back for the addition of whatever top coat will be applied. The advantage to this approach, aside from the speed, is the absence of seams often observed with multiple composite applications. Estelite Omega, while certainly sculptable, possesses a self-leveling and somewhat creamy consistency that allows it to easily “drape” itself over tooth structure. This self- leveling characteristic requires only that the curing light be kept handy to capture one’s quickly created anatomy.
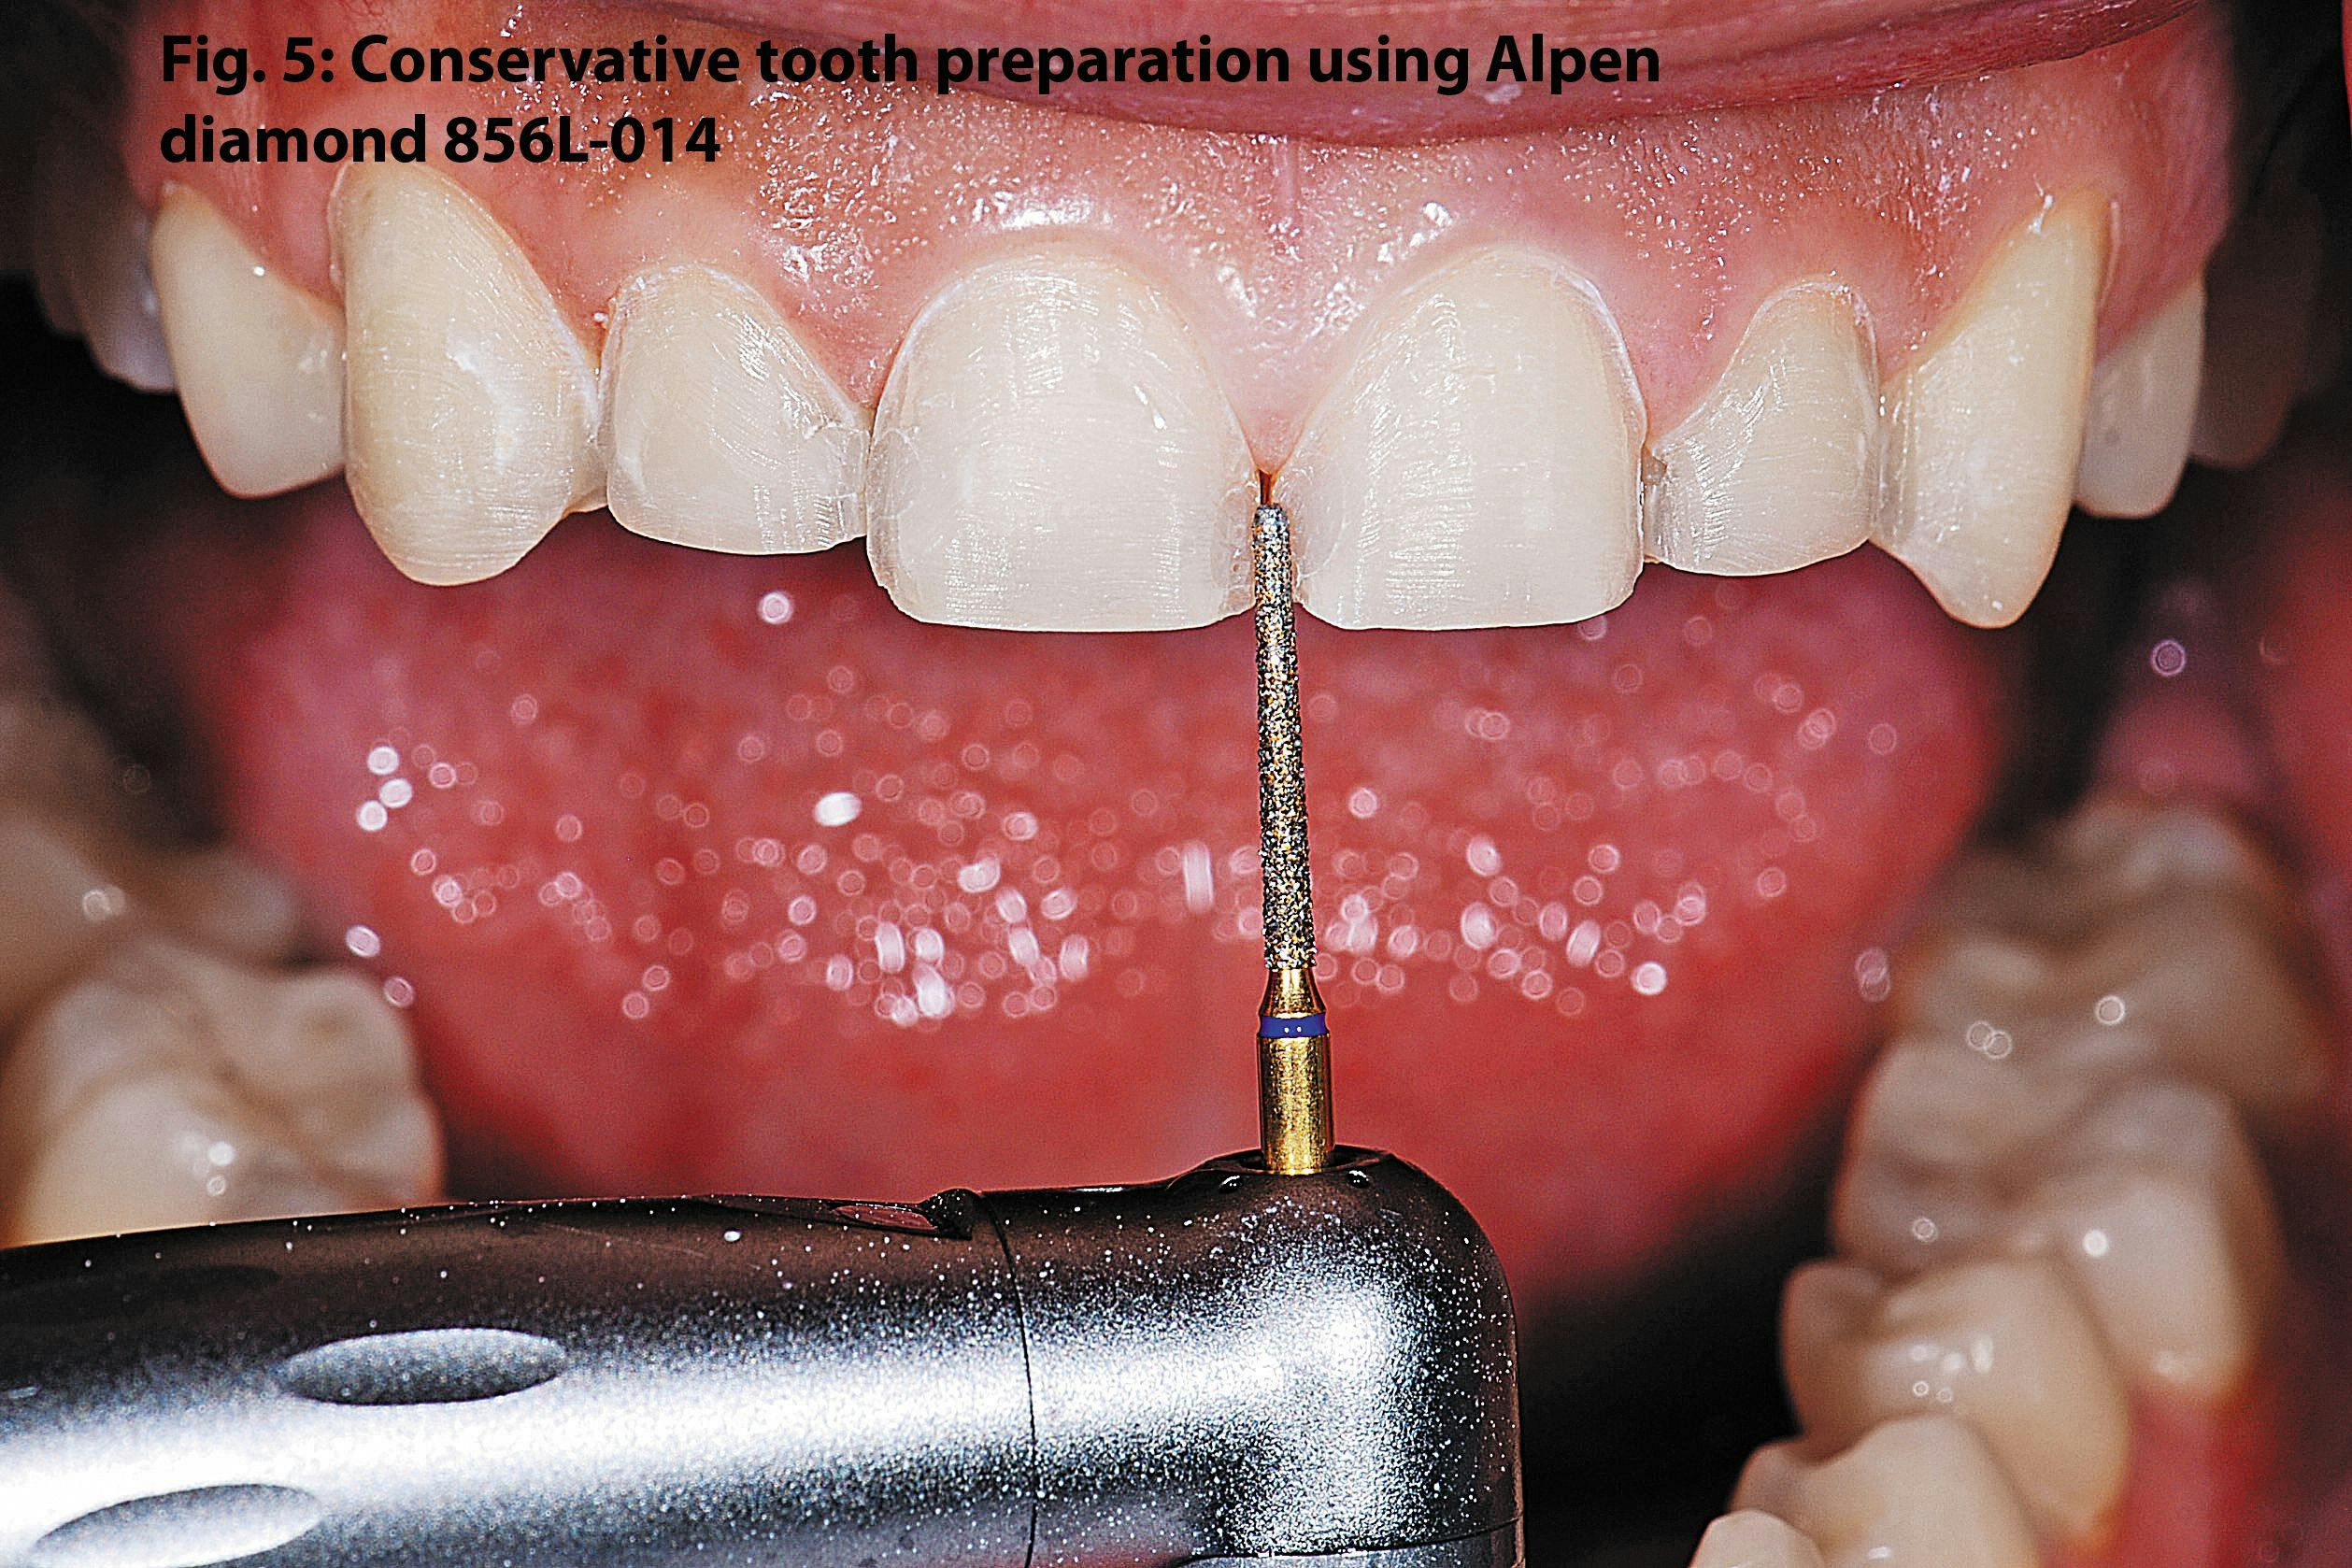
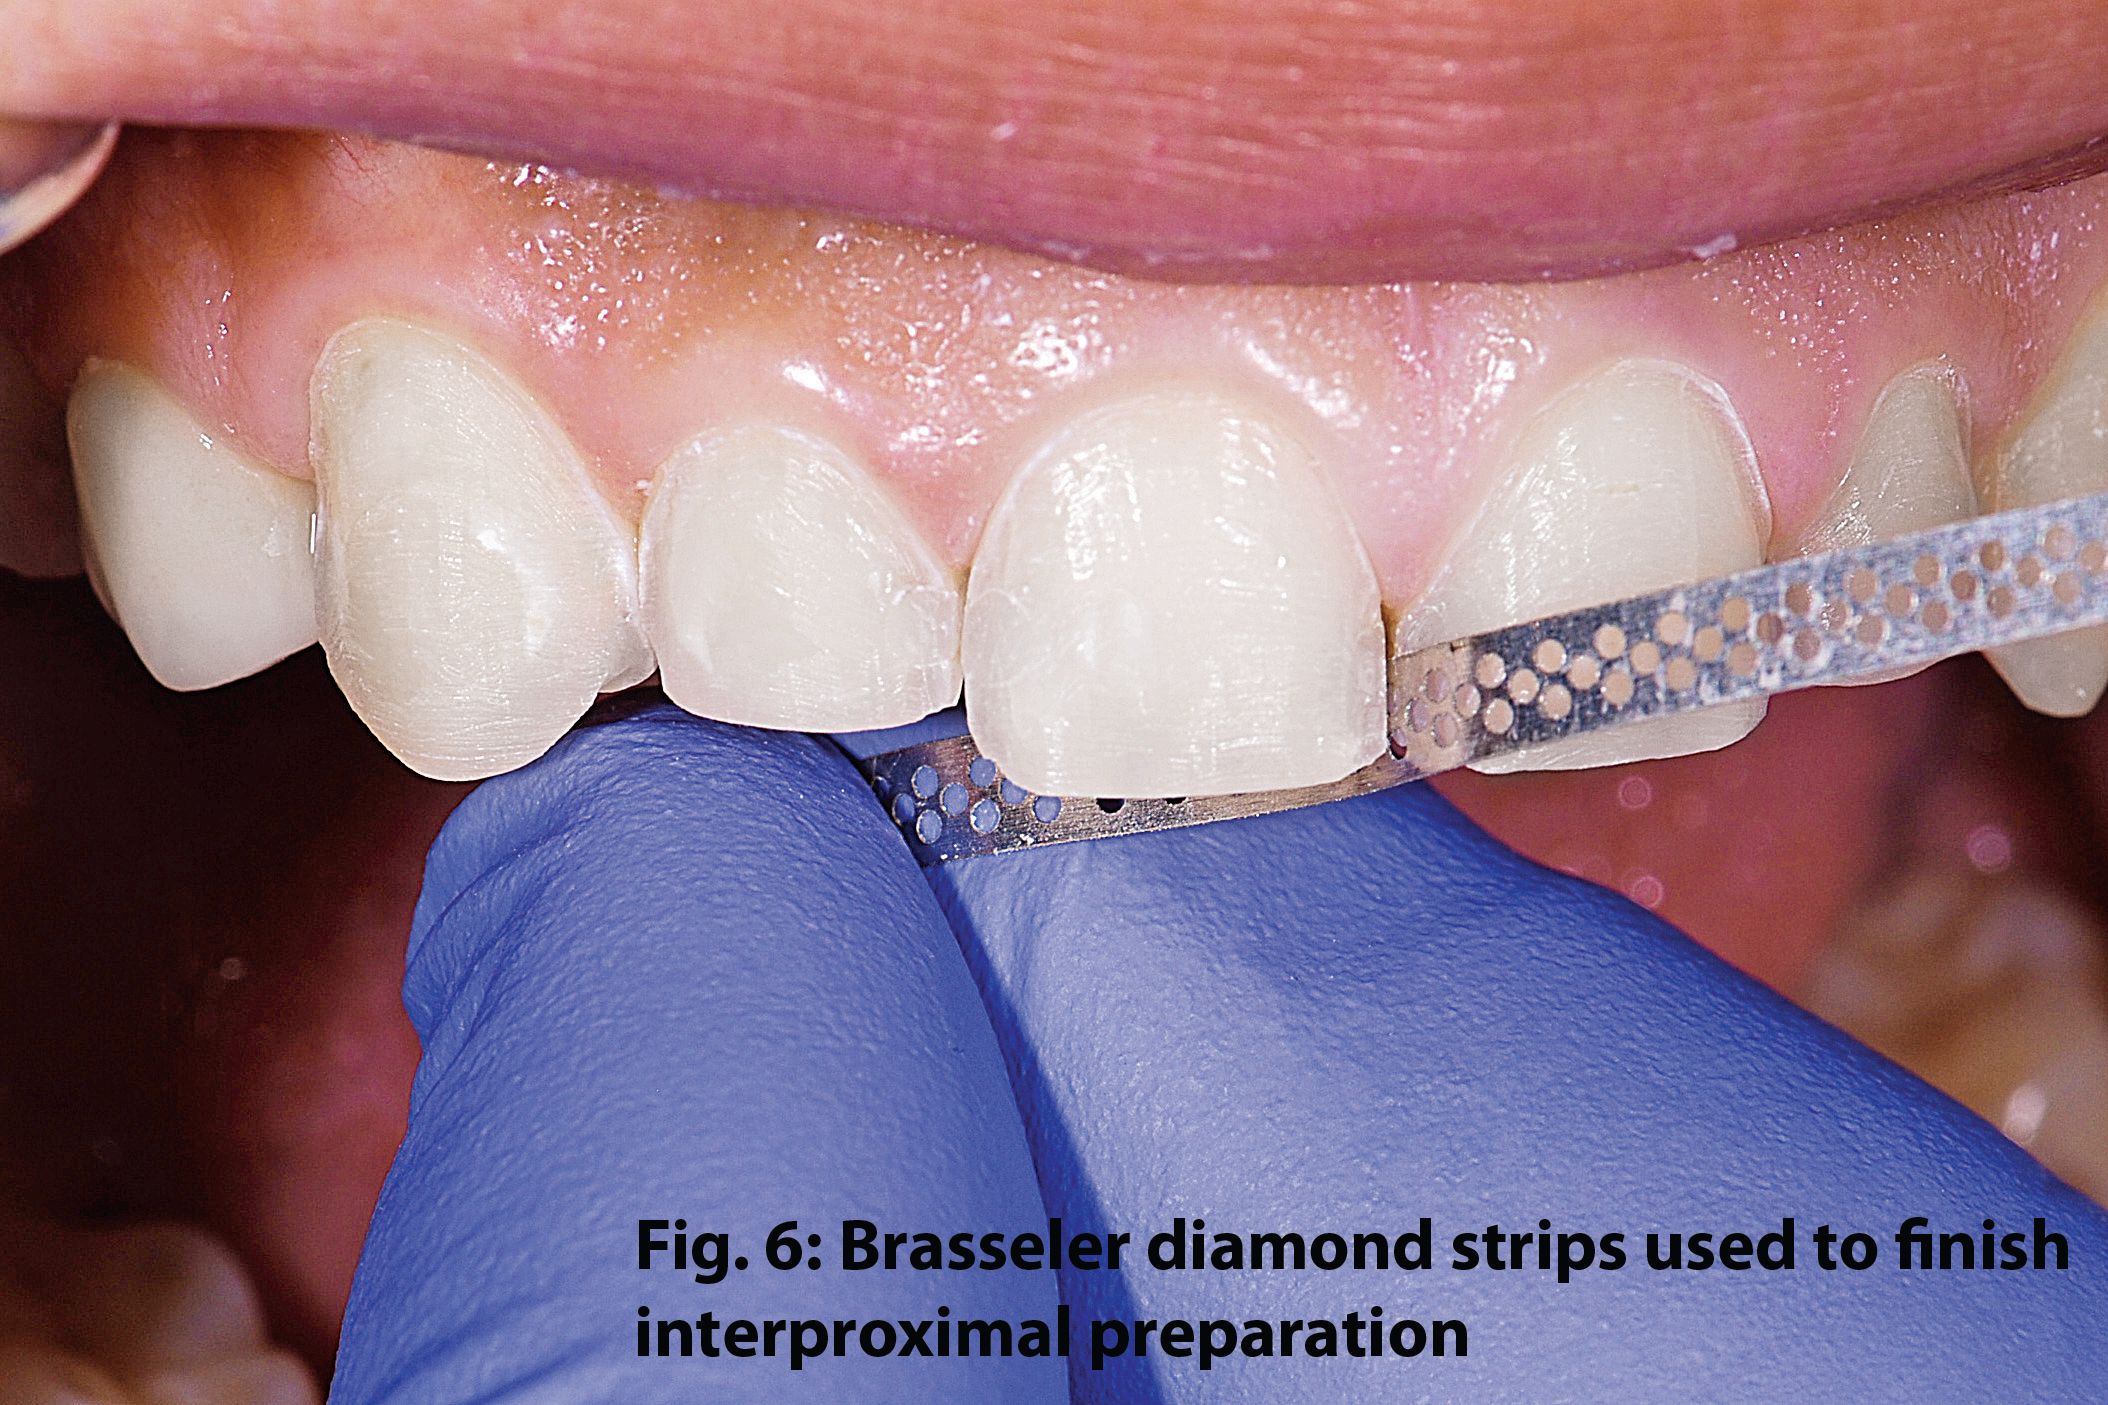
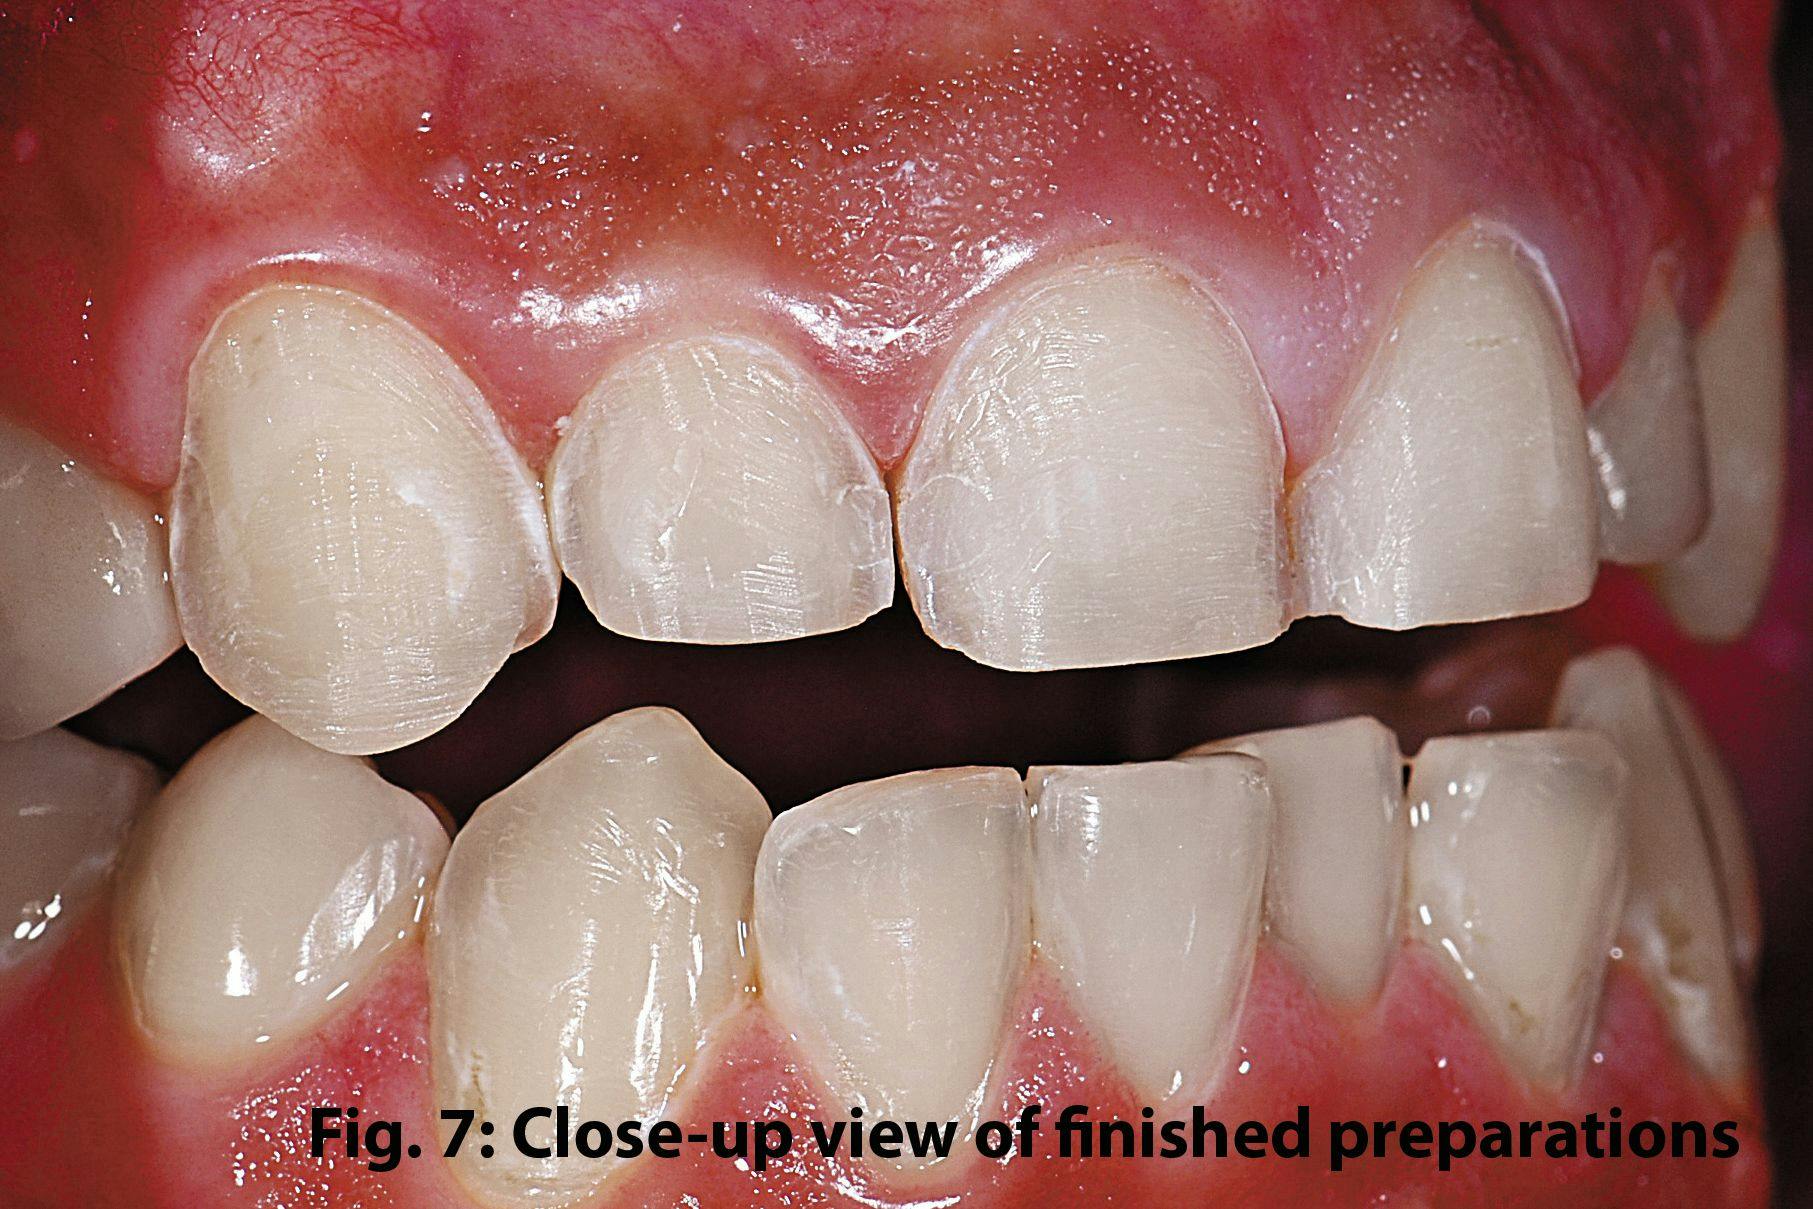
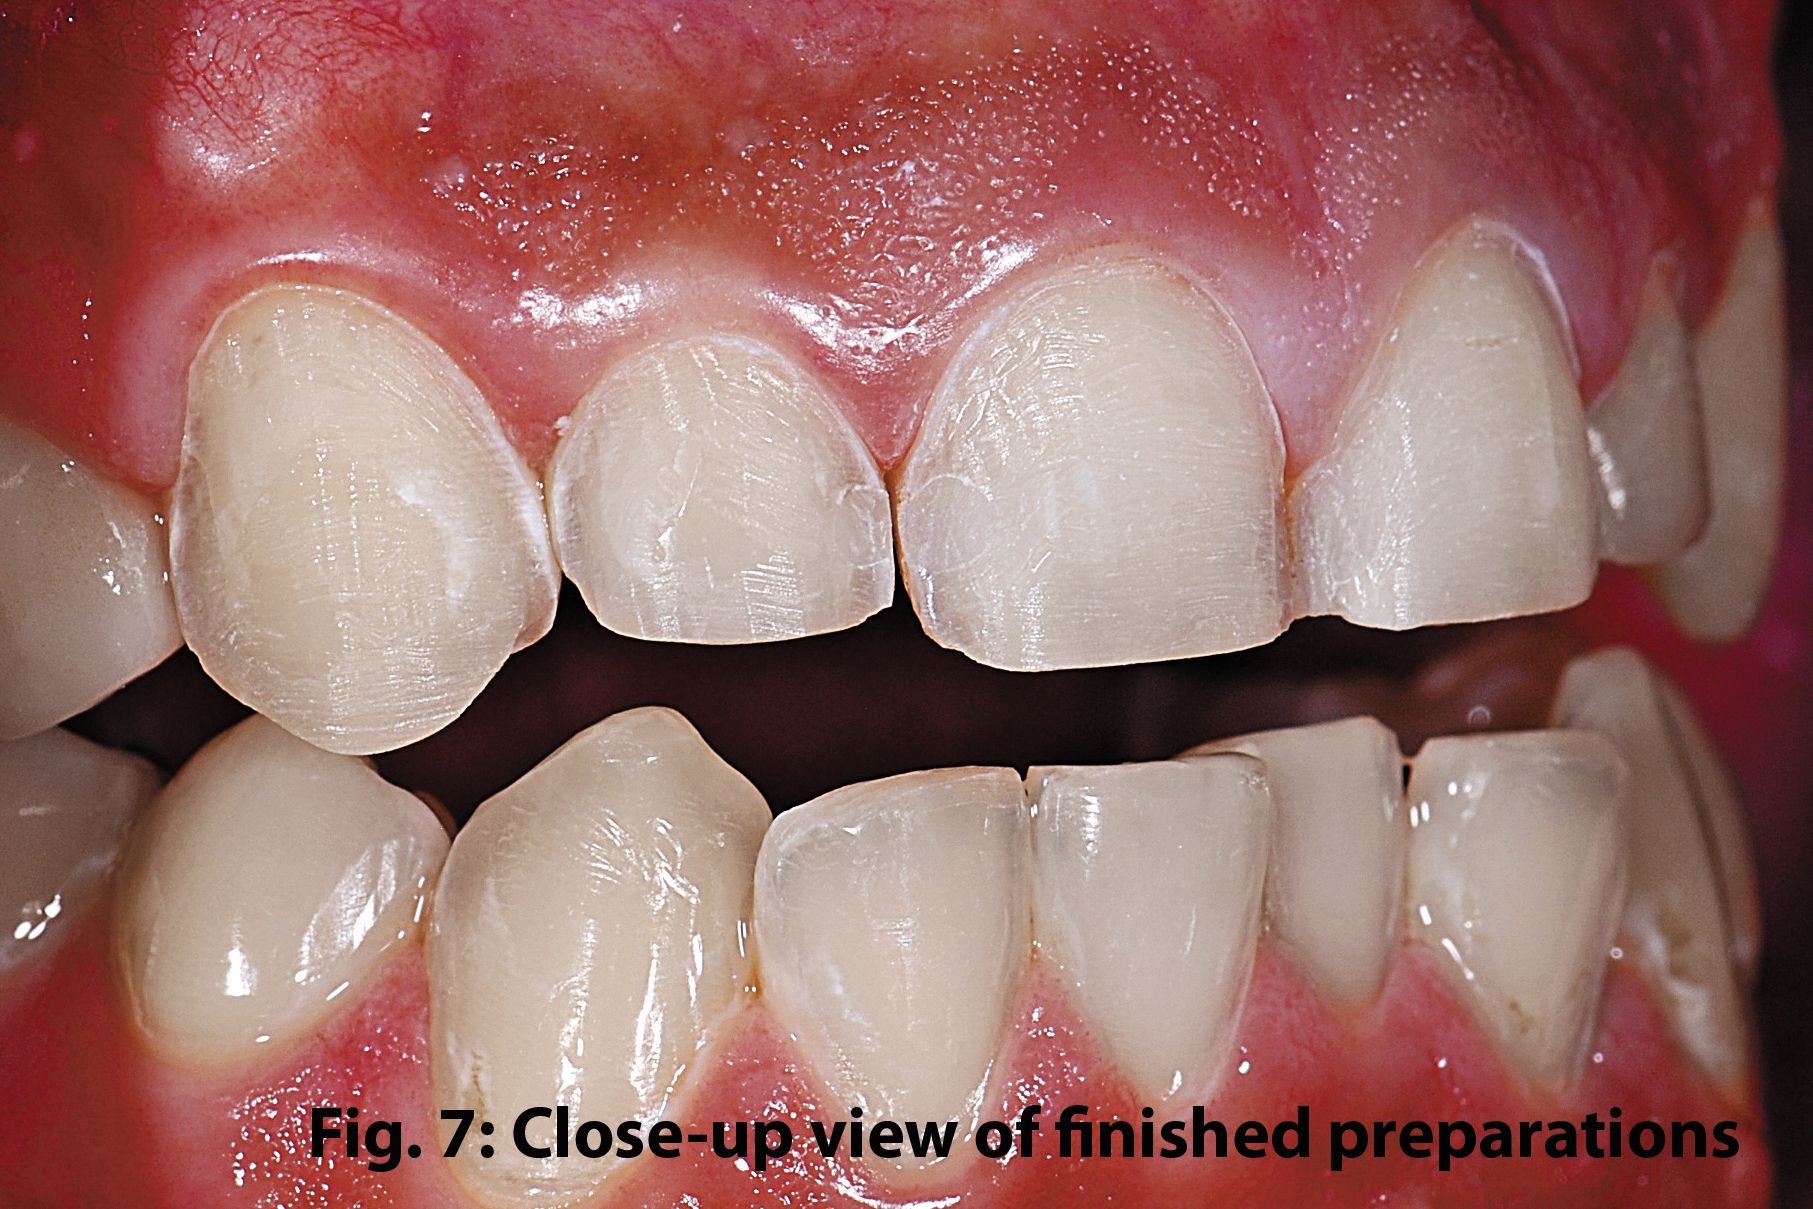
Step 2: Figs. 5-7 demonstrate the conservative nature of the tooth preparation employed. The majority of the preparation was accomplished using an Alpen 856L-014 course diamond point and fine Brasseler interproximal diamond finishing strips.


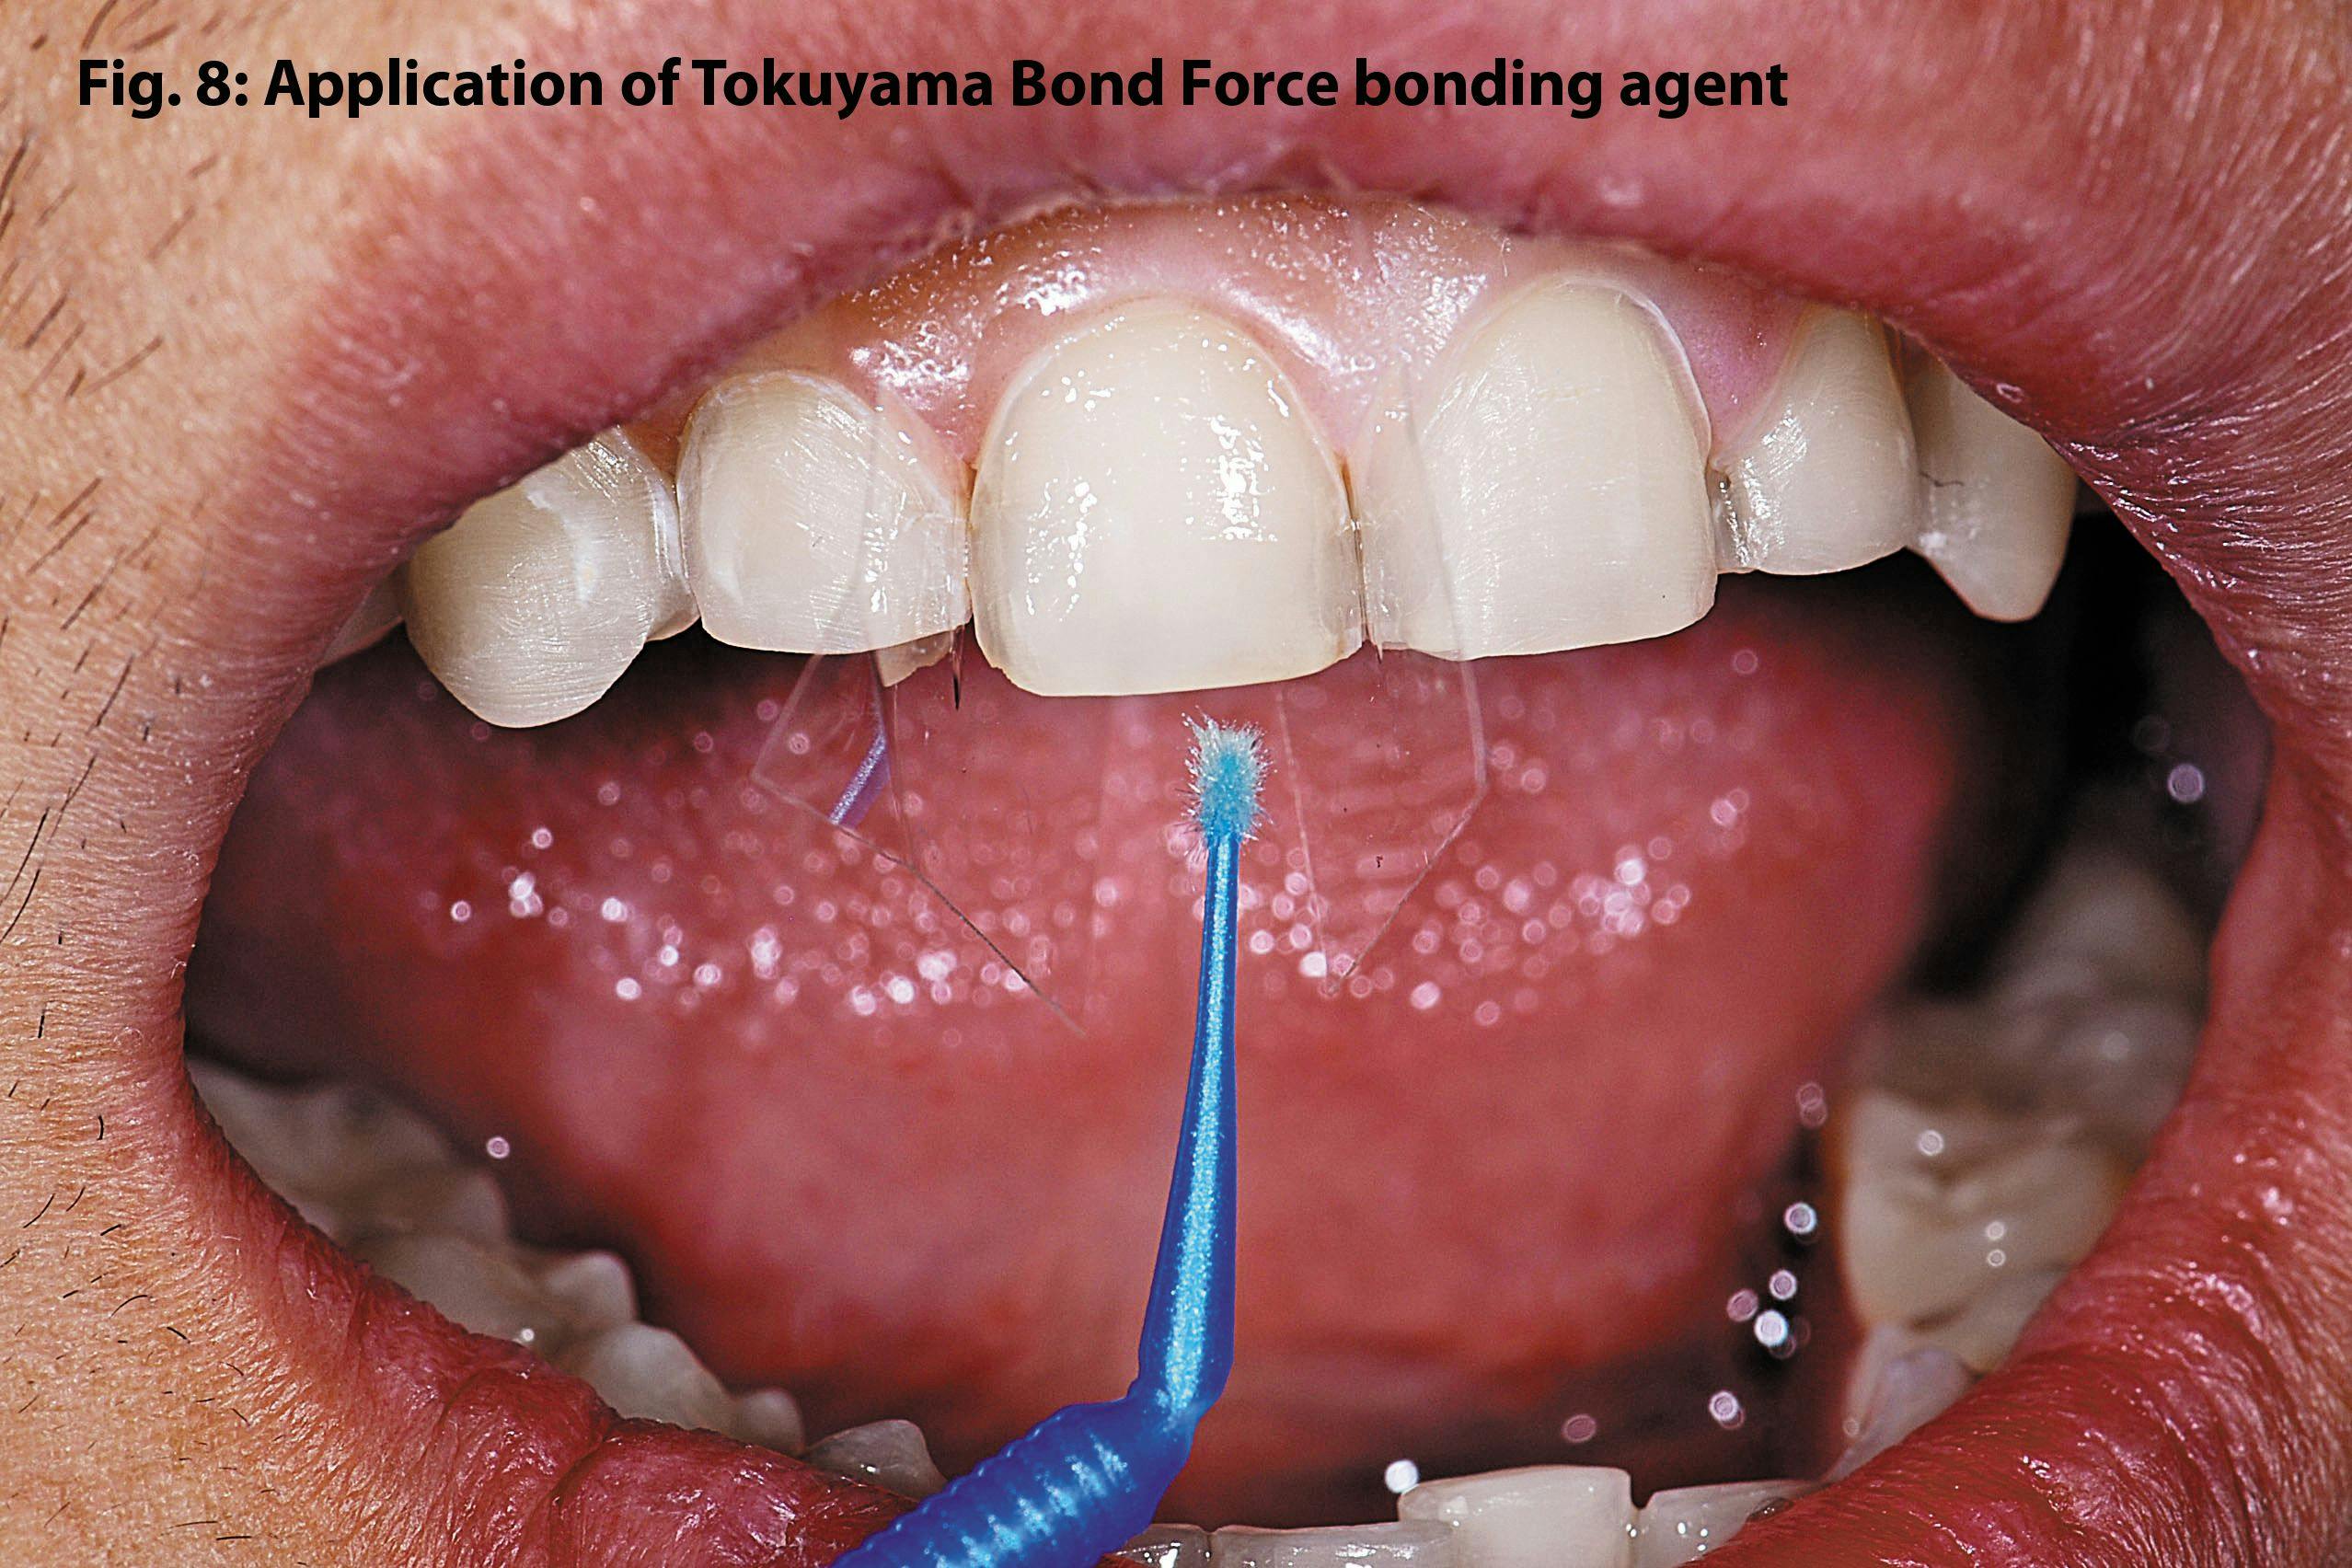

Step 3: Subsequently, each tooth is isolated either with mylar strips or plumber’s tape, (whichever seems to work better for the contacts at hand) phosphoric etch is applied for 15 seconds, rinsed, dried and then coated with Tokuyama’s Bond Force bonding agent and rubbed in for 20 seconds (Fig. 8).
Step 4: Following light curing of the bonding resin, the Body Enamel EB1 is applied in bulk to the tooth surface and buttered to shape with Clinician’s Choice Esthetic Contouring Instrument (gold grip) having been lightly dipped in an unfilled resin intended to lubricate the sculpting surface. This instrument possesses just the right amount of flex to enhance the sculpting process.
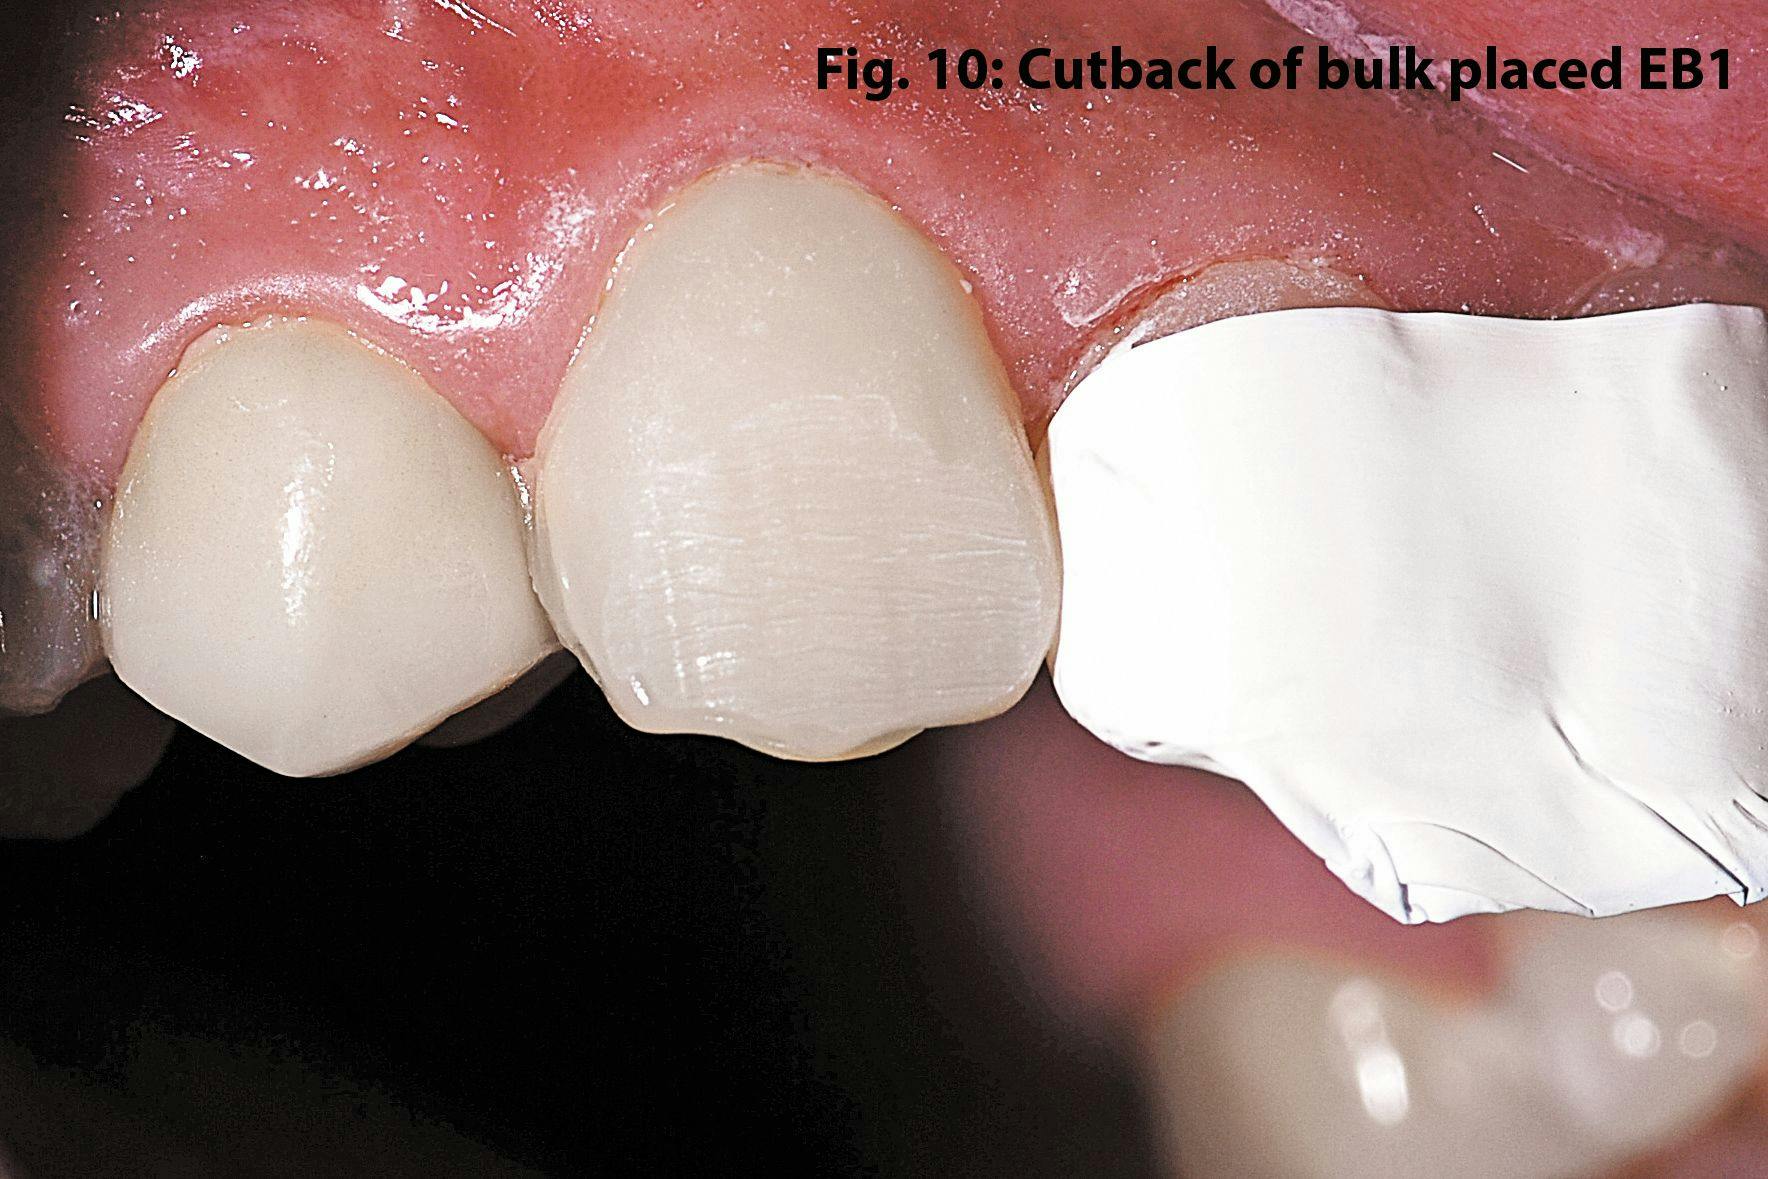
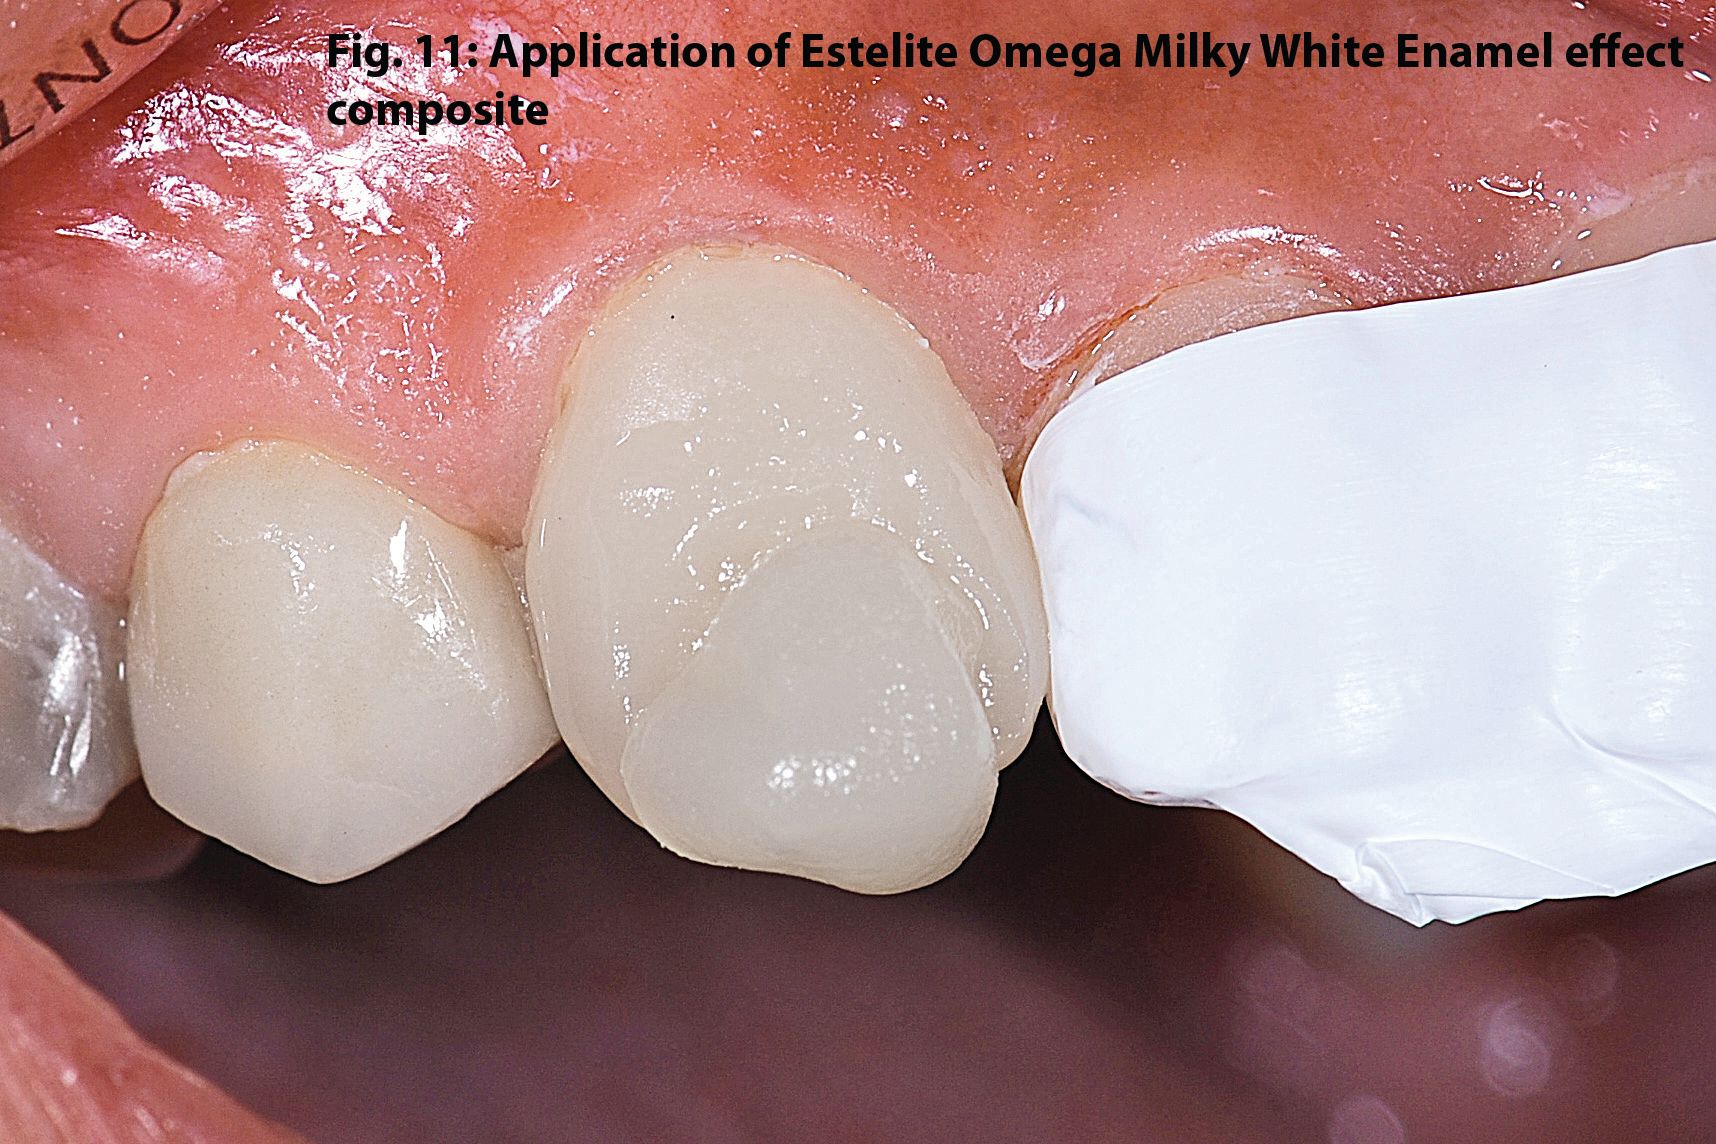
Step 5: Fig. 9 demonstrates the bulk build out in tooth No. 6 while Fig. 10 demonstrates the labial cutback on the facial incisal third of the tooth surface. In Fig. 11, the Milky White Enamel Effect shade has been applied to the cutback surface, which has been lightly pre-coated and blown thin with an unfilled resin. The presence of the unfilled resin reduces the possibility of a visible seam between the two composite materials. The Milky White enamel is then spread, buttered and blended with the previously placed EB1 composite.


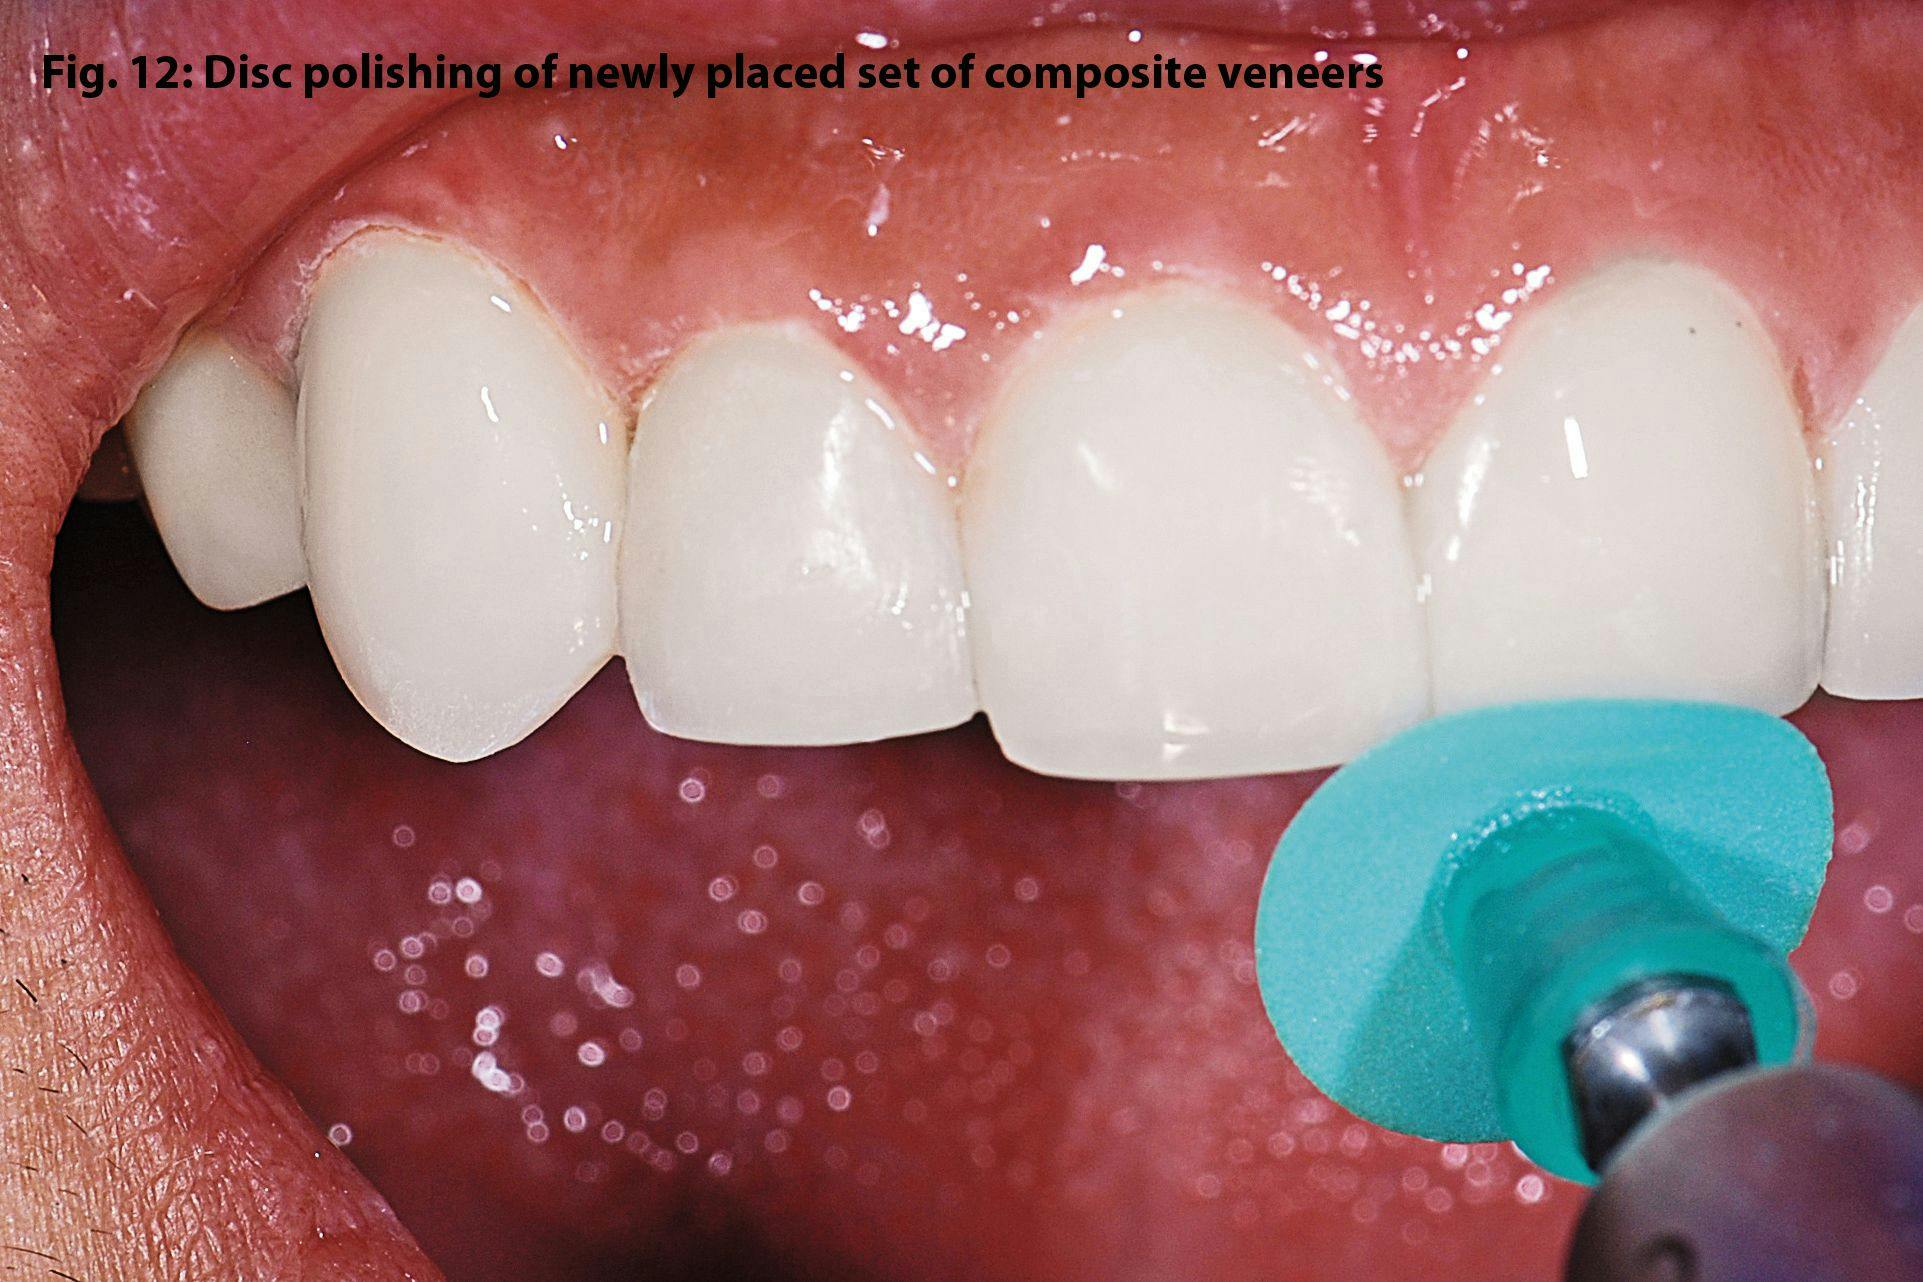

Step 6: Fig. 12 features the applied set of composite veneers having gone through a finishing sequence that included 8 and 16 bladed composite finishing carbides from Alpen and composite finishing discs from Brasseler (coarse, medium and fine.) Certainly a host of composite finishing tools can be used to contour the anatomy to one’s liking. The disc polishing sequence, however, seems to be the essential ingredient when seeking Estelite Omega’s glass-like shine.


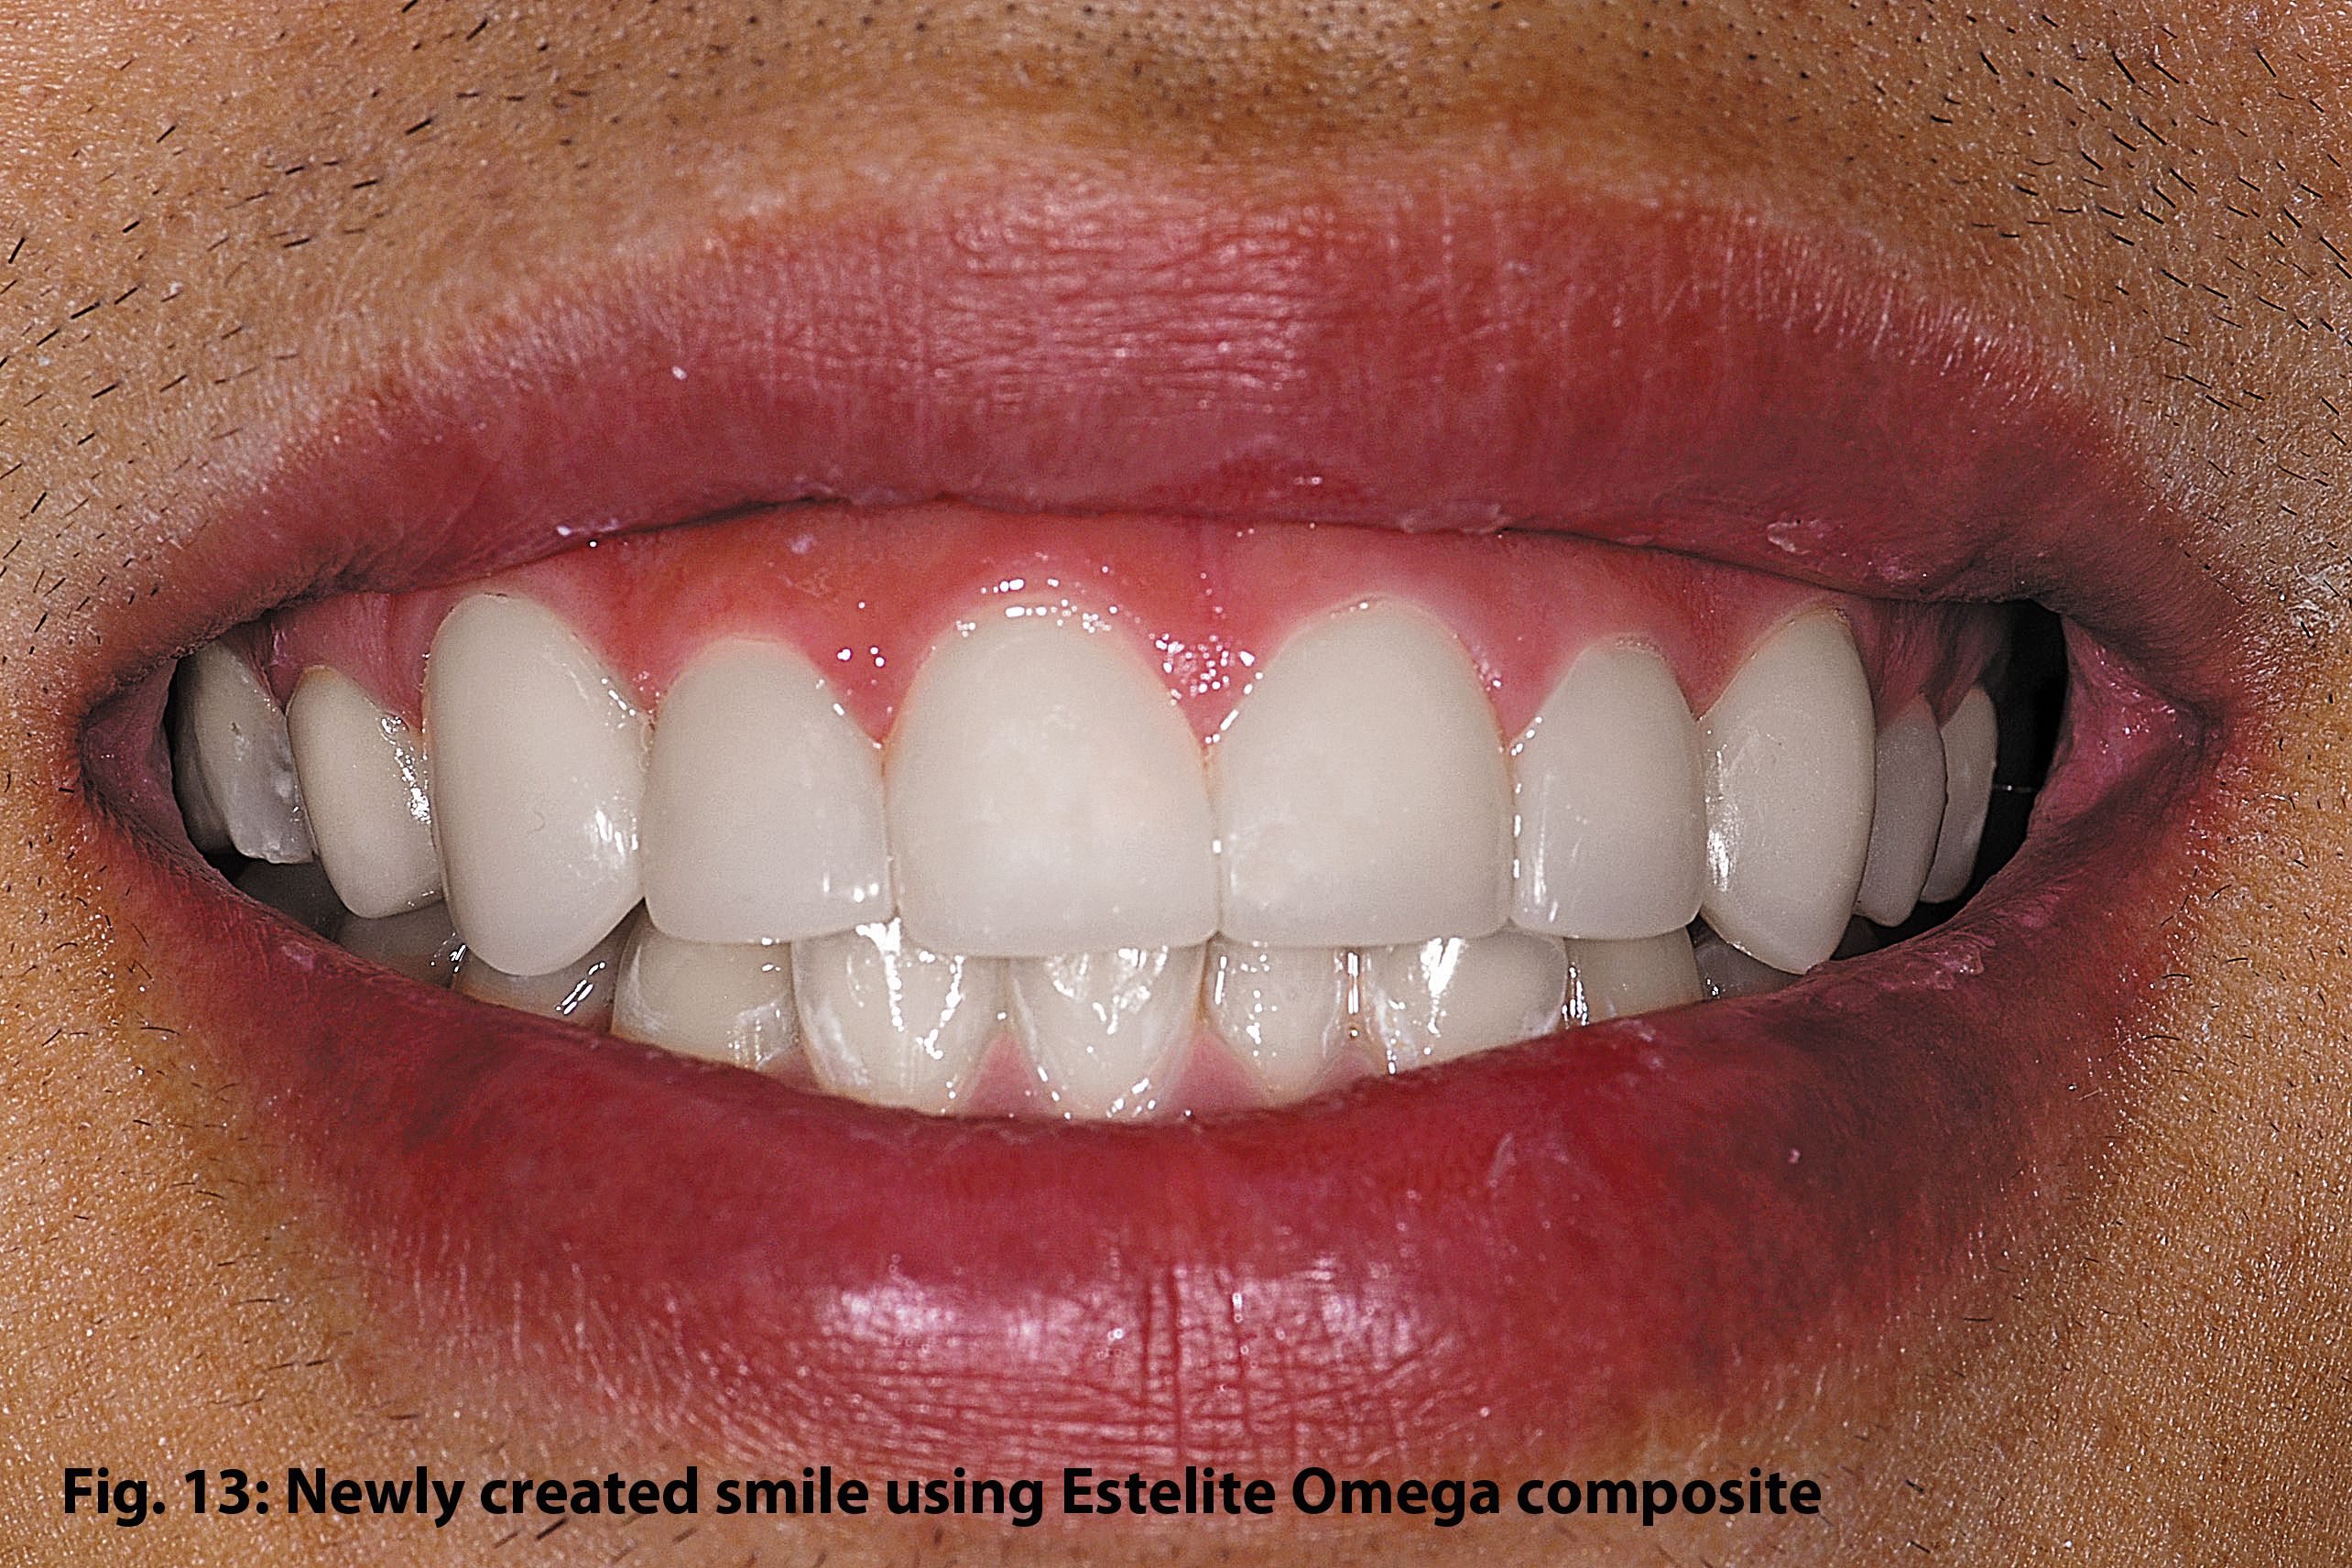
Step 7: Fig. 13 demonstrates the completed case. The patient and his mom were delighted. Prior to dismissal the patient was provided with a chairside fabricated nightguard and instructed to wear it every night if he wished to preserve his new smile.
Watch the video below for Dr. Goldstein's instructions on how to fabricate a nightguard
Closing thought
Like most dentists, I stock and use several brands of composite, having my favorites for different situations. Sometimes strength is the goal. Other times I may be more concerned with quickly covering up unsightly or damaged areas with a mono-shade approach needing one robust resin to do all of the work. We all understand that different resins have different shading and opacity characteristics that must be matched to the task at hand. Having a tool like the Estelite Omega system simply expands the range of what we can offer to patients when esthetics is the ultimate goal. I encourage you to take a close look at this unique and well thought out composite resin system from Tokuyama.

ESTELITE OMEGA FEATURES
- Specifically designed for polychromatic restorations (layering)
- Optimal esthetics, by customizing hue, value and chroma
- Simple system with only 11 shades


