Cutting costs, keeping quality
In the current market, communication between the dental lab and dentist is more important than ever.
In the current market, communication between the dental lab and dentist is more important than ever.
Dentists keeping a watchful eye on their overhead are faced with a lab bill every month that is reflective of the products and materials they are selecting for their patients. The case represented here demonstrates the importance of close communication between the lab and the dentist in regards to not only material science when selecting restorations, but in relation to different price points available from the lab for these products and materials.
A lab’s goal is to retain its clients, and a dentist who has to seek out and use multiple labs to obtain either higher quality work or lower priced restorations is not a viable path to this goal.
Simplified production
In this case, a 74-year-old female patient presented in excellent health, but with multiple missing and decayed teeth, severe wear fractures, and very dark discoloration (Figs. A & B). The dentist determined the need to open the patient’s bite to even out the plane of occlusion and provide room in the areas of super eruption for a mandibular RPD.
Much has been written about Ivoclar Vivadent’s e.max Press and its ability to provide reliable strength and beautiful lifelike restorations. Ivoclar’s Lithium Disilicate material can be waxed to full contour, pressed, stained and glazed, or be cut-back after pressing and porcelain layered on for increased translucency while providing a vast range of characterization and custom shade matching options.
The latter technique has become the standard when fabricating anterior restorations with e.max, but Ziemek Dental Lab has discovered that highly esthetic restorations can be produced without layering porcelain over e.max with the cut-back technique. Instead we are using a simpler stain and glaze process, and this is allowing dentists to successfully place monolithic e.max restorations in the anterior esthetic region more frequently, and at a lower cost.
With adequate prep reduction and custom abutment design, the Low Translucency (LT) ingots can mask dark stumps and even titanium custom abutments while still providing natural, lifelike translucency along with 400 MPa strength.1
Matching a single anterior restoration to existing natural dentition is among the most challenging tasks a lab undertakes, and this is unchanged when going monolithic. What does change is the workflow in the lab, and this change can allow a lab to potentially offer these restorations as a lower priced alternative to layered ceramics in the challenging anterior region. The strength of e.max Press, and the versatility provided by waxing and pressing it, allows a lab to design the restorations in virtually any style a PFM can be designed, incorporating features such as guide planes, rests and undercuts in conjunction with partial dentures, which was done in the case presented here.
Waxing, pressing and finishing anterior e.max Press monolithic restorations can be accomplished by lab technicians without porcelain layering experience, reducing the cost for the lab to produce them, and freeing up the more experienced technicians for the complicated custom ceramic layered cases, training other techs or other tasks.
Mid- and small-sized dental labs are under increasing pressure from a variety of sources to provide lower priced restorations, be it from overseas outsourcing or the large 1,000+ person labs here in the U.S. that are turning out lower priced products. To stay competitive with a lab across the state or across the sea, labs have to be proactive about seeking out materials and using technology along with techniques that allow them to stay profitable, while providing their dentists with a more varied price list and a myriad of restorative options. Fabricating e.max Press monolithic restorations for multiple unit anterior cases with straight forward shades can allow a lab to offer lower priced anterior esthetic options.
Although the case featured in this article is not a basic anterior case, the shade matching was similarly simple because all the existing teeth were restored. The final cost incurred by the dentist on this case was drastically lower than if the restorations chosen were e.max Press layered with ceramics, or if the dentist had chosen PFMs with the unpredictable price of alloy that has been very high in recent months.
Case study
The patient presented with extremely dark and worn dentition, along with existing PFMs of varying shades, and a large diastema between tooth Nos. 8 and 9. On the maxillary arch, the decision was made to restore the teeth and replace the existing crowns on tooth Nos. 3 through 13. On the mandibular arch she was missing all the teeth except tooth Nos. 22 through 27, and tooth No. 32 so it was decided the missing teeth would be replaced by an RPD.
The restorations chosen were e.max Press monolithic, which allowed the lab to mask the dark stumps adequately while still providing natural looking translucency. It allowed the lab to design the mandibular restorations in conjunction with the new RPD fabrication. And it allowed the lab to complete the entire case for about 25% less than if the same case was completed with layered e.max restorations, and about 40% less than PFMs. That is a substantial savings on a case of this size, without sacrificing strength, esthetic outcome or limiting the design.
01 Pre-op impressions were provided by the dentist, the lab fabricated pre-op models (Fig. C), duplicated them, and fabricated diagnostic wax-ups (Fig. D), following the dentist’s prescription to open up the patient’s bite approximately 3 mm.
02 The wax-ups were sent to the dentist for patient consultation and approval, and were used for the fabrication of the temporaries.
03 The dentist prepped the maxillary arch, recorded the stump shades (Fig. E) and placed the temporaries (Fig. F).
04 After seeing the stump shades, the technician and dentist decided that LT ingots would be the best choice to mask the dark stumps while still creating a natural translucency without appearing opaque when finished. When using e.max Press monolithically, there is no incisal or effect porcelain layered on the buccal to provide this effect, and esthetics are achieved with only the e.max material and the e.max stain/glaze.
05 At the lab, an impression was made of the diagnostic wax-up and a wax injector was used to quickly duplicate the crowns on the working model (Fig. G). This technique not only saves the lab the time and labor of waxing, but also provides accurately pressed crowns that require minimal time to finish.
06 The wax-ups were invested and pressed with e.max LT A1 ingots (Fig. H), de-vested and finished on the model (Fig. I).
07 The technician applied e.max stains 2 and 3 at the gingival to enhance the chroma, I1 on the line angles and to create a mammalon effect, and I2 as a basic translucent overlay (Fig. J). The stains were fired on the crowns, and then the e.max Glaze Paste was applied and fired on a separate cycle.
08 The maxillary crowns were seated, the dentist prepped the mandibular teeth (Fig. K), recorded the stump shades (Fig. L), and sent the impression to the lab, again fabricating the temporary crowns from the original diagnostic wax-up provided previously.
09 The lab repeated the wax injection procedure to create the mandibular wax-ups, this time using a light colored wax as the dentist requested a wax try-in to check the patient’s occlusion, and aid in design of the mandibular RPD.
10 Because the mandibular e.max restorations were to be designed for the fabrication of the new RPD, at this time the wax-ups were placed on the surveyor (Fig. M), guide planes were established on the distals of tooth Nos. 22 and 27, as well as the mesial of tooth Nos. 32, 22 and 27 were designed with lingual rests, as well as .01 undercuts on the buccal for I-bars (Fig. N). Tooth No. 32 was designed with a lingual shelf as well as a .01 undercut (Fig. O).
11 The temporaries were removed and the wax-ups tried in (Fig. P), and any minor corrections for occlusion or esthetics were performed.
12 The wax-ups were then sent back to the lab, invested and pressed (again, LT A1 ingots were used), and the same stain recipe used for the maxillary crowns was applied to the pressed mandibular restorations (Figs. Q and R).
13 The crowns were seated, and impressions were taken for fabrication of the RPD.
14 The RPD was fabricated and tried in for fit, with only very minor adjustments required.
The final result is considered by the authors and the patient as a great success and a very big improvement esthetically, and in the quality of life overall (Figs. S and T).
This case presentation illustrates how a dental lab can be proactive in research and development as well as communication with its dentist clients, informing them about products and materials that are priced lower, while still providing the dentist and patient strong and esthetically pleasing restorations with flexible design possibilities.
The authors would like to acknowledge and thank Sheryl Wolden, CDT, for her excellent work on the e.max Press restorations completed for this case.
About the authors


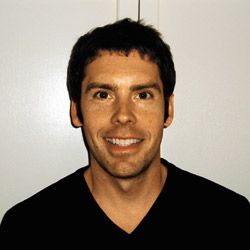
Jamie Stover, CDT, is a member of the ACP Lab Alliance and Lab Manager at Ziemek Dental Lab, a high-quality fixed restorative lab located in Olympia, Wash., as well as Ziemek Innovative Digital Solutions and Ziemek Milling Center. His focus is using his experience at the bench as a technician along with new technology and materials to provide dentists with highly esthetic restorations, while keeping them on the cutting-edge of dental technology. He can be reached at Jamie@ziemekdentallab.com.

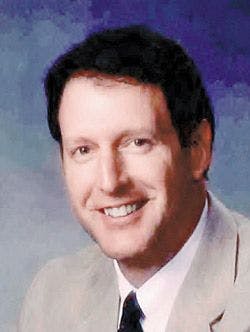

John C. Walker, DDS, graduated from the University of Washington dental school in 1983 and runs a full-time general and cosmetic dental practice in Olympia, Wash. He can be reached at john@smileolympia.com.


