Technique: Shade matching in the most difficult possible case
In this step-by-step technique, Luke S. Kahng shows how to create an esthetic, shade matched single anterior tooth.


Our case study will involve a patient in her mid-30s and will demonstrate a layering technique for matching a single anterior tooth. The patient is a teacher who had concerns about public speaking because she was self-conscious about her smile. Knowing this, the dentist gave the case to the author to provide the patient with the best possible restoration where her color and fit was concerned.
Matching a single anterior tooth is the hardest job a technician can be given, as we all know, and this case was no exception. An important question the author had for the patient was which tooth she wanted him to match. She asked that he match the color on central No. 9 as closely as possible and indicated Nos. 7 and 10 were going to be restored in the future.
Technique: Building a full-mouth hybrid denture
In the author’s opinion, the prep was perfect with gorgeous tissue design. In comparison to the adjacent teeth, the stump color was dark after preparation, so the author chose zirconia to mask that internal color. He also noted central No. 9 had a high value, which he would try to recreate in No. 8, as well.
Click here to go step-by-step ...
01 In his conversation with the patient, during the custom shading appointment, the author asked about the color she wished him to mimic (Fig. 1; all figures in video below) after the provisional was removed. As we established above, she chose the central. In his next step, the author matched the stump color (Fig. 2) with his own porcelain-fabricated custom shade tab. The color was dark ochre brown, which would be difficult to mask internally without a zirconia coping.
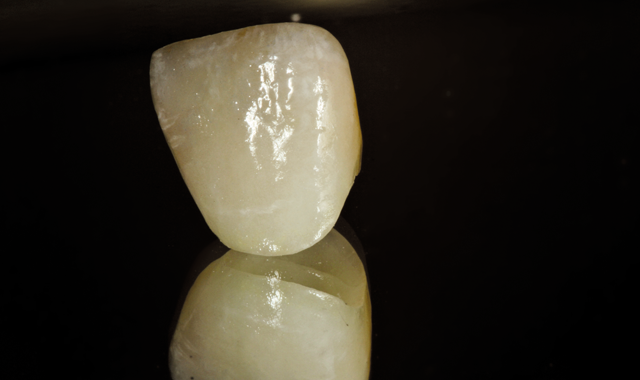
02 The author next checked the overall color (Fig. 3) with his same custom-made shade tabs, which are low in value but high in characterization. He noted white calcification throughout with subtle, dense areas and grey translucency. He next checked the facial thickness in this occlusion view photo (Fig. 4), which helped him with the proper material selection.
03 The Amann Girrbach MAP400 scanner was used to design the restoration for tooth No. 8 (Fig. 5) using a 12 mm zirconia block (Fig. 6). Several lab cases were sintered along with our case study (Fig. 7), as shown. The author then utilized multi-layering color, specifically Enamel 59, and Translucency Modifier B1 dentin color as his build-up (Fig. 9). After the build-up was applied, he next layered translucency modifier TMO5 (Fig. 10) to the incisal area. He then applied Enamel Opal-EOP1 (Fig. 11) to the incisal and EOP4 to the mesial corner (Fig. 12). Lastly, he applied Translucency Neutral to the distal corner (Fig. 13).
Bench Mastery: Creating low-cost veneers for a cost-conscious patient
04 Translucency 02 white fluorescent color (Fig. 14) was layered on after the dentin application. He then applied Translucency Modifier 01- TMO1 to the distal corner (Fig. 15). Cervical Translucency 22 (CT22) created an optical illusion (Fig. 16). Enamel color 59 went on next (Figs 17, 18) and EO3 was applied to the body area for a little sparkle effect throughout (Fig. 19). Enamel 58 was next applied to the distal corner (Fig. 20), then EI 11 over that to the same corner (Fig. 21) and EI 14 to the mamelon area of the incisal 1/3 (Fig. 22).
05 In Figure 23, the final details of the color are shown in the gingival, surface texture, translucency and transparency of the shading. During a try-in the mouth, white calcification was added to the gingival area with subtle stain (Fig. 24). Upon insertion, the patient had this appearance (Fig. 25), and her smile tells it all (Fig. 26).
06 As mentioned, it is important to diagnose each case thoroughly to create the best possible restoration. Tissue design, adjacent teeth color, prep design and the value of the teeth are all considerations to be made as well, and will lead to proper material selection. The layering of the tooth analysis helps with the sophisticated porcelain build-up and any irregularities it may reveal.
More techniques: Luke Kahng shows how to create the best esthetics using modern dental technology
As for the final external stain, if we have to add that after the final try-in, we can. It’s not a burden or something to be dreaded-we can do it. Through a sense of curiosity about the outcome and the growing technique we learn, we, as technicians, can create beautiful restorations and become educated at the same time.


