Technique: Using a 3D printer for model work
Luke S. Kahng, CDT, demonstrates a technique for using a 3D printer, a VARSEO from Bego, to create better models in a restorative case.
Dental laboratory techniques are changing, growing more digital and moving toward the electronic age at a rapid pace, as most technicians know. Everything happens at a lightning-fast pace and it can be overwhelming and hard to keep up.


How do we decide what to do? How much money should we spend on the equipment? What should we buy first?
Technique: Using digital dentistry for esthetic implant work
The author will, in this case study, demonstrate the value he has found in one such piece of equipment and the benefits he believes all dental technicians would reap from purchase of the same. It’s a good value for the money.


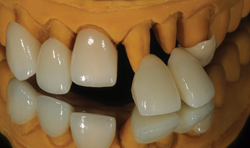
Fig. 1 Pre-op
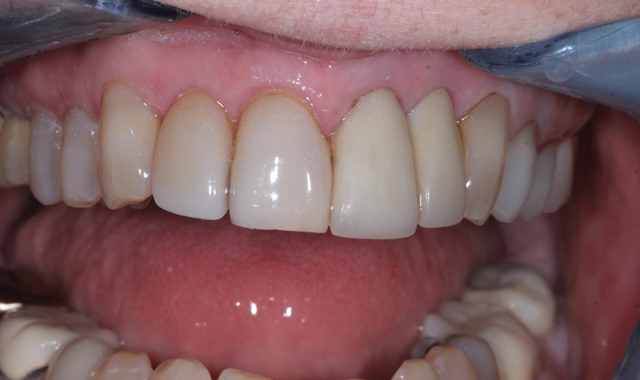
Fig. 1 Pre-op
Case Study
Pre-operatively, the patient presented with restorations on teeth numbers 6-11. During the custom shading appointment, the patient indicated that he liked the incisal length of number 8 (Fig. 1), which was duly noted.


Fig. 2 Post-op
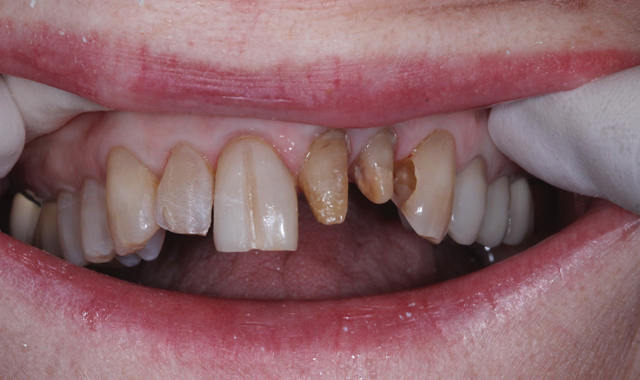
Fig. 2 Post-op
The prep was begun with a diamond burr, with a close-up view of the vertical preparation cut to number 8 (Fig. 2), sent with an STL file from the cloud by the dentist to the lab.

Fig. 3 Nesting
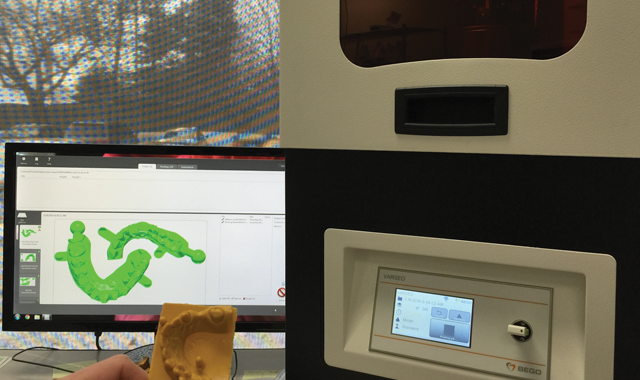
Fig. 3 Nesting
In Figure 3, the Cambridge nesting software program is put to work using the cartridges that are placed on a plate which blacks out the light using the photosensitive printer. The Bego VARSEO 3D printer has 20 micron layers which are flash frozen in order to solidify the liquid which hardens inside and becomes the model.
Technique: Shade matching in the most difficult case
The glass plate underneath the cartridge allows the light inside, flashes and hardens the liquid at the points of contact outlined within the digital file from various scanning programs such as iTero, TRIOS, CEREC and Planmeca, among others. During contact with the lens, the program builds the model and prints it onto a face plate in a material which consists of a blended wax and plastic. When it is light cured, it hardens into a dental stone model-like consistency. Supports underneath the vertical or horizontal model are built within the Cambridge program so that the model does not sag or become distorted while being printed.

Fig. 4 Nested dies
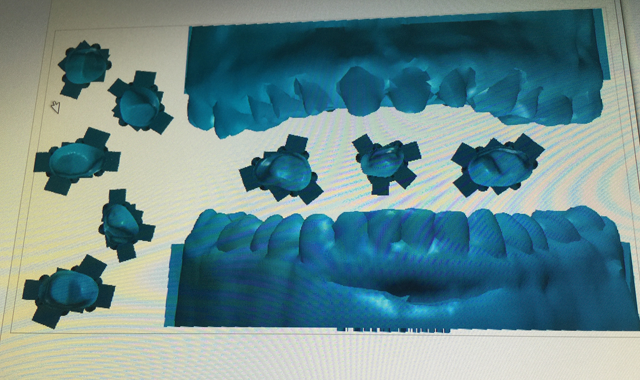
Fig. 4 Nested dies
Our next image illustrates the nested dies placed far enough apart to be successful in the printing process (Fig. 4). The image was printed vertically with a full arch model which needed to be properly fit into the plate. Vertical placement will require more support underneath the model and throughout because of the way it lies within the material.

Fig. 5 Finished prints and dies
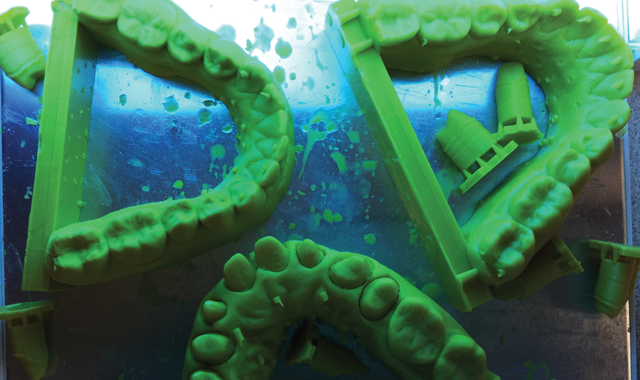
Fig. 5 Finished prints and dies
The finished prints with separate dies and supports follow (Fig. 5). The approximate time within the printer for a case such as this, vertically placed, is two-to-two-and-a-half hours. The horizontal placement time is less-approximately one-to-one-and-a-quarter hours.
The time requirement is based on the height of the models. Our image gives the reader a look at the appearance of the liquid within a model after it has been converted to a semi-hardened state-which will be light cured and completely hardened by the technician before being given to the ceramists for completion of the restorations. The solid resolution is between 20-50 microns, with each layer of material being about 20 microns.

Fig. 6 Post-vertical printing
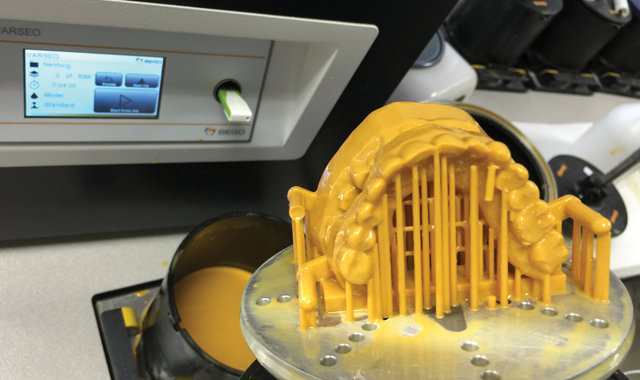
Fig. 6 Post-vertical printing
Post-vertical printing will have this appearance (Fig. 6), with the longest supports varying drastically in size in order to handle the unsupported weight within the model. The liquid must be mixed each time and the glass lens cleaned thoroughly after use in order to be able to utilize the plastic film which is placed over the glass and used 50-75 times before replacing.

Fig. 7 Base plate printing
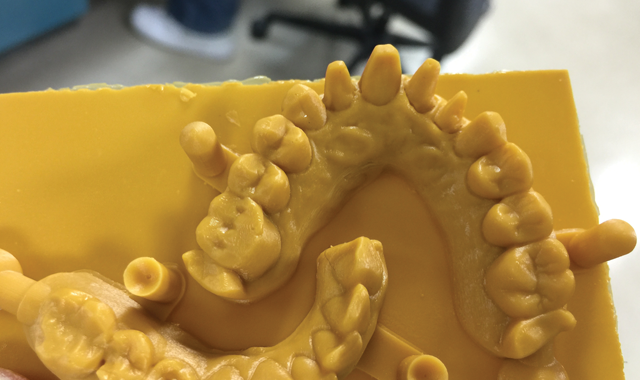
Fig. 7 Base plate printing
Figure 7 is an example of a print created on a base plate and printed flatly, which is generally a highly successful technique and it eliminates the need for support. The problem is that it wastes materials because the base is simply cut away from the model and the material thrown away. Furthermore, the hollowed models contain excess liquid after printing which is drained and therefore wasted. In the author’s experience, it is better to try and print the models either vertically or horizontally for these reasons.

Fig. 8 In-occlusion models
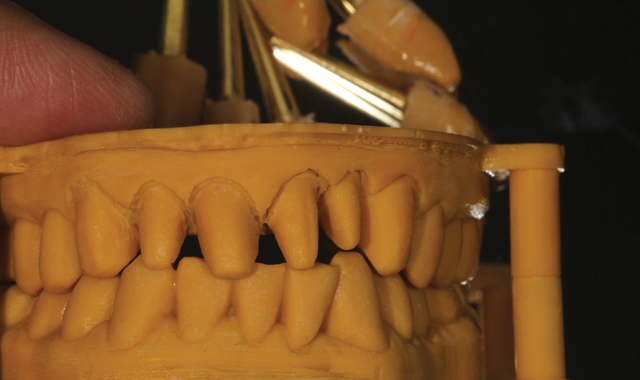
Fig. 8 In-occlusion models
In-occlusion models printed and shown on an articulator are featured next (Fig. 8). Please note the layering of the model’s appearance and the excellent resolution.

Fig. 9 Dies and restorations
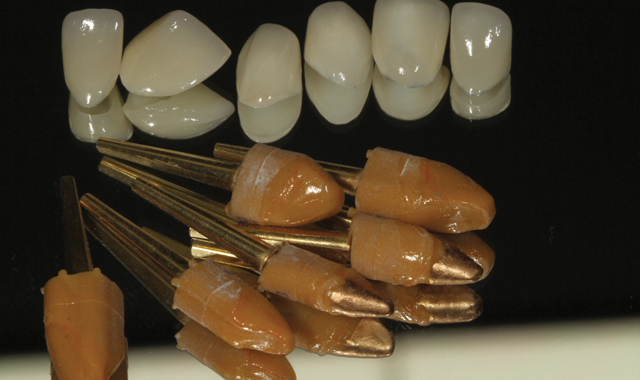
Fig. 9 Dies and restorations
The dies and restorations (Fig. 9), clearly showing the margins, printed out very accurately.

Fig. 11 Two centrals

Fig. 10 Two centrals
The two central teeth are shown on the model during a contour and size check (Fig. 10).

Fig. 11 Size and symmetry check
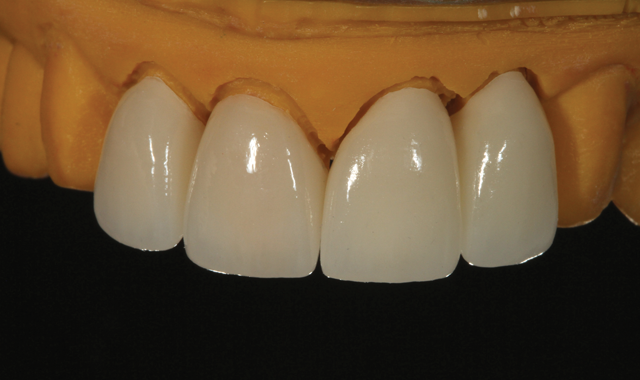
Fig. 11 Size and symmetry check
Next the author checked the size and symmetry of four front teeth on the model (Fig. 11), with a mirrored image between the model and the lithium disilicate restorations (Fig. 12, below) following.


Fig. 12 Mirrored image

Fig. 13 Occlusion view

Fig. 13 Occlusion view
An occlusion view of the finished restorations shows the reader the veneers for teeth numbers 6, 7, 8 and 11 as well as the crowns for 9, 10 and 12 (Fig. 13).

Fig. 14 Final

Fig. 14 Final
A final view of the restorations on the model demonstrate the beauty of the GC LiSi Porcelain System restorations using OM2 base color with translucency (Fig. 14). The author contoured the restorations before sending the finished product to the clinician.
Conclusion
In order to meet his clients’ demands for fast turn-around, the author purchased the Bego VARSEO 3D Printer for opportunities to learn about and utilize the technology it provides. He was amazed at how accurate the models’ marginal integrity is compared to the traditional analog method, but there was a learning curve with this piece of machinery just like everything else.
Step-by-step: An alternative approach to long-term temporaries
The exciting part for him was that he could see the future of the industry! Not only was he impressed with the fit, interproximal contact and marginal integrity, he was glad to learn about the benefits of the STL filing system and all that it could offer. As mentioned earlier, it is a very good value for any technician who is considering what to purchase first in his laboratory and he would recommend its purchase.


