Technique: Using digital dentistry for esthetic implant work
Luke S. Kahng, CDT, explains how he uses CAD/CAM tools to get great esthetics in an implant case.
Our latest techniques in digital dentistry are getting faster and better. We have so many options available to us that we did not in years past and our esthetics and overall case design have been greatly improved as well because of these streamlined processes.
The purpose of this article is to explain digital workflow to create zirconia porcelain layering for a screw retained unit to a full mouth case. There are considerations to look into when fabricating the final restorations securely, such as path of insertion for the implant crown. We also have to look at how deep the implant level is since this will have a major effect on the framework design.


Before we can have a basis for our frame design, we have to have a step-by-step plan from both the doctor’s and the lab’s side of the case.
Technique: An alternative approach to long-term temporaries
From the lab’s perspective, for this case study, we needed a verification jig as our first step in making sure the six implants engaged together accurately. Secondly, we checked the bite registration and bite block for the denture teeth setting to accurately check the patient’s mid-line, smile line and occlusion.
The wax try-in indicates the final frame design if we are making a screw-retained denture since occlusion will be lingualized. If we are fabricating a screw-retained zirconia restoration, we will need centric contact-either tri-pod or cusp to fosse. These are all working areas of necessity for the laboratory as they begin work on a case such as the one we will be describing.
Continue to the next page to go step by step ...


Fig. 1 Six implants with pink tissue indication
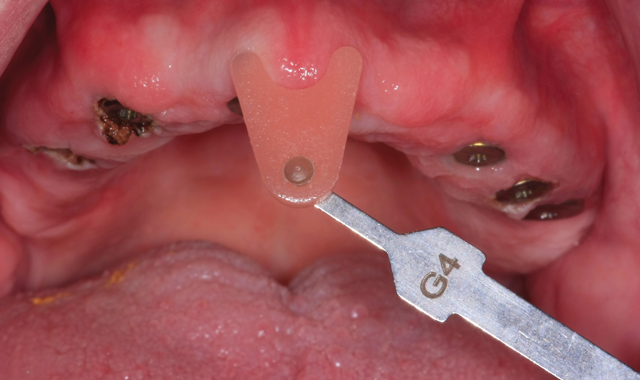
Fig. 1 Six implants with pink tissue indication
Case Study
In Figure 1, our image is of the six implant units indicating the pink tissue color. The patient’s natural color has variety with five or six different colors and indicates a reason to utilize as many as possible. The life-like pink esthetics would prove to be essential to create natural looking restorations.


Fig. 2 Dentist impression
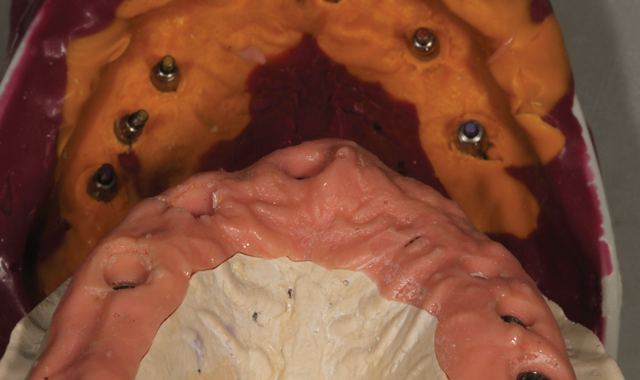
Fig. 2 Dentist impression
An impression was taken by the dentist and sent in to the lab after which the technicians fabricated the soft tissue for the model (Fig. 2).

Fig. 3 Ceramill Map400 digital scanner
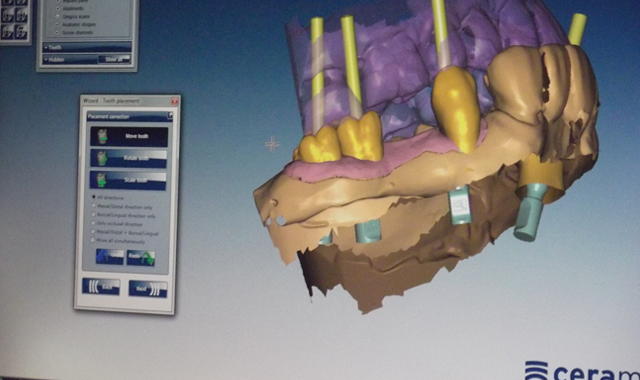
Fig. 3 Ceramill Map400 digital scanner
After that was completed, the CAD/CAM technicians completed a scan and design of the model using the Ceramill Map400 digital scanning machine from Amann Girrbach (Fig. 3).

Fig. 4 Nesting technique

Fig. 4 Nesting technique
The next image demonstrates the nesting technique in which the technicians try to increase or decrease the fit of the restorations as they are placed in the zirconia block for correct milling (Fig. 4).

Fig. 5 Post milling appearance
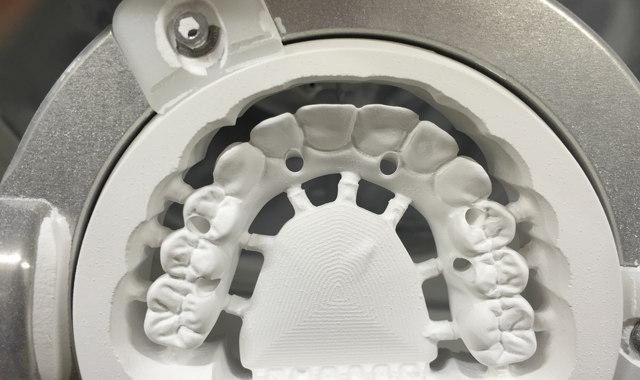
Fig. 5 Post-milling appearance
The next step was the milling process, and the technicians milled the restoration in the Motion Mill 2 machine from Amann Girrbach (Fig. 5), which we see in the finished product, pictured here.

Fig. 6 Amann Girrbach pre-shading color
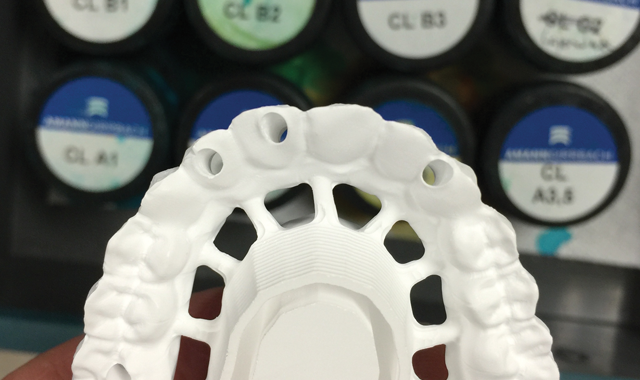
Fig. 6 Amann Girrbach pre-shading color
The technicians utilized the pre-shading color, liquid shade in an A1 base with pink color for tissue and facial layering porcelain application (Fig. 6).

Fig. 7 Modify zirconia block
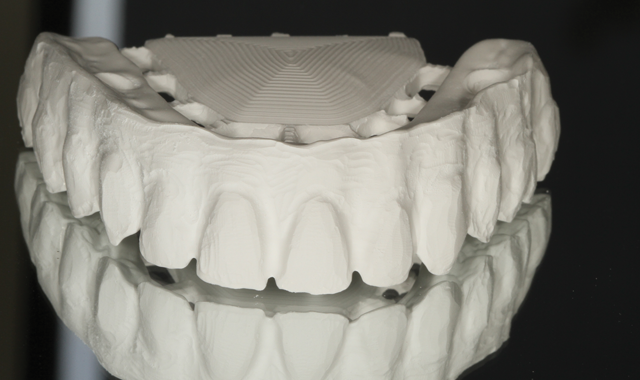
Fig. 7 Modify zirconia block
The zirconia block was modified by hand using a diamond burr. The goal was to create irregular tissue shaping (Fig. 7) for a more natural restoration.


Fig. 8 After sintering
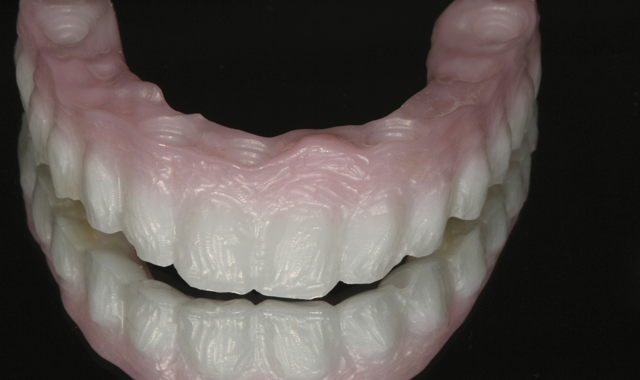
Fig. 8 After sintering
After sintering and applying porcelain over the zirconia blocks, we can see the appearance of the restoration (Fig. 8). The author used zirconia porcelain from GC Initial ZR for the second build-up stage (Fig. 9), illustrated below.

Fig. 9 GC Initial ZR second build-up stage
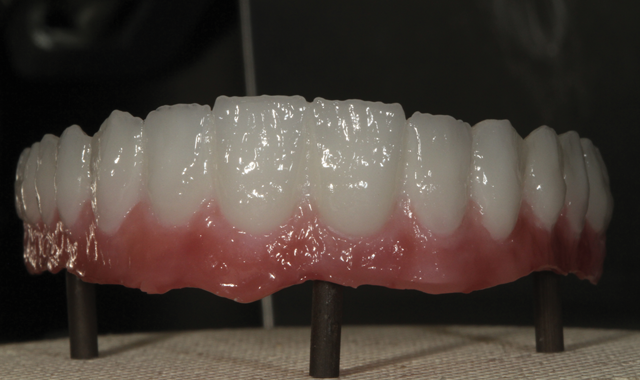
Fig. 9 GC Initial ZR second build-up stage

Fig. 10 Finished restorations
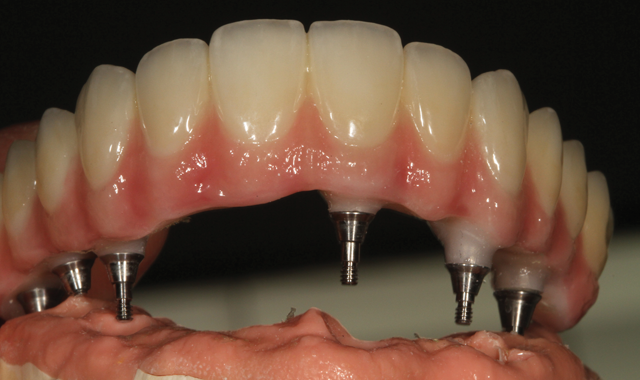
Fig. 10 Finished restorations
The final restoration was then seated on the model after the titanium base was cemented to the zirconia framework (Fig. 10), not before shown. In a mirrored image, the final restoration is shown for the reader in order to note the tissue area indentation and color, whitish-pink with texture.

Fig. 11 Mirrored image final restoration
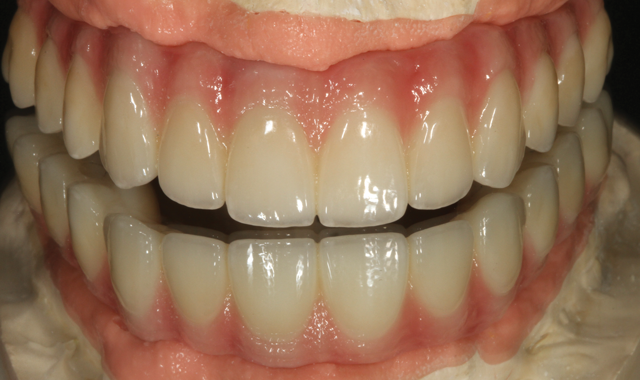
Fig. 11 Mirrored image final restoration
The author utilized and applied an A1 base color for the incisal area, with translucency (Fig. 11).

Fig. 12 Occlusion view
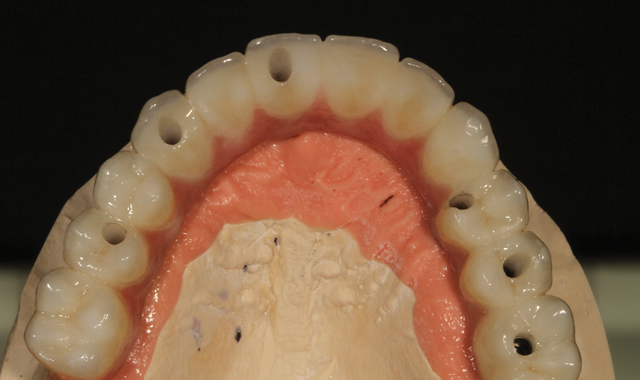
Fig. 12 Occlusion view
In an occlusion view image, the author gives the reader a view of appearance after Lustre Paste application with maximum strength and no porcelain layering involved (Fig. 12).

Fig. 13 Internal implant screws
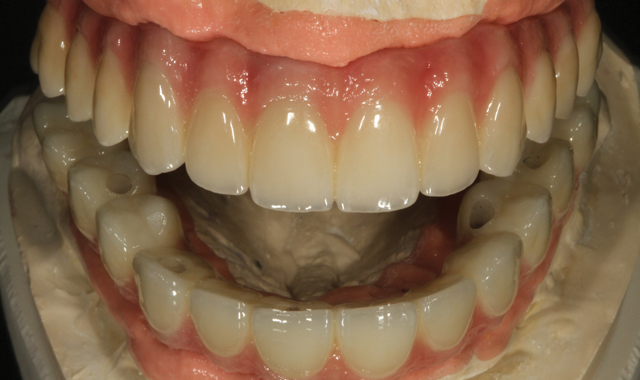
Fig. 13 Internal implant screws
We can see the internal implant screws in the next mirrored image (Fig. 13), not previously visible.

Fig. 14 Side view in the mouth
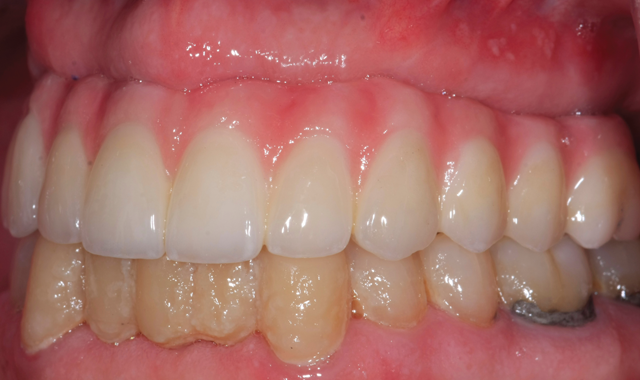
Fig. 14 Side view in the mouth
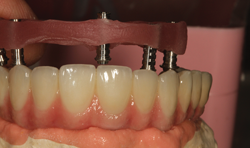
The finished restoration was photographed in the mouth after immediate try-in (Fig. 14).

Fig. 15 Wax try-in
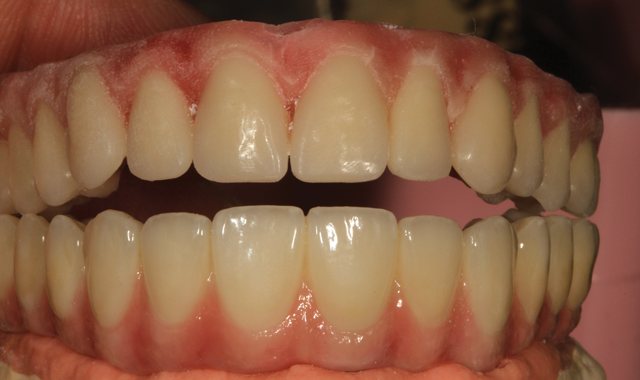
Fig. 15 Wax try-in
A wax try-in model is compared to the final restoration, after duplication (Fig. 15) to verify fit and appearance based on the beginning stages.

Fig. 16 Try-in the mouth
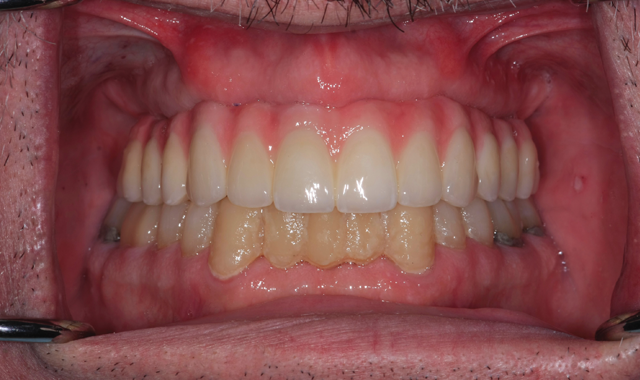
Fig. 16 Try-in the mouth
Final, upside down view of the six implant units (Fig. 16) follow.
Conclusion
As we indicated, the traditional method for fabricating a case such as this one is with a verification jig and wax try-in. We are now able to efficiently utilize the digital system method for our cases but in order to do so, we still have to make certain the preliminary work has been properly completed. And as with the traditional method, it is still essential to check the implants on the model with a verification jig and to allow the patient a wax try-in stage in the dentist’s office in order to make sure the case fits before the final restorations are completed.
As technicians, we also must still utilize our porcelain layering skills for the facial area of the restoration, as with traditional restorations. Life-like restorations can be created with zirconia screw-retained implants if we are aware of and practice our porcelain layering skills in the facial area.


