Technique: An alternative approach to long-term temporaries
Luke S. Kahng shows an alternative method to creating a long-term temporary.
Our case study involves a female patient who was missing her lateral teeth, numbers 7 and 10. An implant had been placed on number 10 because the patient sought longevity in the treatment plan. She also wanted esthetically pleasing provisionals for cosmetic reasons since she would be wearing the restorations long-term-for six-to-nine months.


Our purpose for this article is to demonstrate the best method for fabricating this type of excellent long-term temporization. This type of work is done through the fixed department and is cosmetic in nature.
Must-read: Understanding the reality of the digital workflow
We have to carefully follow the tooth color in order to get the best results, in this case, matching that of centrals 8 and 9. The criteria the author used for determining whether or not to use the method we will discuss to fabricate this case was, as follows:
- Patient is without teeth-best method?
- Short- or long-term temporization?
- Would patient be interested in long-term option? Cost is higher
- Is the dentist interested in providing this option? Some may not be aware of it
- Not a removable type of case-fixed
Click the next button to go step-by-step!


Fig. 1 Prepped view
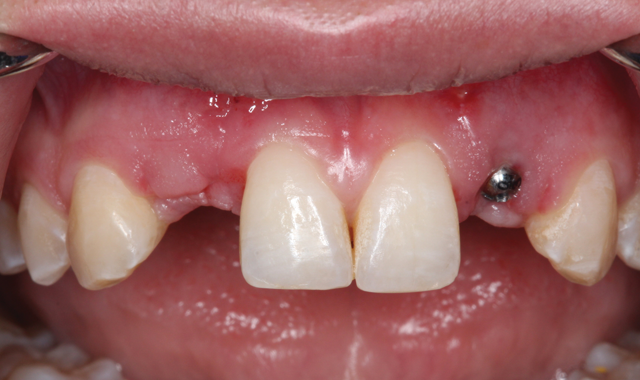
Fig. 1 Prepped view
Case Study
In (Fig. 1), we are given a prepped view of the patient’s laterals. (Reader please note: it is the author’s opinion that an implant would be placed on number 7 at a future date, but as of this writing it had not yet been accomplished.) The doctor and patient had agreed prior to the patient visiting the lab that they wanted good-looking, esthetically pleasing long-term temporaries for her.
How-to: How a tablet computer can ensure better esthetics
In the author’s experience, there is often an issue when the patient presents with no teeth in fabricating a temporary that is acceptable, and it can create some difficulties. In this case as well, the reader may notice that number 10 is wider than number 7 and the teeth will therefore not be the same symmetrically. All of this was noted during the custom shade appointment, as we see in the next image.


Fig. 2 Custom shade matching
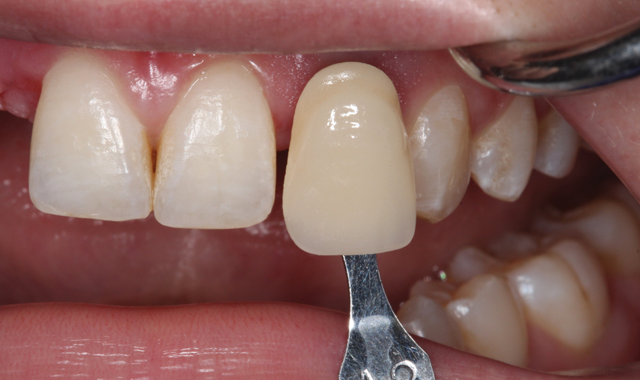
Fig. 2 Custom shade matching
Figure 2 demonstrates custom shade matching techniques the author uses when beginning a patient case. He noted that A2 was too dark compared to her adjacent teeth-about a 20% match. Instead, he decided that a B1/A1 mixture together with 80% translucency and white opacity would be his formula for a perfect shade match.

Fig. 3 Fiber connection in the restoration on the model
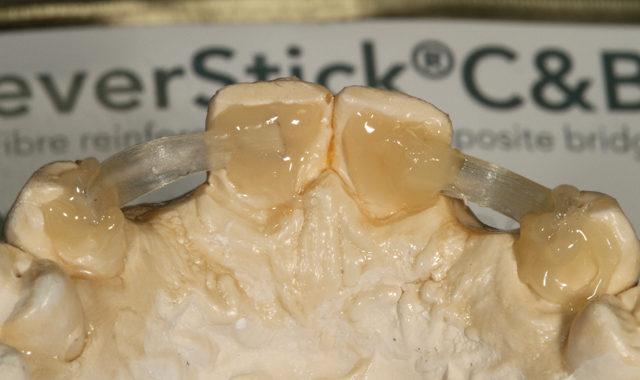
Fig. 3 Fiber connection in the restoration on the model
Figure 3 demonstrates an important stage in the case fabrication. The fiber connection between the teeth is visible in this image, handled with Ever-Stick Crown and Bridge, GC America. The ribbon is the connector and the author fabricated composite for the lingual area of numbers 6-10.

Fig. 4 Light curing the restoration
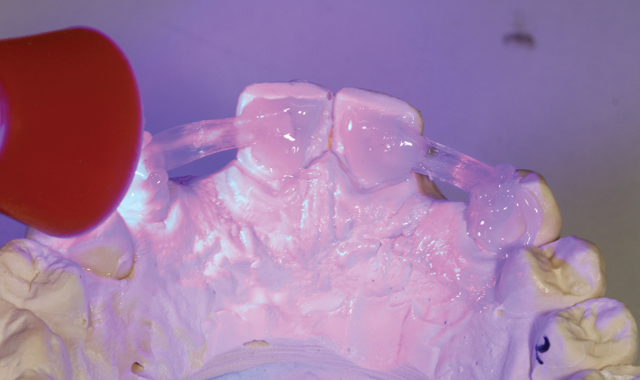
Fig. 4 Light curing the restoration
In (Fig. 4), the author light-cured the work illuminated in the previous image in order to make sure the case was solid.

Fig. 5 Application of A2 dentin
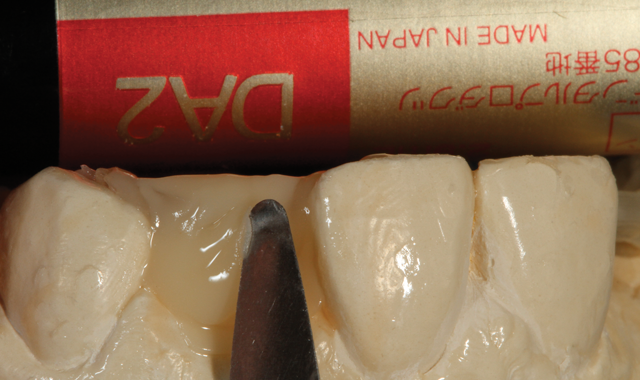
Fig. 5 Application of A2 dentin
He next applied A2 dentin in order to prepare room for the facial of number 10 (Fig. 5), after which he applied dentin to number 7 (Fig. 6, below).

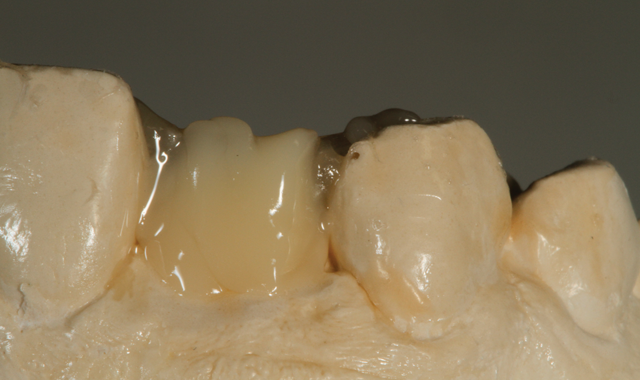
Fig. 6 Dentin application number 7

Fig. 7 Enamel Opal, white effect; number 7
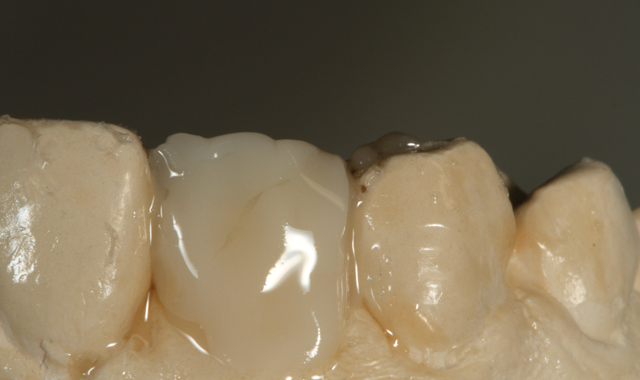
Fig. 7 Enamel Opal, white effect; number 7
The next step in the process was the application of enamel opal, white effect to number 7 (Fig. 7) and then to number 10 (Fig. 8, below).

Fig. 8 Enamel Opal, white effect; number 10
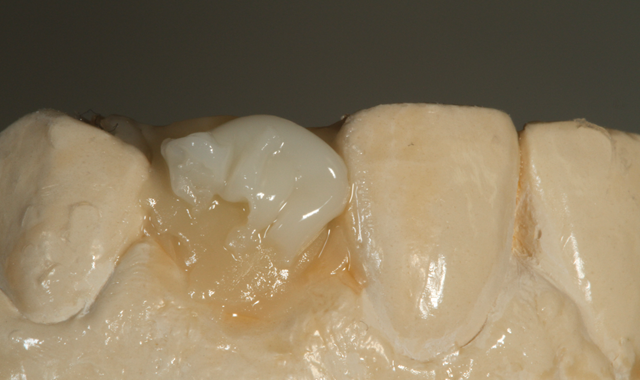
Fig. 8 Enamel Opal, white effect; number 10

Fig. 9 Trans Opal application, number 10
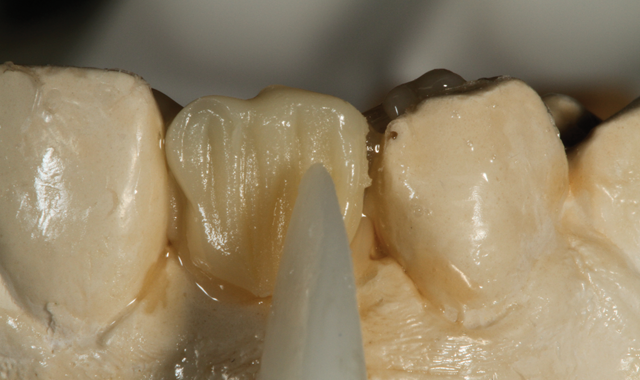
Fig. 9 Trans Opal application, number 10
A Trans Opal application for number 10 followed (Fig. 9). After contour and shaping, the restorations are shown on the model (Fig. 10, below).

Fig. 10 After contour and shaping appearance
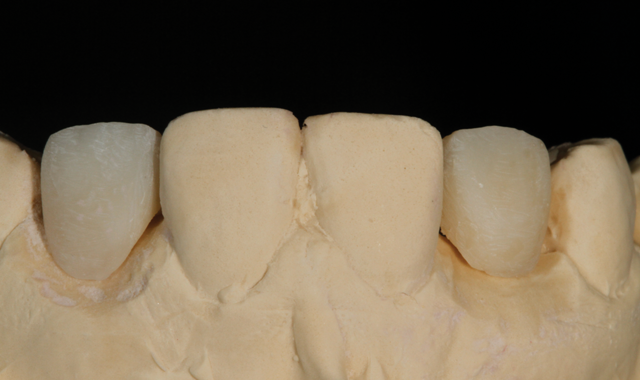
Fig. 10 After contour and shaping appearance

Fig. 11 Mirrored image; texture creation
Fig. 11 Mirrored image; texture creation
A mirrored image follows and demonstrates the creation of texture (Fig. 11). In this occlusion view (Fig. 12, below) we can see the shape and contour of the emergence profile.

Fig. 12 Occlusion view, shape and contour
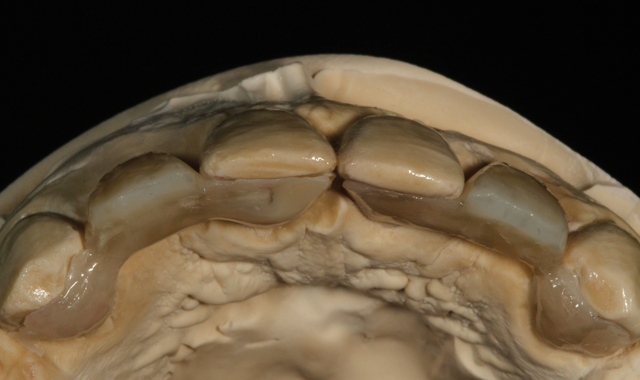
Fig. 12 Occlusion view, shape and contour

Fig. 13 Occlusion check; not too heavy
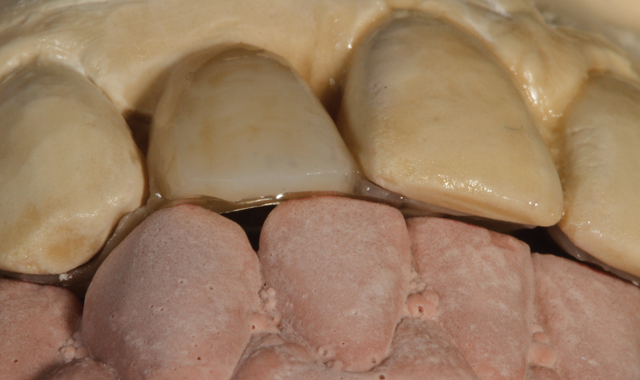
Fig. 13 Occlusion check; not too heavy
Figure 13 is an occlusion checking image. The author was determining whether or not the occlusion was too heavy in order to prevent fracture.

Fig. 14 Final mirrored view

Fig. 14 Final mirrored view
A mirrored image (Fig. 14) is of the final restoration, as completed, and then again on the model (Fig. 15, below) after staining and glazing with GC America’s Optiglaze, with curing. The problems encountered by the author were due to the difference in width between the two teeth, creating a problem with symmetry, and the fact that one restoration involved an implant and the other did not.

Fig. 15 Final image; stain/glaze, with curing
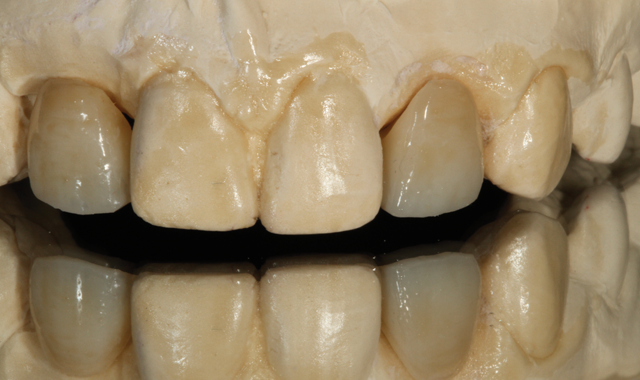
Fig. 15 Final image; stain/glaze, with curing
Conclusion
This case was one of the most satisfying the author has ever completed because it solves the problem of what to do about long-term temporization in a way that makes the dentist and the patient happy with the result. It’s not complicated to complete, but the technician must have an accurate understanding of occlusion, tooth shape and contour. If the patient has the right type of teeth for the connector to be placed, we can use three color composite material and get excellent results with our staining, curing and shaping techniques. This case produced the best response from a dentist ever regarding provisionals-in the author’s experience. It is with great pleasure that he passes this information on to his colleagues in the hope that you will all benefit from trying this fantastic technique!
Special Acknowledgement
The author thanks Abraham E. Stein, DMD, MS, Skokie, IL for sharing his knowledge and time.


