How to create an esthetic smile with smile design principles
In this article, I will demonstrate smile design principles that can help in achieving esthetics in a smile.


In this article, I will demonstrate smile design principles that can help in achieving esthetics in a smile. The patient was a young woman who had benefitted from porcelain veneer placement to achieve a better smile.
In Figure 1 you can see her smile as she presented to me. She had porcelain veneers in place on teeth numbers 8, 9 and 10. The clinician who place these restorations was obviously talented and achieved an excellent color match and marginal integrity as well as good anatomy. In a photograph the patient brought with her (Fig. 2), you can see her original smile before treatment. The left maxillary central incisor had an incisal edge fracture that had been smoothed off. She also exhibited a central diastema.


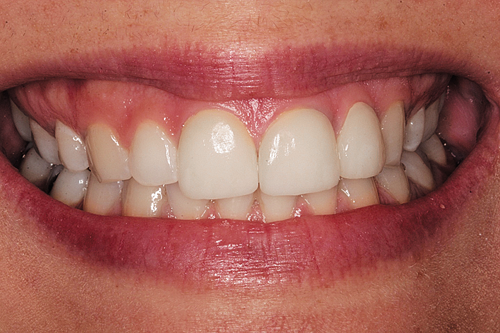


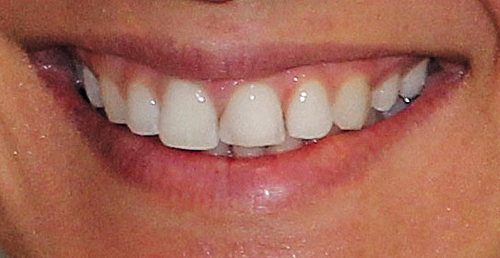
Fig. 1 Fig. 2
More from the author: How to restore Class V restorations with EPIC-TMPT
In nature, the average adult maxillary central incisor is 10 mm long. The ratio of width to length is normally 70 to 80 percent. So the average width is about 7.5 mm. The maxillary central incisor should be about 1.6 times as wide as the adjacent maxillary lateral incisor and the central incisors should be as close to mirror images as possible.
As you look at the patient’s preoperative image, the right central and lateral incisors seem to be close to these parameters. However, the left central incisor appears almost square due to the shortened incisal edge.
Continue to the next page to read about the step-by-step fix.


The first attempt
In Figure 3, you can see the anterior teeth in centric occlusion. Note the excellent tissue health indicating that the restoration margins were superb. the difference in mesio-distal width of the two maxillary central incisors can be noted in Figure 4.
Since the patient desired for the diastema to be closed, the veneer on the left central incisor was obviously made wider. This again gave the appearance of a more “square” tooth. However, the width of the left central was made to be about 1.6 times the width of its adjacent lateral incisor. If one were to evaluate only the central incisor width compared to its adjacent lateral incisor, the proper proportions are there. However, the central incisors are not mirror images and have different widths. In the incisal view in Figure 5, you can see that the left central incisor is slightly rotated at the mesial and the incisal edges of the maxillary canines, while worn short, had been restored with composite resin.

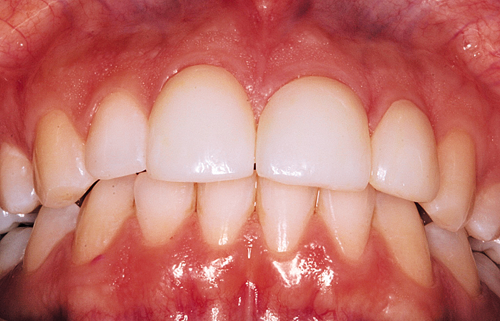


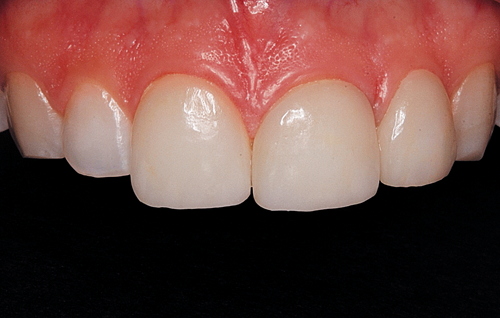

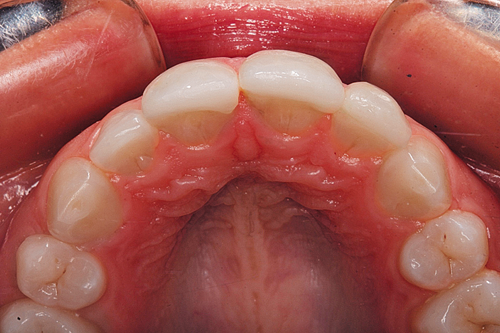

Fig. 3 Fig. 4 Fig. 5
Trending technique: How to efficiently place posterior direct composites
The patient’s concerns
The patient reported that she appreciated the previous treatment to restore the length of her broken central incisor and close the central diastema but she felt that her front teeth look “big” and she would like a more “natural” appearance. While the previous restorations actually mimicked the anatomy of her original teeth, she wanted a different look. When evaluating images of other cases I had performed, she found that she liked the ones that exhibited some incisal translucency and subtle mammelons. She requested slight imperfections for realism. It was decided that we would replace the three porcelain veneers but add one more on the right lateral incisor to achieve more symmetry and proper proportions.


Preparation
The three porcelain veneers were removed and the preparations refined. 0.5 mm of space was provided for the ceramic laminates and subtle but definitive chamfer margins placed at the height of the tissue. Butt margins were prepared over the incisal edges and rounded corners were created.
Since the left central incisor was rotated, I chose to prepare for a 360-degree laminate so the lab could control the lingual contours. Figure 6 shows the finished preparations from the incisal view. The prepared teeth can be seen from the facial aspect in Figure 7.
Trending technique: How to prep for all-ceramic anterior crowns with Expert Kit 4573ST
Shade OM3 on the Vita 3D shade guide was chosen (Fig. 8). Final impressions were taken (Panasil, Kettenbach) and an occlusal registration was made. Provisional restorations were fabricated with bisacrylic resin and the patient was appointed for placement.
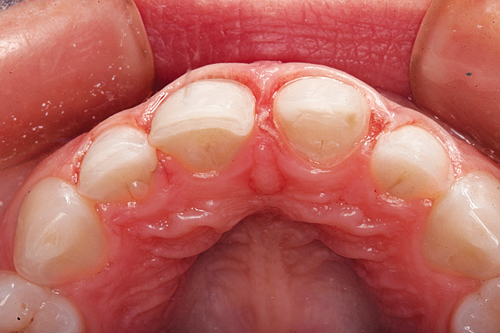


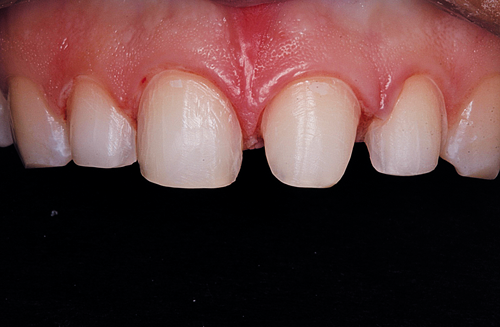

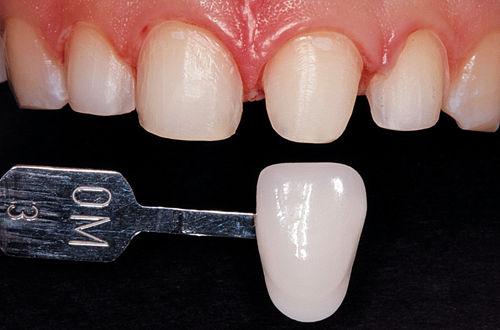

Fig. 6 Fig. 7 Fig. 8
Lab communication and fabrication
Preoperative and preparation digital images were sent to the dental laboratory (Viax) and eMax restorations were requested. The “natural” look with slight incisal translucency and subtle mammelons was requested.
Figure 9shows the four eMax (Ivoclar) restorations on the working model. They can be seen on a mirror surface in Figure 10. Note the symmetry, the proportions and the desired aesthetics. It seemed that everything we asked for was present.
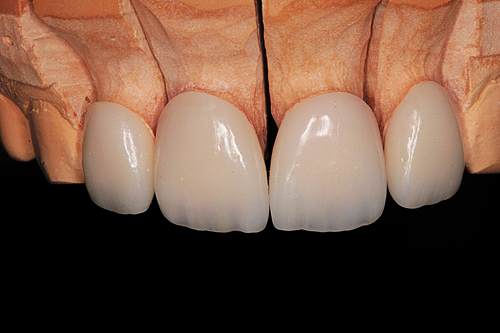


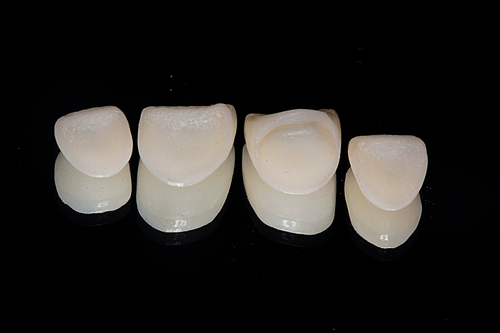
Fig. 9 Fig. 10
Trending technique: How to use CORE-FLO DC LITE for post and core build-ups
Try in and placement
At the delivery appointment, the provisional restorations were removed and the ceramic restorations were tried in using water as a try-in medium. The fit and aesthetics were evaluated and the patient was asked to judge the appearance. She was very pleased and we proceeded to place the restorations. They were bonded to place using a total etch technique and a universal bonding agent (All Bond Universal, BISCO) and a light cured luting composite (Choice 2, BISCO).
The final result
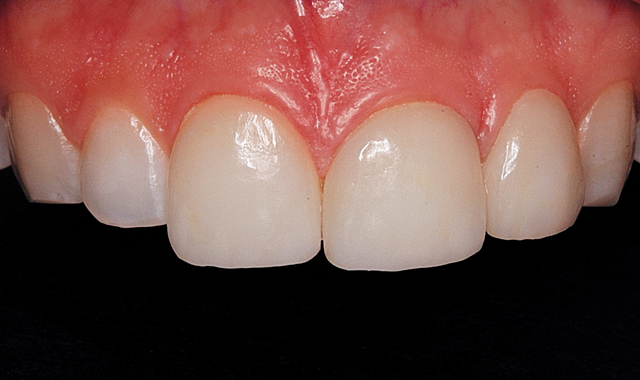
The final result can be seen in Figure 11 from the facial view. Note that the central incisors are mirror images except for differences in the incisal edges to provide “slight imperfections” and the width to length proportions are approximately 75 percent as well as being about 1.6 times as wide as the adjacent lateral incisors. Direct composite resin (Empress Direct, Ivoclar) was used to enhance the length and shapes of the maxillary canines. In the incisal view (Fig. 12) you can see that the left central incisor has 360 degree coverage. The centric occlusion view after treatment is shown in Figure 13.


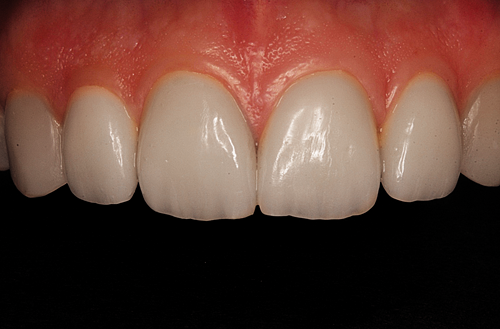
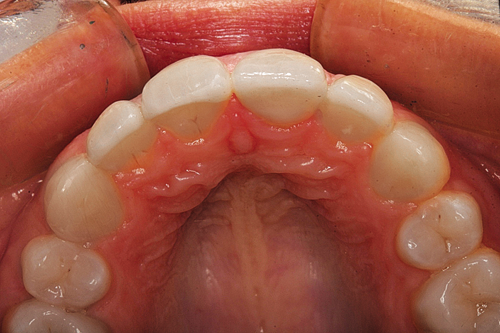

Fig. 11 Fig. 12
The patient’s new smile with four eMax restorations and two direct composite restorations can be seen in Figure 14. She told me that we achieved exactly what she was looking for and that she was getting many compliments on her smile.
More how-to techniques: How to close diastema using time-tested materials


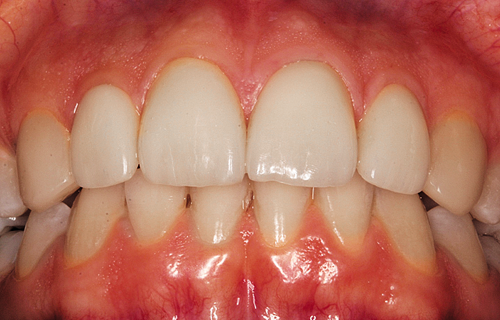
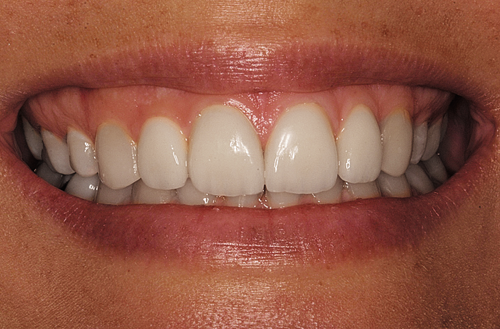

Fig. 13 Fig. 14
Conclusion
By using smile design principles and an excellent dental laboratory using state of the art ceramic restorations combined with composite resin bonding we achieved a smile that exceeded the patient’s expectations.
Lab work for this technique was performed by VIAX Dental Technologies, viaxdental.com/ 844-842-9522.


