How to take accurate photographs and impressions for Invisalign Treatment
Align Technology's Invisalign SmartTrack aligner material is designed to more precisely conform to tooth morphology, attachments and interproximal spaces for improved control of tooth movement.
Align Technology'sInvisalign SmartTrack aligner material is designed to more precisely conform to tooth morphology, attachments and interproximal spaces for improved control of tooth movement.


Dental assistants create the foundation for a variety of dental treatments, including orthodontic treatment planning for Align Technology’s Invisalign cases. Among their many roles, dental assistants and dental team members are responsible for facilitating the various tasks associated with record taking.
Photographic and impression records are essential to the success of these endeavors. Therefore, education and practice are necessary to consistently produce accurate and detailed information. With ongoing education, implementing new techniques and procedures can ensure proper protocols are followed, while practice develops ample experience and the ability to adjust to each unique patient.
By combining education and practice with technique tips from experienced dental assistants, the highest likelihood for obtaining accurate records can be realized.
Treatment planning for Invisalign
Invisalign treatment planning, in particular, involves assembling patient alignment information, eight photographs, and upper/lower impressions.3 Invisalign uses these records to create aligners that are unique to each patient and are essential to the orthodontic treatment’s success. Dental assistants are generally responsible for the majority of Invisalign record taking. The process begins with an evaluation that includes several questions regarding the patient’s current tooth alignment and the anticipated final results.
Accurate dental photography in the orthodontic treatment planning process requires proper equipment, correct camera settings, and experience for optimum results.1 The eight photographs needed for Invisalign treatment represent the patient both extraorally and intraorally and include full-face and retracted images. Impressions also require proper materials, as well as an ability to ensure patient comfort, because impressions can cause distress and gagging that can result in compromised intraoral details.2 Dental assistants are responsible for taking, organizing and submitting all of this information to facilitate proper fitting orthodontic appliances. Inaccurate records can lead to retakes, extra time, costly materials, unhappy patients, and ill-fitting aligners that result in poor treatment outcomes.


The Canon Rebel from Photomed International can help you capture the images the you need for Invisalign cases.
Technique tips
Obtaining accurate photographs is more involved than using a “point and shoot” camera. The recommended equipment includes a digital single lens reflex (DSLR) camera, neutral background, and flash. While a DSLR camera is an investment, it is important for capturing clear images.4 However, understanding the camera and its settings plays a larger role in photographic accuracy. By learning about exposure, specifically aperture, shutter speed, and film speed, the camera can be set correctly for each particular photograph. Additionally, the histogram feature can be used for instant exposure verification to ensure the image is clear and accurate.
Besides mastering the camera and its settings, dental assistants can be responsible for taking the actual photographs. After selecting an appropriate background, choosing the most effective retractors for photographic purposes is also helpful. The eight required images are all different, but they are all important for creating a successful Invisalign aligner. To capture them accurately, it is essential to know the optimal way to take each photograph.
To capture the correct patient features, it is necessary to look at the frame, aim, and focus. For full-face smile and rest pictures, the frame includes the top of the head to below the chin. The aim focuses on the nose and is perpendicular to the face. The patient’s right side profile also is framed in the same way as full-face pictures and is the final extraoral image. The anterior picture includes the second molar to the second molar. The aim is perpendicular to the face and focused on the centrals. The right and left lateral frames should maximize the exposure of the right or left region, which can be accomplished by pulling the retractor toward the respective ear. The aim is perpendicular to the buccal segment and focuses on the molar and cuspid relationship.
The final two photos are of the maxillary occlusal and mandibular occlusal frame. The main emphasis of these shots is to not leave any teeth out of the photo. Focusing the camera in the center of the plate and keeping the nose out of the frame completes these images.
When taking impressions for Invisalign treatment planning and record taking, the goal is to accurately record the intraoral structures.3 The greatest interference dental assistants experience while taking impressions is patient discomfort. This can present itself in several forms, including fear, distress and gagging.5 By avoiding patient discomfort, dental assistants can create predictable and accurate results on the first attempt. Invisalign training materials focus on using a one-step technique to create the impressions.3 This technique, in combination with a VPS impression material, allows for maximum patient comfort and the most efficient impression-taking procedure.

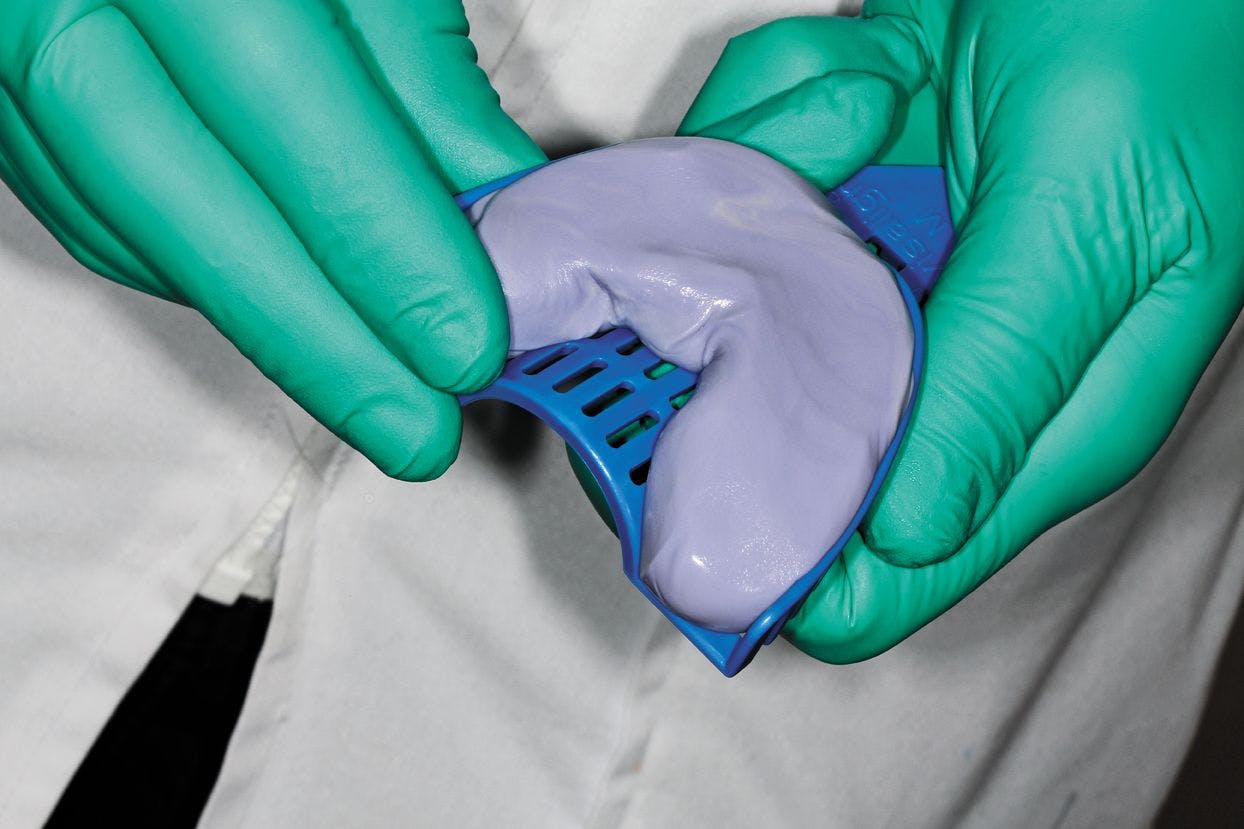

Fig. 1: Using Heraeus Flextime Putty, knead and fold the catalyst and base. Load the putty around the tray making sure you have a good, even amount of material.

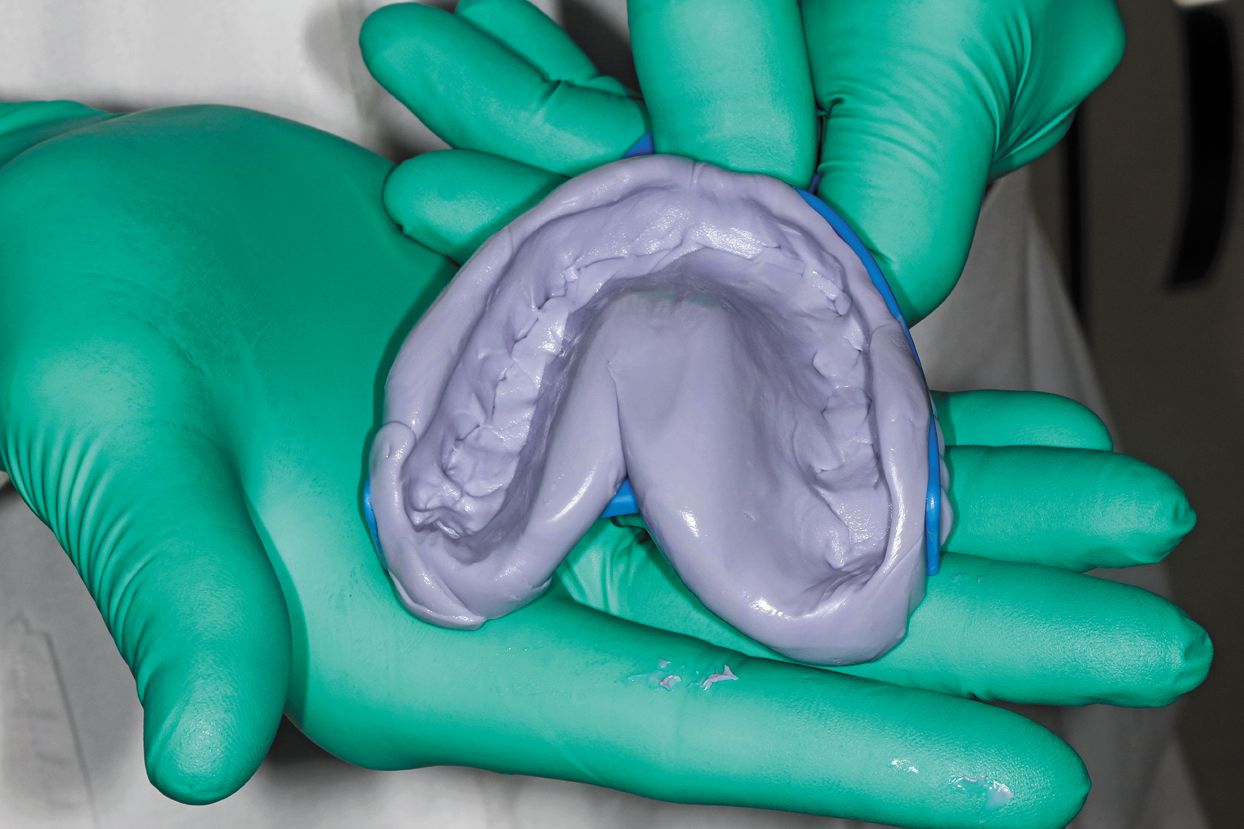
Fig. 2: Make indentations where the teeth should be with your finger before tray placement.

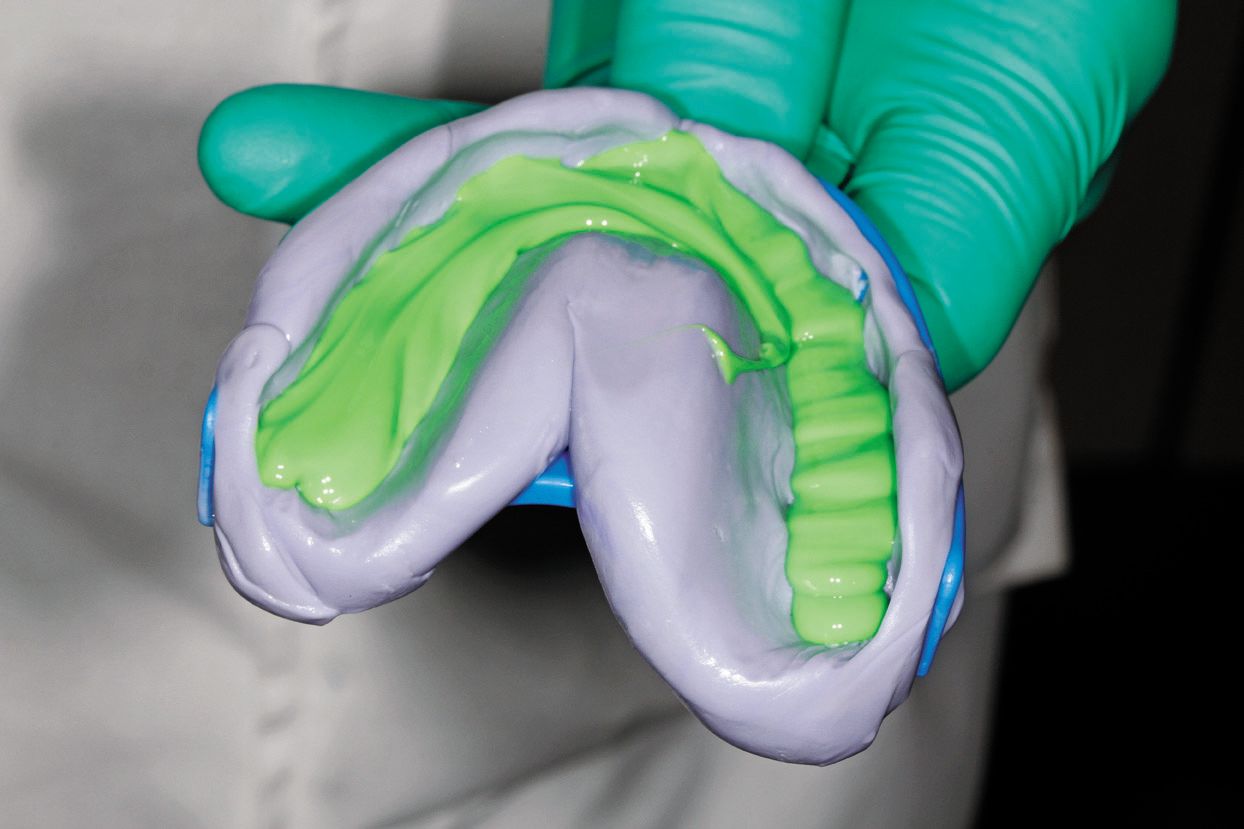
Fig. 3: Add the Correct Flow wash right on top of the putty and seat into the patient's mouth.


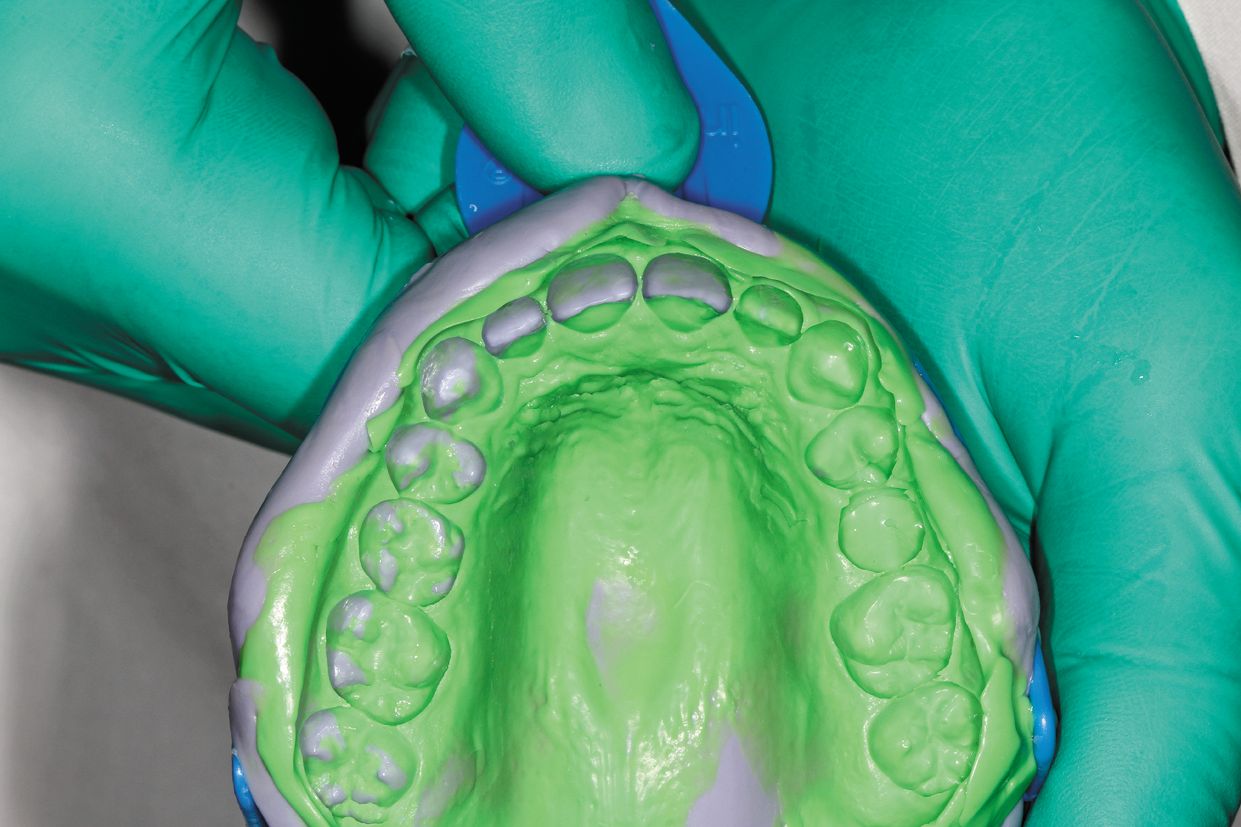
Fig. 4: Seat the tray into the mouth. When the time is complete, remove the impression.
Clinical record-taking technique
1. After the patient was determined to be a suitable candidate for Invisalign treatment, proper assessment of the patient and his alignment needs was completed, and an Invisalign case was selected.
2. Photographic records were obtained by setting up a neutral and plain background. The dental assistant used a DSLR camera and ideal photography retractors.
3. Eight photographs were taken, including:
(1) Full face at rest
(2) Full face smiling
(3) Right side profile
(4) Retracted anterior frontal
(5) Buccal right
(6) Buccal left
(7) Maxillary occlusal
(8) Mandibular occlusal


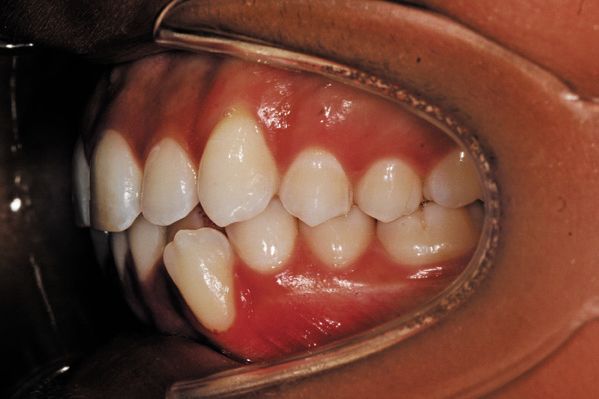
Fig. 5: Left buccal photos for Invisalign records.
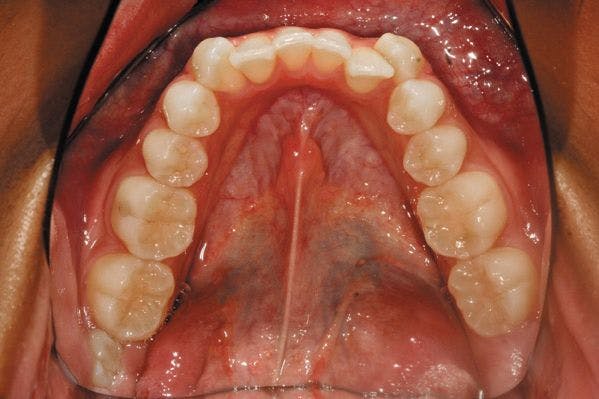

Fig. 6: Lower full arch mirror photo.

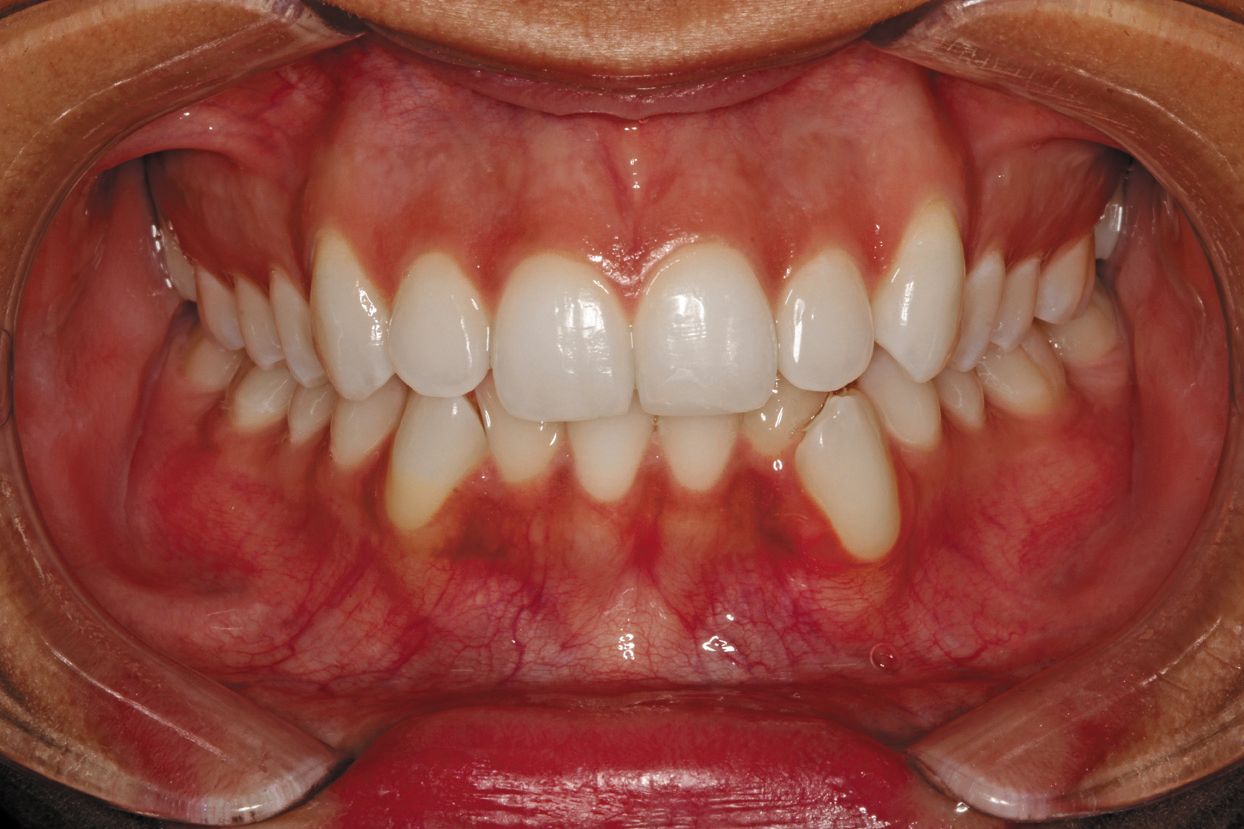
Fig. 7: Retracted biting together photos.
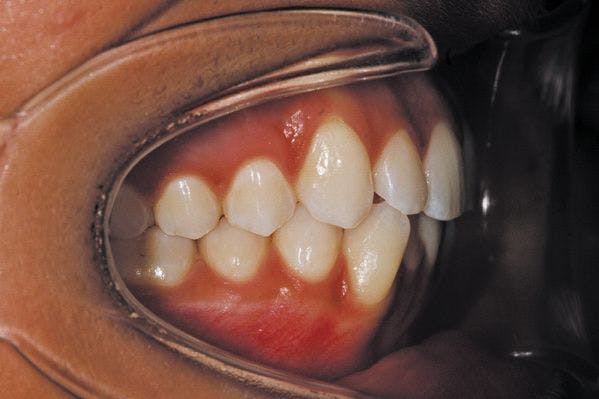

Fig. 8: Right buccal photos for Invisalign records.
The images were then uploaded to the Invisalign website and patient profile, along with additional patient information.
4. VPS impressions, both upper and lower, were taken using VPS/PVS material. After the allotted time, the impressions were set, disinfected, and packaged for shipment.
5. The treatment plan was reviewed and submitted, and the impressions were shipped for fabrication of the customized Invisalign aligners.
The foundation for case planning
Invisalign treatment planning ensures the correct fit and function of the customized aligners for the patient. It is essential to the final result and successful nature of the treatment and is predicated on accurate photographs and impressions to aid in the development of the orthodontic appliances. Dental assistants and team members perform these record-taking and treatment planning tasks, creating the foundation for case planning. To produce the requisite photographs accurately, the proper camera is required. Beyond that, knowledge of the ideal camera settings and the best way to capture the specific necessary images is essential. The materials, as well as the dental assistant’s ability to avoid patient discomfort, strongly influence the accuracy of impressions.
References
1. Nuckles DB, McCall WJ Jr, Jones CR. Close-up photography in the dental office. J Am Dent Assoc. 1975;90(1):152-8.
2. Farrier S, Pretty IA, Lynch CD, Addy LD. Gagging during impression making: techniques for reduction. Dent Update. 2011;38(3):171-2, 174-6.
3. Align Technology, Inc. Invisalign: A quick start guide. San Jose, CA: Align Technology, Inc; 2013:1-14.
4. Goodchild JH, Donaldson M. Getting the right shots! Tips and tricks for consistent photographic excellence. Dent Today. 2013;32(3):112, 114-8.
5. Armfeld JM. Towards a better understanding of dental anxiety and fear: cognitions vs. experiences. Eur J Oral Sci. 2012;118(3):259-64.
6. Kerr Sybron Dental Specialties. AlgiNot: Product brochure. Orange, CA: Kerr Dental; 2009.


