How to create a better, permanent smile
How one technician used his inLab system (Dentsply Sirona) to make a digital solution from analog dental information.


This was a case that I worked on for a very special patient-my own sister. The patient had a complicated dental history and has worn a removable denture for a very long time. Thankfully, she has a dental professional in the family and came to learn that she now had options for a more stable, permanent and beautiful smile.
The patient no longer wanted the partial denture that she had basically learned to live with for many years; she wanted a “fixed” solution. Teeth #s 3, 4, 8, 9 and 13 were to be prepped and were our only abutments. (Figs. 1 & 2)


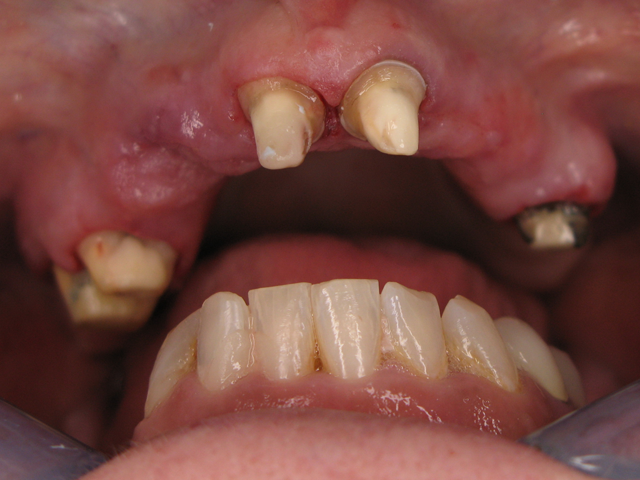
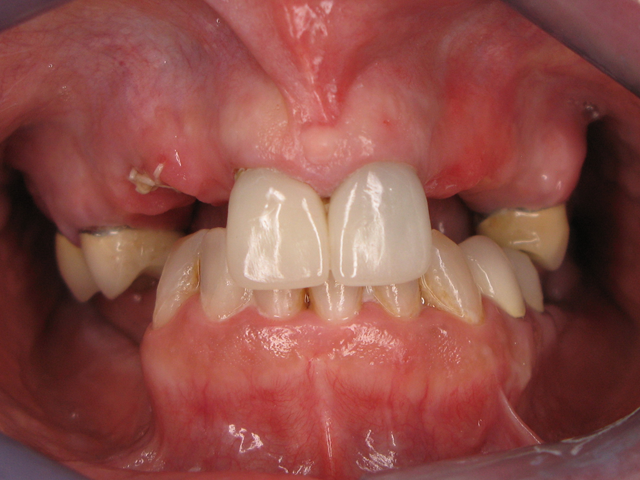

Fig. 1 Fig. 2
My initial thought was to fabricate two bridges but I did not trust so few abutments and the multiple pontic spans. The doctor and I decided that a round house bridge (full upper restoration) was our best plan for success.
It’s important to note that my referring doctor is not a CEREC® doctor nor a digital doctor in any sense, as I’m sure many of us still have quite a few of these traditional clients. I am, though, indeed an inLab®-using laboratory and all of my restorative solutions are produced using the latest laboratory equipment from Dentsply Sirona.
Trending article: How to do same-day implant restoration
Step-by-step case
The doctor sent us a physical pre-op model with an opposing model and the bite registration so we could create a full temporary for the patient to wear while her new smile was being prepared. After doing the model work, the maxillary model was prepped here at the lab. The case was mounted and then scanned with the inEos® X5. Using inLab SW (software) 16, we designed the temporary free-hand with no wax up for a bio-copy, and then milled the temporary out of a multi-layered PMMA puck. The patient was then able to test drive her new smile for a couple weeks. (Fig. 3)
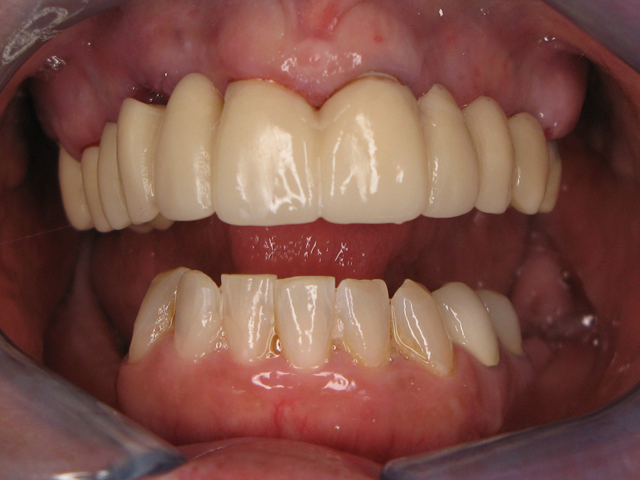

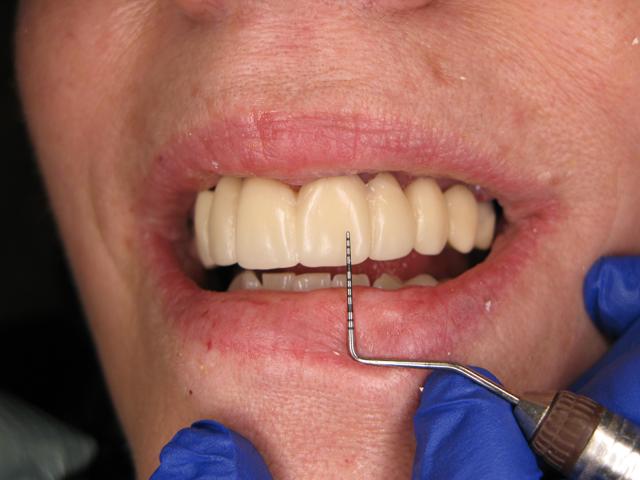

Fig. 3 Fig. 4
The only change that we gathered was needed from the patient was to shorten the front four restorations about 1 mm. (Fig. 4) We later received the final traditional impressions along with a face-bow. We did the model work and articulated on the Hanau™ articulator Face-Bow system. (Fig. 5)

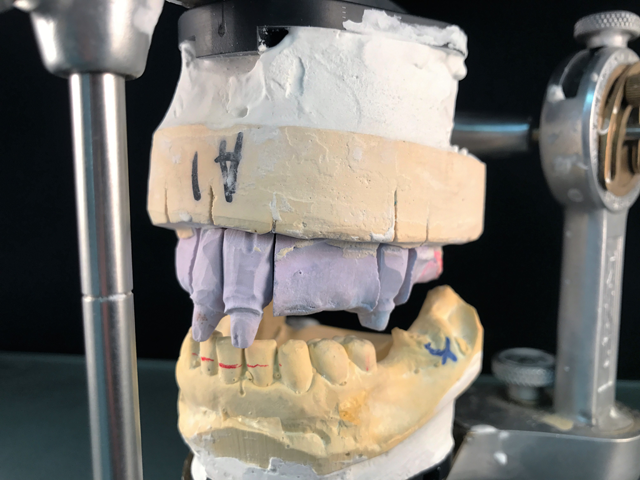
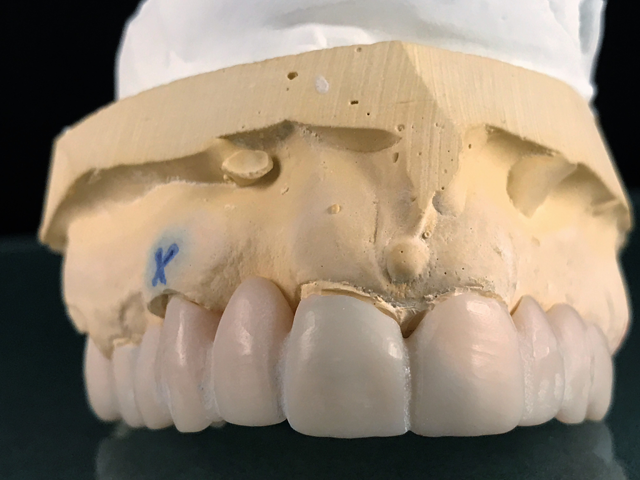

Fig. 5 Fig. 6
We then milled a second temporary with the necessary adjustments to use as biocopy in the inLab SW (Fig. 6). The case was set-up in the administration function (Fig. 7) and was scanned into the SW using the inEos X5 (Figs. 8 & 9).


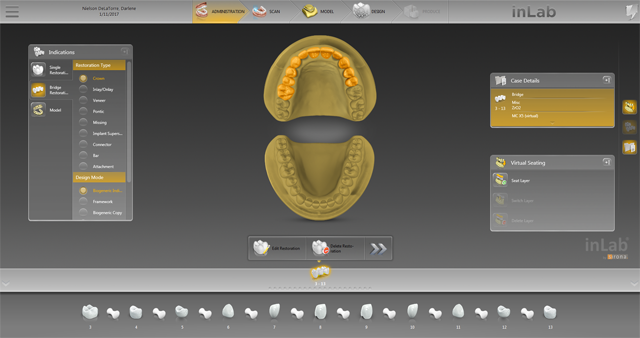

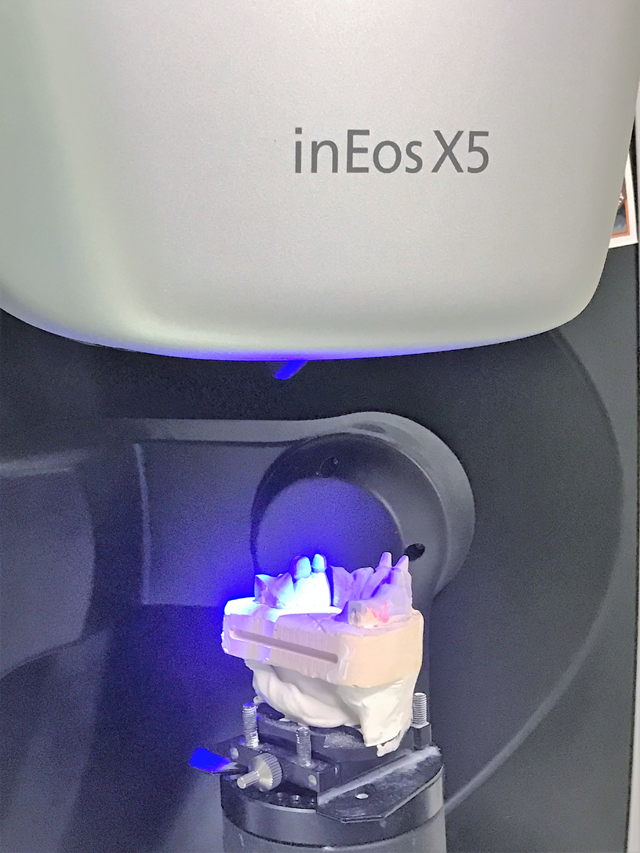

Fig. 7 Fig. 8
We finished scanning the upper, lower, buccal bite and bio-copy (Fig. 10) and the bio-copy stitched extremely well (Fig. 11).

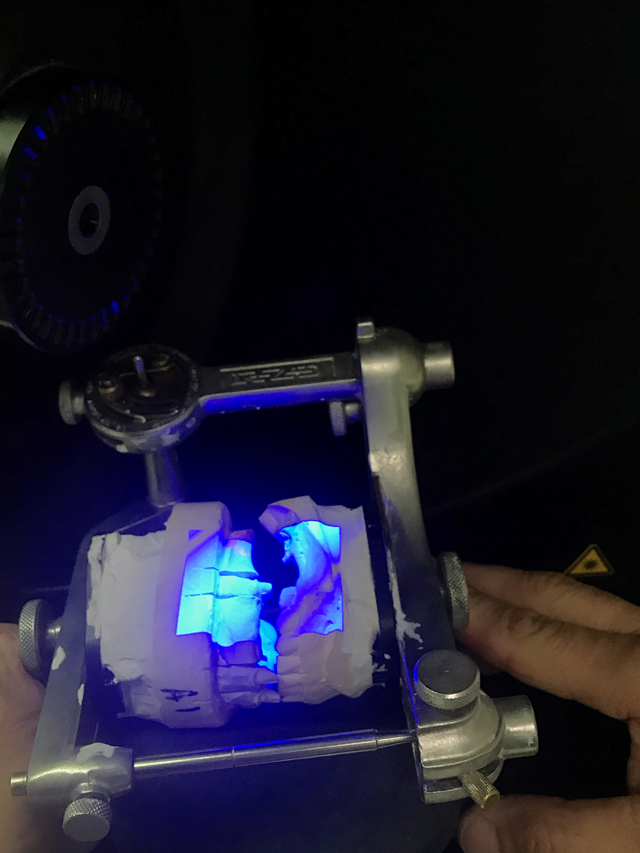


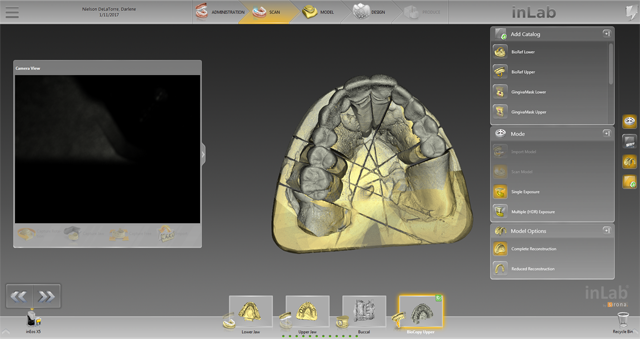
Fig. 9 Fig. 10
Continue to page two to read more...
We thoroughly checked the occlusion (Fig. 12) and then set the model axis to use the virtual articulator in the SW in order to check any excursive and protrusive movements (Fig. 13). The jaw line was now set for the SW.
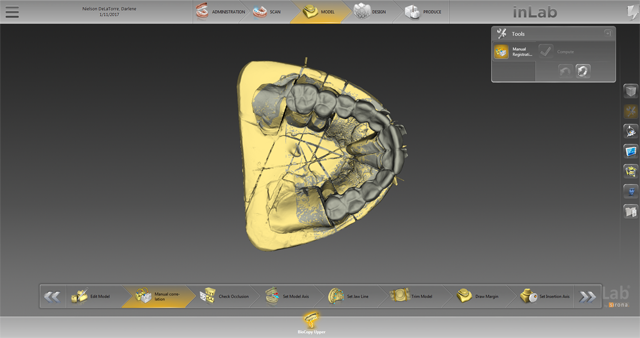

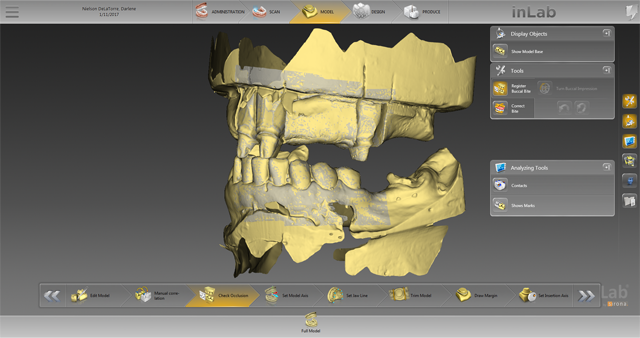

Fig. 11 Fig. 12
Especially with large jobs, it is especially important to meticulously set the model axis and individual jaw line in order to create perfectly harmonious occlusions (Fig. 14). I let the inLab SW auto trim my dies and then auto mark them, but I always double check to see if any edits are needed before moving forward (Fig. 15).
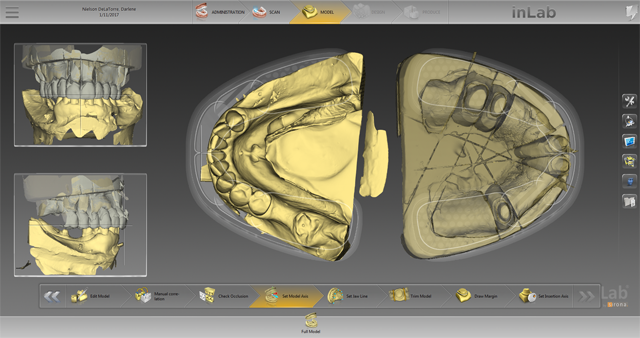


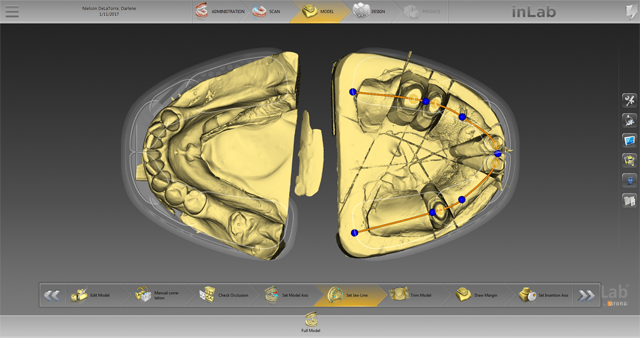
Fig. 13 Fig. 14
Next, we set the insertion axis or, as I think of it, the “bur axis,” which is the direction the bur will need to be in in order to mill the bridge with no undercuts that may cause a less-than-perfect seating of the bridge (Fig. 16).

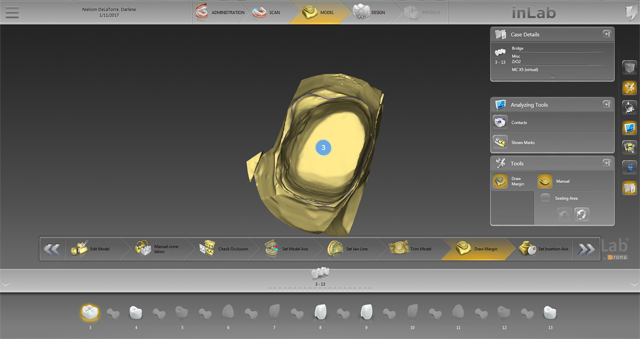
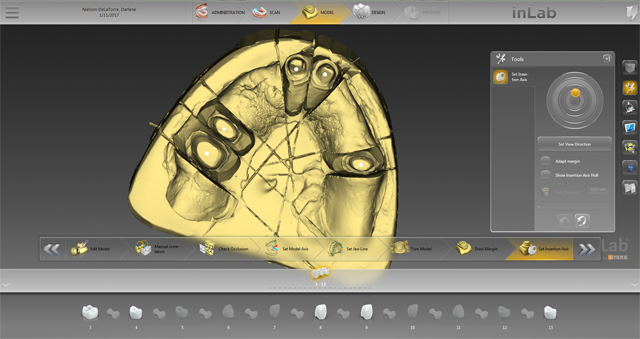

Fig. 15 Fig. 16
Although I used a bio-copy, I did not call this “bio-copy” in the administration step. Rather, I chose the biogeneric individual option instead, and I used the bio-copy as a guide to get my width, length and placement of each unit while allowing me to use the SW to choose the style of the restorations.
Related reading: Using digital diagnostic design to achieve great results
Next, I checked the spacer and other parameters according to the type of material being used as well as keeping the doctor’s specifications and preferences in mind (Fig. 17).

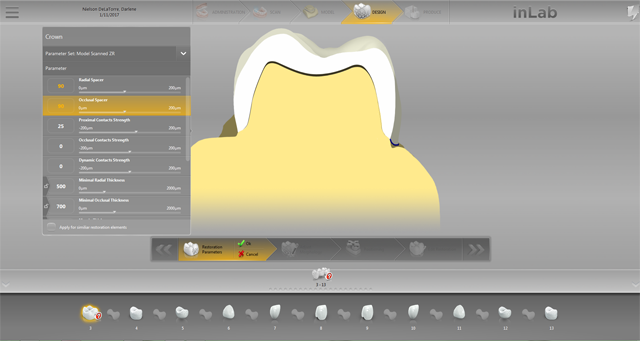


Fig. 17 Fig. 18
The positioning step is very important to ensure all restorations are perfectly situated. Taking some additional time and care to position and size the restorations will result in a better design proposal. By not checking the adapted proposal box, the SW will provide me with the ideal positioning as I set it, as opposed to adapting it to the mandibular arch (Fig. 18).
In the edit restoration stage, my bridge design is set exactly like it was displayed in my positioning step (Fig. 19). For this particular case, I chose a full contour zirconia with cut backs on teeth #s 6 to 11 in order to layer those six labials to give it a more natural, lifelike look. The zirconia we chose was Cercon® HT (Dentsply Sirona) layered with VITA® VM9 porcelain. I did the cut backs in the inLab SW so it would mill ready to layer (Fig. 20).
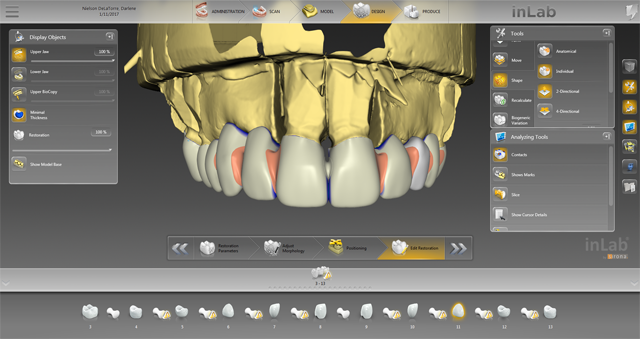


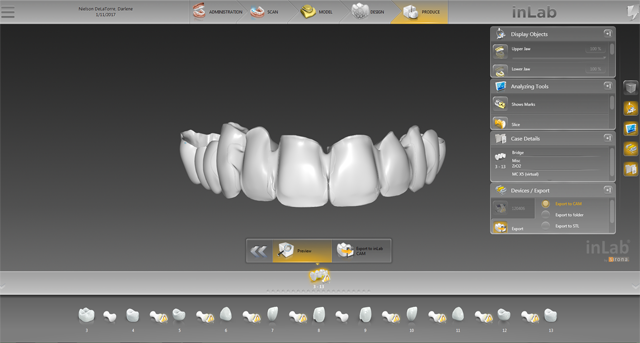
Fig. 19 Fig. 20
Continue to page three to read more...
We milled on the inLab MC X5 along with another case (Fig. 21). After cutting out of the block but before sintering, I used VITA HT YZ shading liquids to help enhance the body and look after layering (Fig. 22).
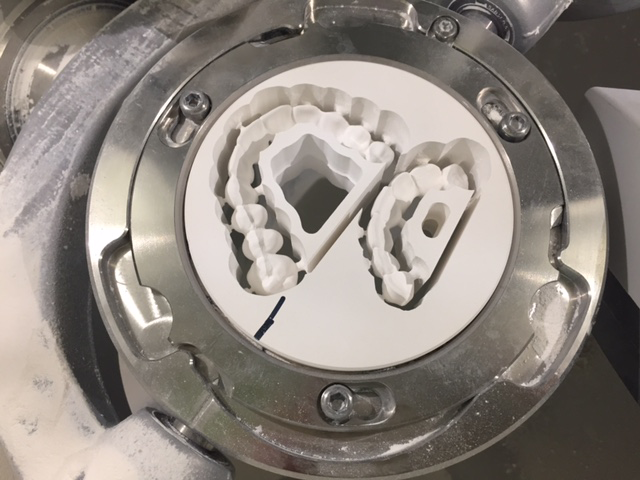

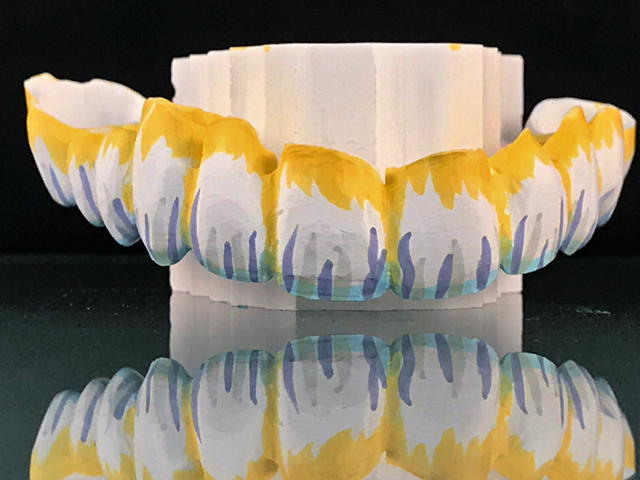

Fig. 21 Fig. 22
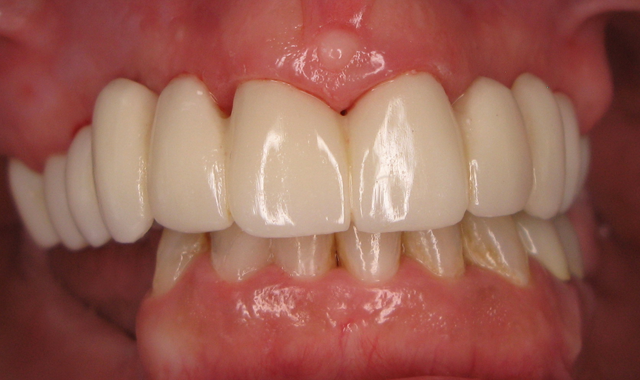
Here is the finished case before sending it back to the dentist (Figs. 23-25) and here is the final seated case (Figs. 26-28).

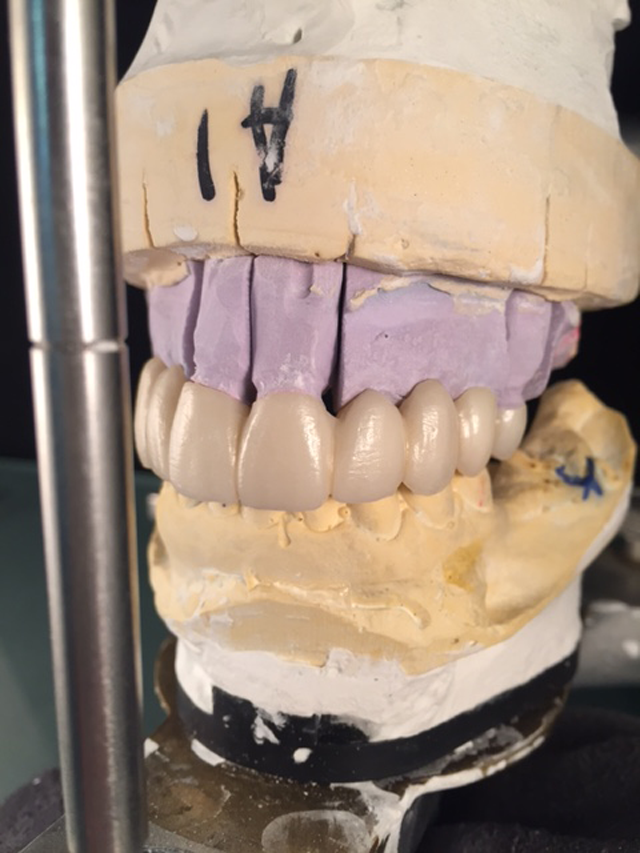
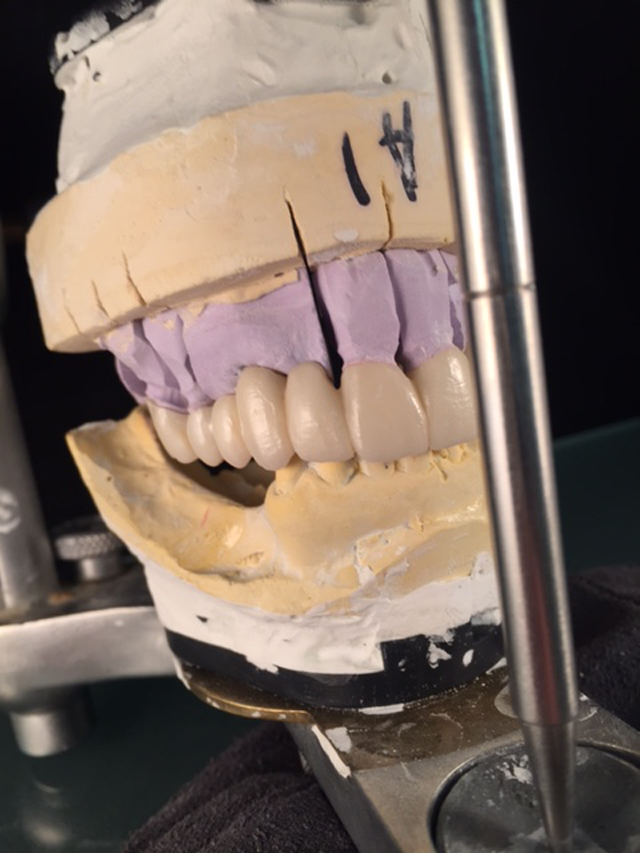

Fig. 23 Fig. 24


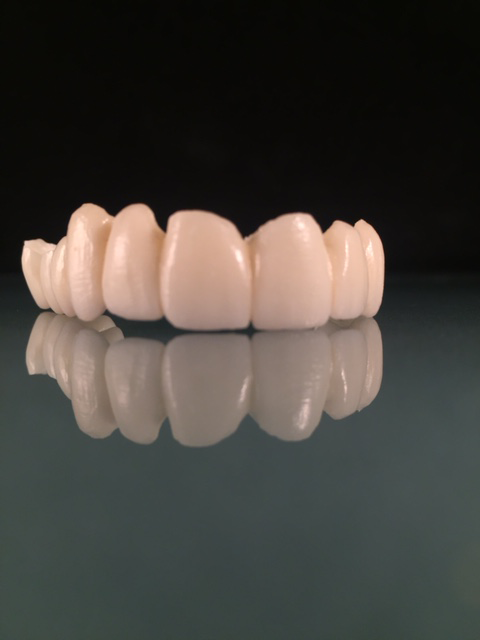

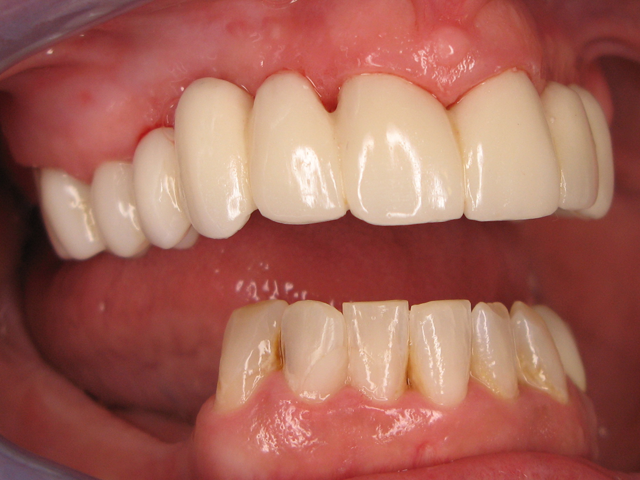
Fig. 25 Fig. 26
As you can see from the picture, the patient was extremely happy with her permanent smile and so was the doctor.
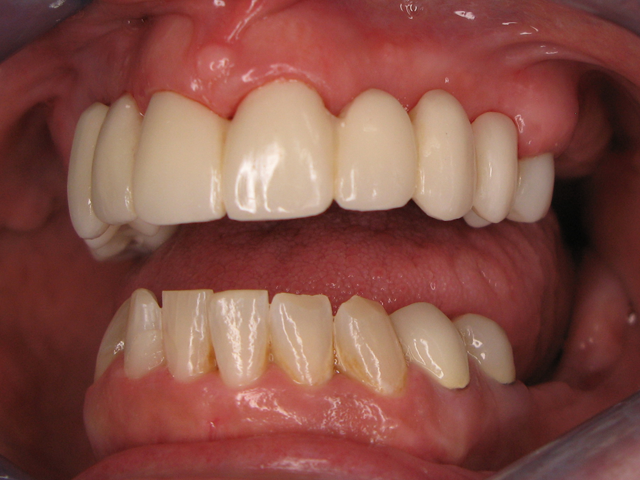


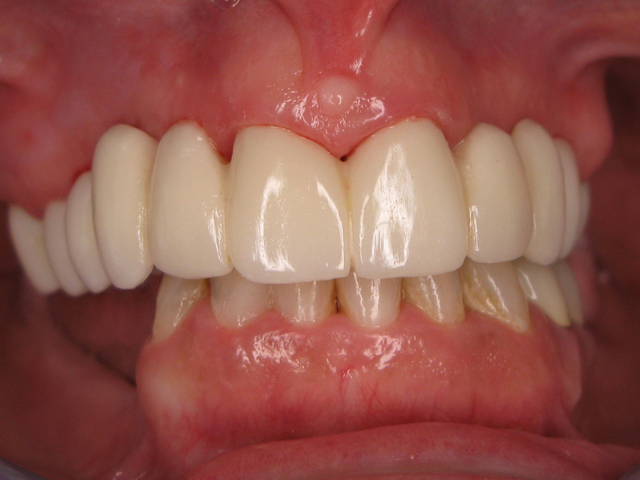
Fig. 27 Fig. 28


