How to complete a same-day restorative case using a chairside workflow
How one dentist was able to use chairside milling to help an out-of-town patient.


In December 2018, a 39-year-old male patient from out of town reported to the office complaining of cold and sweet sensitivity on the maxillary left area of the jaw.
Visual examination revealed decay on the mesial marginal ridge and distal marginal ridge of tooth #13 as well as extensive buccal and occlusal decay on tooth #15 (Figs. 1-2). Bitewing radiographs and intraoral photographs were taken, which confirmed the above diagnosis and also exposed additional decay on the distal of tooth #12 (Figs. 3-4).

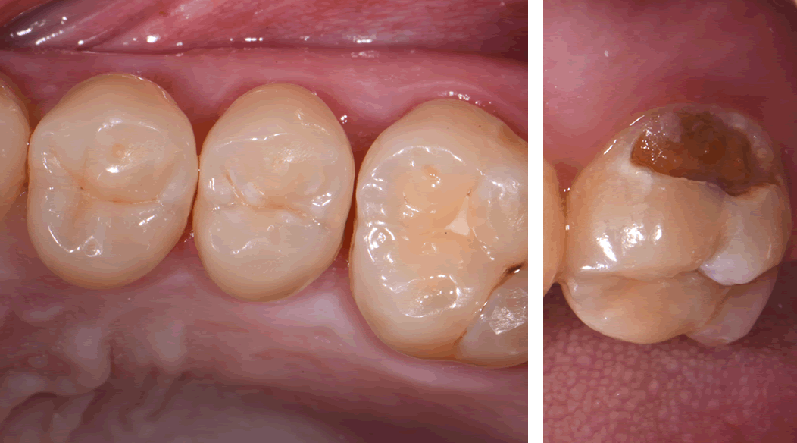

Figs. 1 and 2
Treatments for the teeth were discussed, which included crowns, inlays, onlays and composite restorations. The patient requested that the restorations be conservative, be ideal for each tooth and also have longevity. It was decided to do ceramic inlays on teeth #12 and #13 and a ceramic crown on tooth #15. The materials selected reflected the strength and esthetics needed for the long-term service of the specific restorations.


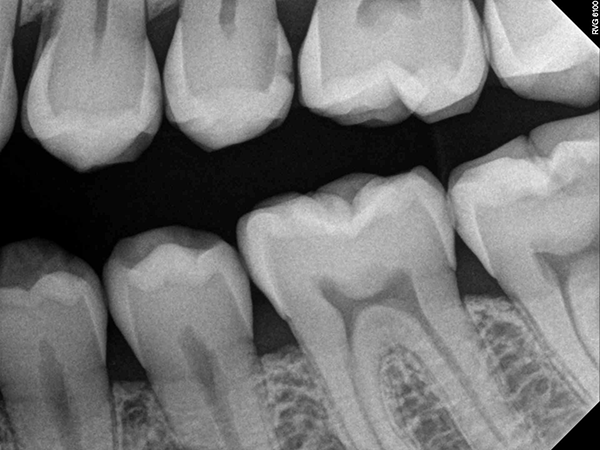

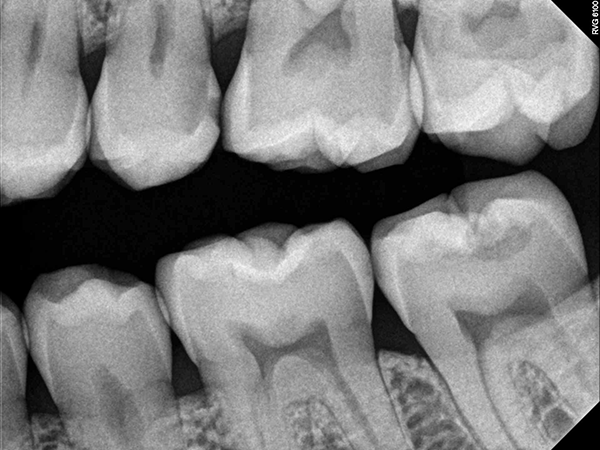
Fig. 3 Fig. 4
Often, we work with outside laboratories to complete our restorative cases; however, considering the patient had a travel itinerary to keep, time was of the essence in this case. Managing the complete chairside workflow in our practice meant the patient could receive his restorations in the same day without an inconvenient interruption to his schedule. In addition, we could provide more control over esthetics, function and quality of any ceramic restoration.
Read more: Carestream Dental announces two new software partners
Treatment
The tooth was prepped and the CS 3600 intraoral scanner was used to scan the preparation sites and surrounding dentition to create the digital model (Fig. 5). This digital model would be later used to plan the preparations in computer-aided design (CAD) software (Figs. 6-7).


Fig. 5
The scan was saved in the patient’s chart in CS Imaging version 8 software. Due to direct integration, exocad ChairsideCAD software was launched directly from the patient’s chart and the digital impression was automatically transferred into the design software. This seamless interface not only saved time but also eliminated the risk for errors-import/export issues, opening the wrong file, etc.-that can sometimes occur when a dataset is transferred between software platforms.
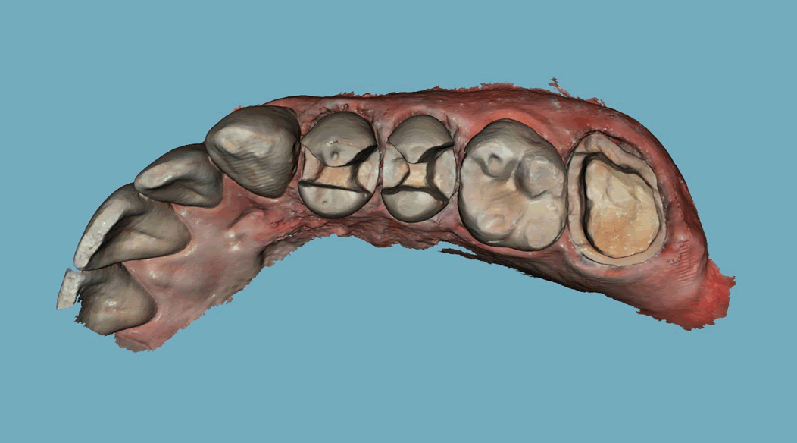


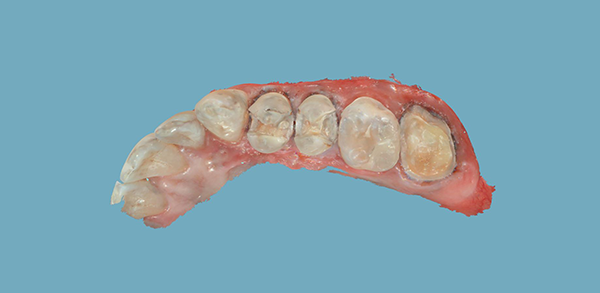

Fig. 6 Fig. 7
Inlays and crown were prepped, and the rubber dam was removed for photos (Figs. 8-9).


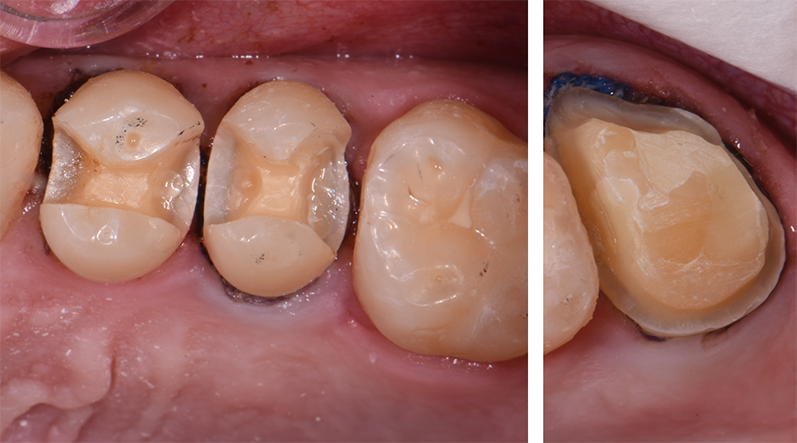

Fig. 8 Fig. 9
Continue to page two to read more...
Next, the inlays and crown were designed (Fig. 10), the occlusion was checked and the blocks were nested for ideal placement of the restoration in the block.
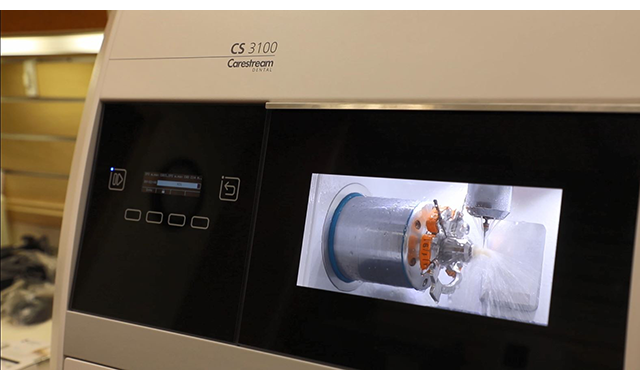
Once the design was complete, the job was sent to the CS 3100 Smart Milling Queue for chairside manufacturing (Fig. 11). The bicuspid restorations for teeth #12 and #13 were completed with the feldspathic ceramic in VITA Mark II block. The VITA Mark II block was specifically developed for use with CAD/CAM technology, such as the CS 3100. Its fine-particle structure ensures enamel-like behavior, natural abrasion characteristics and a translucency/chameleon effect. After the quick milling process, the restorations were completed with no thermal refinement processes, such as staining, glazing, or crystallization firing.

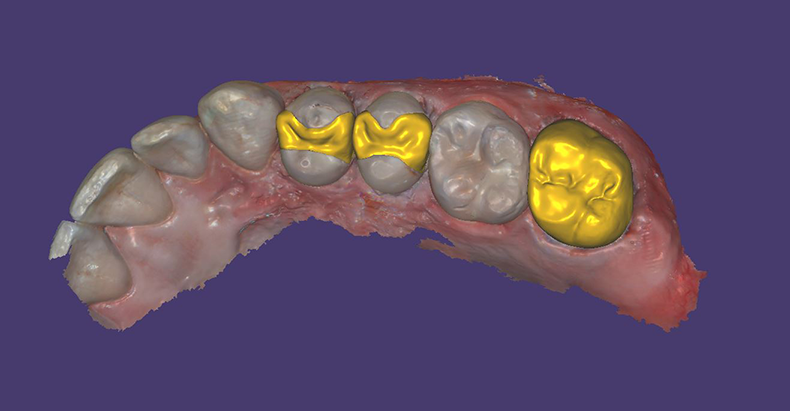

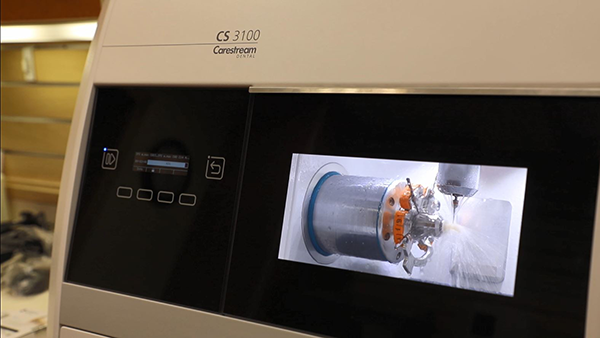

Fig. 10 Fig. 11
The molar restoration for tooth #15 was completed with lithium disilicate, or Ivoclar Vivadent e.max material. The CS 3100, a four-axis mill with multiple tools, cut the e.max blue block precisely, creating a smooth margin for a near perfect fit with no chipping at the margin, unlike other milling systems.
Trending article: Changing the implant workflow
The IPS e.max CAD acquired its final strength of 500 MPa and the desired esthetic characteristics, such as tooth color, translucency and brightness, during its crystallization process. Time savings during the design phase allowed ample time for crystallization and glaze.

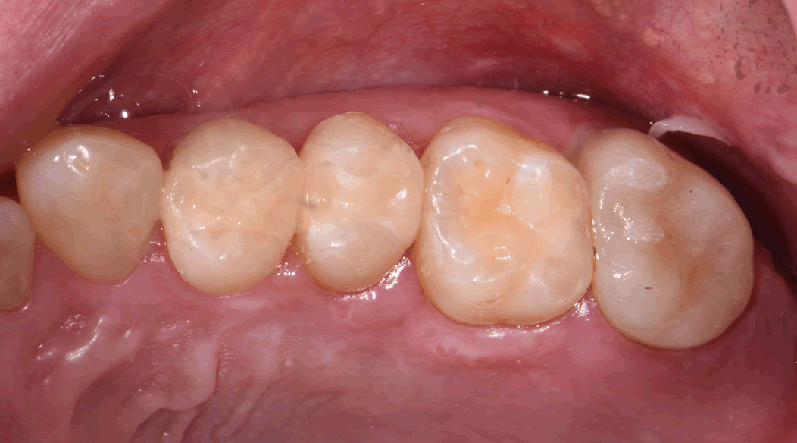
Fig. 12
Once the milling was complete, the restorations were polished, the fit was verified and they were cemented in place (Fig. 12). Final control radiographs were acquired with the RVG 6200 intraoral sensor to confirm the fit of the inlays and crown (Figs. 13-14).


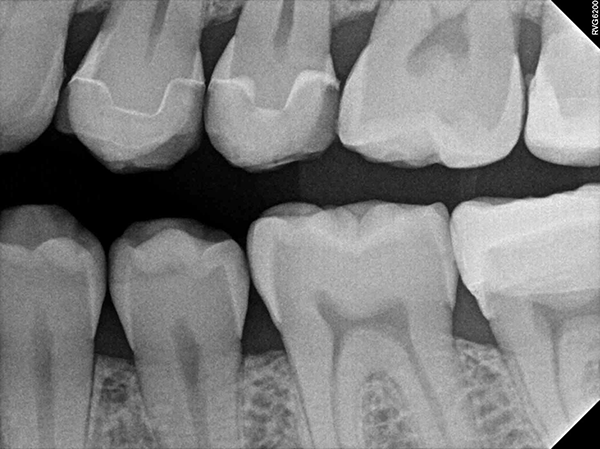
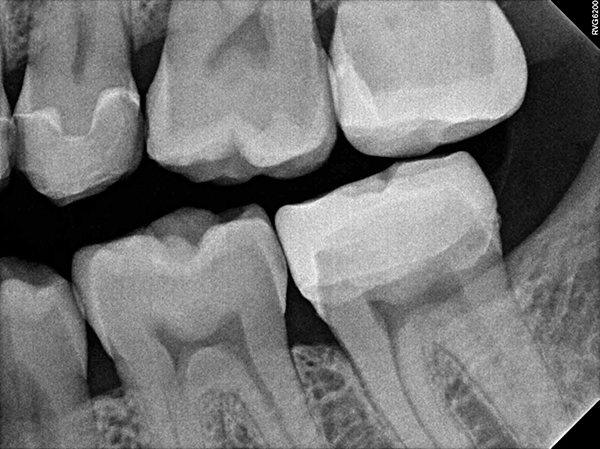

Fig. 13 Fig. 14
Continue to page three to read more...
Key takeaways
Utilizing a chairside restorative system that connects each step in the process seamlessly from the first scan to the final restoration plays a key role in my practice’s ability to deliver quality results to patients.
First, the CS 3600 intraoral scanner captures the digital impressions. From there, the clinical chairside version of exocad ChairsideCAD can be launched directly from the patient’s digital chart where the digital impression is saved. ChairsideCAD can be used to design single units, multiple units, implant restorations, veneers, bridges, or overlay wax-ups and fabricate restorations needed to correct occlusion and/or esthetics.
When designing in ChairsideCAD, the clinician selects the type of restoration and material to use. Next, he or she may continue the design using the typical CAD/CAM workflow: mark the margin; select a tooth from the anatomization library, or just let the software select the proposed tooth anatomy; and check the line of draw. The software can automatically adjust the proposed tooth to the preparation, creating contacts and an occlusion the clinician has preset in his or her preferences.
Related reading: How to use digital technology to improve patient care
Once this proposal is complete, the clinician can inspect the restoration for approval and make any changes using simple tools. Finally, the restoration is sent to block nesting, modified if necessary and sent to the milling queue for fabrication.
The CS 3100 system for use with instant ceramic restorations has changed the CAD/CAM game for in-office chairside milling. It’s fast, accurate and expandable to other materials, and it creates a quality restoration with multiple ceramic materials I haven’t seen in my 16-year involvement with other CAD/CAM systems.
Once the restorations are completed and taken to the mouth, there’s minimum need for adjustment. With my preferences preset-such as cement thickness, percent of occlusal and interproximal contact-I virtually have no, or minor, adjusting.
The most amazing thing about these restorations is the marginal integrity. It creates a margin I haven’t seen before with other CAD/CAM systems or from commercial laboratories-virtually smooth and radiographically like the patient has received his or her enamel back.
With control over the quality of the restoration in my hands, my practice was able to deliver first-class ceramics quickly with increased profitability and less overhead.