How to close diastema using time-tested materials
Dr. Marcos Vargas explains how using 3M materials and a breakthrough new polishing system help him create amazing and esthetic smiles.
Given my primary research interest in the area of dental materials-bonding, composite resins and esthetic dentistry-I’m always examining products with an eye toward simple techniques and patient-pleasing esthetic results.
Recently, I was greatly impressed to discover a high-gloss finishing and polishing system that is effective for both anterior and posterior, direct and indirect restorations. The Sof-Lex™ Diamond Polishing System from 3M introduces a two-step approach that achieves a paste-like gloss with the convenience of a rubberized system. The flexible shape adapts to all tooth surfaces, producing a life-like, high-gloss finish for the dental restoration.
Q&A: What makes 3M continue to innovate


Used with Filtek™ Supreme Ultra Universal Restorative (3M), the polishing system delivered excellent results while maintaining the integrity and anatomy of the restoration. When a young patient presented with a small anterior diastema, I used Filtek Supreme Ultra restorative to close the diastema, then completed the case using the Sof-Lex diamond polishing system, delivering beautiful esthetic results with a high-gloss shine that greatly impressed the patient.
As a complete system, the Esthetic Restorative Solution from 3M combines the time-tested Filtek Supreme Ultra restorative with the new Sof-Lex diamond polishing system to impart a very natural-looking gloss in a technique that is kinder to gingival tissues when compared with conventional discs. It brings together the diamond paste-like polish in the convenience of a rubberized system, which I can appreciate in my practice.
Next page: Go step-by-step ...


Case Presentation
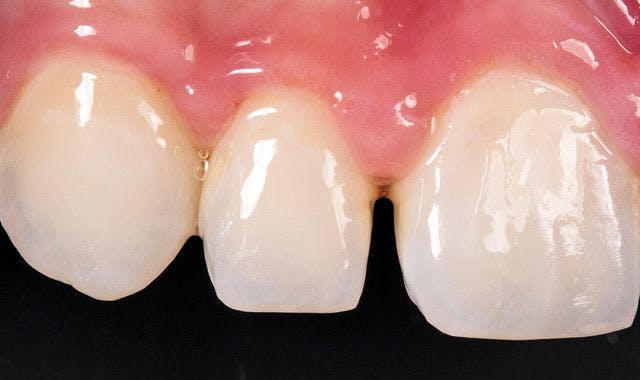
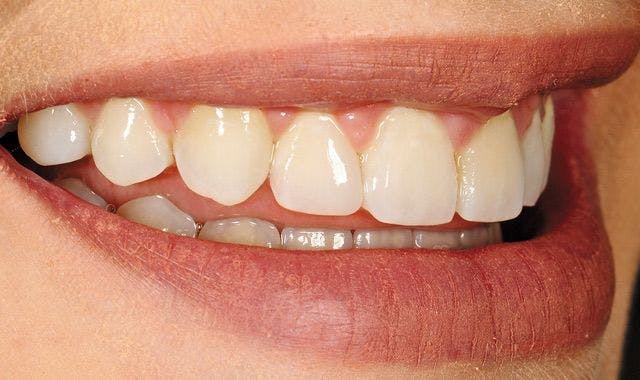
Step 01: A young female patient presented, after orthodontic treatment, with a small anterior diastema, mesial to the right lateral incisor (Fig. 1). The patient’s main esthetic concern was to eliminate the space and increase the size of the lateral incisor. Additionally, to ensure optimal stability of the orthodontic treatment, proximal contact among all anterior teeth is desirable.


Step 02: Isolation with a rubber dam pushed the gingiva apically to provide accessibility to the cervical area and allowed me to create proper anatomical contour and emergence profile (Fig. 2).
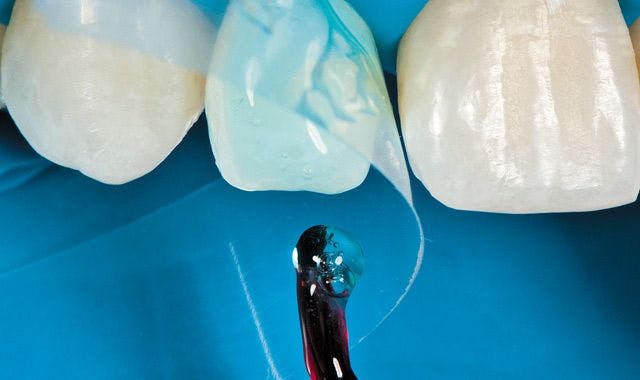
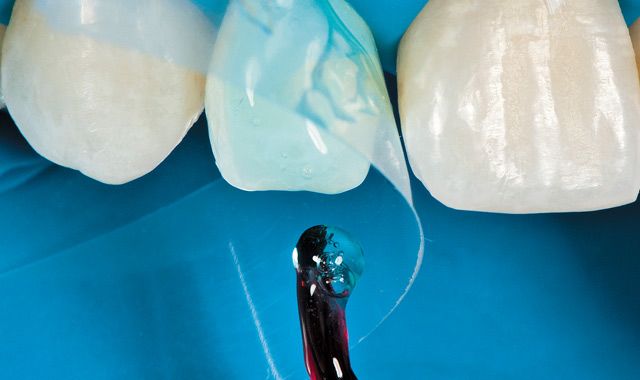
Step 03: A mylar strip was used to protect the adjacent tooth from etching (Fig. 3). The mesial proximal, facial and lingual areas were etched. I prefer to use a selective-etch enamel technique with Scotchbond™ Universal Adhesive from 3M to increase the bond strength.

Step 04: To prevent contact of the adhesive with the adjacent tooth, another mylar strip was placed and adhesive was applied for 30 seconds and dried for 30 seconds (Fig. 4).

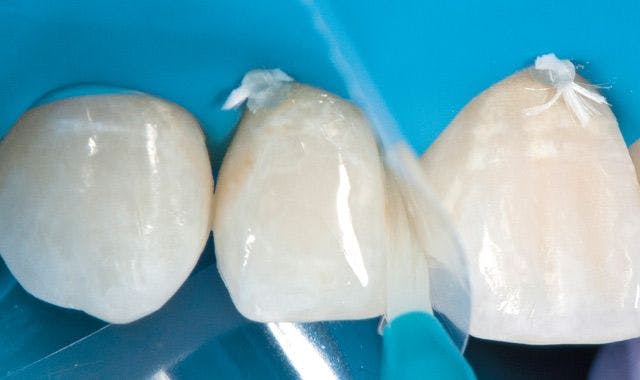
Step 05: Filtek Supreme Ultra shade XWE was placed in two increments and each increment was light cured for 20 seconds. The first increment was placed over the facial aspect of tooth #7 (Fig. 5).

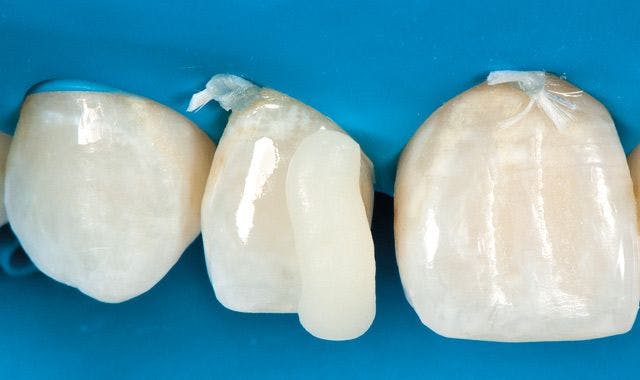
Step 06: This increment was then spread and feathered towards the middle of the tooth to improve blending (Fig. 6). The second increment was placed to fill the palatal aspect of the diastema with the help of a mylar strip. This completely closed the diastema.

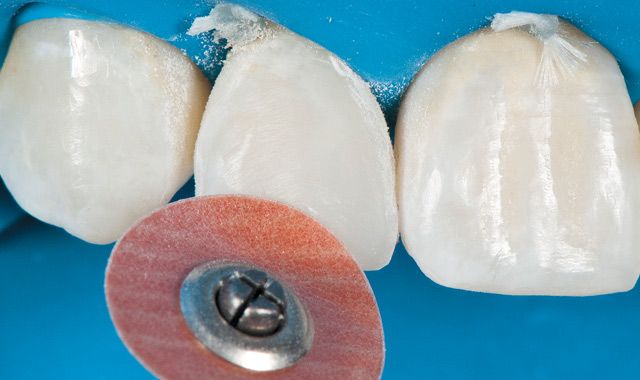
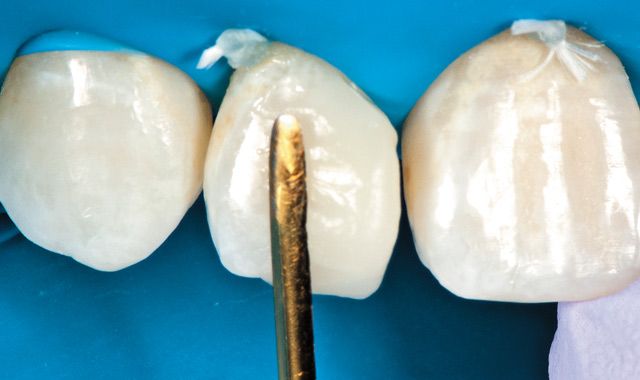
Step 07: To begin the contouring and polishing process, the proper length was first established with a Sof-Lex™ XT Contouring Disc (3M). Second, an incisal-facial line angle was formed. Third, the mesio-facial line angle, as well as the incisal, facial and palatal embrasures were defined (Fig. 7).
Once contoured, the surface characterization of the adjacent teeth was copied onto the restoration using a fine diamond. In my experience, a speed of about 5,000 rpm using the diamond is ideal to create microanatomy.
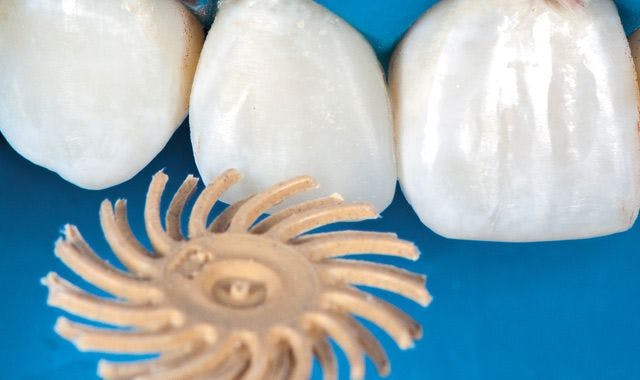

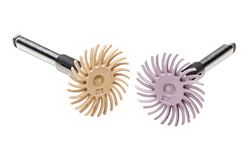
Step 08: Next, I utilized the Sof-Lex diamond polishing system, which consisted of two steps: a beige pre-polishing spiral (Fig. 8) that smoothed and removed scratches in the restoration to prepare the surface for high-gloss polishing ...
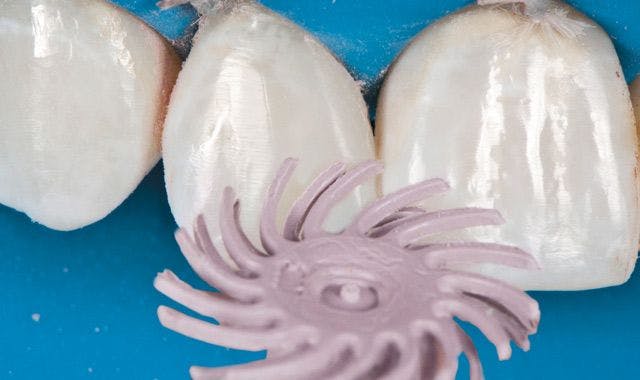

Step 08 continued: ... and second, I used a pink diamond polishing spiral that imparted a smooth, high-gloss polish (Fig. 9). These spirals reached small crevices and easily adapted to all surfaces. Finally, the proximal surface was polished with finishing strips.
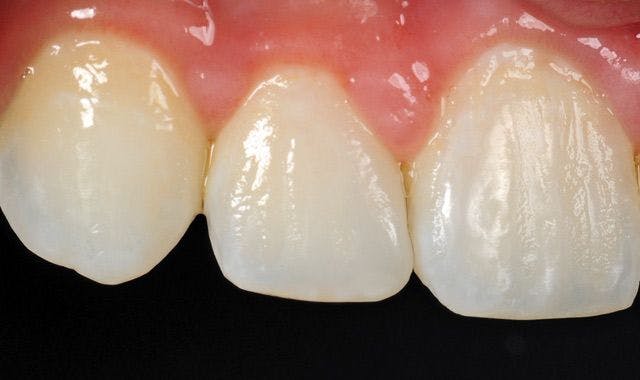

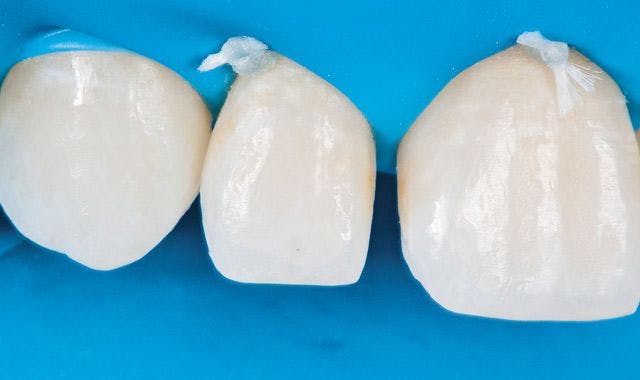
Step 09: Upon finishing the restoration, the patient was very satisfied by the ideal contour, surface smoothness and life-like luster (Fig. 10).
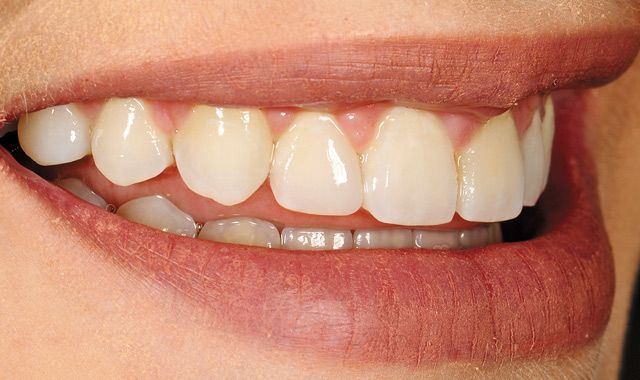
Step 10: The patient returned one week later for a final post-operative appointment (Fig. 11). She was still very satisfied with the final restoration.
For more information about 3M Sof-Lex polishers, call 800-634-2249 or visit 3M.com/estheticrestorations