Technique: Fabricating full arch implant prosthesis
A technique demonstrating the use of a zirconia CAD/CAM-milled restoration for full arch implant supported fixed prosthesis.


Full-arch implant-supported restorations have been documented to have high success rates. Many combinations of materials have been used for this type of restoration, such as metal alloy-acrylic, metal alloy-composite and metal alloy-ceramic.
However, complications including fractured or debonded acrylic resin teeth, wear of opposing surfaces, ceramic chipping, difficulty in shade matching of acrylic and pink ceramic, lack of passive fit and extensive work for repair after framework breakage have encouraged dentists to look for other material options. The following case study will present the clinical and laboratory protocol to fabricate a zirconia full arch prosthesis.
Related article: Creating monolithic zirconia splinted crowns
Case study
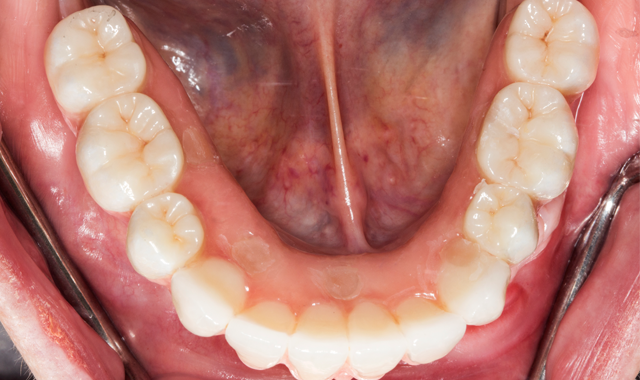
A 70-year-old patient presented with fractured teeth and multiple failing restorations (Fig. 1-2). It was determined that the mandibular teeth were not restorable. The treatment plan was for a mandibular fixed detachable prosthesis with five implants. Due to patient’s finances, the maxillary arch will be restored after the mandibular arch is finished.

Fig. 1
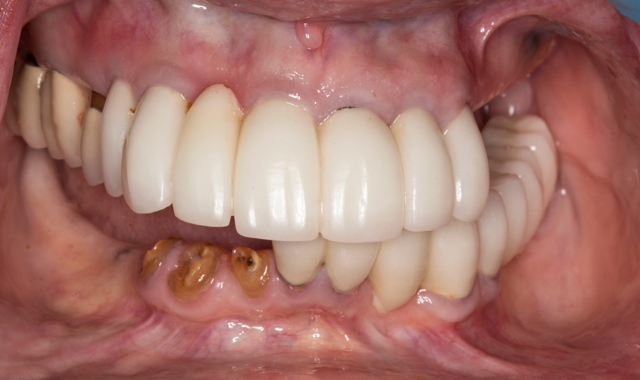

Fig. 2
A full thickness flap was performed, as well as extraction of remaining mandibular teeth with alveoloplasty to create restorative space and achieve an even ridge. A clear duplicate surgical guide was used for implant position and distribution. Five BioHorizons Tapered Internal implants were placed using a second stage approach (Fig. 3).
After an uneventful healing period, uncovery of the implants was performed and multi-unit abutments were placed and torqued to 30NCM (Fig. 4).
")
Fig. 3
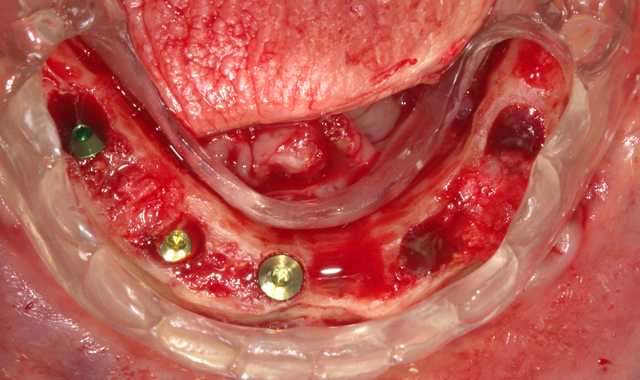

Fig. 4

Up next: The fabrication and final results
A CAD/CAM generated custom tray was designed using 3Shape software with precise open tray holes, and a custom tray was 3D printed in resin(Figs. 5-5b). Open tray impression posts were placed with sectioned jig and joined intraorally with flowable light cure composite (PrimoPattern Clear, Primotec USA) (Fig.6).

Fig. 5
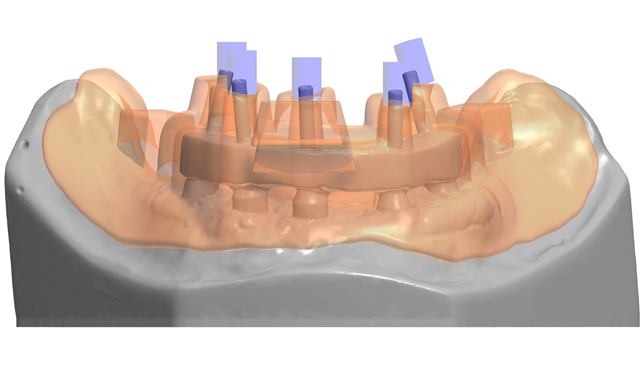

Fig. 5b
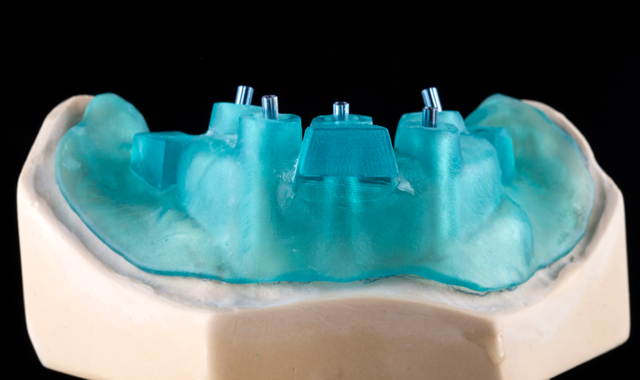

Fig. 6
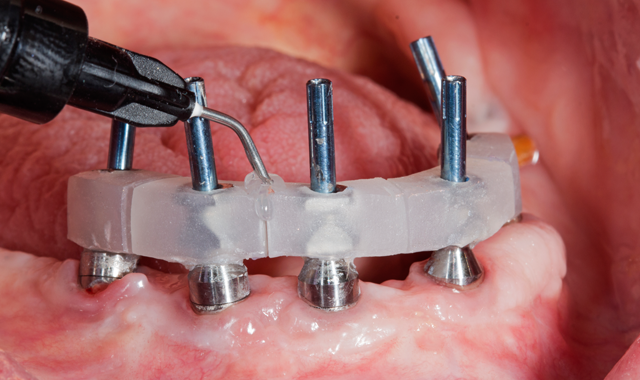

Fig. 7
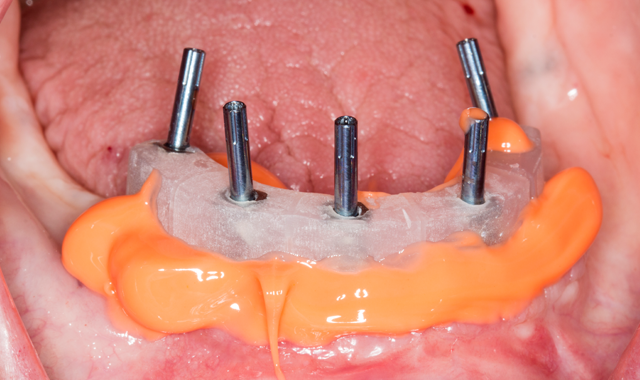
Final impression was done with extra light PVS around impression posts and monophase viscosity for the impression tray (Virtual XD, Ultradent Inc) (Figs. 7-7b). After master cast fabrication, maxilomandibular records were taken and a wax teeth set-up was done to determine teeth position and vertical dimension (Figs. 8-8b).

Fig. 7b
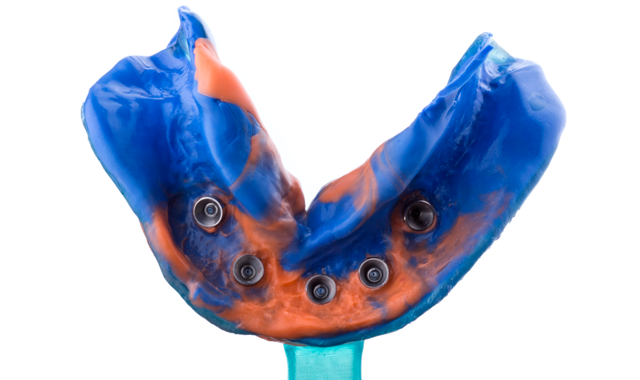

Fig. 8
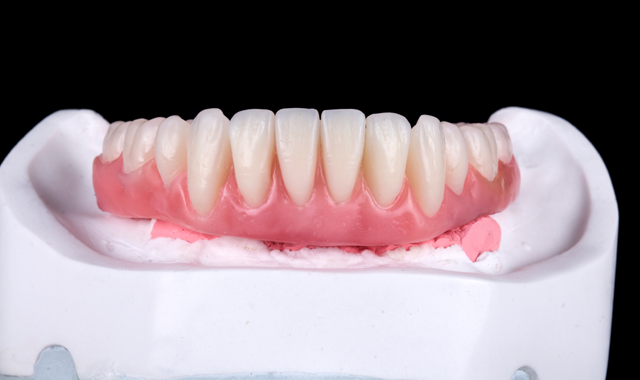

Fig. 8b
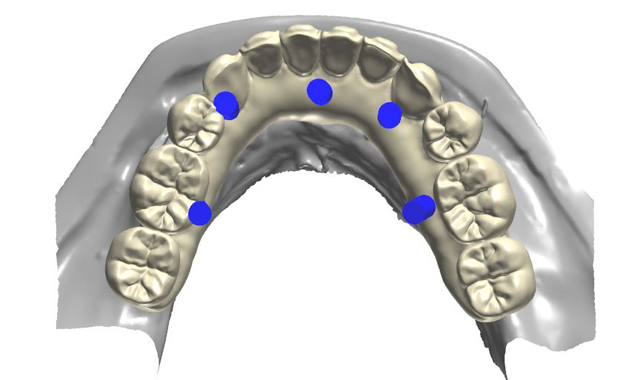
The wax set-up was scanned and digitized to fabricate a poly-methylmethacrylate (PMMA) restoration (Figs. 9-10). The design software for the aforementioned scanner had the ability to uniformly cut back the gingival area of the prosthesis to a desired thickness so space would be provided to apply tissue-colored composite resin to esthetically simulate soft tissue (Figs. 11-11b). After milling the PMMA blank, tissue-colored composite (Gradia, GC International) was applied and subsequently finished and polished. The esthetics, lip support and occlusion were then confirmed intraorally.

Fig. 9
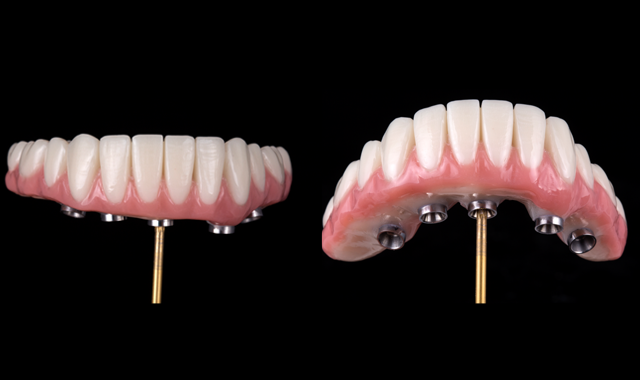

Fig. 10
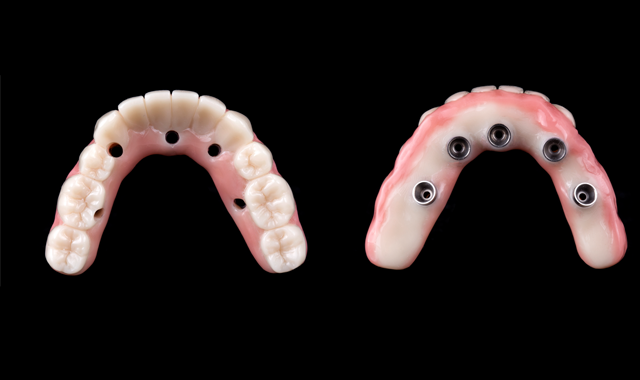

Fig. 11
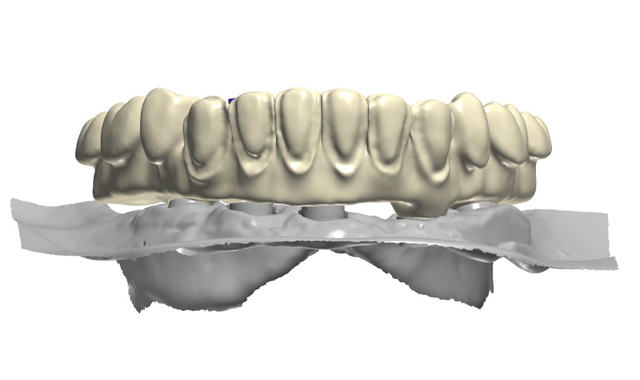

Fig. 11b
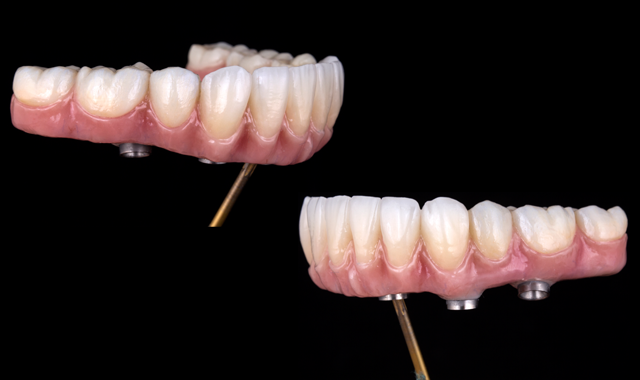
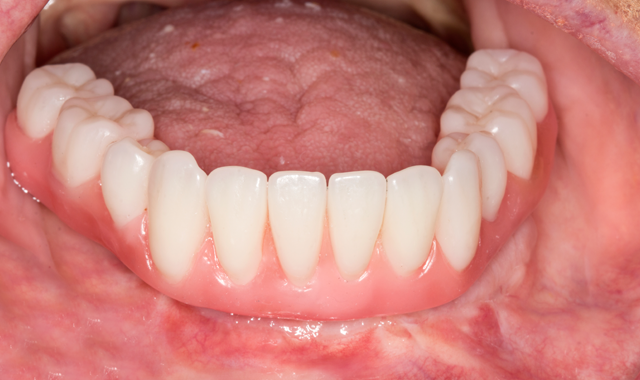
The final design of the zirconia prosthesis was done with monolithic zirconia for posterior teeth and only facial cut-back from canine to canine for porcelain veneering (Noritake CZR) and pink porcelain for the soft tissue area (GC Initial). A zirconia blank (Argen Z Esthetic 22 × 95 mm, Argen) was used for milling the definitive prosthesis (Figs. 12-13). The final zirconia restoration demonstrated excellent esthetic results (Figs. 14-15)

Fig. 12
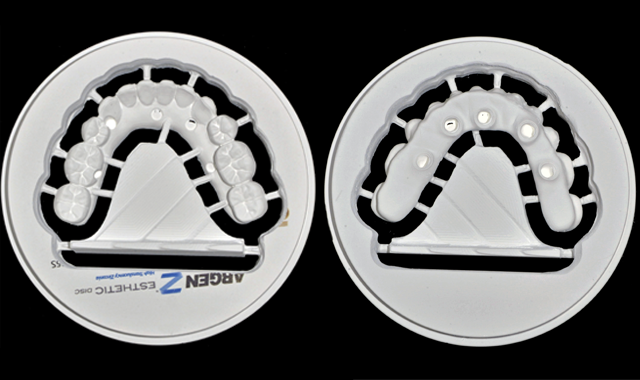

Fig. 13
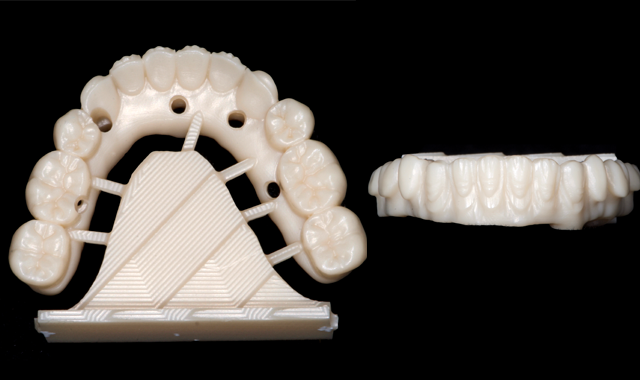

Fig. 14
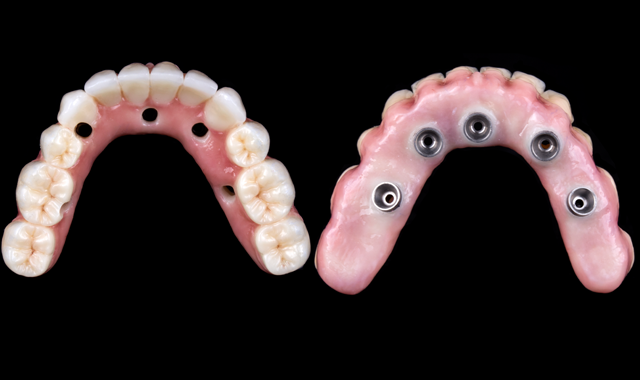
Fig. 15
Conclusion
The use of zirconia CAD/CAM-milled restoration is a great treatment material option for full arch implant supported fixed prosthesis. Some of the benefits are accuracy, reduced veneering porcelain and minimal occlusal adjustments. A full occlusal monolithic framework and minimal facial cutback can diminish chipping of the veneered porcelain.
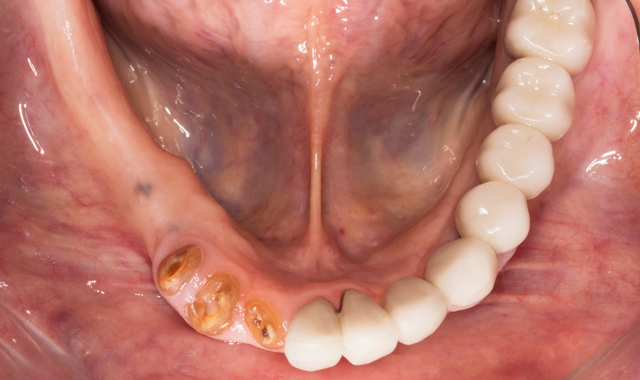
However, the fabrication is technique sensitive and should follow the appropriate clinical and laboratory steps discussed in this case study. The patient outcome showed high success in function, esthetics, phonetics and high patient satisfaction (Figs. 16-17).

Fig. 16
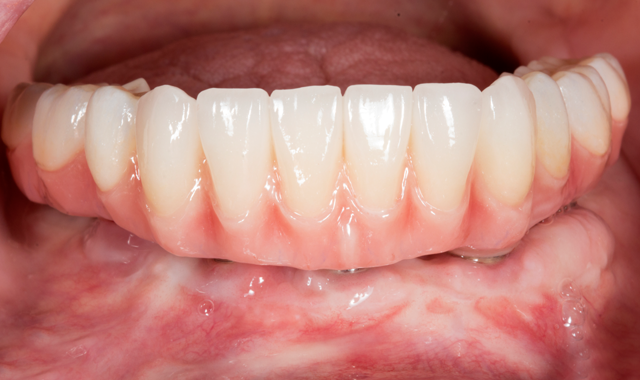

Figure 17