What to look for when cementing thin-walled restorations
Why identifying appropriate cement choices and proper handling are key to successful results with veneers and other esthetic restorations.


Everyone has their favorite cements for everyday use, but are those go-tos the right choice for thin-walled restorations?
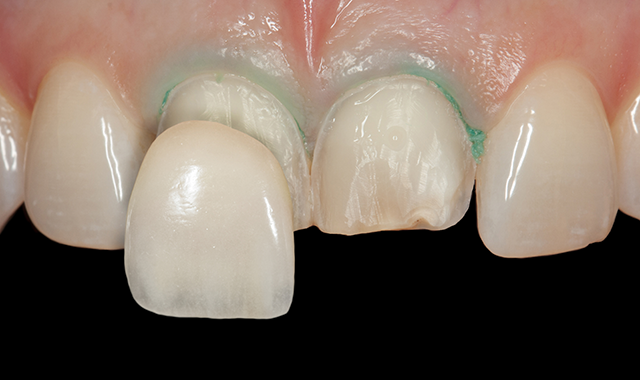
Restorations with thinner walls, such as veneers, that provide natural-looking results require more finesse to ensure optimal esthetics. This might require you to look outside your usual arsenal or add a few extra steps to the procedure to guarantee high-quality outcomes.
“I take extra care with thin-walled restorations, and for veneers or thin crowns with limited retention, I use a cement system that has multiple steps: etching, and priming the tooth, cleaning and priming the crown, and finally cementing,” says Jennifer Sanders, DDM, a general dentist in private practice in Frenchtown, Montana. “Using a complete system ensures that the products behave well together.”
The correct cement for the job
Product advancement and ever-emerging technique developments have made the placement of veneers less complicated if you use the right materials. Selecting a cement with a viscosity level that will limit drifting after seating, is easy to dispense and apply (and remove for clean-up), and provides lasting color stability can greatly enhance the chance of success with veneers.
“I always do veneers with a low-viscosity material to ensure they seat easily,” says John Flucke, DDS, Dental Product Report®’s Chief Clinical Editor and Technology Editor, who practices in Lee’s Summit, Missouri. “I prefer to use materials that offer a variety of shades, are dual-cure, and are the ideal viscosity for my cases, such as PermaShade from Ultradent.”
Practitioners should look for light-cured total-etch, resin cements, such as Choice 2 (BISCO Dental), Prime&Bond elect (Dentsply Sirona) or RelyX Veneer Cement (3M), rather than self-adhesive versions. This is because self-adhesive resin cements are more prone to color change over time, ruining the appearance of the veneer. Also, light-cured resin cements don’t need to be mixed, allow for longer working time and shorter finishing time.
“In general, I use a universal bonding agent after doing total etch, and use a light-cured resin for thin-walled restorations,” says Jeff Lineberry, DDS, a general dentist practicing in Mooresville, North Carolina. “In areas of thicker restorations or difficult access for proper curing, the use of other bonding adhesives that are compatible with dual-curing cements is essential.”
Continued on next page…
Light-cured cements provide better color stability, and some, such as Choice 2, are available in a wide range of VITA and chromatic shades that mimic natural dentition.
“This type of cements has thin film thickness, which allows for better dentinal sealing,” says Sridhar Janyavula, BDS, MS, a clinical research dentist at Dentsply Sirona. “Plus, you can visualize a glossy surface without the residual yellowing hue typical of most bonding agents.”
Essentially, the higher the translucency of the cement, the more natural the appearance.1 Opaque cements will hide the tooth’s natural luminescence and cause a more monochromatic effect that doesn’t look as natural or esthetic.
Although some practitioners prefer dual-cure cements, and use them to great success, they may run into the aforementioned yellowing effect.2 This is due to the amine co-initiators and catalyst byproducts contained in dual-cure resin cements, which can sometimes cause veneer color change.3
Warming up for cementation
Ensuring a cement is the proper temperature can also be critical for a successful restoration, so clinicians should avoid refrigerating resin veneer cements. Cements should be room temperature or warmer to avoid colder temperatures affecting the pseudoplastic behavior of the material, as well as flowability.3
“I think it’s a great idea to warm the material,” Dr. Flucke agrees. “This makes it flow even better.”
Improving the flow properties can result in a more controlled seating with less drift, and makes cleanup a lot easier. Plus, warmer cement can help cut down on the likelihood of veneer fracture during placement.
Esthetics and accuracy
As with any restorative process, complete isolation needs to be achieved to prevent contamination. Once isolation is achieved, you can move on to the all-important step of color matching with a try-in paste.
Many current adhesive systems include these water-soluble try-in pastes for shade testing, but it’s important to note that the try-in paste may not always match the end shade of the light-cured resin adhesive. One 2010 research study concluded that, “The color match achieved by the try-in paste has to be treated with caution and further assessment of the restoration made with the resin in place before curing is recommended.”4Because esthetics are key to veneer success, color matching should be approached with care.
Continue reading on next page…
When it comes to actually seating the restoration, the risk of slippage or shifting is something to be taken seriously. This is where a low-viscosity cement becomes so critical, as it will prevent more shifting than a higher-viscosity alternative; plus, light-cured resin cements have a shorter finishing time, limiting the opportunities for slippage.
In his practice, Dr. Flucke takes additional steps to ensure the veneer doesn’t shift.
“We also use a tacking tip on our curing light that sets a 2-to-3-mm area on the midfacial,” Dr. Flucke explains. “This holds the veneer in place while we clean the margins that are not yet set. Once all the excess material is removed from all the margins, we remove the tacking tip and bond the restoration into place.”
Read more about cementation best practices: Best practices for bonding with zirconia
In addition to the consideration of viscosity, it’s important to select a cement that won’t require much pressure to seat.
“Seating thin prosthetics, such as veneers, is ideally done with a material that requires less pressure to seat,” Dr. Flucke confirms. “That way, you do not have the risk of fracturing as you apply seating pressure.”
Wrapping up
By choosing the correct cement and implementing it properly, dentists can create long-lasting, durable, thin-walled restorations that retain their color, while saving time, increasing profitability and pleasing patients.
“These concepts aren’t anything new,” Janyavula concludes. “We’ve been doing the same thing for decades. We just have improvised newer ways of doing it.”
References
1. Kandil BSM, Hamdy AM, Aboelfadl AK, El-Anwar MI. Effect of ceramic translucency and luting cement shade on the color masking ability of laminate veneers. Dent Res J (Isfahan). 2019; 16(3):193-199.
2. Munoz-Viveros C. How to choose a cement for porcelain laminate veneers. Journal of Cosmetic Dentistry. 2011;27(2)78-84.
3. Chadwick RG, McCabe JF, Carrick TE. Rheological properties of veneer trial pastes relevant to clinical success. Br Dent J. 2008;204(6)E11. doi: 10.1038/bdj.2008.136.
4. ALGhazali N, Laukner J, Burnside G, Jarad FD, Smith PW, Preston AJ. An investigation into the effect of try-in pastes, uncured and cured resin cements on the overall color of ceramic veneer restorations: an in vitro study. J Dent. 2010;38(suppl 2):e78-e89. doi:10.1016/j.jdent.2010.08.013


