Technique: Using digital diagnostic design to achieve great results
A technique showcasing the latest digital tools and how they helped create a satisfied patient.


Digital intraoral scanners, as well as stand-alone and complete computer-assisted design (CAD)/computer-aided manufacturing (CAM) equipment are powerful and efficient tools in today’s dental practices. They eliminate the need for traditional analog impressions and wax-ups, as well as the conventional hands-on fabrication processes associated with all-ceramic restorations.1
As a result, in one digitally centered workflow that could be implemented, impressions are taken with an intraoral scanner, not conventional materials and trays. Computer software is used to digitize, analyze and manipulate the scanned images, instead of pouring models. Restorations are designed with CAD software, not by hand-waxing models, after which they are milled through a CAM process, rather than by pressing and/or layering.
Related article: How is digital technology REALLY being used?
Case presentation

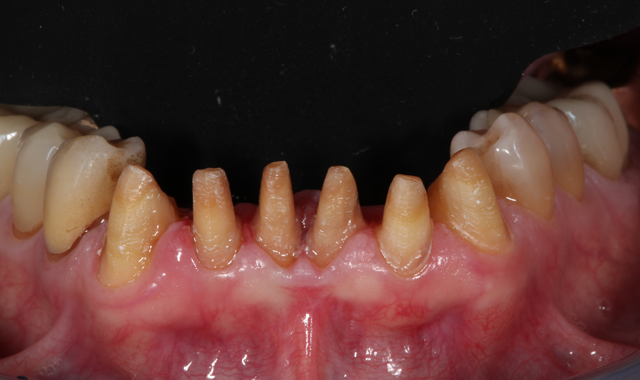
Fig. 1
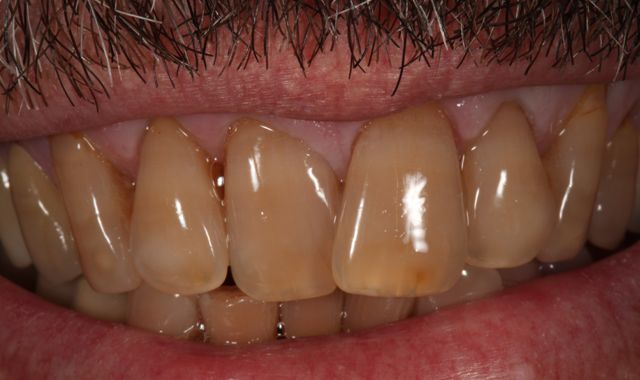

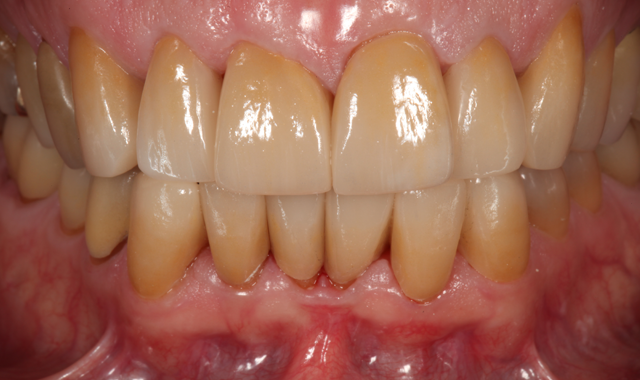
Fig. 2
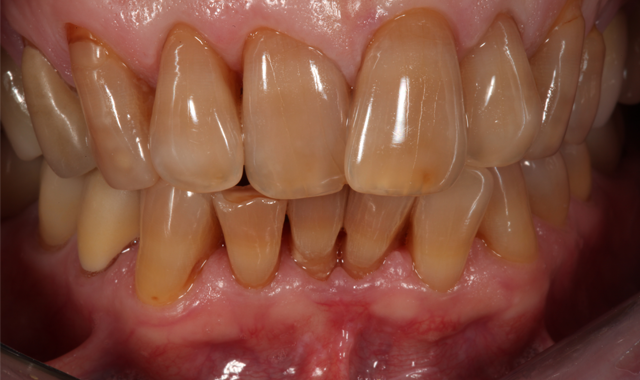
A male patient in his mid-60s presented with a chief complaint about the esthetics of his anterior maxillary and mandibular teeth (crowding, severe tetracycline staining) (Figs. 1 and 2). Orthodontic treatment was suggested. However, because the patient had fairly significant sleep apnea requiring nighttime wear of a custom-molded device, he declined this option.

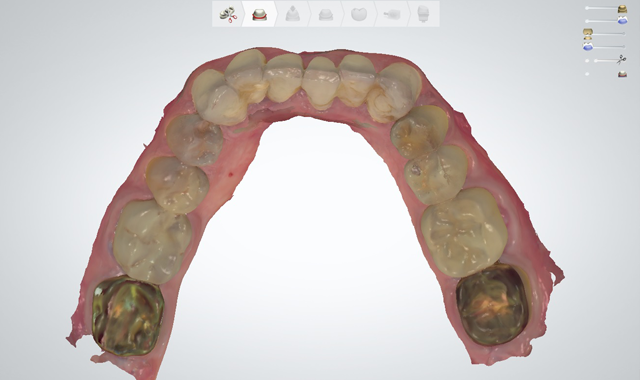
Fig. 3
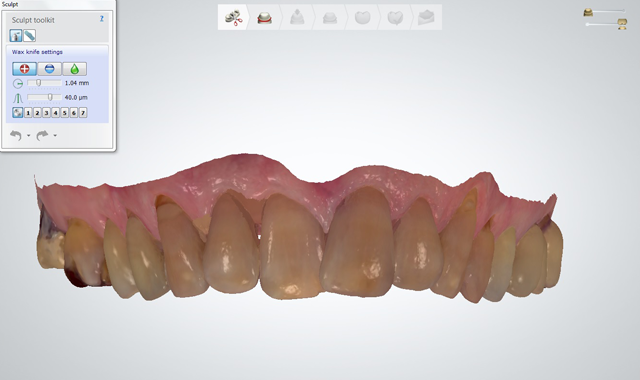

Fig. 4
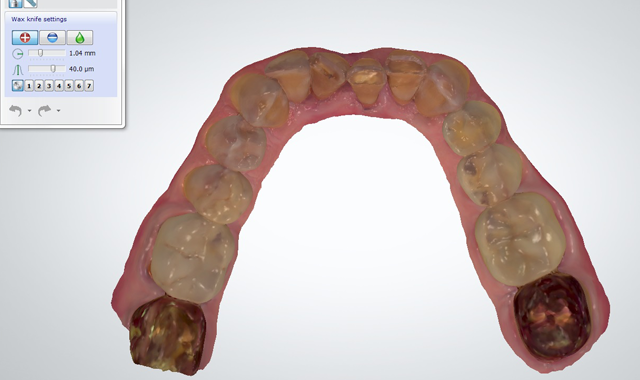
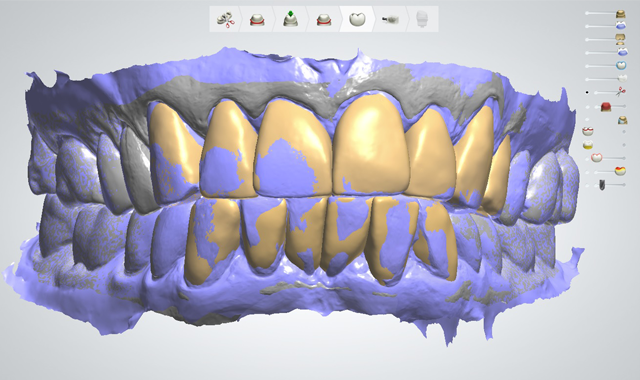
An initial scan of the patient’s preoperative condition was completed using a digital intraoral scanner (3Shape TRIOS) (Figs. 3-6). This eliminated the need for traditional analog impressions.2

Fig. 5
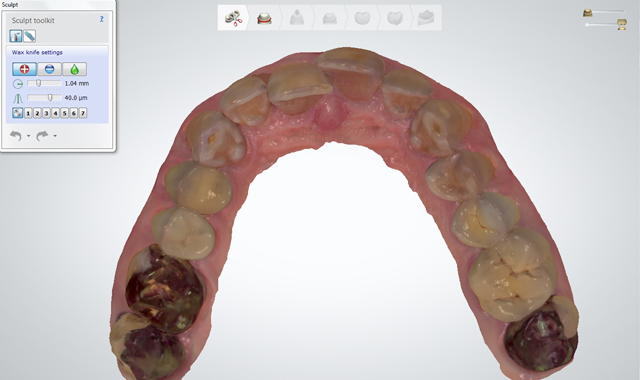
Fig. 6
Up next: The complete technique and the amazing results

Fig. 7
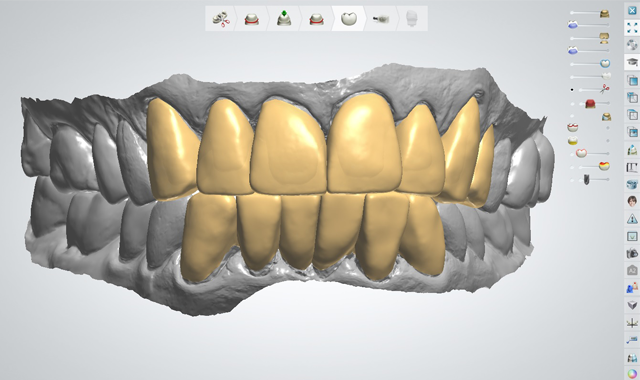
Using dental CAD software (3Shape), the scans were manipulated to virtually alter the patient’s existing dentition into the final restorative state, create a digital diagnostic wax-up, and demonstrate treatment options to the patient (Fig. 7), all without patient discomfort or the time-consuming steps involved with traditional impressions and models.The proposed treatment involved placing milled monolithic lithium disilicate (IPS e.max CAD, Ivoclar Vivadent) full-coverage crown restorations on seven maxillary teeth (#6 through #12) and six mandibular teeth (#22 through #27). The patient approved the treatment plan.
Preparation and provisionalization
The initial assessment indicated that the treatment was too extensive to complete in one day. However, the digital diagnostic wax-up enabled more efficient tooth preparation and provisionalization. Based on the digital wax-up, provisionals were milled in the practice prior to the second appointment from PMMA blocks (Telio CAD, Ivoclar Vivadent), which eliminated the challenges associated with traditional temporization processes (e.g., polymerization shrinkage, clean up, impression and mixing errors).3 These CAD/CAM created provisionals also contributed to an ideal fit, strength, and durability.

Fig. 8
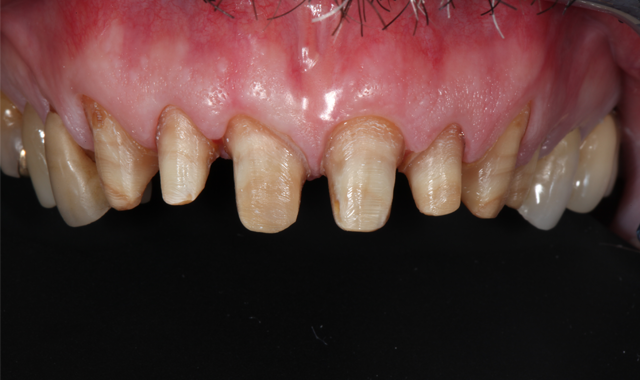

Fig. 9
During the second appointment, the teeth were prepared (Figs. 8 and 9) and digital scans taken (Figs. 10 and 11). The milled provisionals were relined, cemented and customized, enabling the patient to “test-drive” the proposed treatment and share his desired alterations prior to fabricating the permanent restorations. The patient completed a one-week trial period and, upon returning, requested modifications to the maxillary provisionals, which were made.

Fig. 10
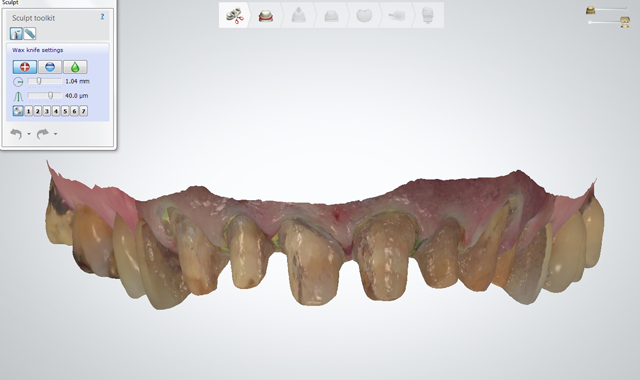

Fig. 11


Fig. 12
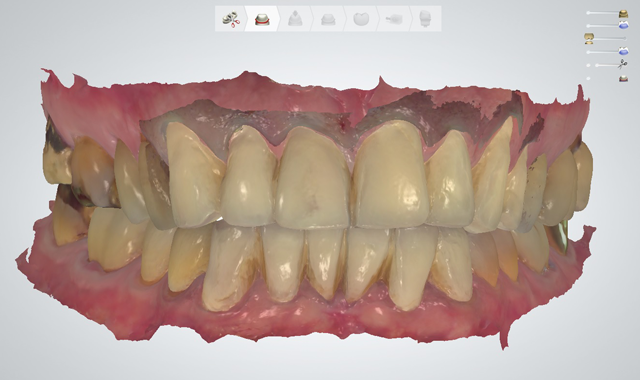

Fig. 13
He returned again two weeks later, at which time he approved the provisionals for comfort, proper occlusion and esthetics. The provisionals were digitally scanned to serve as templates for the final restorations and enhance their predictability by facilitating the design of their shape and occlusion (Figs 12 and 13).4
Final restoration design and fabrication
Fig. 14
Even when provisionals are required, complete CAD/CAM workflows achieve a fast turn-around and efficiency for designing and fabricating temporary and permanent restorations,5 which was essential to allow the patient to return to wearing his apnea device as soon as possible. The final crowns were designed based on the scanned provisionals (Fig. 14), then wet-milled (E4D) in the practice from medium opacity monolithic lithium disilicate blocks (IPS e.max CAD) in shade A3.5. The selected material contributed to high esthetics, eliminated the challenge of working with different materials and masked the patient’s underlying tetracycline stained tooth color.6,7
A 3D model was designed and printed for use in controlling contact points, occlusion, and surface texture after milling and while characterizing, staining, and glazing the restorations. Based on the same digital information previously obtained, 3D models have been accurate and reproducible.8
Two weeks after the patient approved the provisionals, the definitive crowns were placed, and the patient was thrilled with the outcome (Figs. 15 and 16).

Fig. 15
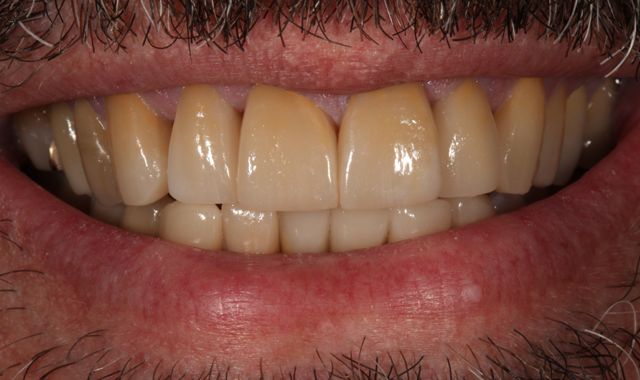

Fig. 16
Conclusion
This case demonstrates that digital dental techniques like intraoral scanning, digital diagnostic wax-ups and CAD/CAM milling are changing the way dentists provide quality treatments. The workflow model here did not require any traditional impressions or models, but relied exclusively on digitally obtained and transferred clinical patient information.
References
1. Miyazaki T, Hotta Y, Kunii J, et al. A review of dental CAD/CAM: current status and future perspectives from 20 years of experience. Dent Mater J. 2009;28(1):44-56.
2. Fasbinder DJ. Digital dentistry: innovation for restorative treatment. Compend Contin Educ Dent. 2010;31(Spec No 4):2-11; quiz 12.
3. Telio CS, Telio CAD Instructions for Use. Ivoclar Vivadent AG, Schaan / Liechtenstein; 2010:1-36.
4. Beuer F, Schweiger J, Edelhoff D, et al. Reconstruction of esthetics with a digital approach. Int J Periodontics Restorative Dent. 2011;31(2):185-93.
5. Zimmermann R, Seitz S, Evans J, et al. CAD/CAM and lithium disilicate: an anterior esthetic case study. Tex Dent J. 2013;130(2):141-4.
6. Fasbinder DJ, Dennison JB, Heys D, et al. A clinical evaluation of chairside lithium disilicate CAD/CAM crowns: a two-year report. J Am Dent Assoc. 2010;141 Suppl 2:10S-4S.
7. McLaren EA, Phong TC. Ceramics in dentistry: classes of materials. Inside Dent. 2009;5(9):94-103.
8. Sousa MV, Vasconcelos EC, Janson G. Accuracy and reproducibility of 3-dimensional digital model measurements. Am J Orthod Dentofacial Orthop. 2012;142(2):269-73.


