Technique: Successful implant case with hybrid bar design
An up-to-date procedure showing how fabricating a screw retained denture can achieve beautiful results.


Most everyone in dentistry today would argue that the rapid advancement of technology has created in-lab milling restoration possibilities that did not exist even five years ago. If technicians are willing to take advantage of these major advancements, the sky is the limit when it comes to what they can produce. It takes investment, time and educating oneself regarding all this equipment, but it’s worth it, in the author’s opinion, if one wants to control the outcome of one’s production. Waiting time is reduced, there is no anxiety regarding delayed shipments, and the results are stunningly accurate and esthetically pleasing.
Today’s study will focus on the up-to-date procedure for fabricating a screw retained denture and the final beautiful results. Dental technicians everywhere can benefit from these step-by-step images and directions.
Read more: Using new technology for old cases
Up next: How to use a scanner to achieve great results ...


Case study
In our first image and the first step in fabrication (Fig. 1), the case was placed into the scan body. The reader is viewing the implant model screwed down, as well as the soft tissue model. It has been sprayed with a powder, visible in this image, which turns it a whitish color. This color creates density that the computer can read. In Figure 2, the reader is given a view of the DOF Freedom Scanner with scan stage activated.


Fig. 2
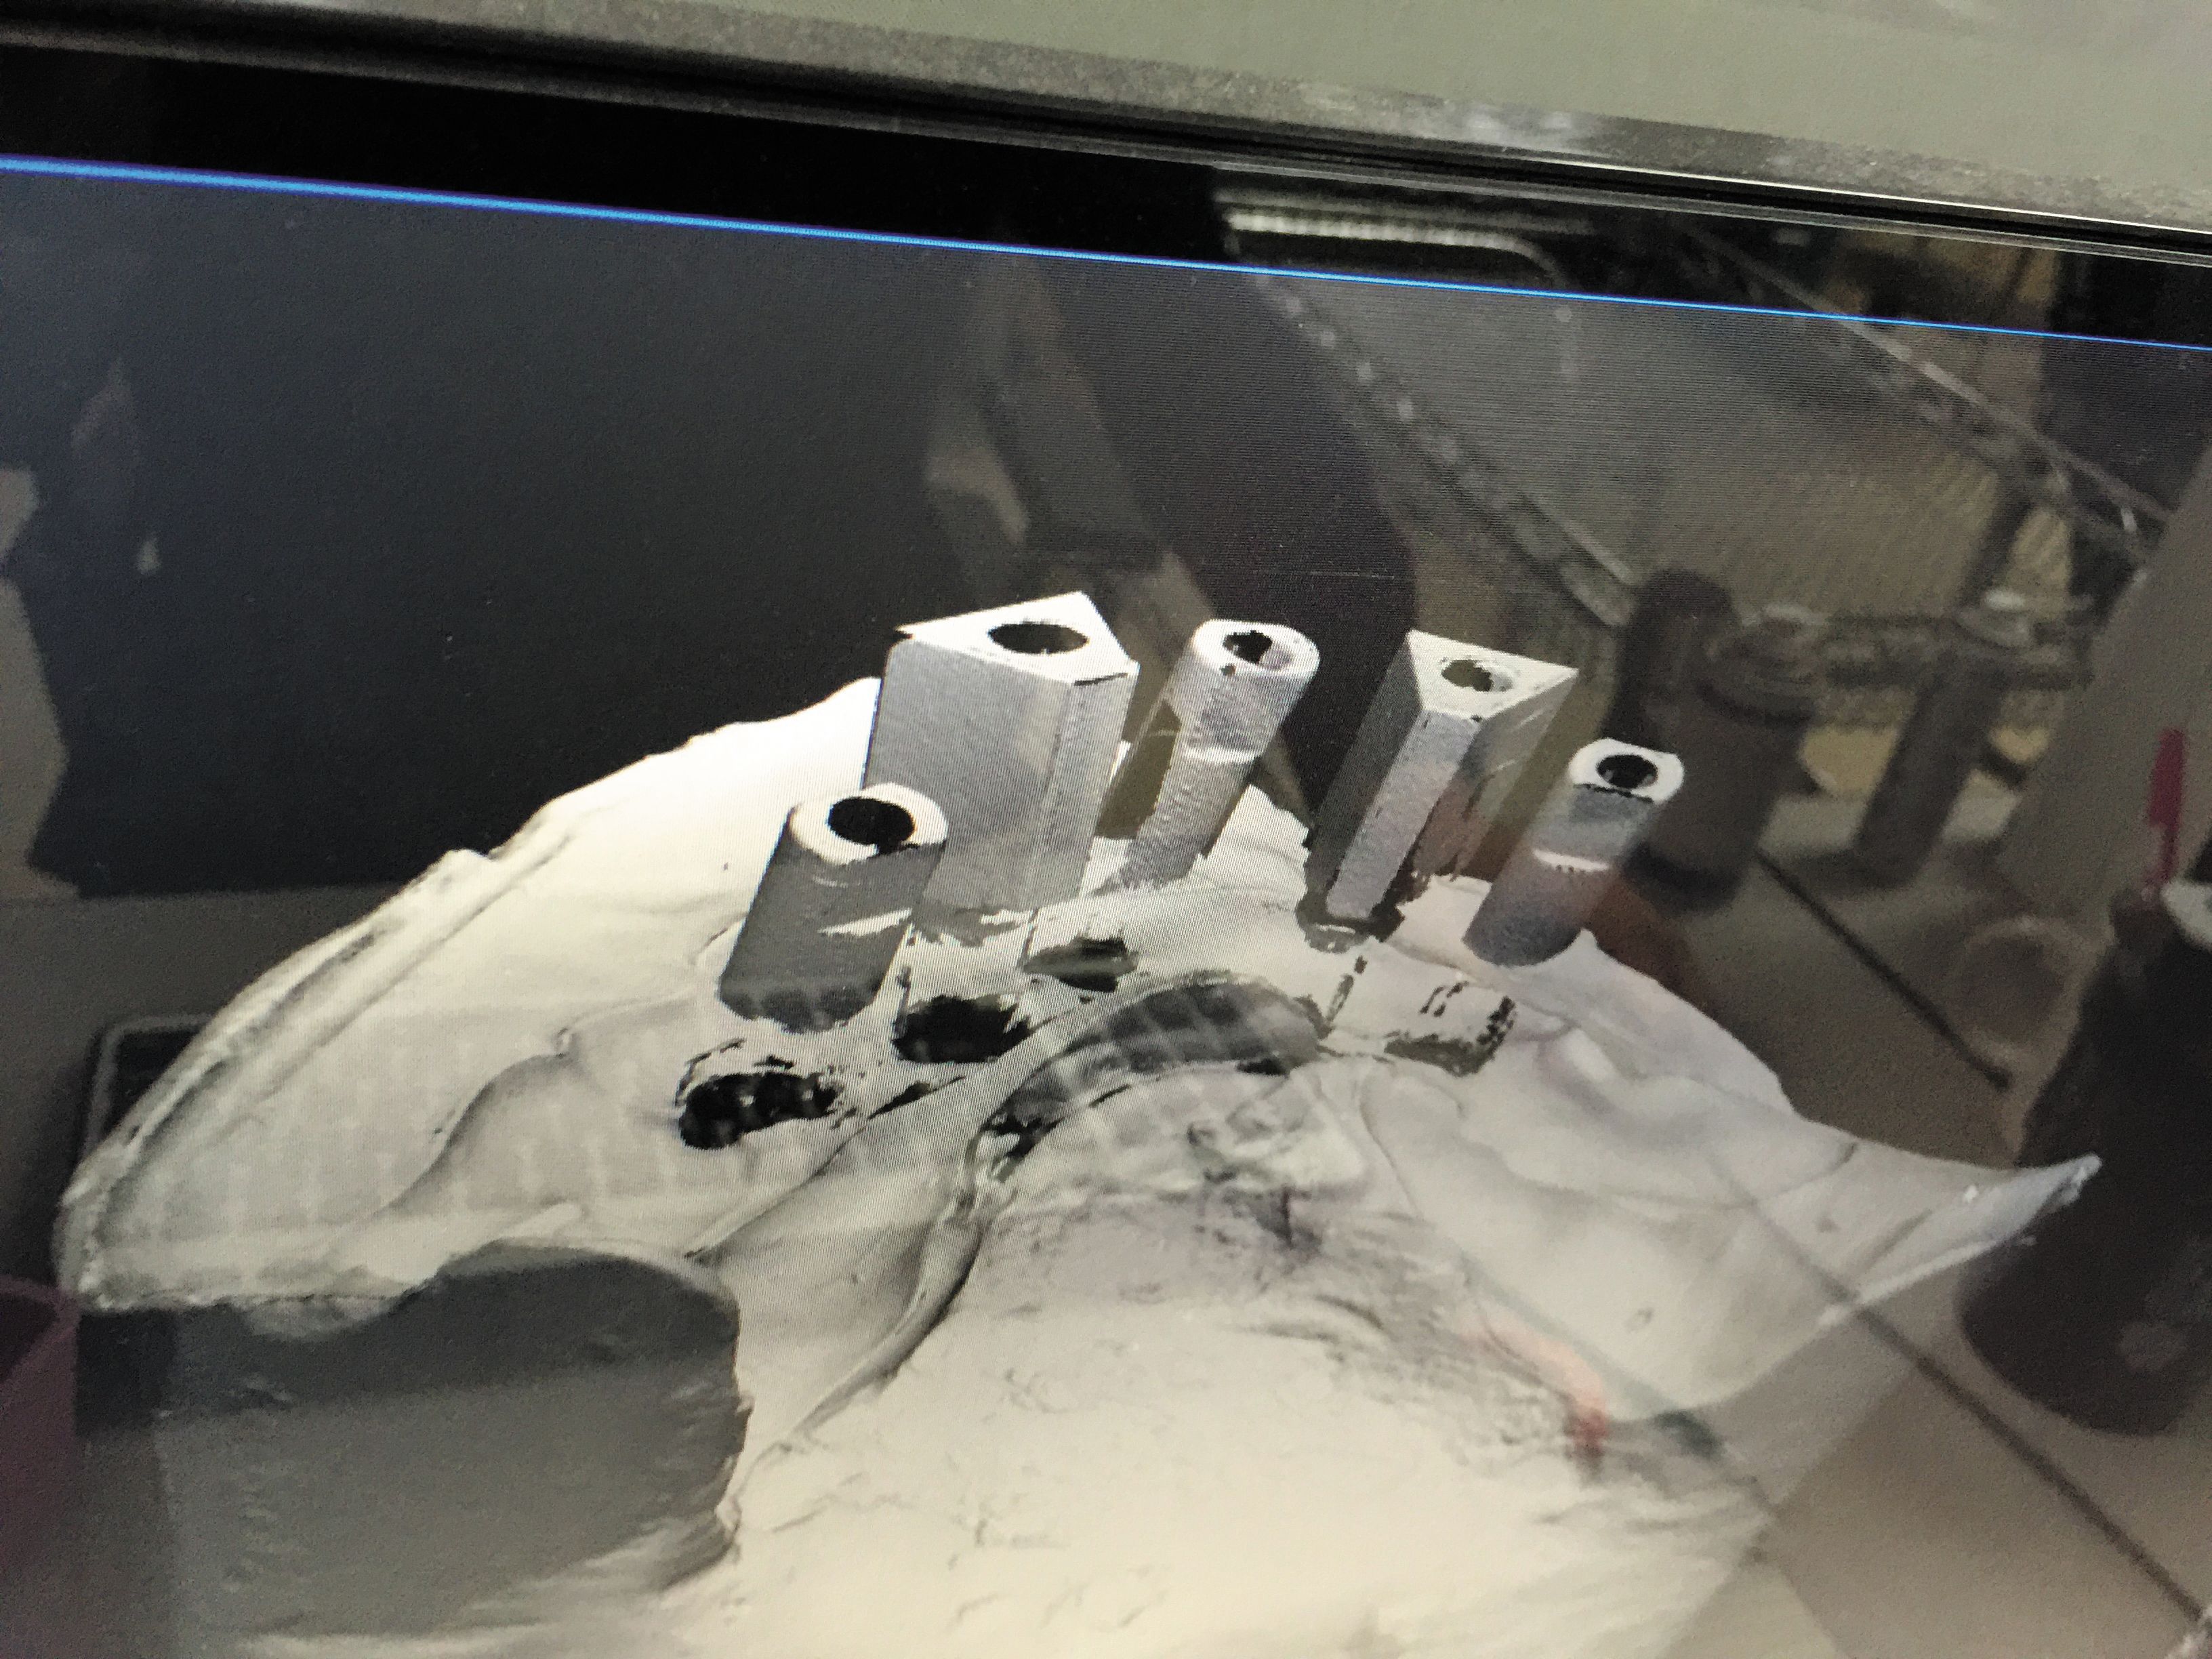

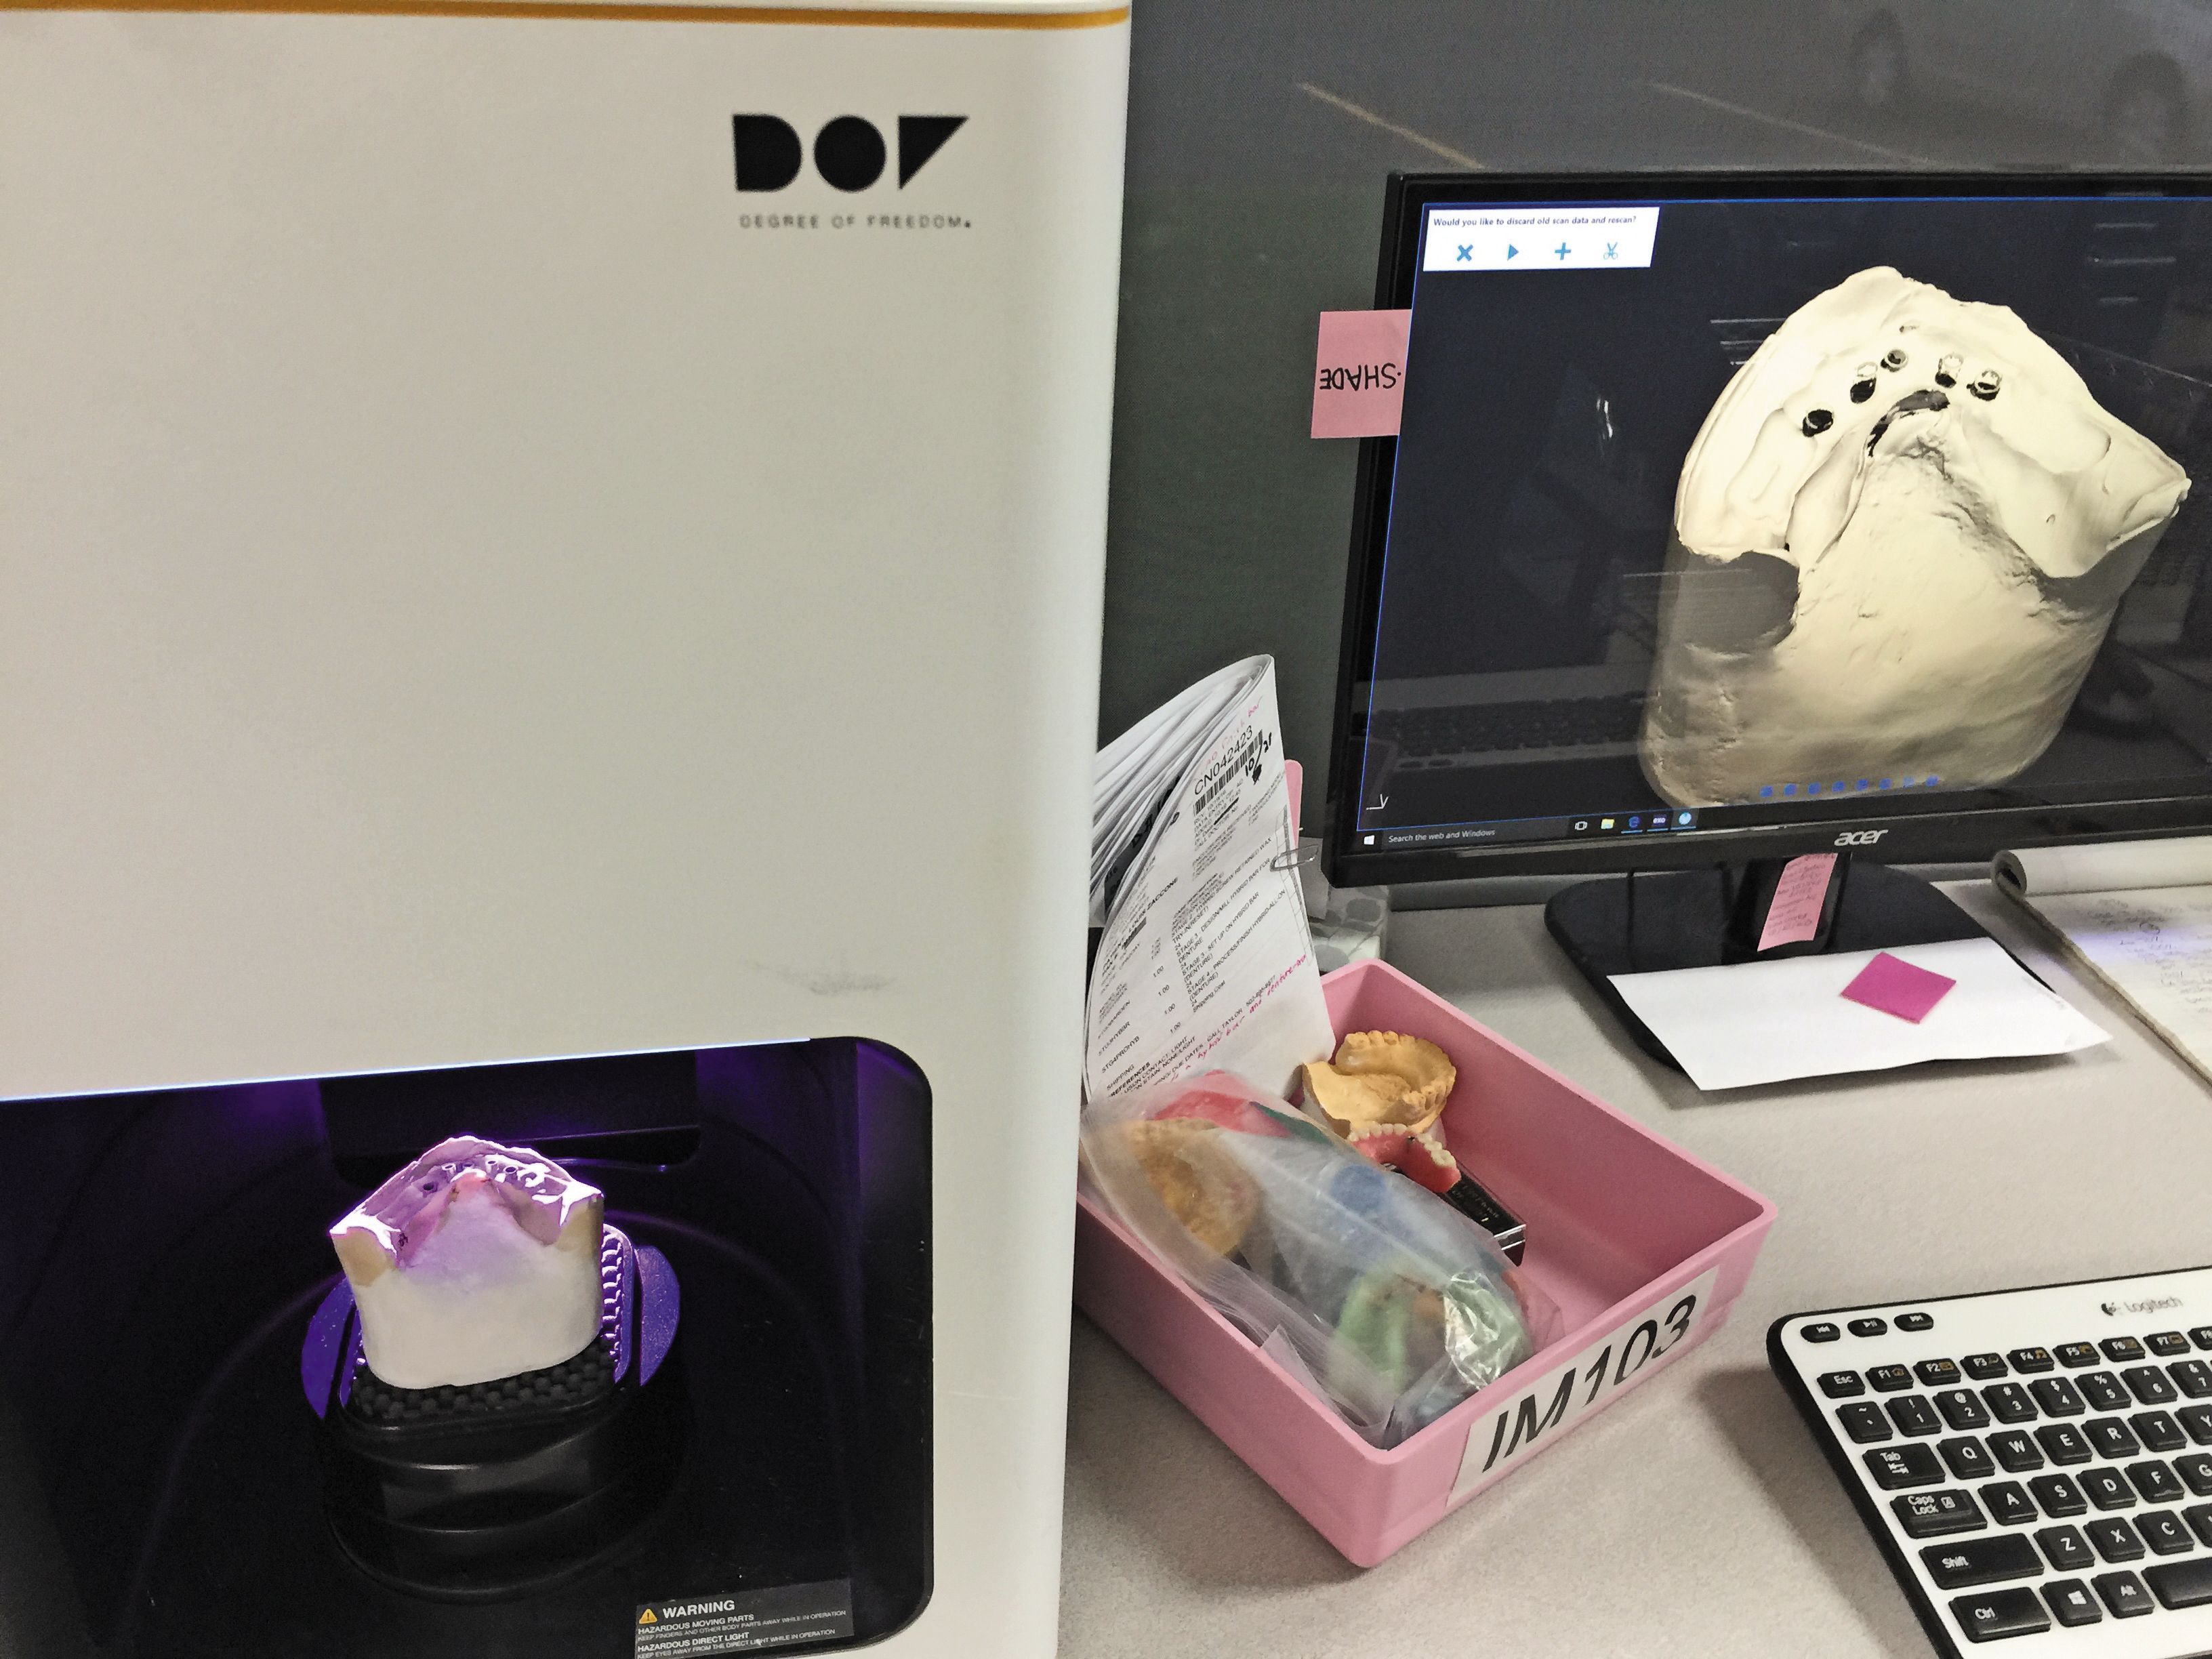
Fig. 1


The DOF Freedom Scanner has many excellent qualities which make it the author’s choice for his in-lab scanning system. He has noticed a surge in productivity with the 40-percent increase in speed due to the ScanApp software addition, extra precision in design with 10 microns in measurement, an expanded scanning stage which can accommodate large articulators-possibly eliminating the need for re-articulation-and quick, efficient help from experts who test and use the equipment themselves. His view is that it is a high quality machine that has helped him more competently fabricate his case work.
Related article: Creating an immediate load denture using digital tools
There are five implants placed in this particular hybrid bar (Fig. 3), which was designed appropriately using the GC Aadva in Exocad software. In this image, we see the GC Aadva bar, a purplish color image on the screen. Figure 4 demonstrates the yellow bars nesting stage utilizing the HyperDENT adaptable software milling strategy. The software can be used in either Classic mode, which is a pre-defined template, or in the Expert mode, where the technician can directly adapt the templates to suit the case. The size of the implant is checked with one titanium disc inserted into the nesting stage. The system is highly convenient with excellent machining precision and predictable results, in the author’s opinion.

Fig. 4
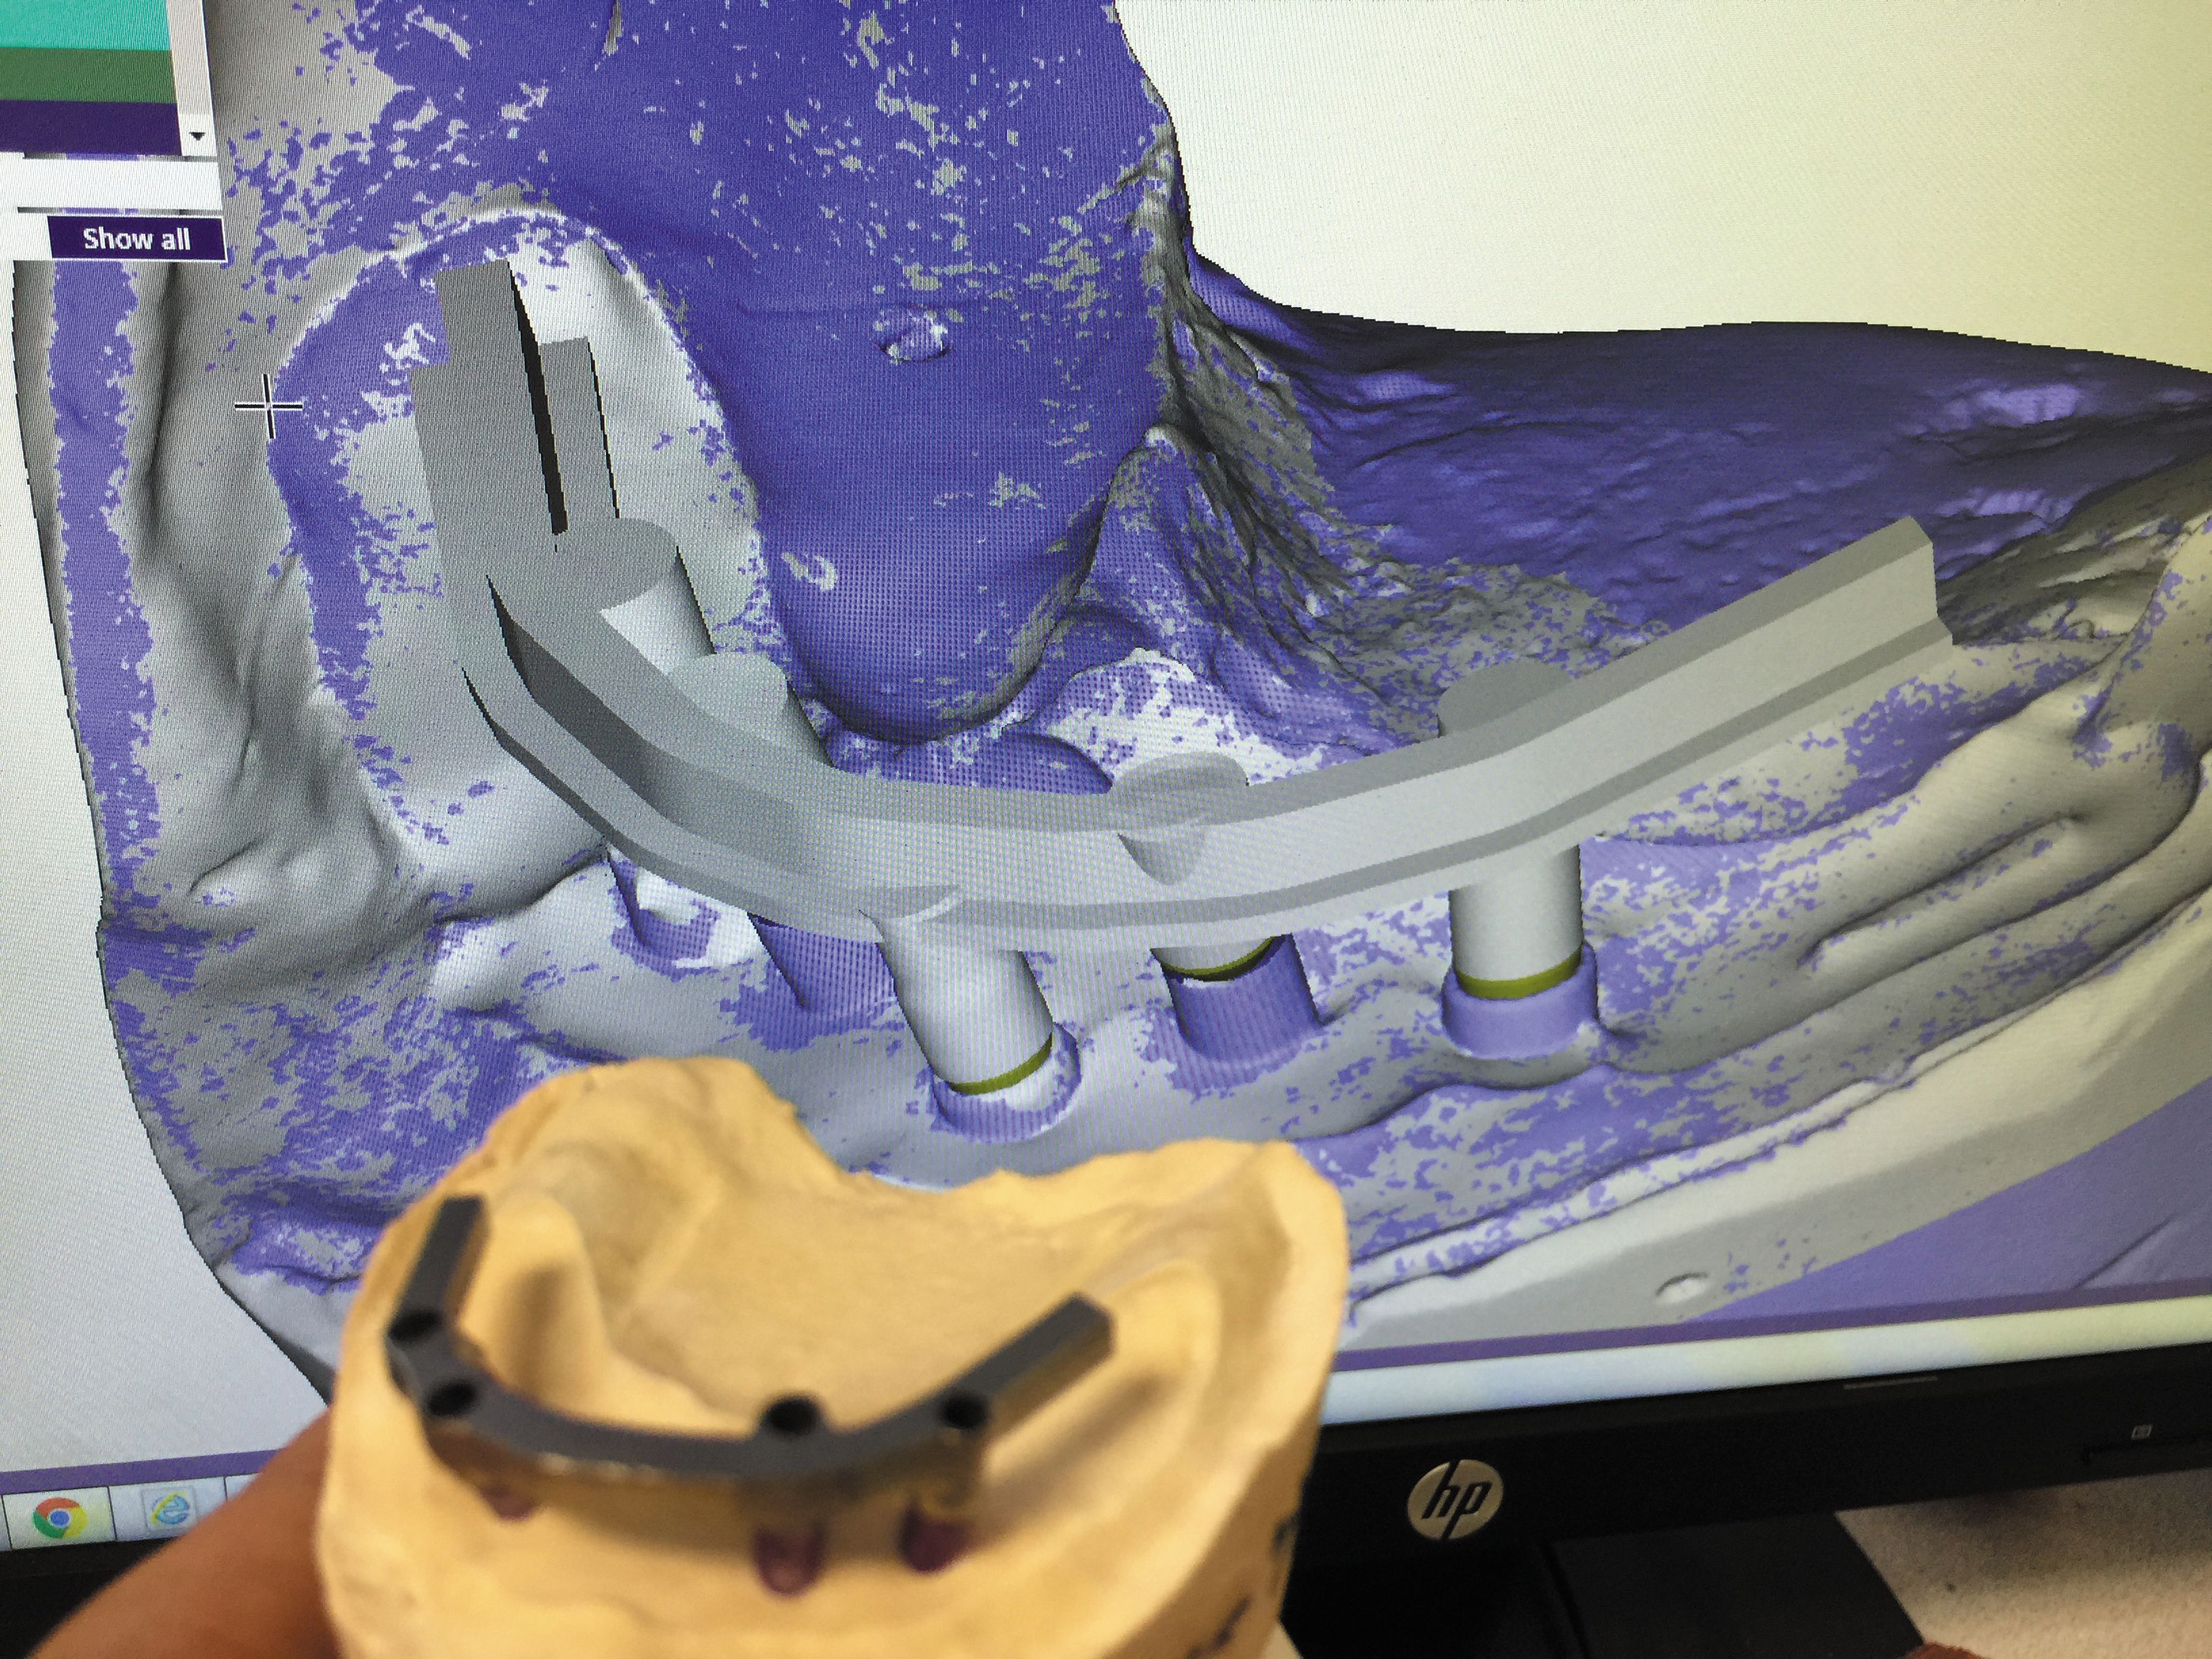


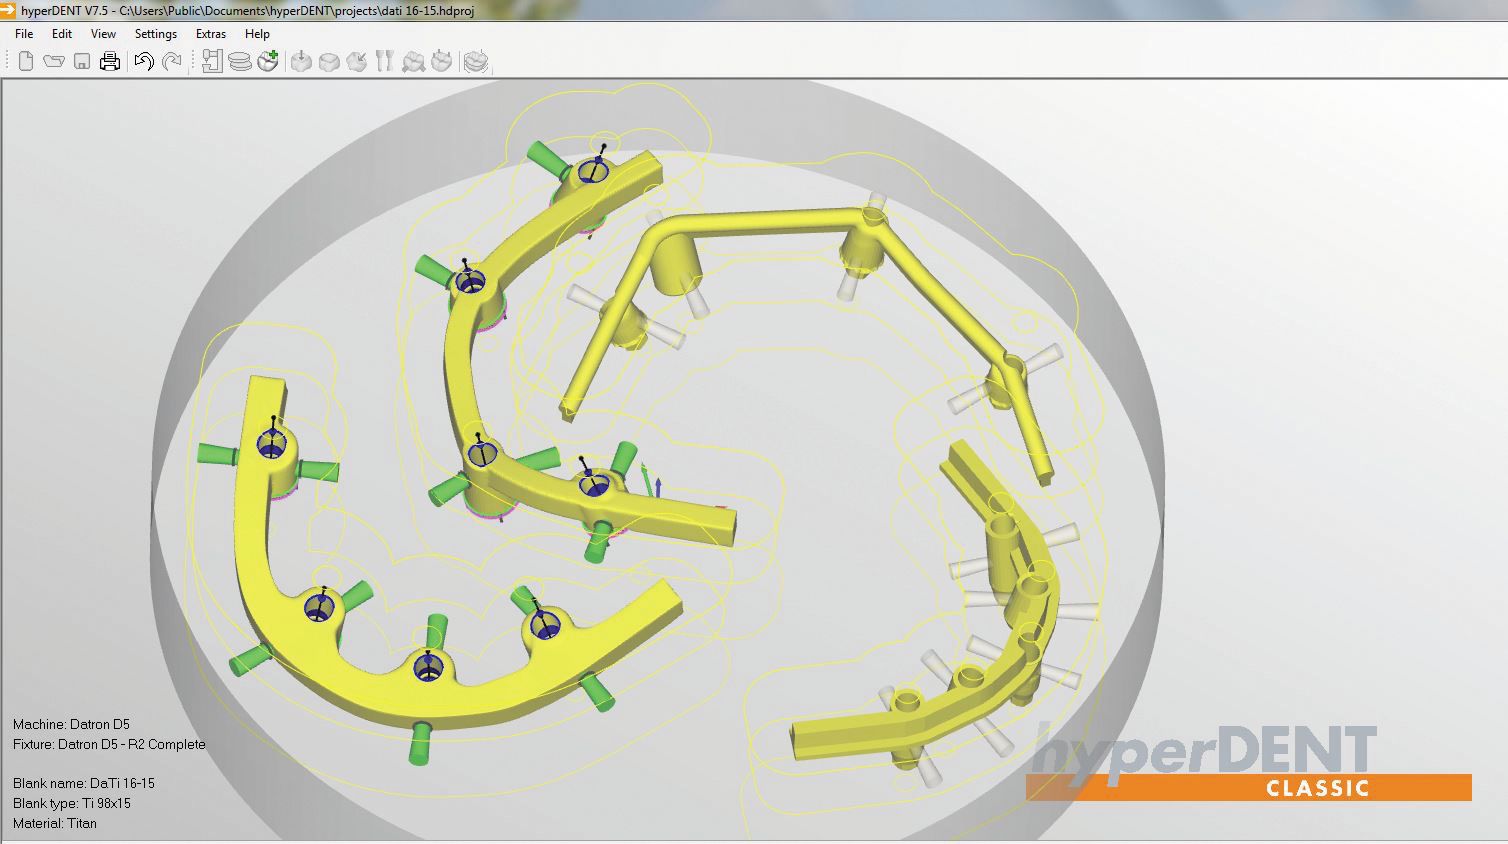
Fig. 3
In Figure 5, the titanium bars are nestled within the Datron D-5 machine, having milled for about six hours in order to create a highly precise milled hybrid bar. Figure 6 illustrates the bar fit to the model in order to check the fit for the final restoration.


Fig. 6
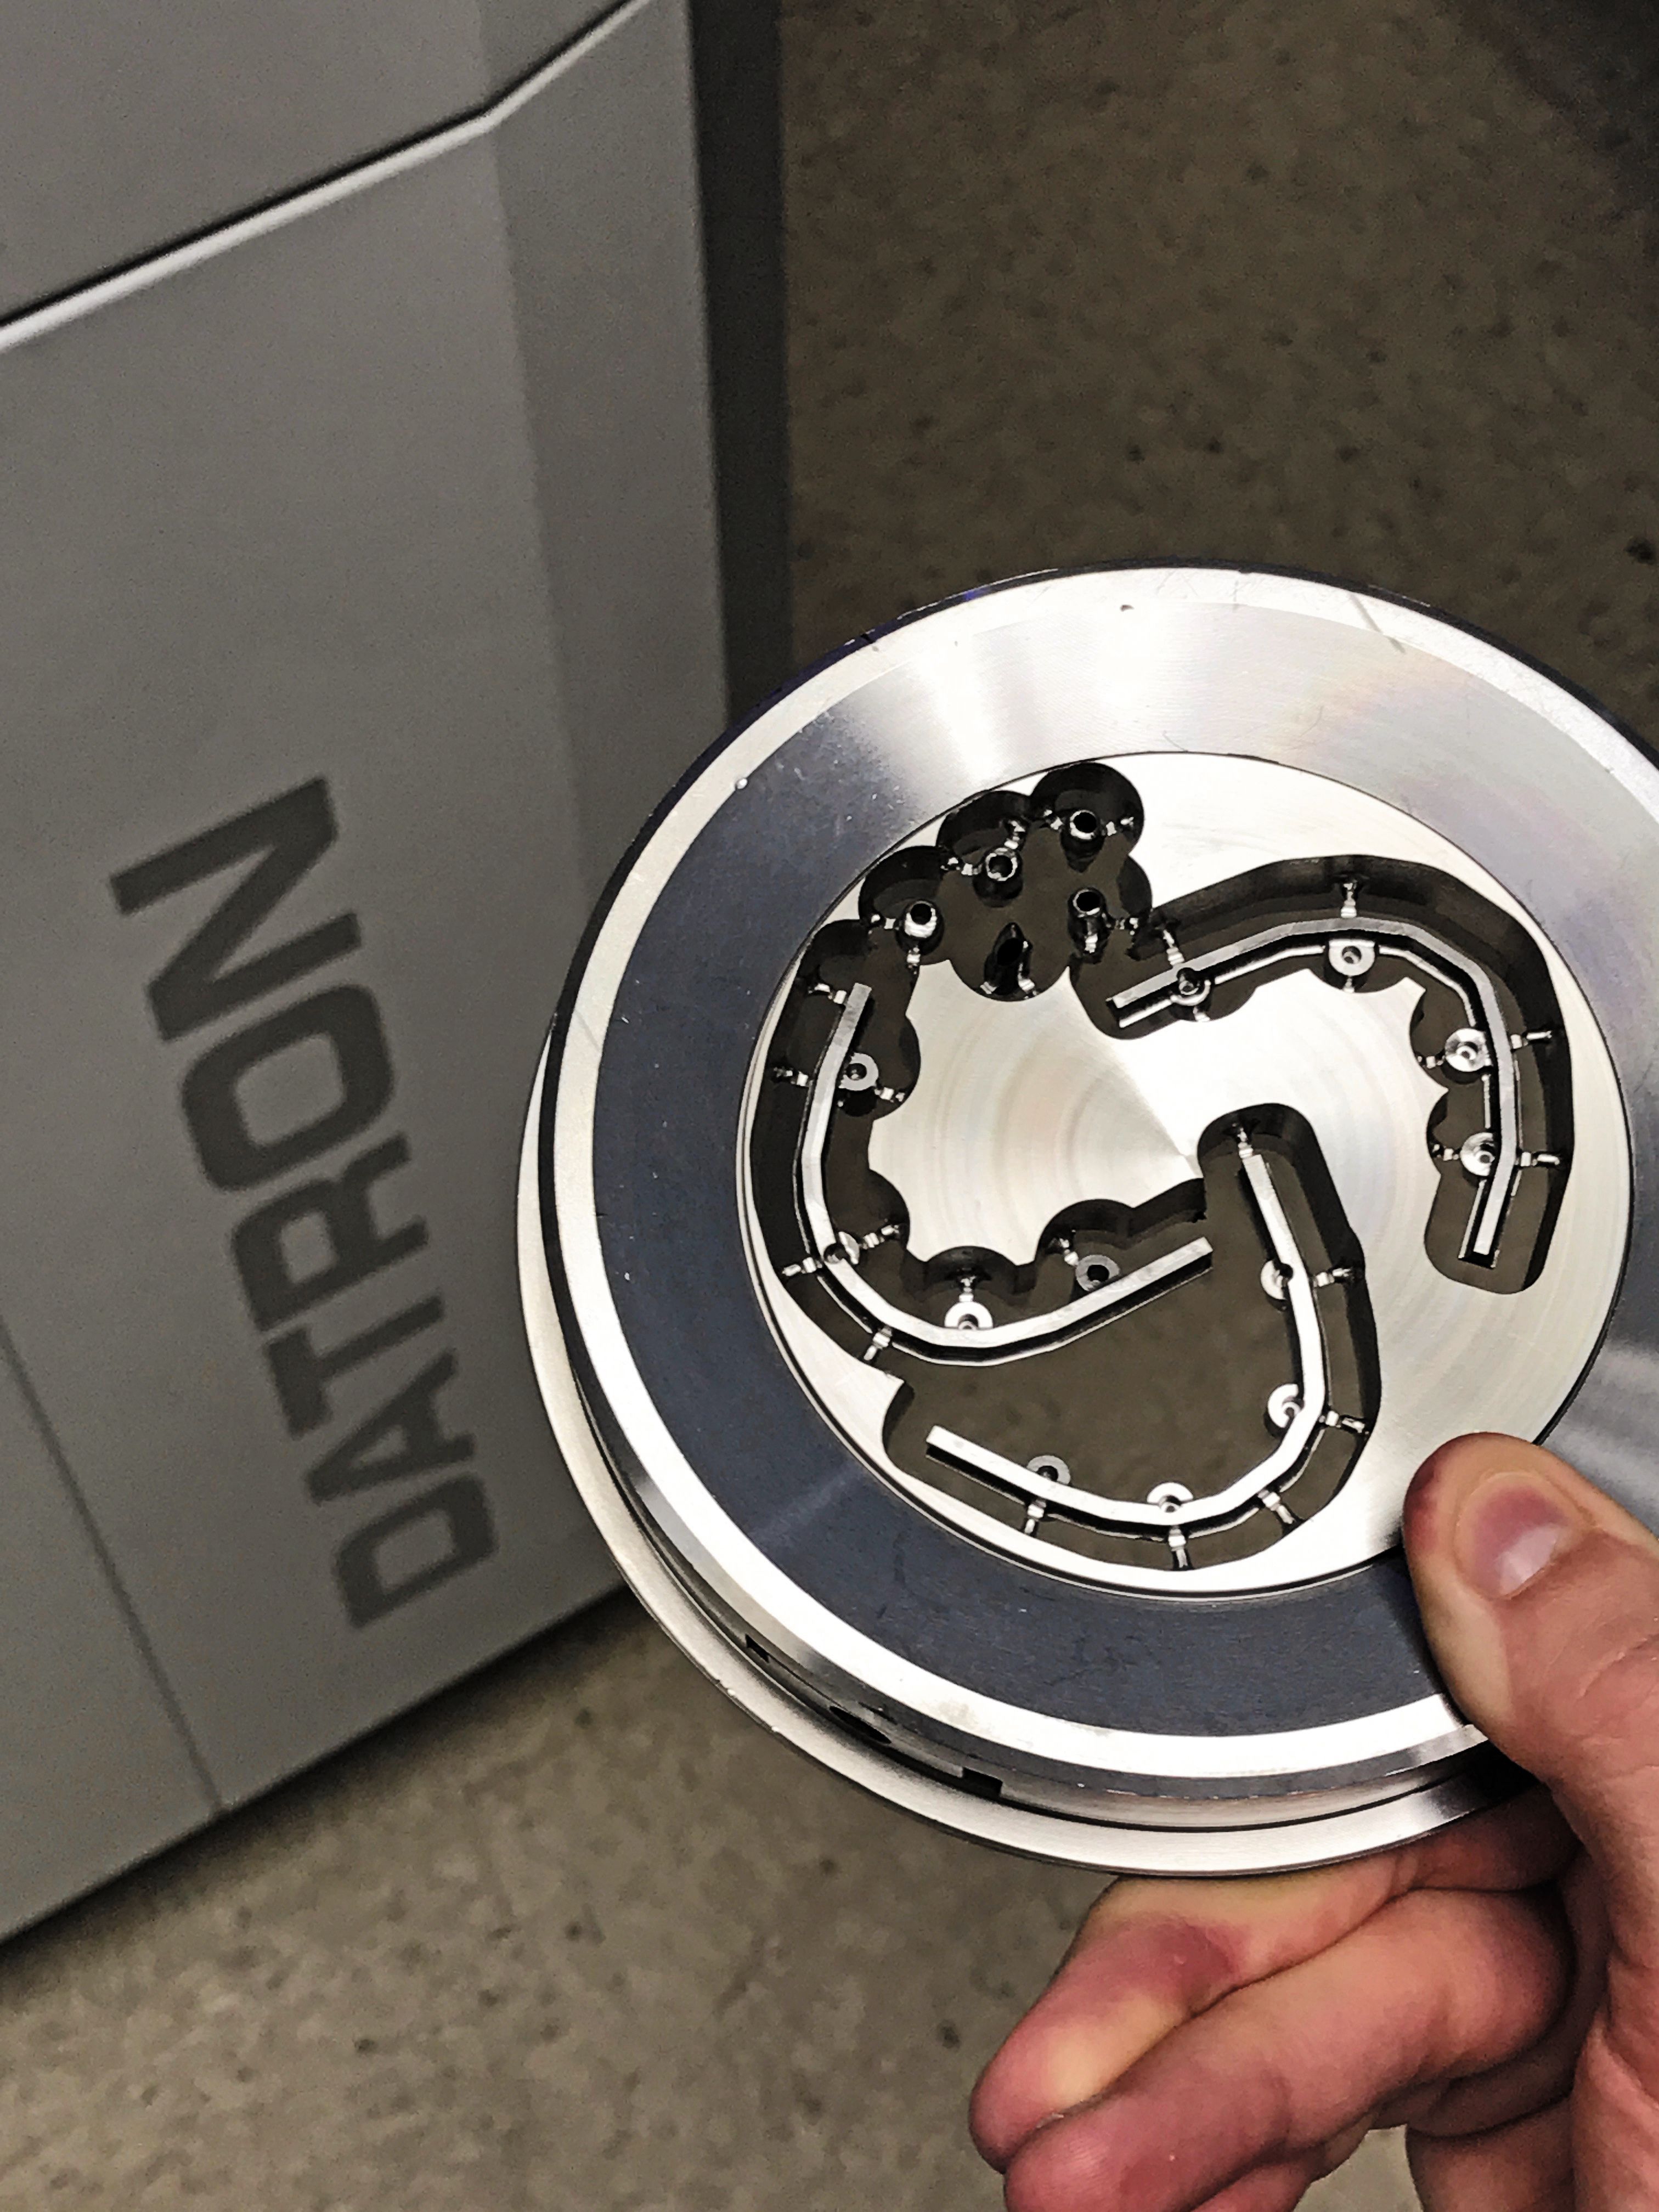


Fig. 5
Implant verification jigs with a temporary cylinder along with the final mandibular screw retained denture are pictured next (Fig. 7). After the processing is finished, the denture is fit to the model for a fit and esthetics check. Note the beautiful tooth and tissue color (Fig. 8).

Fig. 8
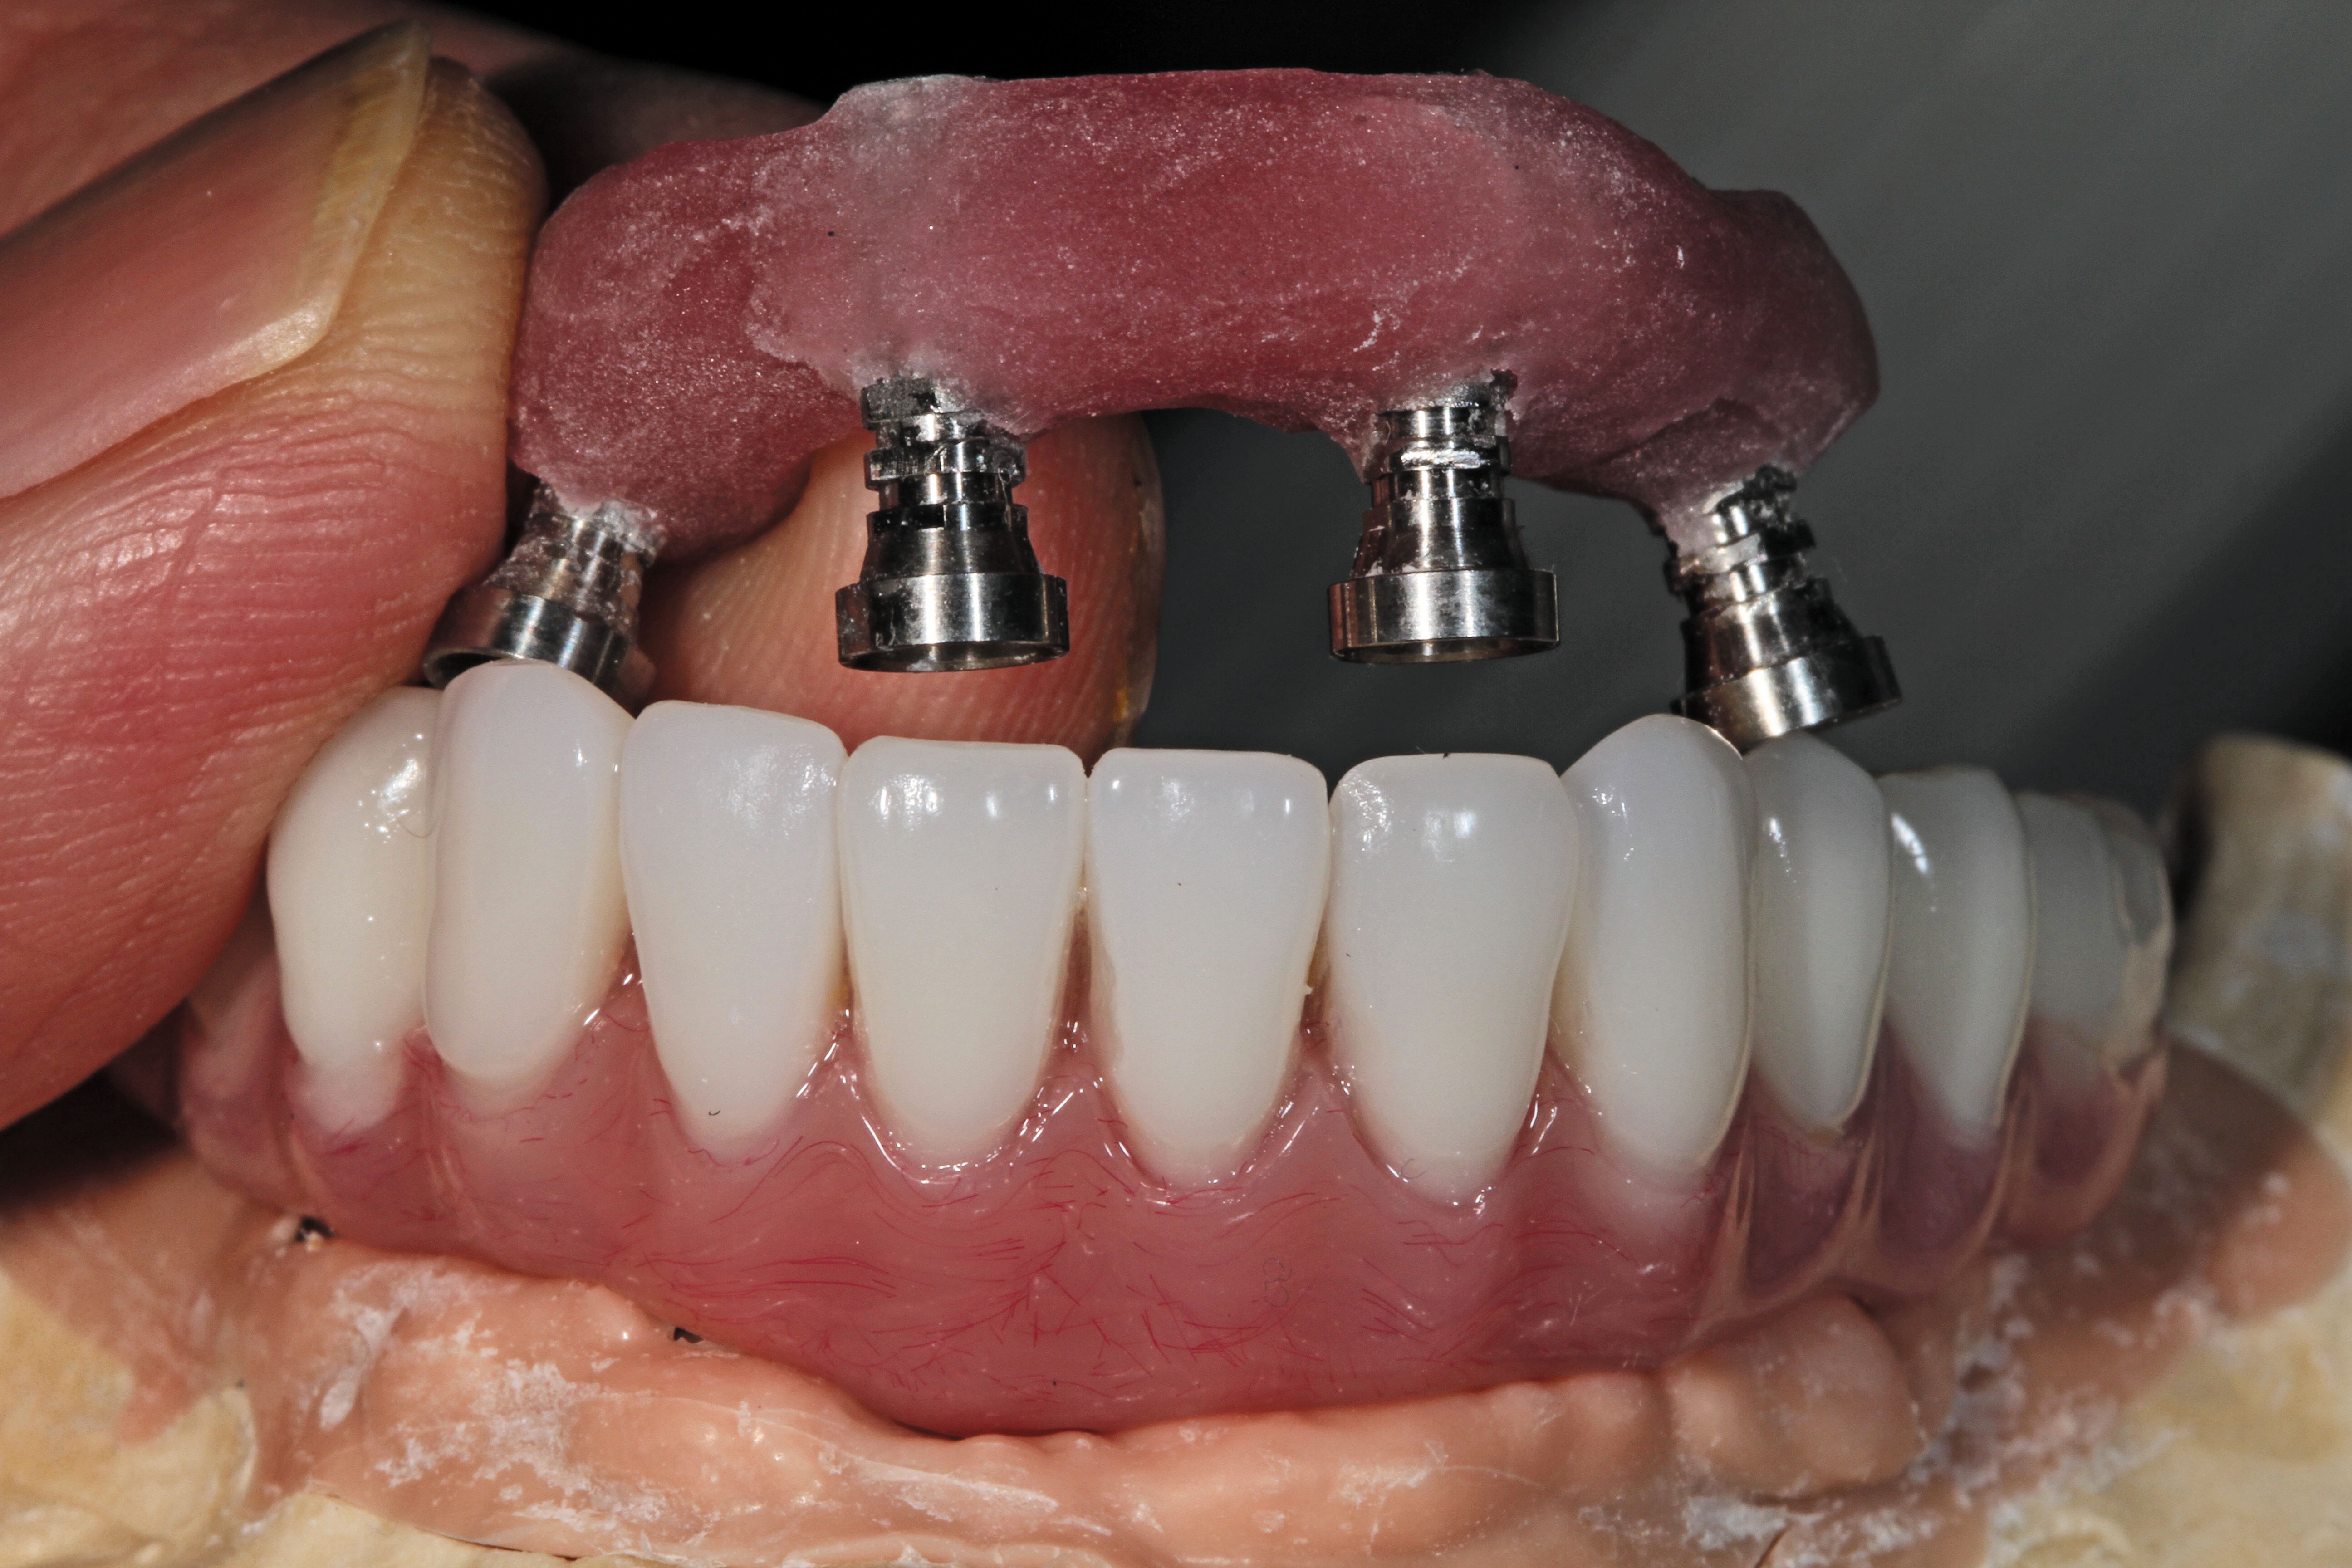

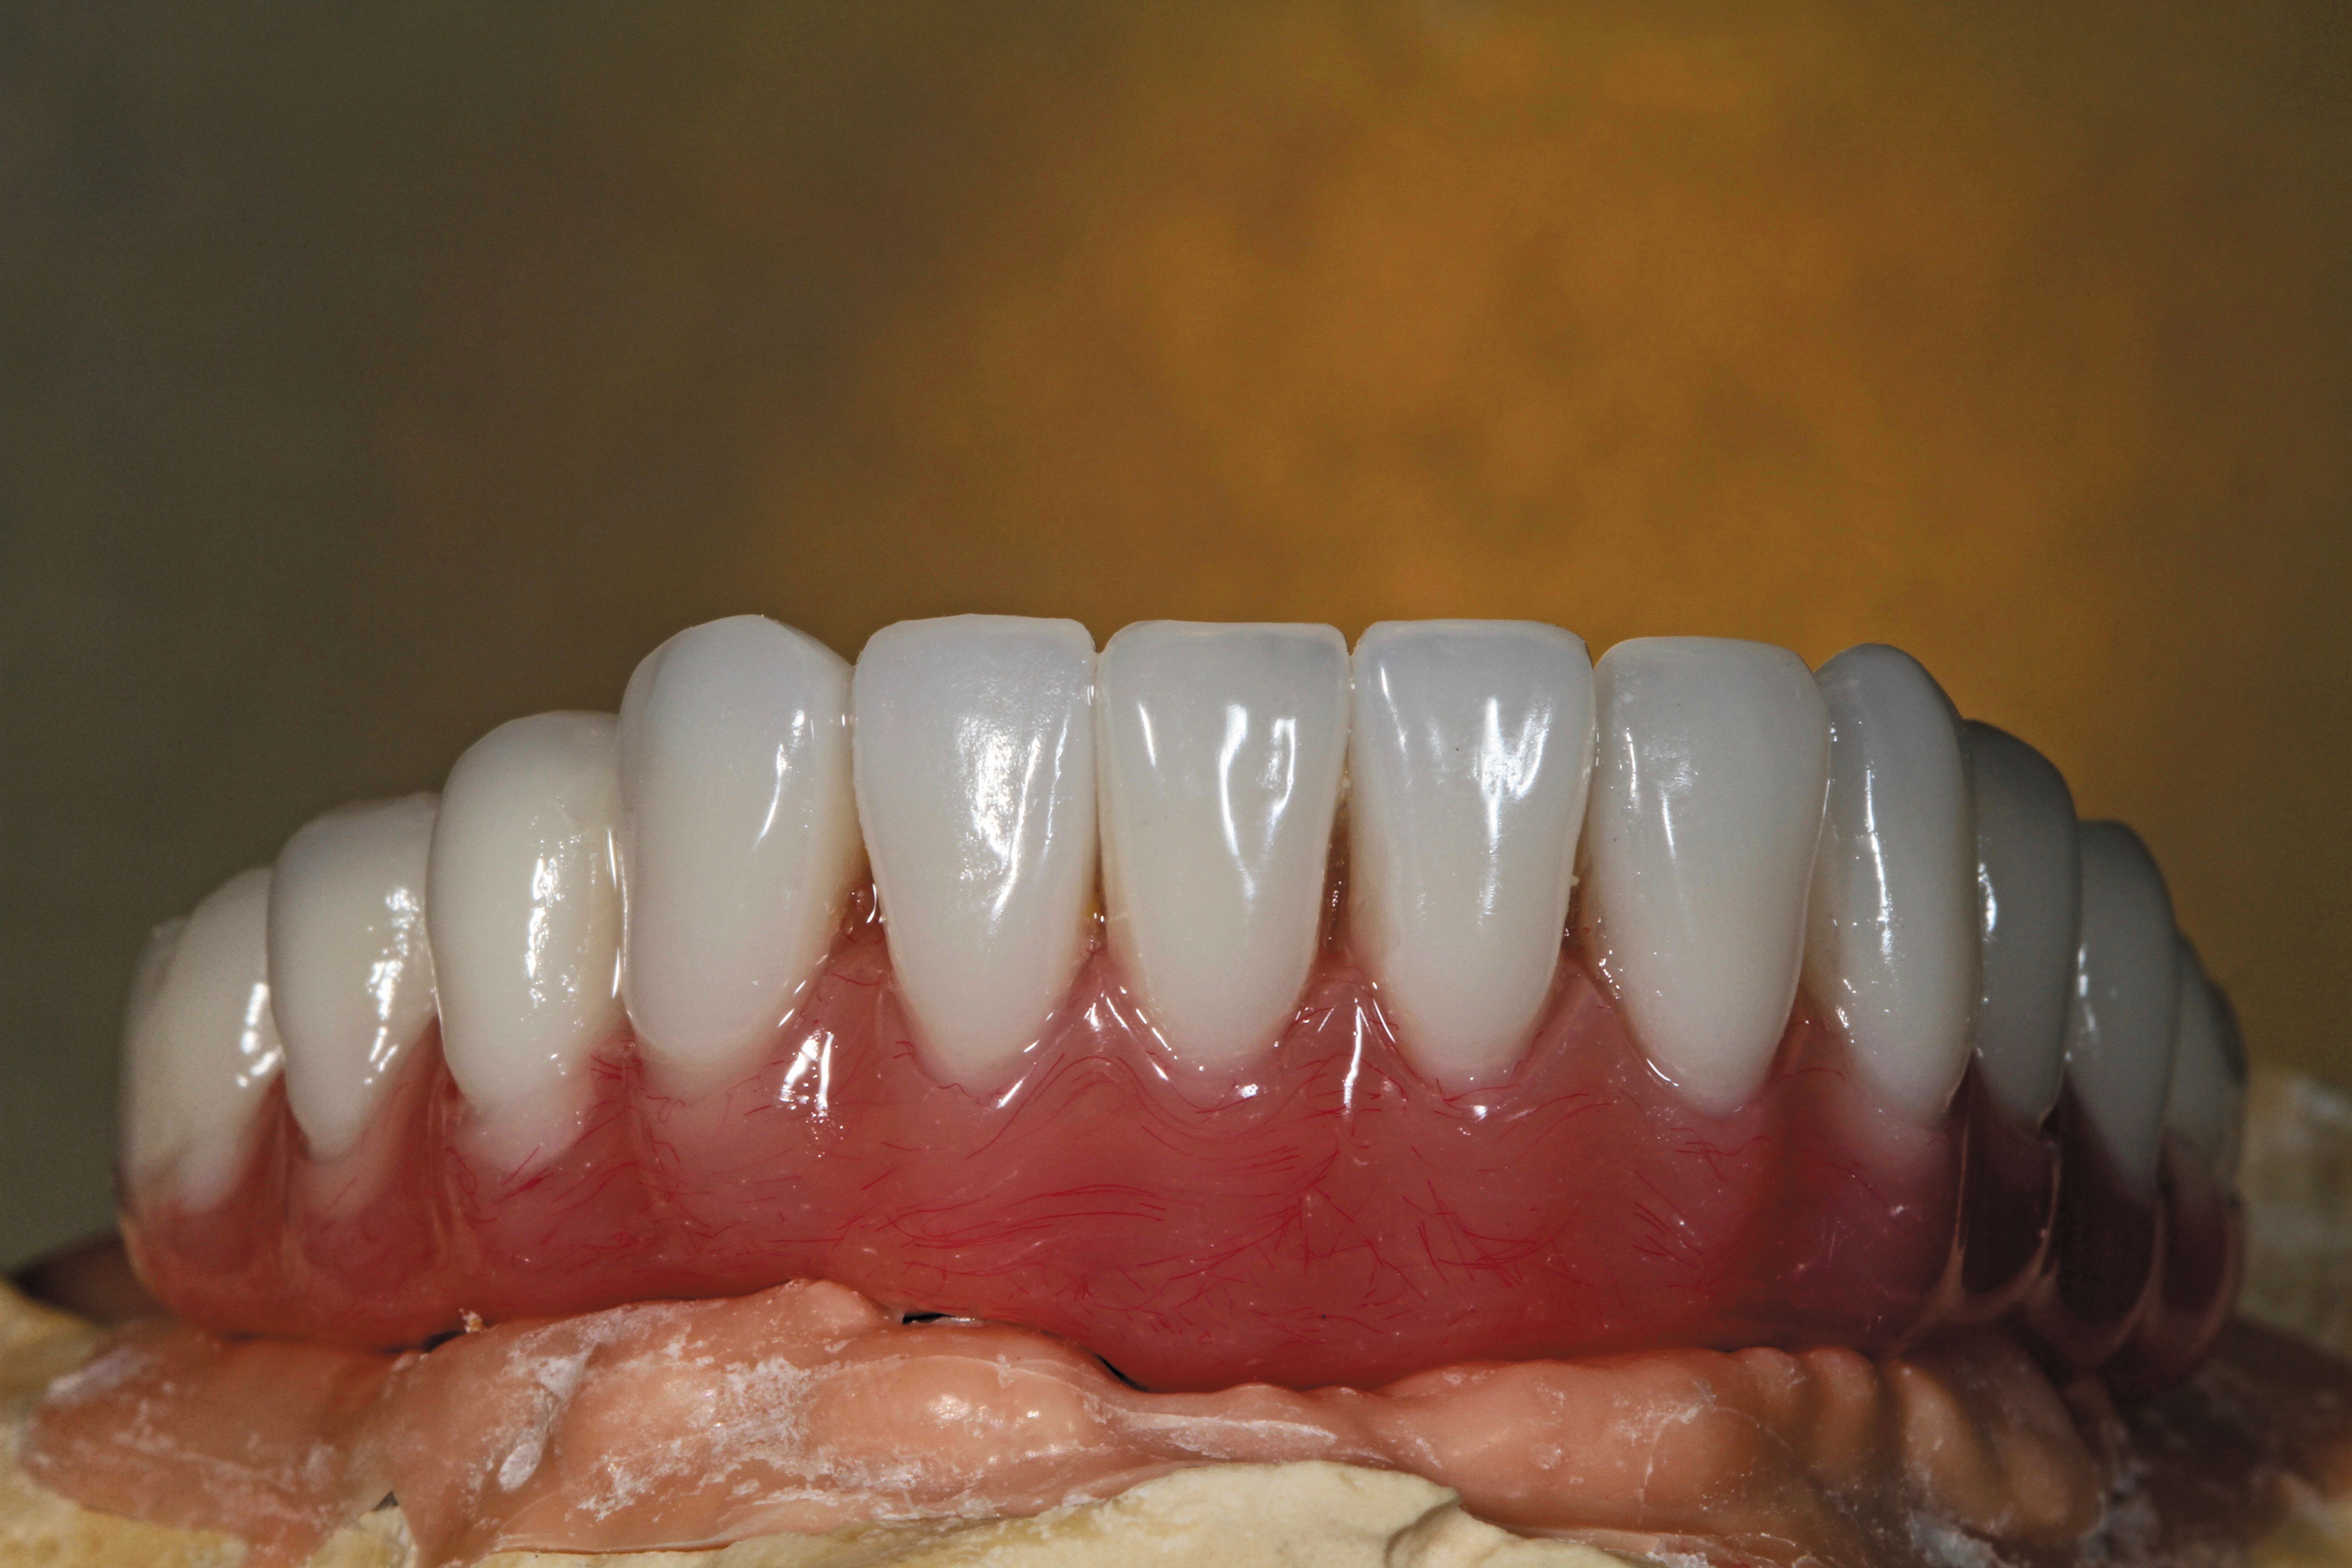
Fig. 7
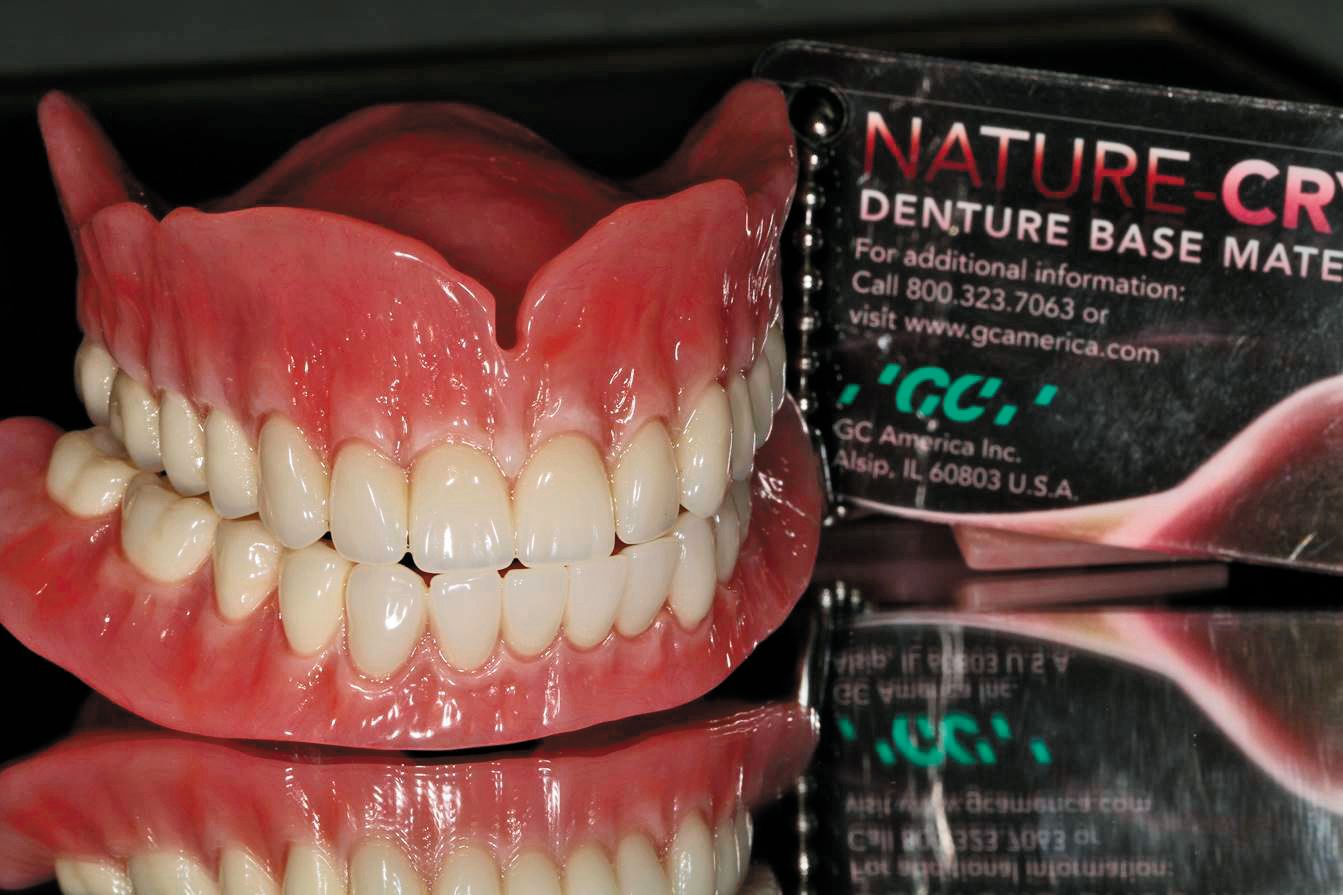
The author has been using a product called Nature Cryl Denture Base material (Fig. 9) from GC for his acrylic resin work in cases such as this one, with excellent results. It worked well for the wax try-in stage in the maxillary and mandibular models, with tissue characterization shown here. Figure 10 is of a soft tissue model, both the top and bottom, with the same concept as our previous image, eight implants with a screw-retained denture, just in a different patient case.
Fig. 10

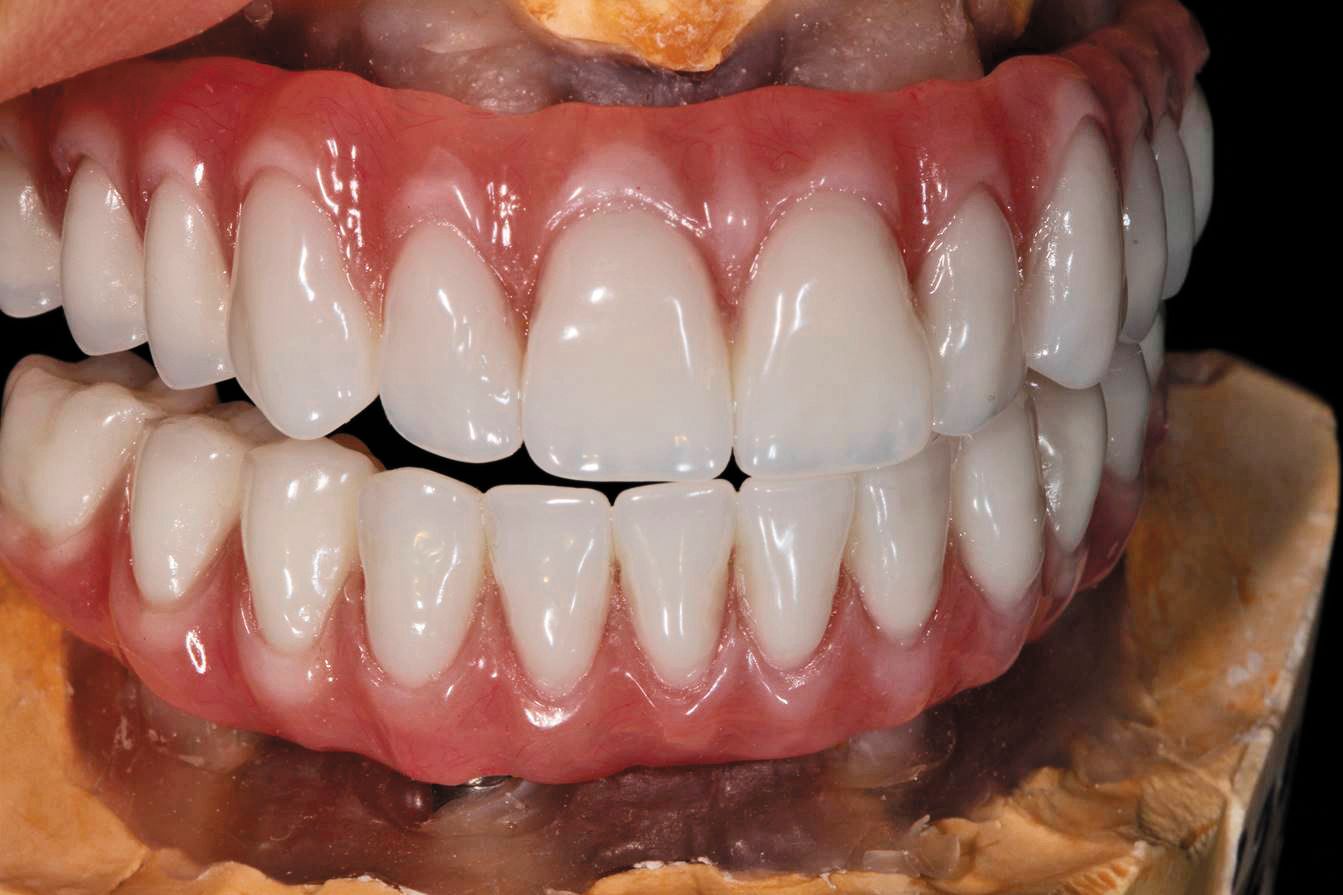
Fig. 9
Next we are given the left side view of the patient case (Fig. 11) and then a centric view in order to demonstrate the harmony of the teeth and the successful finished results (Fig. 12).
Related reading: Fabricating full arch implant prosthesis

Fig. 12
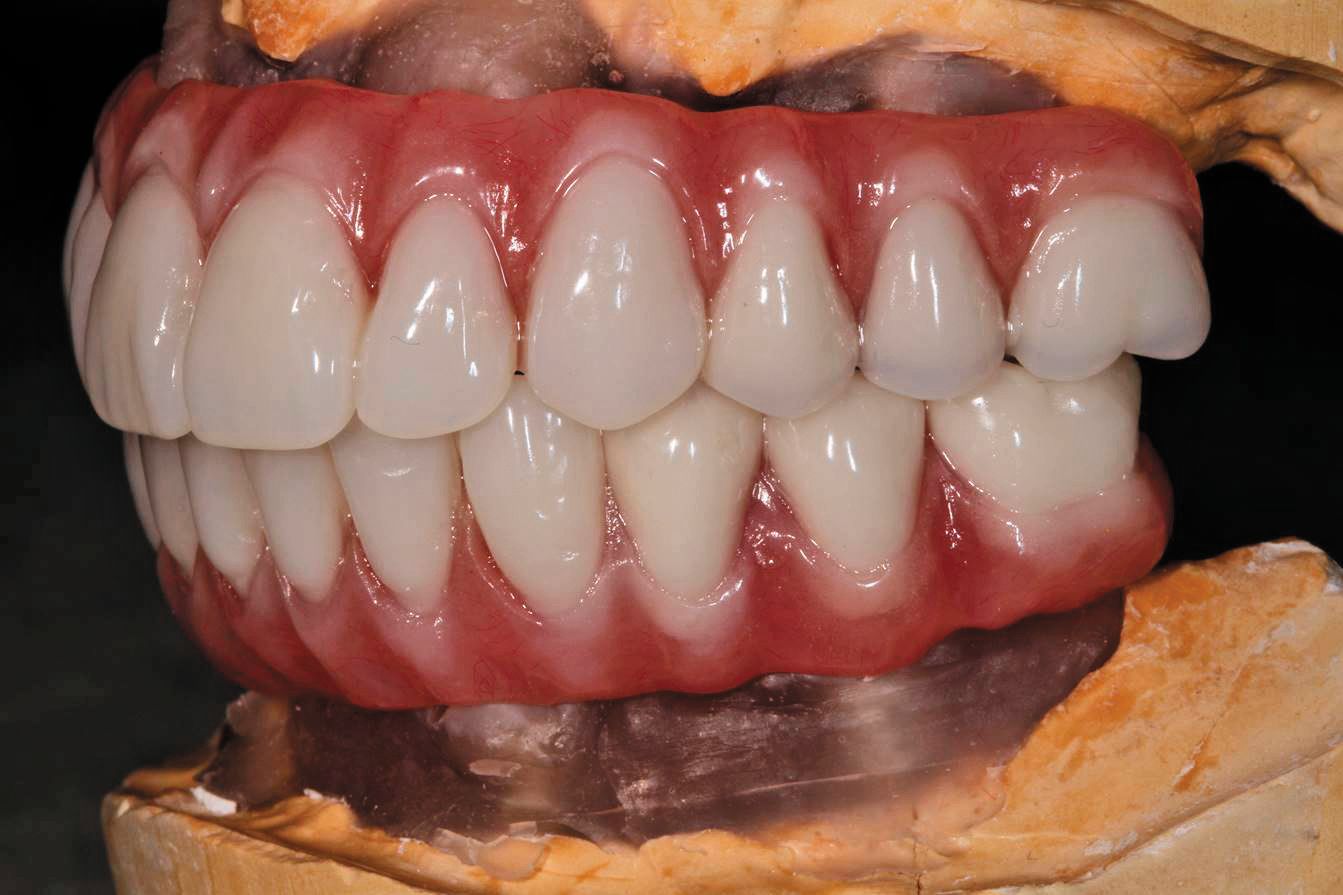

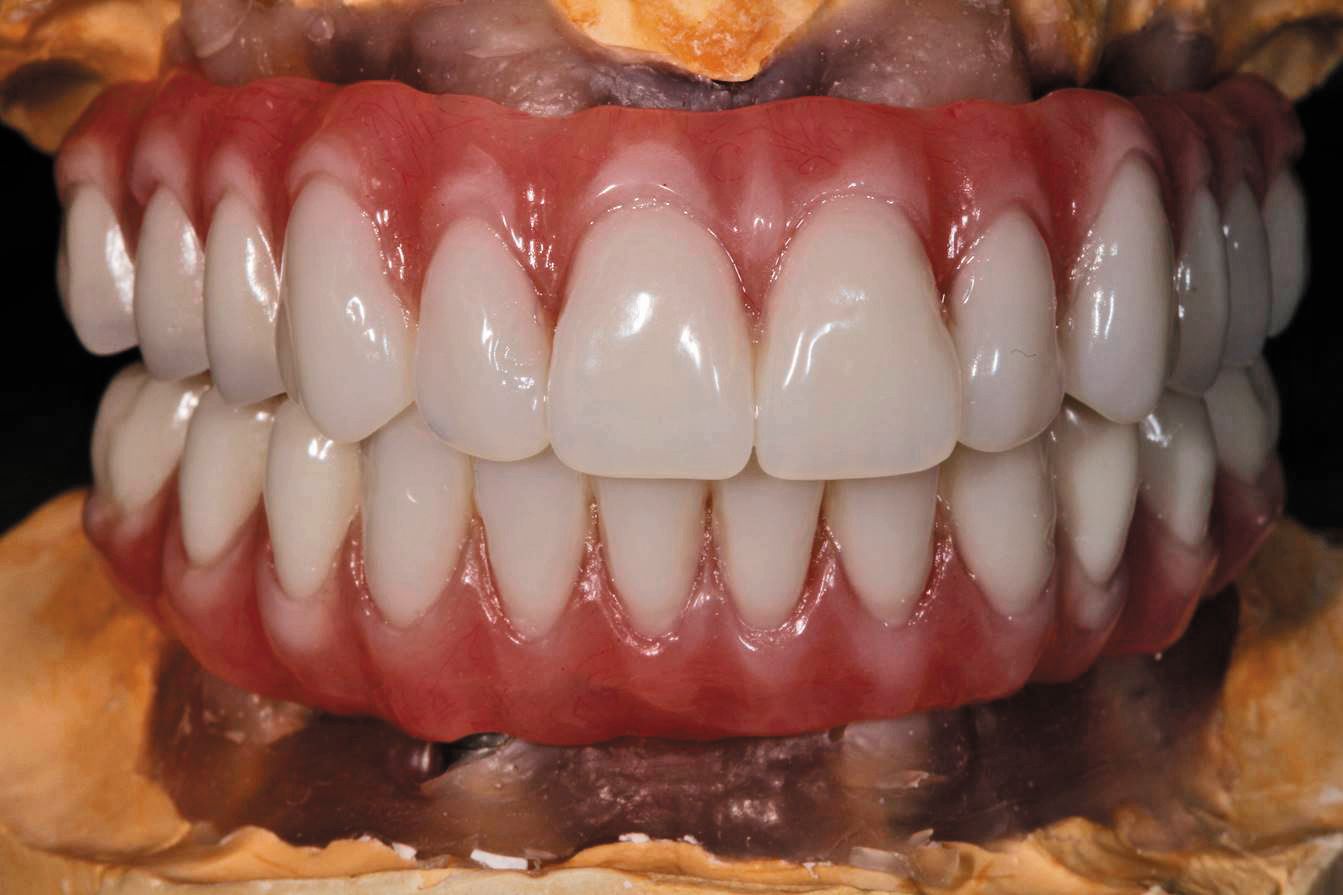
Fig. 11
Conclusion
Once we have the method and strategy worked out for our cases, a high definition scanner and accurate software design in place, we need an experienced and expert technician to design the case. Our milling strategy is important, and with in-house milling we can see our results right away. Sometimes what we receive from the dentist’s office presents a difficult fit. In order to fix the path of insertion for our prosthetics, we need a milling strategy that will work to create a well-fitting bar. HyperDENT helps us to plan for any unforeseen areas of concern and avoid rocking. However, the technician who works with the software has to understand and develop the case, as he also works with the software. If all the elements fit together, our case will be beautifully designed with an expert fit for the dentist to present and place for the patient.


