Technique: An easier way to repair partial dentures
Darrel Clark, CDT, shows a step-by-step technique for using Dental Creations' EZ Partial Denture Repair Kit to repair a partial denture.


At first glance, the partial repair kit from Dental Creations may not look like much. But oh what it can do!
The kit contains an assortment of parts that can be used in a variety of ways to add retention, mesh sections and even clasps to cast metal partial dentures.
Must read: The top 10 lab articles of 2015
At the heart of the system are the very small bolts and nuts. These are used to attach to plate or mesh sections of the metal framework. Additional parts include nuts with attached wires that can be bent for retention loops, washers with a heavy gauge wire to bend into clasps and washer strips to make mesh sections. All components are made from the same stainless steel as ortho wire and are FDA-approved. The kit also includes a hex tool for tightening the bolts.
Next page: Go step-by-step ...
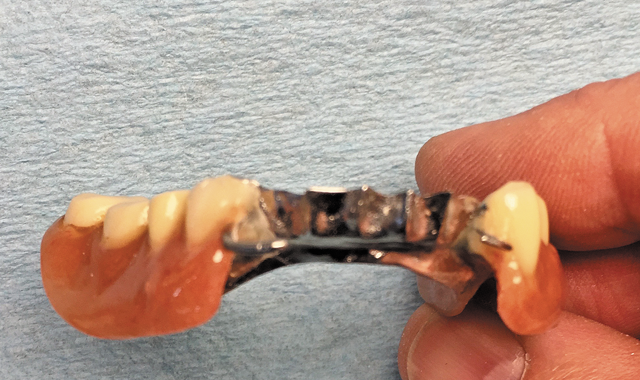
Case study
01 In this case, the patient has lost No. 28 and has a failed previous repair replacing No. 22 (Figs 1-3; all figures in video below). The process begins by creating a flat spot (Fig. 4) on the lingual plate to accommodate the head of the bolt. Thinning this area also makes it easier to drill.
Check it out: A surprising use for a void filler
02 A hole is drilled at the desired location using a tapered carbide drill (Figs 5-6), being careful not to make the hole too big but large enough to accommodate the bolt (Fig. 7).
03 A nut with attached wires is then tightened in place (Fig. 12). One wire is bent for a clasp and the other as an acrylic retention wire (Fig. 13).
04 On the right side, the process is repeated first by drilling the hole (Figs 8-9).
05 Next, remove the old clasp (Fig. 10). This time, a washer with a heavier wire is selected for a clasp and a nut with a single wire for a retention loop (Fig. 17).
Related: The top 5 dental lab techniques of 2015
06 Wires are positioned first and then the bolt tightened (Fig. 18). Then wires are cut and bent as desired (Fig. 19).
07 New teeth are added using a tinted acrylic to match the patient’s existing time aged partial (Fig. 22).
08 Bolt heads can be flattened at this point if necessary to provide better contours (Figs 20-21).
In conclusion, the partial fix kit is an excellent way to rescue partials to provide more retention or retain additional teeth. It can be used in the lab or intraorally using composite resin to make quick, economical repairs. The kit contains enough material to do approximately 10 repairs.
For more information about the EZ Partial Denture Repair Kit, contact Dental Creations at wonderfill.com or by calling 254-772-4661.


