Take an in-depth look at this alternative to dentures
A look at the All on 4 Denture Procedure using GC’s Nature-Cryl.
A look at the All on 4 Denture Procedure using GC’s Nature-Cryl.
Patients with dentures almost always will become tired of the re-lining process. It has to be done frequently, and gets to be a nuisance. The ever-increasingly popular alternative to dentures, known as the All on 4 Implant System, has alleviated this problem to a large extent for patients who have suffered with dentures. Some labs fabricate All on 4 dentures but some do not. It’s a very difficult restoration to outsource because it still has to be delivered to the doctor’s office for try-ins and adjustments quite a few times, depending on the fit. In my opinion, it is wise to learn how to fabricate these restorations because they are becoming more and more prevalent within the dental community.
This article illustrates the procedure for the All on 4 technique, involving the laboratory side. It also addresses using the new GC’s Nature-Cryl Super Hi Impact, a denture based resin for the edentulous area. This product makes the technician’s job much easier because the product is strong, durable and esthetically beautiful, too.
The case
01 After taking off the healing caps, the mandibular 4-unit implant site was exposed before the impression was taken (Fig. 1). The doctor can use four temporary abutments and floss material to engage the implants together. The clinician used an open-tray technique to take this impression.
02 The lab technician put the lab analogs into the impression tray and created the soft tissue and poured up the model (Fig. 2).
03 The bite block was pre-made with the verification index (Fig. 3) from Primotec USA’s primopattern light-cured wax.
04 After curing with the temporary abutment it was ready to send to the doctor for verification in the patient’s mouth. The doctor then sends back the bite block after verifying the patient’s bite. Then it is tried and verified on the model (Fig. 4).
If everything fits properly, the clinician sends it back as is. If for any reason it doesn’t fit properly, he must fix it by cutting and patching it with resin. If it is cut and patched because it does not fit, the lab will fix it on the model, then send it back to the doctor again for a wax try-in. The wax try-in is tried on the model (Fig. 5).
05 The lab’s next step is to send the wax teeth to the doctor for a try-in in the patient’s mouth (Fig. 6) to re-check the bite.
06 For the final teeth production, the lab used a GC Putty Guide material, based on the wax teeth (Fig. 7) to act as a template. At this stage, it is also necessary to look at the frame design for guidance with the final restoration. GC’s Nature-Cryl resin material (Fig. 8) is high impact and convenient to use. It requires two hours of heat curing and is available in seven different shades. The material is easy to finish and polish, and resists fracturing. I created some samples of the various colors available with Nature-Cryl, demonstrating how easy it is to create special characteristics and mimic the gum tissue aspect (Fig. 9).


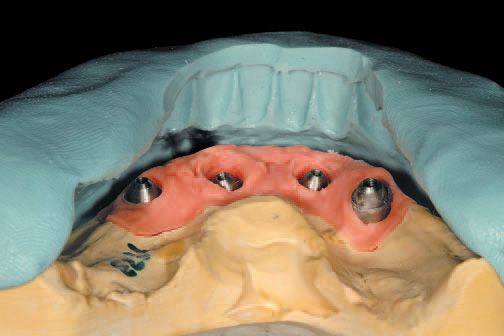
Fig. 7 GC Putty material as a guide. (Figs. 1-6 above)


Fig. 8 Nature-Cryl from GC.
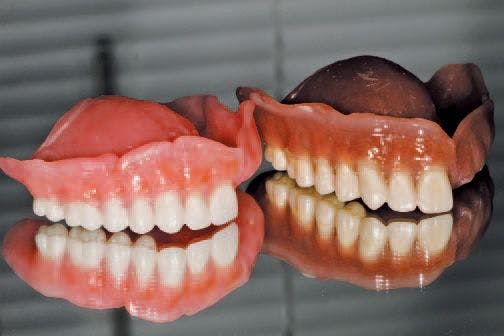
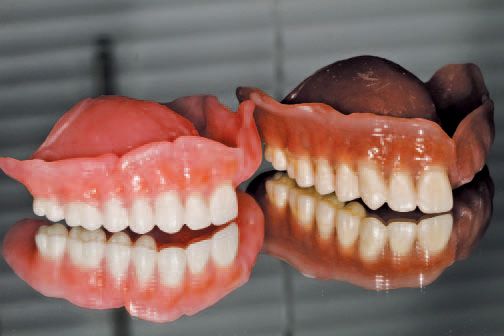
Fig. 9 Gum tissue color samples.
The colors in this image are: COE-LOR Moderate (#21) and COE-LOR Heavy (#22). In the next image (Fig. 10) there is another denture sample, from a true patient’s case, this time to demonstrate frame design and the mesh metal in a light color (#34). With the All on 6 denture pictured next (Fig. 11) the finished product is a light reddish pink in color (#35) and in the next (Fig. 12) we see a mandibular denture in the original color (#36).

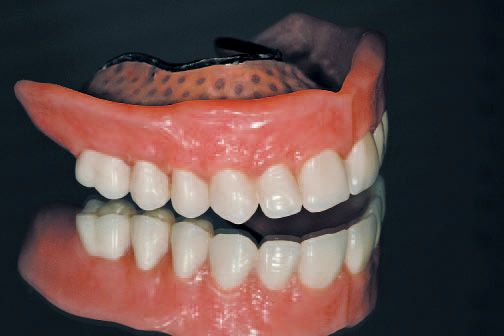
Fig. 10 Denture sample.
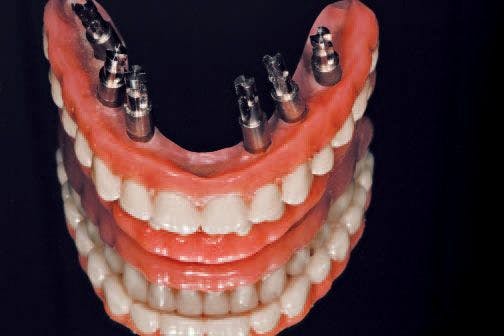
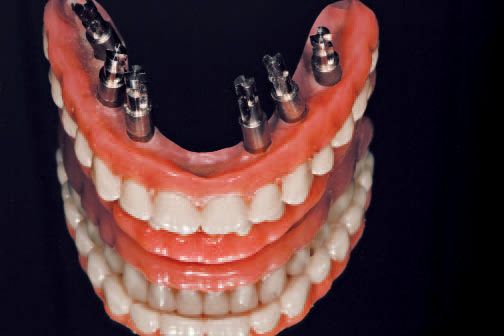
Fig. 11 All on 6 denture.
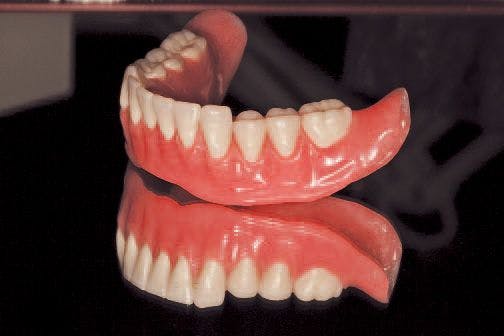

Fig. 12 Mandibular denture finished.
07 The flipper for the four missing mandibular teeth (Fig. 13) was completed in COE-LOR Moderate (#21).

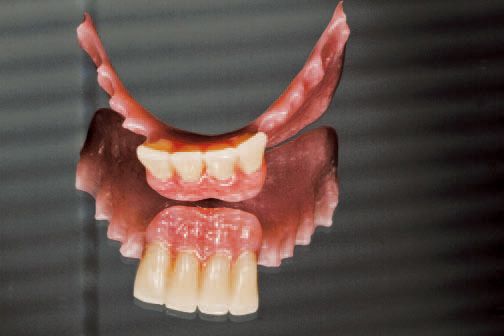
Fig. 13 Flipper for four teeth.
08 Finally, we see the All on 4 finished restoration with a hybrid bar as a two-piece detachable appliance (Fig. 14) or an All on 6 one piece restoration (Fig. 15).

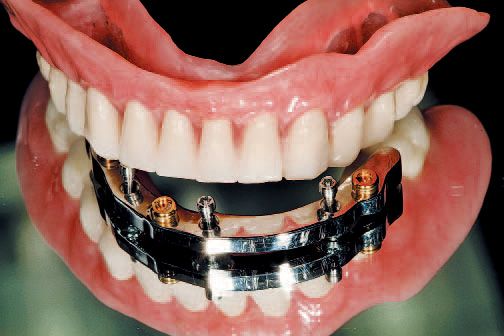
Fig. 14 All on 4 finished product, 2 piece detachable
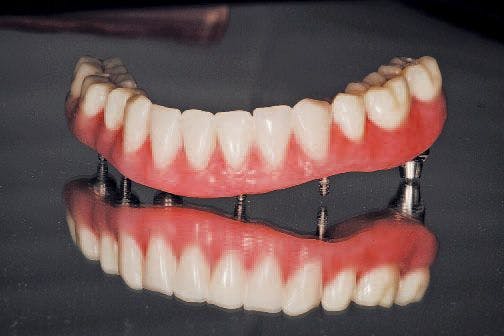

Fig. 15 All on 6 one piece.
Closing thought
As a dental technician working primarily as a ceramist, I understand and create beautiful esthetics with my porcelain layering technique. However, things are changing rapidly in the dental industry and I began to realize it was important to expand my knowledge and keep up with the newer product offerings. To that end, it is always advantageous to experiment with new dental materials as they are offered.
We have all seen cases where the patient has an upper or lower denture only, but then find that he needs to have the opposite denture placed as well. The two should match in tooth color or the effect will be displeasing in appearance. For this reason and many others, technicians should learn how to fabricate All on 4 cases using denture or ceramic teeth. It is my hope that by sharing this knowledge we can expand our product bases and serve our clients better, too. There is a whole world of new creations out there for us to take advantage of. We should learn as much as we can!