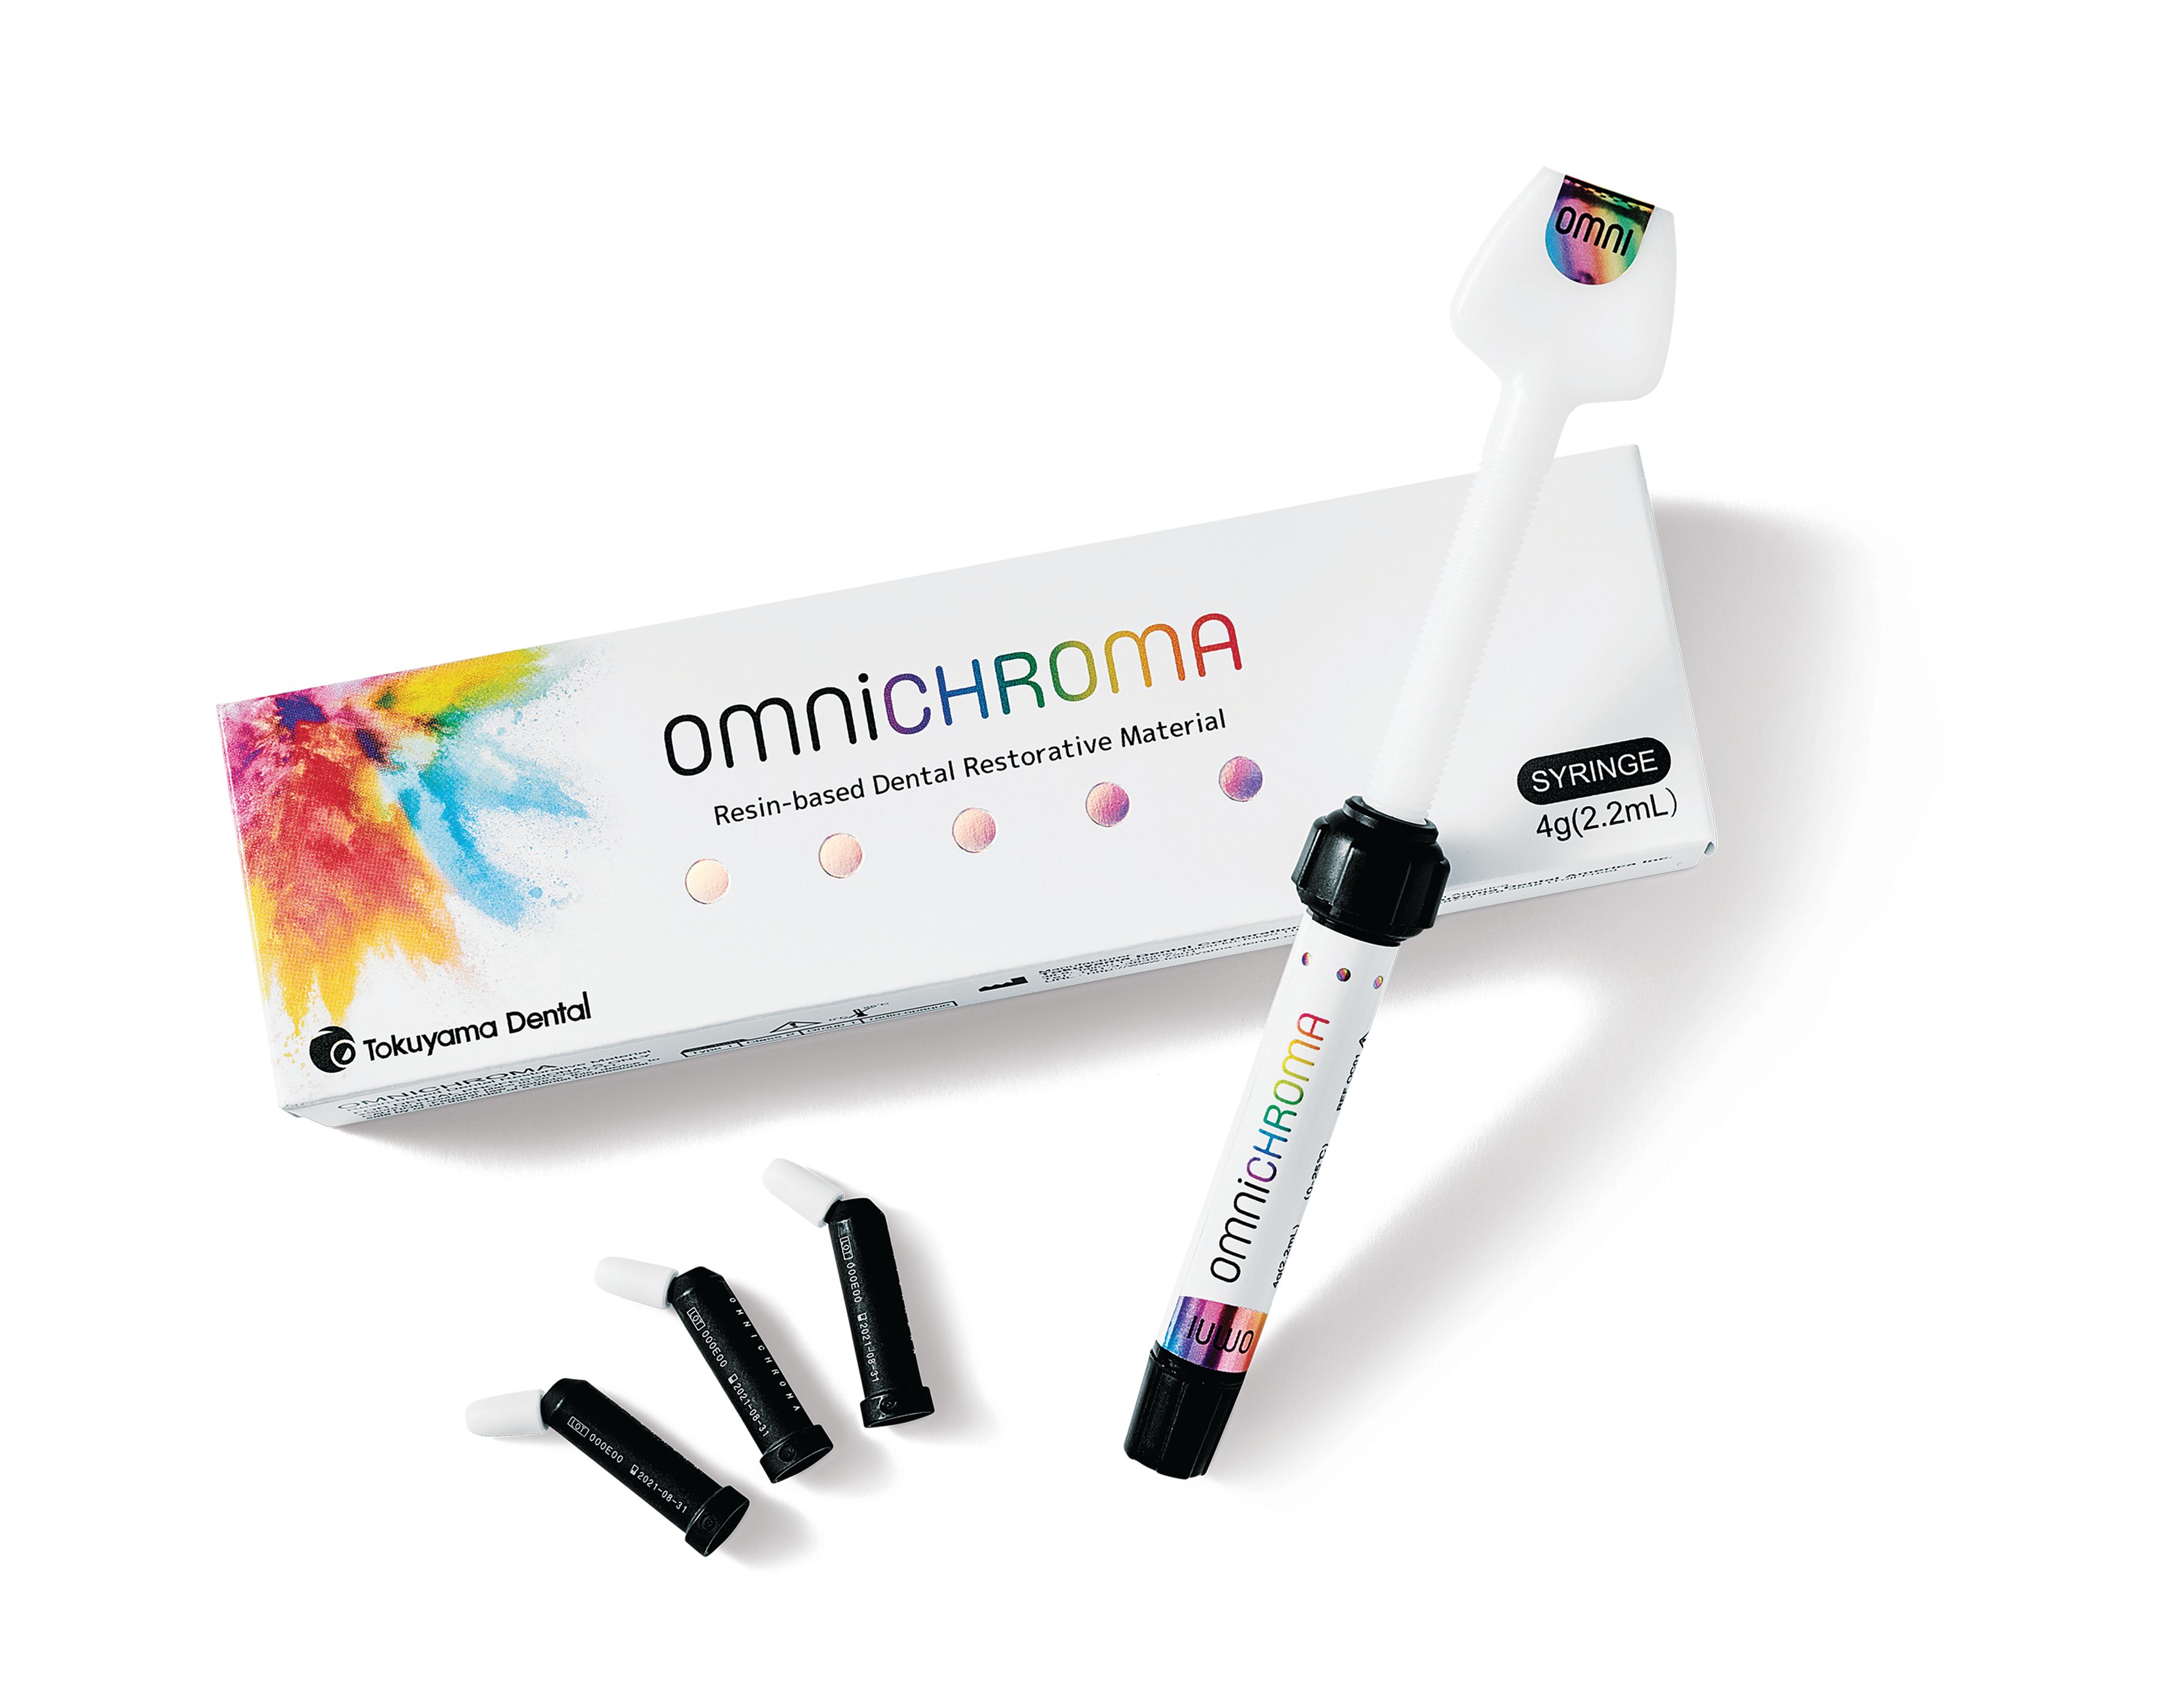
In this case study, a new single shade composite system (OMNICHROMA, Tokuyama Dental) was used in a full-mouth restoration of a young man who experienced amelogenesis imperfecta (AI). AI is a hereditary condition that affects the amount and quality of dental enamel and can range from mild to severe. For patients with AI, the chief complaints can range from tooth hypersensitivity and poor occlusion to esthetic concerns. From the perspective of the restorative dentist, AI is frustrating because of the lack of enamel quantity and quality to which restorations can be bonded. Although there are a few ways to treat a patient with AI, this case study will explore the option of an indirect-direct technique using a universal single-shade composite system.
OMNICHROMA
- A universal composite formulated to match every shade from A1 to D4.
- Its Smart Chromatic Technology utilizes supra-nano spherical fillers to shade match.
- Said to exhibit exceptional handling and polishability.
Tokuyama Dental
877-378-3548 | tokuyama-us.com
This was a highly unusual case that could have been completed in any number of ways with any number of materials. The primary dentist is a pediatric dentist and has been treating and managing the patient’s dental condition since his youth. The patient’s AI was quite severe and resulted in generalized hypersensitivity to touch, temperature, and air, among other complaints. He had no occlusal function, and chewing normal foods was a challenge. As he grew old enough to start noticing the darker color of his teeth, he became somewhat self-conscious about his smile. His father also has AI and has full coverage porcelain restorations on all his teeth. For this young man, who was still developing, it isn’t the right decision to do full coverage porcelain at this point in his life, primarily due to cost of treatment and he hasn’t finished growing. Both the patient and his father were looking for a more conservative treatment option to get him by until he is older and ready for a more comprehensive and long-term treatment with porcelain.
His pediatric dentist did direct composite veneers on teeth 7 to 10 and 23 to 26 but, because of the AI, the composite frequently flaked or chipped (Figure 1). His arch form was very constricted and lingualized (Figure 2). So, his dentist tried to do braces to improve his tooth position so restorations could be ideally placed. However, because of the poor bonding surface from the AI, the brackets would frequently pop off, and the treatment was never fully completed.
The pediatric dentist knew of a possible technique that could help this young man and reached out to a colleague to see whether they would be willing to help. The orthodontist sent 3D-printed models of the patient along with a wax bite registration. The models were mounted to an articulator, and a diagnostic wax-up was completed to open up the vertical dimension of the bite and establish a more functional and esthetic position and shape of the teeth. The wax-up then served as the blueprint going forward (Figure 3).
Because this patient had to drive 3 hours to be treated by this dentist, a lot of pretreatment planning was required, and the material selection had to be considered. In addition to this, the patient would require full sedation, limiting the overall treatment time to around 5 hours by the anesthesiologist, and all treatment would need to be completed in 1 visit.
Materials considered were:
- indirect porcelain crowns: not an option due to cost and multiple visits and travel,
- indirect composite crowns: not an option due to multiple visits and travel,
- direct composite crowns: good option but very challenging to do in the limited time of the single visit with full sedation, and
- indirect-direct composite crowns: best option to be done within the time frame and budget.
Just about any composite system could have been used for this application, but the main desired characteristics were strength, ease of use, and esthetics, in that order. These restorations were only expected to last 7 to 10 years until the patient would be ready for porcelain.
The Process
For the indirect-direct technique, a translucent polyvinyl siloxane material and translucent impression tray were used to take an impression of the wax-up. A stone model of the patient’s existing teeth was lightly modified to resolve any undercuts and then coated with petroleum jelly to prevent any composite resin from adhering to the stone (Figure 4). The translucent impression of the wax-up was filled with OMNICHROMA and placed over the lubricated stone model, and the composite was light cured through the translucent material (Figures 5 and 6). This was done for the entire upper and lower arch of teeth to create a shell (Figure 7).
On the day of treatment, the patient was under general anesthesia with nasal intubation, which made it challenging to work with a bite block in 1 side. This is why an indirect-direct technique was necessary. There was some existing composite on teeth 7 to 10 and 23 to 26 and a few other spots in the posterior where the orthodontist made occlusal stops. These composites were removed, and any other undercuts were resolved, and the composite shells were tried to verify the fit (Figure 8).
A maxillary and mandibular full-arch impression was taken and poured up in fast-set stone (Snap-Stone from Whip Mix). The models were then coated with petroleum jelly, and the intaglio of the composite shells were coated with bonding resin (Tokuyama Universal Bond from Tokuyama Dental), filled with a flowable composite (Estelite Universal Flow, Medium Viscosity from Tokuyama Dental), and seated over the stone model with firm pressure (Figure 9). The excess flowable resin was removed with a microbrush before light curing (Figures 10 and 11). Once the prefabricated composite shells were relined and tried back in the mouth for fit verification, each tooth was carefully sectioned, trimmed, and polished to be an individual unit (Figure 12).
The individual crowns were then cemented in the mouth in quadrants using the same flowable composite as cement (Figure 13). The teeth were cleaned with a pumice, a prophy cup, and air abrasion (MicroEtcher II, Danville) to ensure the best possible bonding surface for the restorations. It is very difficult to cement a composite crown in the mouth using a resin cement as the resin will bond to the composite and be very difficult to clean, especially interproximally. The composite crowns were polished to a high shine, and the bonding resin for the intaglio of each crown was carefully placed, so no excess resin flowed onto the surface of the crown to minimize unwanted resin cement bonding. Only 3 or 4 restorations were cemented at a time to help control the cleanup of excess flowable composite cement.
After all the crowns were cemented, a mosquito tip diamond bur was used to smooth all facial and lingual margins. Then, composite polishing cups, disks, and points were used to polish the restorations sufficiently to be comfortable. Because time was running out and the anesthesiologist didn’t want the patient under for too long, final texturizing and polishing would wait for a follow-up visit when the patient wouldn’t have to be sedated. Occlusion was impossible to evaluate while the patient was sedated, and even when he awoke, he was too groggy to occlude reliably. He had never had a normal bite in his life, so he had no reference for what normal felt like. So, the patient was dismissed, and he and his family decided to stay the night at a hotel and leave the next morning. This way, he was able to have the dentist check the bite later that night when he was awake and had half of a day to test things out. Only minor adjustments were needed. The pediatric dentist would also be able to make any other minor adjustments as needed.
Figure 14 shows immediate results post cementation, and Figure 15 illustrates the patient’s 1-month post-operative full smile.