How-to: Press up to 20 units in a single press oven
Jörg Muller of Aesthetic Press explores how this product can help technicians press more units than ever.
As a technician, I have been faced with the challenge of successfully pressing large cases containing more than 10 units in one ring (Fig. 1, below).
Today, with the growing amount of large implant restorations, the benefit of a press over coping or pressing of full contour technique is all too evident. A successful restoration starts with good planÂning, whether done by CAD/CAM design or by traditional hand waxÂing. The longevity of implant resÂtoration depends on its anatomy and function.


Fig. 1 20 units pressed with 30g of porcelain
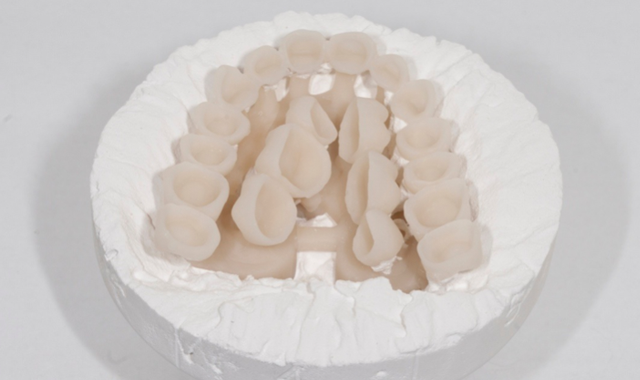
Fig. 1 20 units pressed with 30g of porcelain
Unfortunately, the functional eleÂments are not always respected in applying the CAD/CAM software and utilizing the library as it is with traditional hand waxing. There is quite a difference between workÂing with an articulator in your own hands and designing on a two diÂmensional screen. Functional elements and methÂods, which were taught in the past sometimes seem to play a secondary role in today’s restorations (Fig. 2; below). But now, there is a new way to get more out of pressing techniques that can benefit the dental technician. [Editor's note: The technique that follows describes the new method of pressing along with the product that makes it possible-simply scroll to the bottom of each page to go to the next step of the process!]

Fig. 2 Esthetics and function in harmony
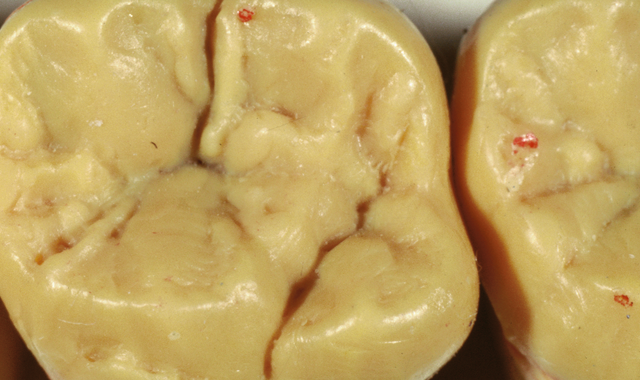
Fig. 2 Esthetics and function in harmony
It is not all about Mega pascal or flexural strength!


Click the next button to learn about a new technique and product that can help ...

Fig. 3 Inside view of AP 400 Ring
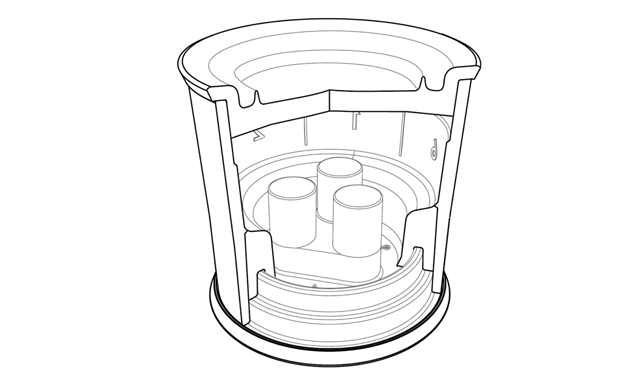
Fig. 3 Inside view of AP 400 Ring
Aesthetic-Press has a product called the AP 400 Investment Ring that can help dental technicians with their pressable workflow. To improve the quality of pressed restorations, it is helpful to keep the pressing time as short as possible. This can be achieved if the length of the individual sprue is relatively short (3mm). (Fig. 3)


Fig. 4 Spruing technique from bird's eye view - pistons need to be connected.
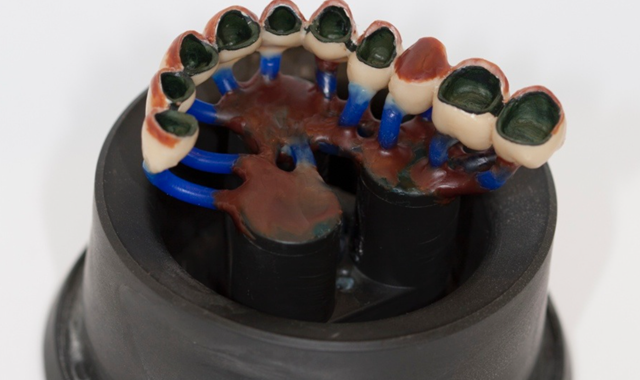
Fig. 4 Spruing technique from bird's eye view - pistons need to be connected.
To cover both the anterior and posterior regions on both sides, the AP 400 ring shows three pistons that are separated from each other with the ability to hold ingots that are 16mm in diameter. The Aesthetic-Press 2.5g ingots give technicians an advantage of controlling the amount of porcelain individually fed in the chambers/pistons.

Fig. 5 Sprues connecting anteriors and posteriors
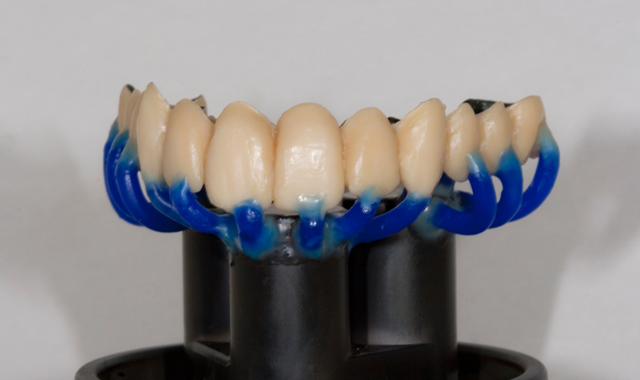
Fig. 5 Sprues connecting anteriors and posteriors
Depending on the amount of wax used for a large case, it might be necessary to use three or even four ingots per chamber. This means that either 22g of porcelain or even up to 30g of porcelain can now be pressed in any oven.

Fig. 7 Plunger maker mold and disposable plunger
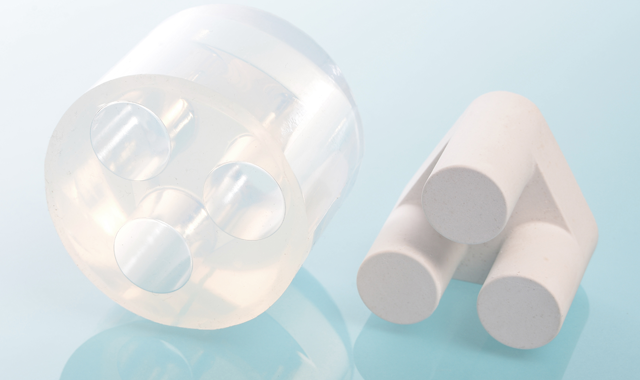
Fig. 7 Plunger maker mold and disposable plunger
The secret to this is the specially designed press-plunger. As Figure 7 shows, the three pistons are connected to a ceiling/top part, which is pushed down by the press drive of the oven.

Fig. 8 AP Press Oven by Dekema
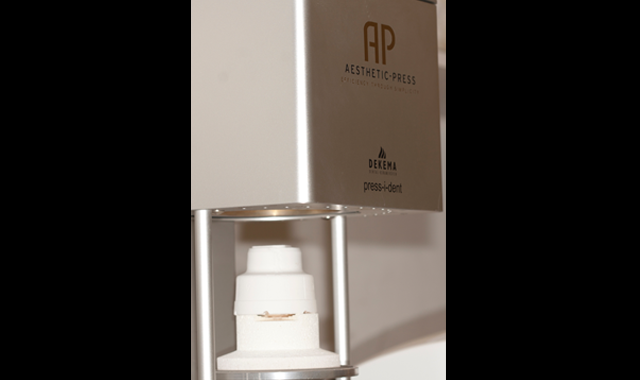
Fig. 8 AP Press Oven by Dekema
The DeÂkema press-i-dent is our recomÂmended press and firing furnace and can be purchased through Aesthetic-Press. (Fig. 8)

Fig. 6 Note the two sprues on each posterior
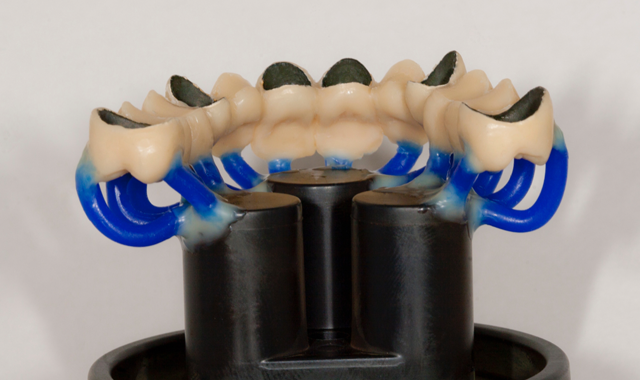
Fig. 6 Note the two sprues on each posterior
How to use the spruing technique:
After placing the small rubber ring over the bottom part, one can start with connecting the three chambers with either one or two sprues of gauge 8 (3mm). This will make sure there is an overflow pathÂway between the chambers, in case one side has completed pressing and the other pistons still have to continue pushing material into the other castings.

Fig. 9 Nine porcelain margins pressed show the advantages towards hand layering
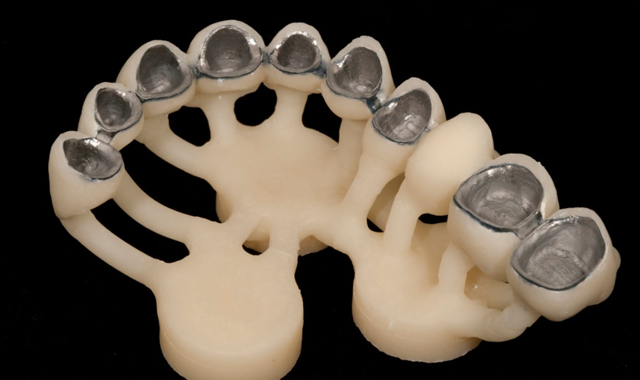
Fig. 9 Nine porcelain margins pressed show the advantages of hand layering
It is imporÂtant for the technician to find the right positioning for all of the resÂtoration in the ring. All anteriors should be sprued straight onto their incisal edge and not from the lingual side. Always make sure the slow flowing material has the easiest path to flow into the crown. All the posteriors from bicuspids to second molars have to be connectÂed to the piston with two sprues.

Fig. 10 Two colors pressed onto the same frame
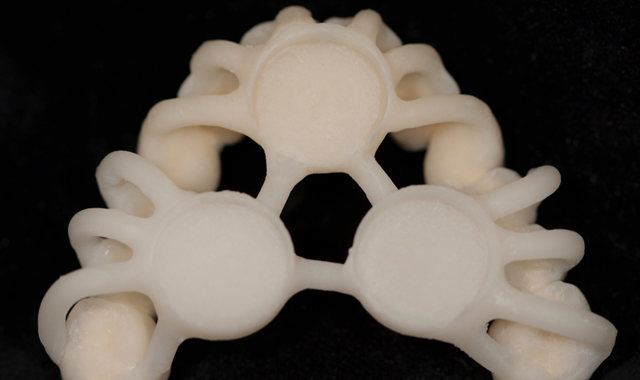
Fig. 10 Two colors pressed onto the same frame
One sprue has to be attached to the lingual and one to the buccal side of the restoration. The best way to wax these connections is if they are placed above the incisal edge and more towards the middle third of the tooth. This will reduce the risk of a short press.
In summary:
- Connect the individual pistons
- Sprue anteriors straight onto the incisal edge with one sprue
- Use two sprues per posterior- one on the buccal and one on the lingual

Fig. 11 Contact points made with articulating paper in a stable occlusion
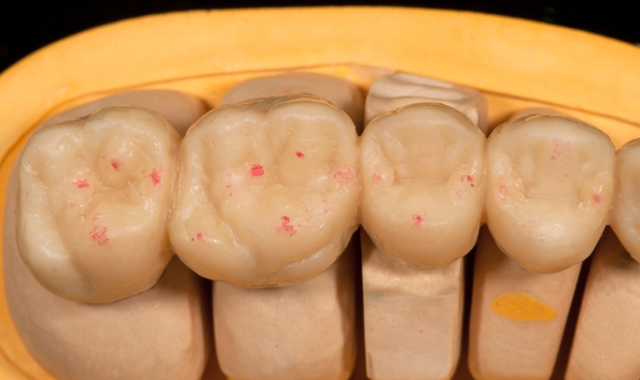
Fig. 11 Contact points made with articulating paper in a stable occlusion
Setting the right parameters:
With the right parameters for each press oven, large cases can be pressed flawlessly. Even with the amount of porcelain margins in this case, the advantages of the press over technique vs. hand stacking is all too obvious.
The parameters need to be adjusted to the following using the AP400g ring: The burn out time needs to be 1.5 hours at 850º C,
The press temp needs to be 40ºC above the regular press temp. LastÂly, the hold time in the press oven needs to be set to 40 minutes.
With these parameters a successful press over metal/zirconia and even full contour silicate/lithium disilicate can be accomplished.

Fig. 12 Transferred 1:1 into porcelain
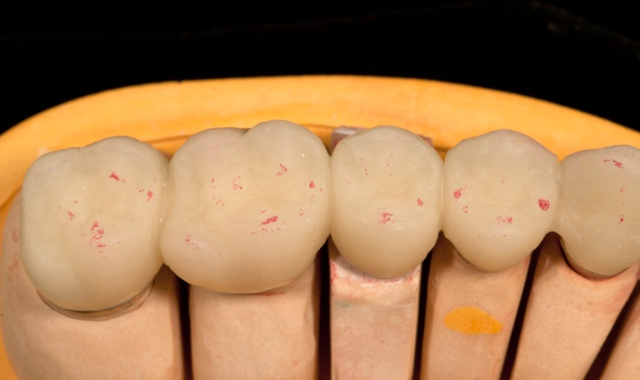
Fig. 12 Transferred 1:1 into porcelain
Press multiple colors in one ring
With the 400 g ring, multiple colÂors can be pressed, even onto the same framework. In the case shown in this article, we used Dentin inÂgots for the six anterior units (Press & Layering technique). The more translucent, Classic Light ingot was used for the posteriors (Press & Stain technique).

Fig. 13 Perfectly pre conditioned surface, rubber wheeled and polished with

Fig. 13 Perfectly pre conditioned surface, rubber wheeled and polished with "Oscar Diamond Paste"
Function & esthetics
One important reason to press rather than hand stack, is the ability to plan the occlusion with the right functional concept and to translate this into porcelain. As a technician myself, I have learned from many hand layered cases that this is simply too difficult to achieve. The proper planning is significantly easier and more realistic to do in wax first. The pictures below indicate a carefully planned occlusion, both in wax and in porcelain. Then right to the stain and glazed finished product. If a technician can reproduce such quality of function and esthetics, a higher price for a restoration is now more justified-differentiate yourself!

Fig. 14 With a few stains and little touch ups with
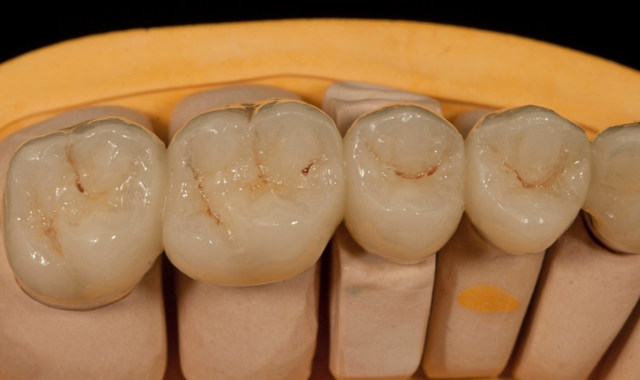
Fig. 14 With a few stains and little touch ups with "Oscar Paste" to highlight surface reflection.
One last tip: Use a scalpel or carver to make a cut right to the frame between the canine and the first bicuspid. This will create a small separation beÂtween the two colors. Since the anÂteriors from 6 to 11 will be cut back and layered, any small corrections can be done at the same time!


