How to do same-day implant restoration
A technique showcasing how the millable VITA ENAMIC IS block enables same-day results.


Prior to the advent of CAD/CAM dentistry, restoring implants using the analog method required PVS impressions and multiple appointments. In the first appointment, a traditional impression was taken and sent to the lab for fabrication of the implant restoration. Several weeks later, the patient presented for the seating of the restoration.
CAD/CAM dentistry allowed dentists to image the implant digitally and eliminate PVS impressions. It also enabled us to design and fabricate the restoration, as opposed to sending it to a lab, giving the dentist the ultimate control over emergence and tissue pressure. Using this method, the final restoration can be delivered approximately two and a half hours following imaging, or in a subsequent appointment.
ENAMIC Implant Solutions (IS) significantly reduces the processing time because it does not need to be fired in the oven. Additionally, the resiliency of the material potentially minimizes forces to the abutment screw and the crestal bone. The case below illustrates the efficiency of using ENAMIC IS to restore an implant in a little over an hour.
Armamentarium
- Chairside CAD/CAM system
- Scan post and scan body to image the implant platform, angulation and timing into the CAD/CAM system.
- TiBase specific to the implant connection and platform diameter.
- VITA ENAMIC IS size 16 or 14 L or S, depending on the type of restoration and implant type.
- Multilink hybrid abutment cement to join the abutment to the TiBase.
- Hydrofluoric acid for etching
- Silane for intaglio surface of restoration
- VITA Easyshade® V
- ENAMIC Stain Kit
- Curing light
Patient presentation
The patient, a healthy 38-year-old male with an unremarkable medical history, presented with a non-restorable tooth #19.
The tooth had a vertical root fracture and recurrent decay. The patient was given an option for an implant at site #19 or a fixed bridge from teeth #18-20. The patient elected to have the tooth extracted and an implant placed immediately at the time of extraction. The implant placement was planned using a CBCT scan and Galaxis software.
The clinical crown was sectioned off and the initial osteotomy was performed through the furcation of the tooth to keep the implant centered. The roots of #19 were then removed atraumatically, and the osteotomy was completed.
A 5x10 mm Implant Direct Interactive implant was placed and torqued to 40 Ncm. The site was grafted with a cortico-cancellous mix of DFDBA bone and sutures were placed. The site was allowed to heal for three months, at which time the patient returned for his final restoration.
Continue to page two to read more...
Case study
1. Always set up as multilayer restoration, even if you plan on a screw-retained restoration (Fig. 1).
- Select ENAMIC IS as the abutment material.
- Select ENAMIC as the veneering material.
- Select the appropriate TiBase for implant brand and platform size.
- Always use a scan post to image the implant platform and timing.
- Imaging
2. Tips:
Make sure the scan post is fully seated on the implant and verify with an X-ray. (Fig. 2).

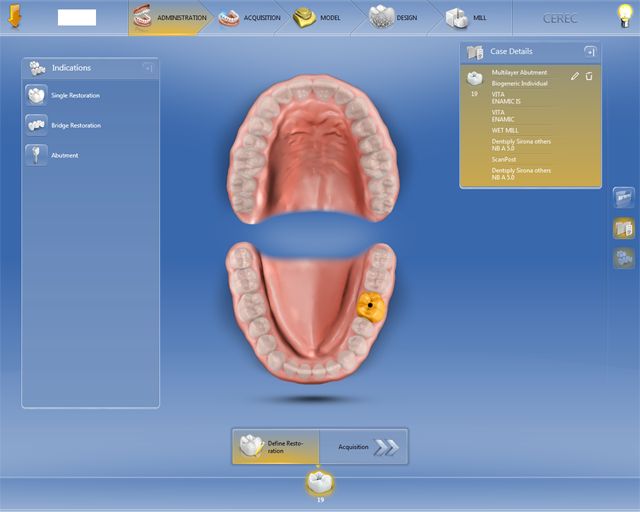

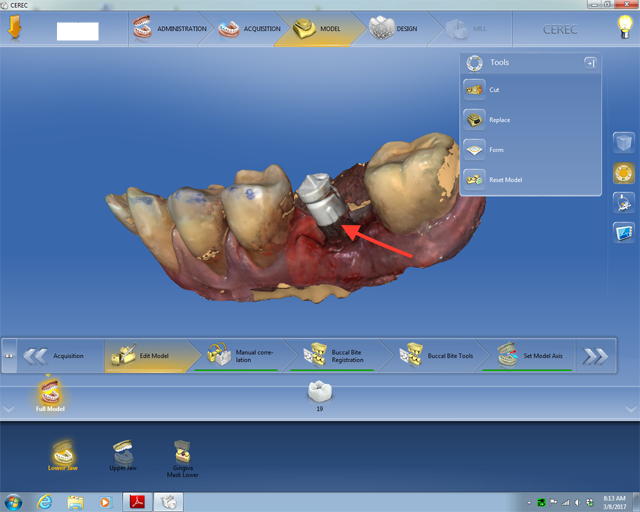
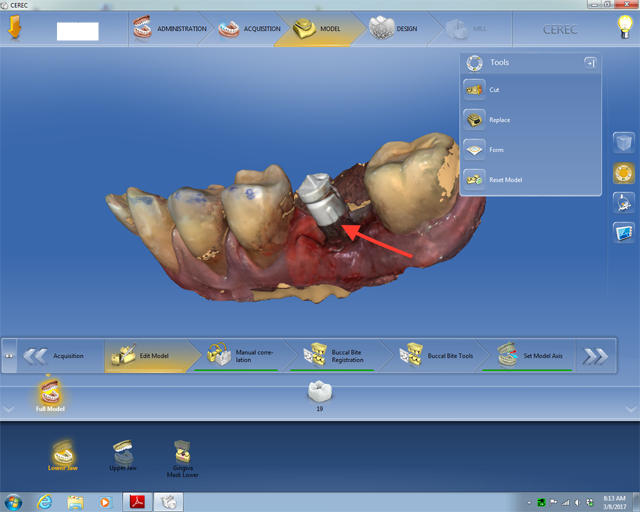
Fig. 1 Fig. 2
For a screw-retained crown, it is best to place the scan post notch interproximally because the sprue will mill 90 degrees from the notch. For an abutment, notch position is not an issue because the software will position it using different criteria.
Make sure scan body is correctly seated over notch of scan post.
The shiny scan post may be difficult to scan. Focus on scanning the area where the scan post meets the gingiva. If you do not have enough scanned data, the software may assume the scan post is an artifact and remove it from the image.
Before dismissing the patient, always move forward to making the models step to confirm that all imaging is accurate.
Step-by-step
3. Add gingival mask catalog (Fig. 3). Then, remove healing abutment and scan gingiva. Be sure to catch the contacts of the adjacent teeth as this will be more difficult to accomplish once the scan post is placed.

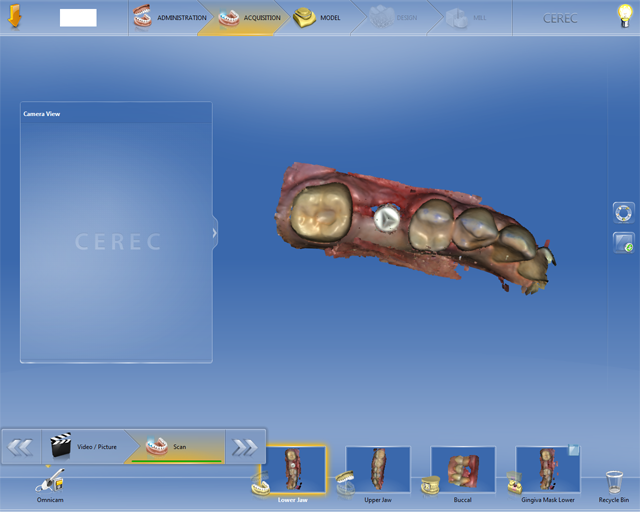
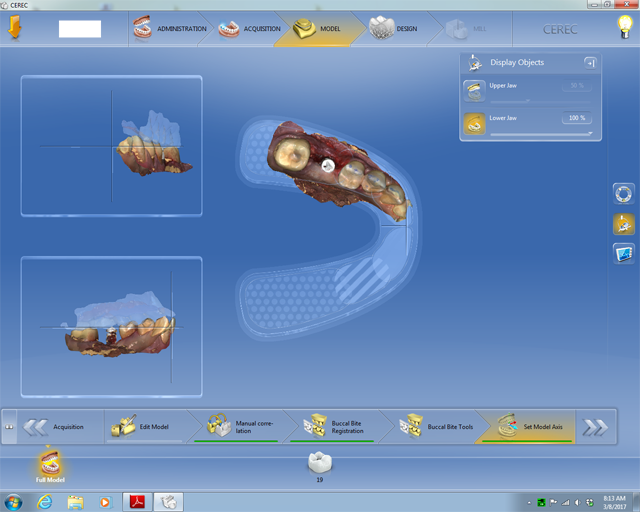
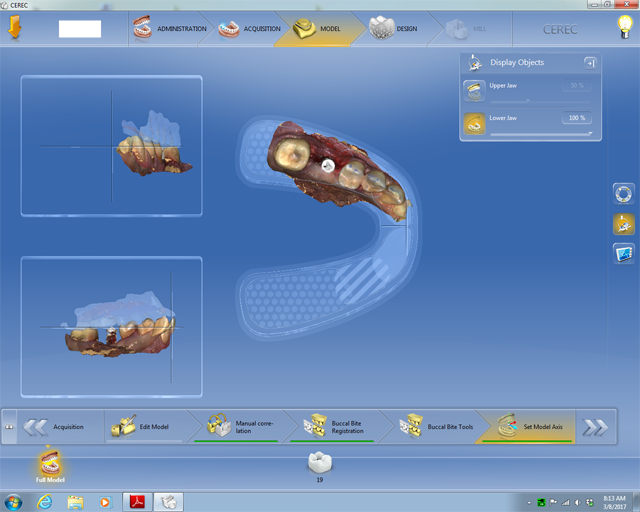
Fig. 3 Fig. 4
4. Scan opposing arch and buccal bite.
- Copy gingival mask scan to the restoration catalog (upper or lower arch).
- Use the Cut Tool to remove a small area around the implant.
- Place scan post and image just enough to fully fill in the scan post data.
- Verify stitch of gingival mask, move forward to models.
5. Set the model axis (Fig. 4). Trim model and click on scan body head (Fig. 5). Uncheck “use gingiva mask” unless the tissue has been well sculpted for the restoration (Fig. 6).
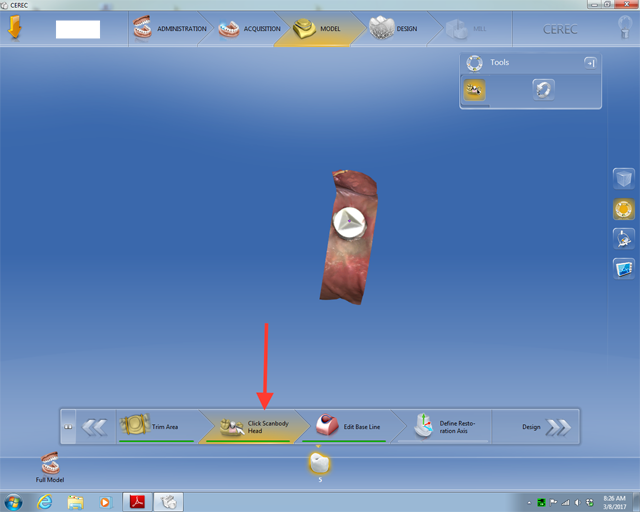
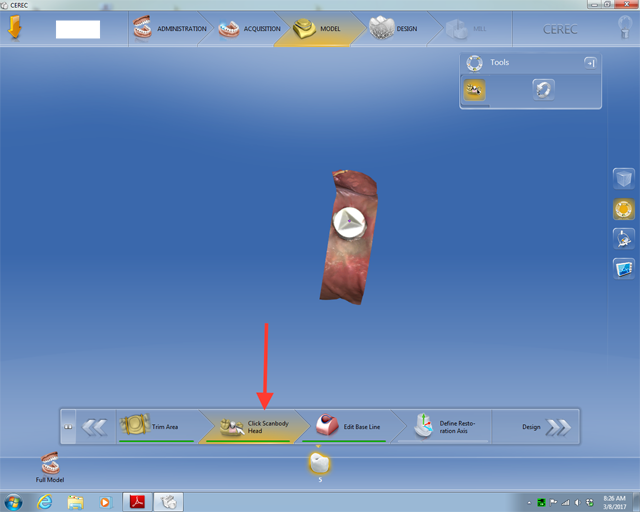
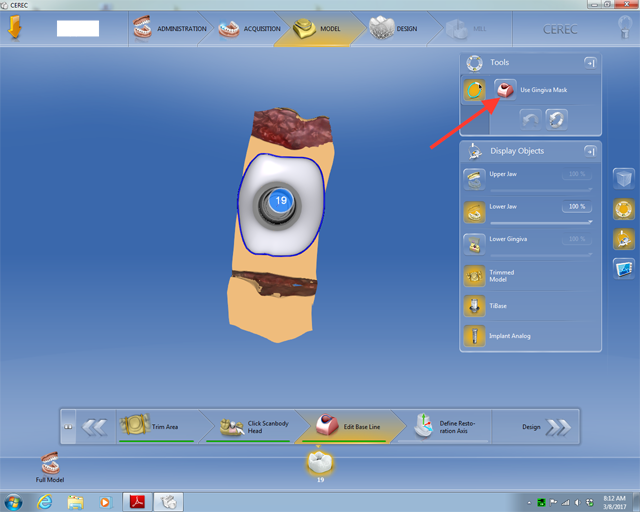
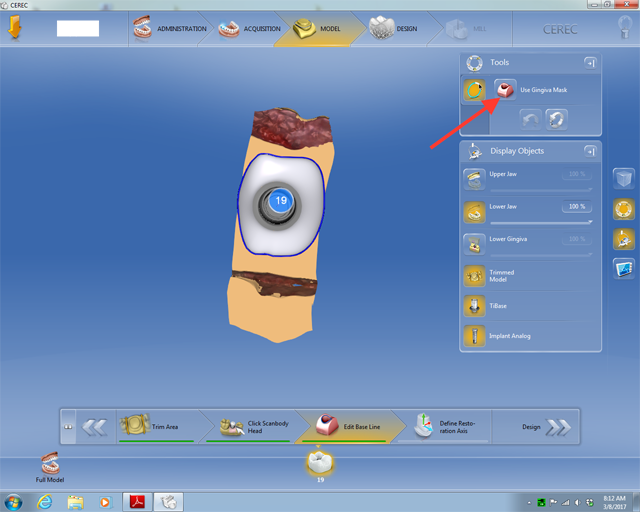
Fig. 5 Fig. 6
5. Verify path of insertion and abutment angle (Fig. 7). Design full contour restoration as usual, for the moment ignoring the sub-gingival areas (restoration thickness, contour, occlusion, contacts) (Fig. 8).
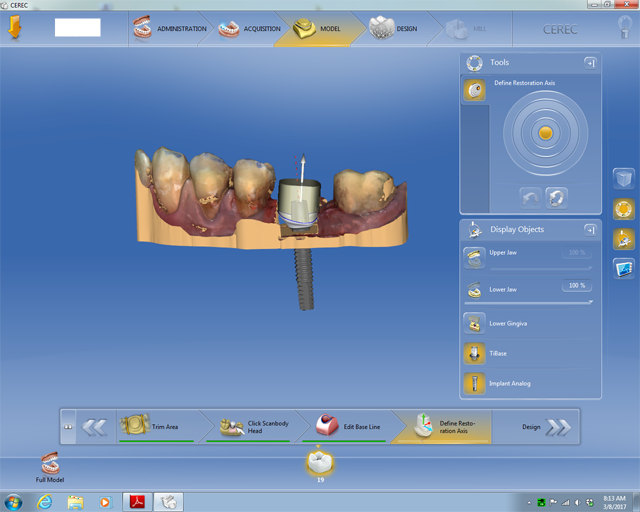
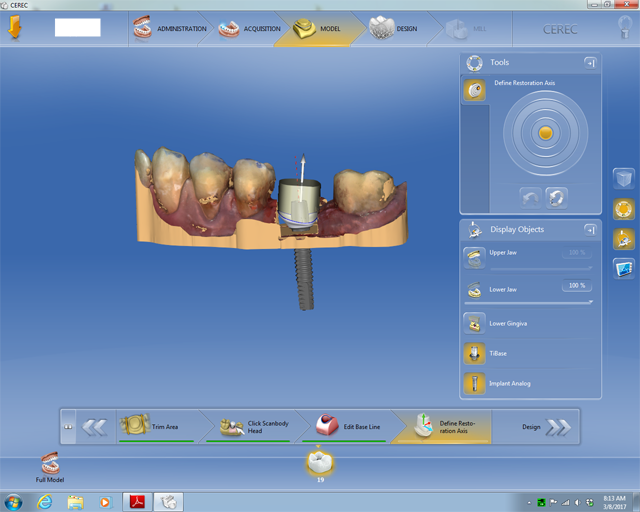


Fig. 7 Fig. 8
7. Under display, remove the model arch that you are working on, and adjust the emergence and contours of the sub-gingival areas so that they are smooth and flowing (Fig. 9).
8. Turn on the gingiva mask folder and make the restoration slightly translucent to evaluate the amount of pressure that will be placed on the tissue (Fig. 10). Any white restoration show-through will be pressure on the tissue. Any tissue show-through will be a void.
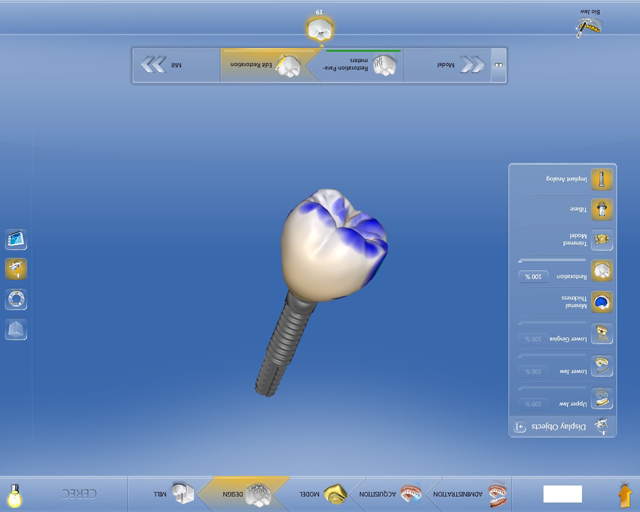

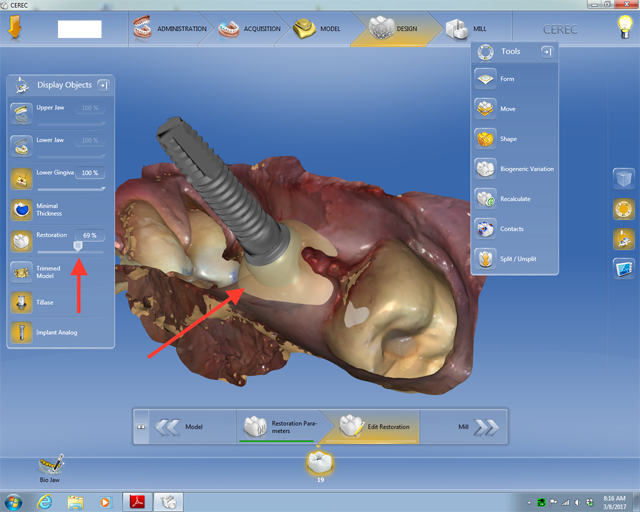
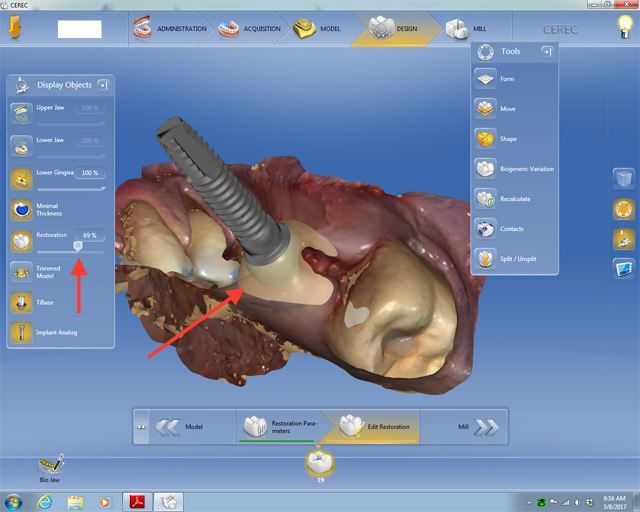
Fig. 9 Fig. 10
9. If there is too much tissue pressure, it may be necessary to do a mid-crestal incision at delivery. When placing, my rule of thumb is that any blanching should subside within approximately five minutes (Fig. 11).
10. After the full contour restoration is designed, proceed to mill. An ENAMIC IS 16 L block in shade 2M2 was selected. Milling time was about 20 minutes (Fig. 12).

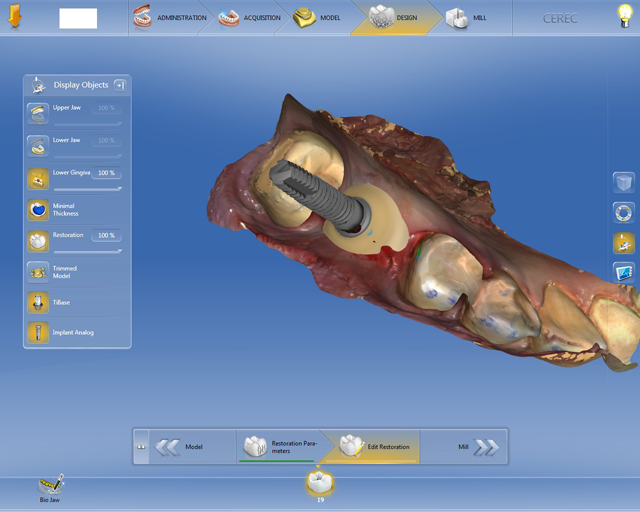
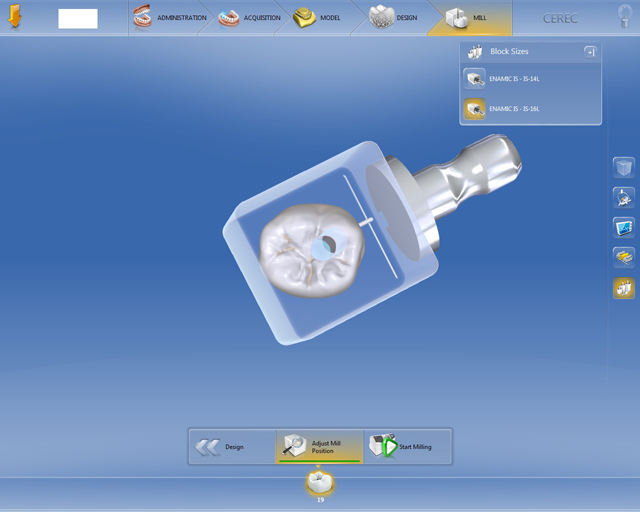

Fig. 11 Fig. 12
11. Remove the sprue and characterize as desired (Fig. 13). Blue and white VITA ENAMIC STAINS were added around the cusps for a translucent effect and brown in the grooves to provide depth. The restoration was then light cured. VITA ENAMIC GLAZE was added on top and light cured (Fig. 14).

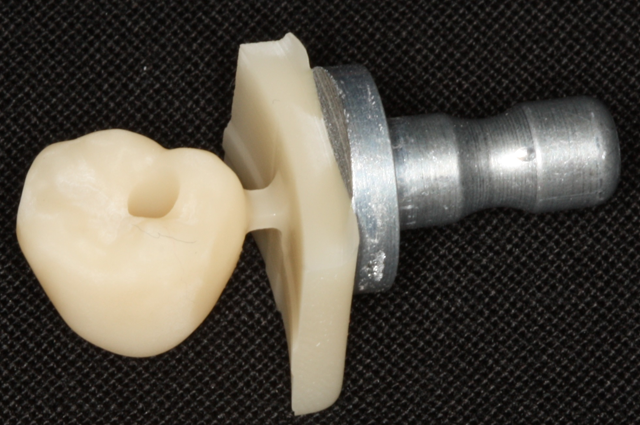


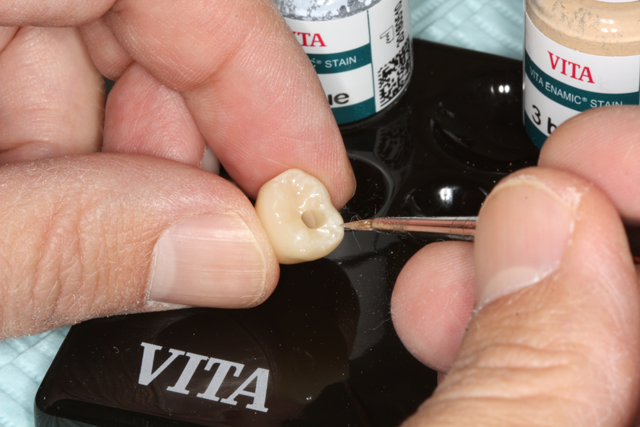
Fig. 13 Fig. 14
12. Bond the finished ENAMIC IS crown to the TiBase. Note in Figure 15 the excellent marginal fit to the TiBase collar.


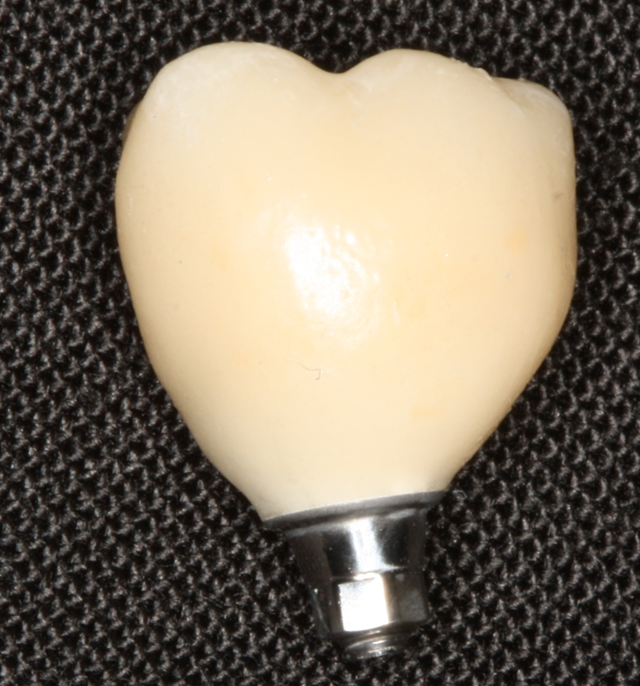

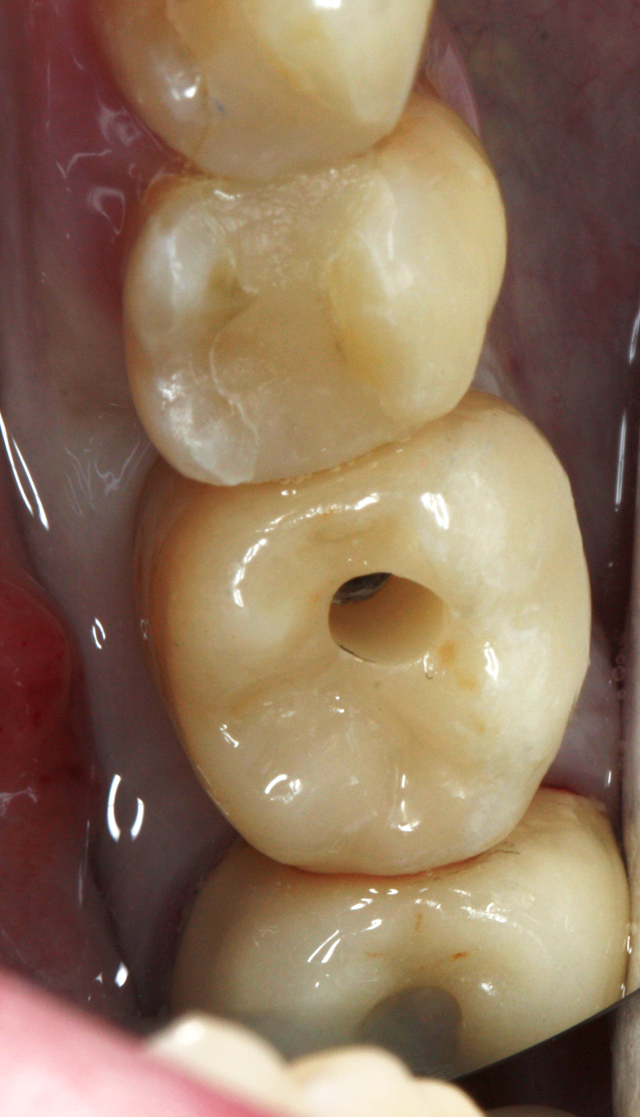

Fig. 15 Fig. 16
13. The crown was torqued into the implant, contacts and occlusion were checked and Teflon placed into the screw access hole (Fig. 16). Composite was placed to close the access hole and the patient was dismissed. Total time from patient being seated to dismissal was an hour and 25 minutes (Fig. 17).


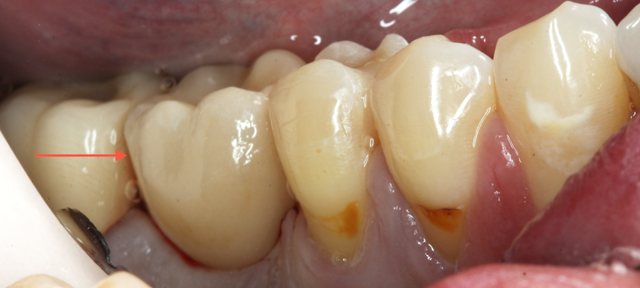
Fig. 17
Result
The finished result shows excellent fit and shade match (Fig. 18). The use of a resilient material on a rigid implant may help distribute forces away from the screw and crestal bone, possibly improving the longevity of the implant and restoration (Fig. 19)


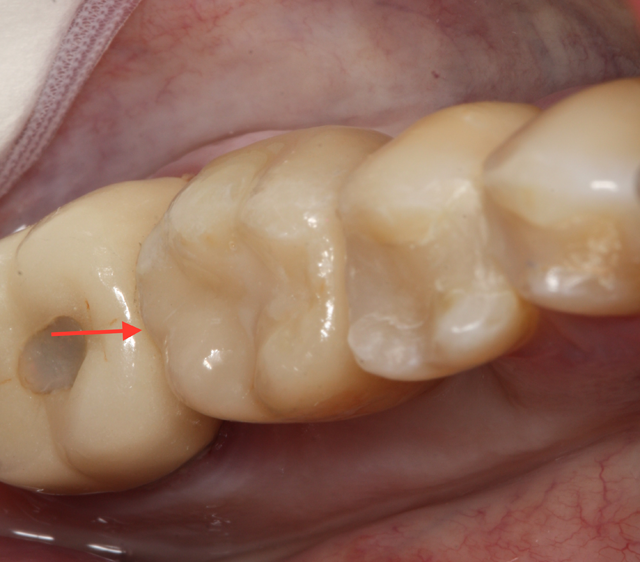

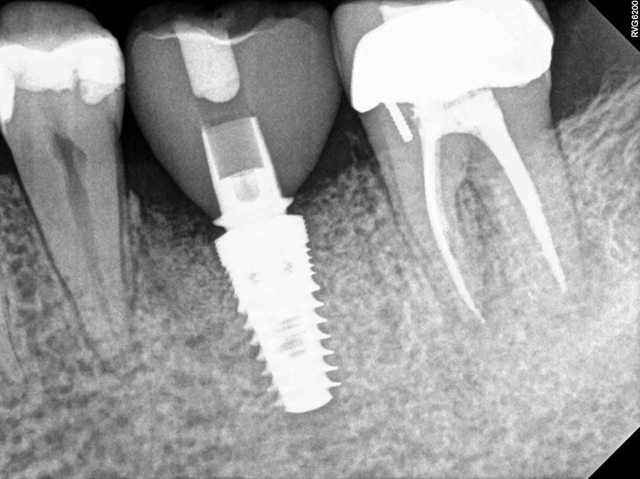

Fig. 18 Fig. 19


