How to create a Class III restoration using the Bioclear matrix with injection molding
The matrix system has evolved, giving even more options for many different types of anterior restorations.


×
Partner Perspectives allows marketers to connect directly with the DPR audience by enabling them to share their content. This content does not necessarily reflect the views of Dental Products Report editorial staff or MMH.
Learn more
Become a partner
A 33-year-old female presented with a classic incipient lesion on the mesial facial aspect of tooth #7. The lesion was visible on X-ray.
We’ve always used traditional techniques for doing day-to-day Class III restorations. Flat mylar tape is the standard way to contain the composite, but this can pose problems depending on the size of the restoration and shape. We would often end up with very flat contact points and contours not replicating the tooth’s natural contours. Metal contoured matrices posed problems in getting an adequate cure as well as too much shape, as most matrices were designed for posterior teeth.
With the introduction of the Bioclear matrix system back in 2009, the solution for anterior restorations changed dramatically. With the use of this matrix, it was easy to contain the composite even in very large Class III restorations while still maintaining beautiful contours that replicate natural tooth structures.
The matrix system has evolved, giving even more options for many different types of anterior restorations from the very simple day-to-day Class III that I will present here to black triangles to very complex diastema closures as well as full facial injection-molded overlays of teeth. We can even beautifully build up a tooth that has been broken above the gumline when using the Bioclear 360 matrix.
Here is the workflow for this Class III restoration.
Fig. 1: Incipient Class III caries on tooth #7, visible on X-ray.
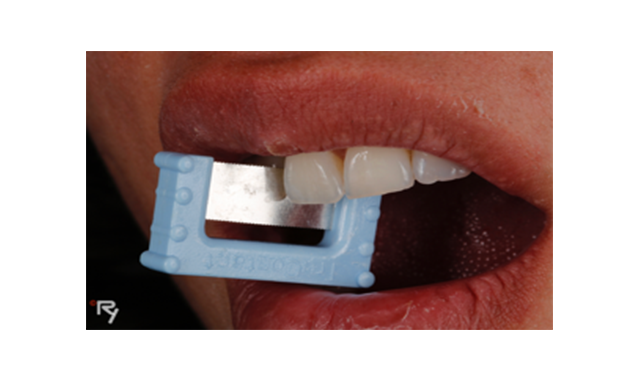
Fig. 2: A ContacEZ saw is taken to clear the contact of any tartar buildup. This is quite common, and if all the contacts are cleared, it makes the placement of the rubber dam much easier.

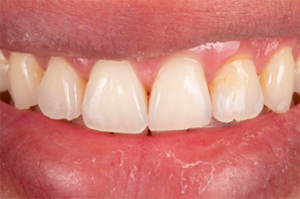


Fig. 1 Fig. 2
Fig. 3: A rubber dam is placed to allow for moisture control and ease of producing a superior bonded restoration.
Fig. 4: A micro-fissure bur from SS White was used to do the initial access prep. A round carbide bur, along with a decay indicator, was used to remove decay. The prep was finessed and a radius bevel was placed using the Brasseler 8833.31.03.
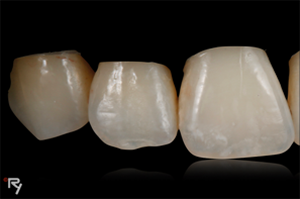

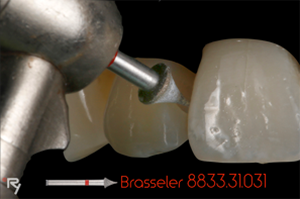

Fig. 3 Fig. 4
Fig. 5: Bioblasting was done by using Bioclear disclosing solutions and the Bioblaster.
Fig. 6: A ContacEZ one-sided sanding strip is used to lighten the contact to aid in placement of the matrix.
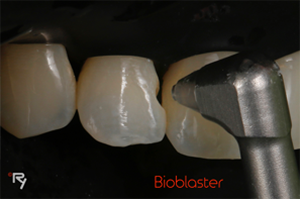

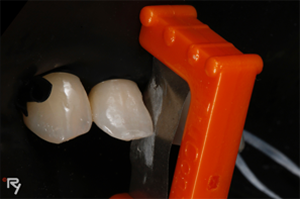

Fig. 5 Fig. 6
Fig. 7: This image shows the finished, cleaned prep with the radius bevel leading out to an infinity margin.
Fig. 8: An appropriate matrix is selected, A103HD, small incisor universal, 0.5 mm curve.


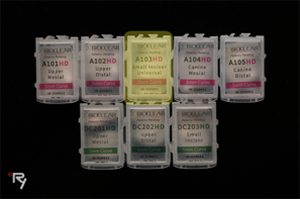
Fig. 7 Fig. 8
Figs. 9a & 9b: The 0.5-mm curved portion of the matrix is cut away, as it’s not needed for this particular restoration. We’re not trying to close a black triangle.
Fig. 10: The bonding procedure is done using total etch with 3M Scotchbond Universal. The bond is gently air thinned and cured.
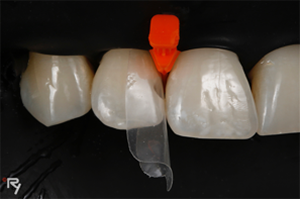

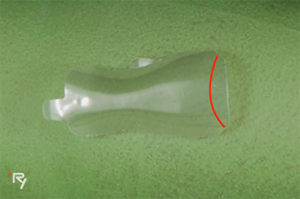

Fig. 9a Fig. 9b
Fig. 10: The bonding procedure is done using total etch with 3M Scotchbond Universal. The bond is gently air thinned and cured.
Fig. 11: A light coat of bond is brushed on the cured bond, but this isn’t cured. It will act as a surfactant for the composite. Filtek Supreme Ultra Flowable B2 is then injected into the matrix. You could heat the flowable for this step. However, I prefer it unheated, as I can control its flow better and create adequate hydraulics.

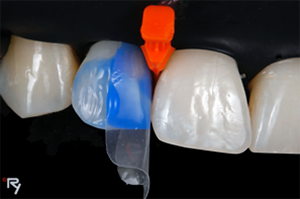

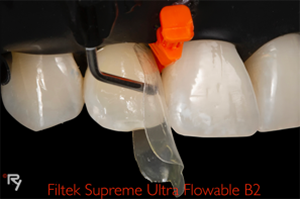
Fig. 10 Fig. 11
Fig. 12: The flowable is followed by heated Filtek Supreme Ultra Composite B2 injected into the flowable causing hydraulics that pushes the flowable back out of the matrix. You over injection mold with the composite, thus creating a sprue that will be cut away after curing.
Fig. 13: After curing the composite from the bucal and lingual for 10 seconds each side, the matrix and wedge is removed. This image shows the sprue that is left. The restoration is then contoured using the 3M soflex disc sequence. Once you’ve achieved the desired contours, use the Rock Star polishing pumice followed by the Bioclear Rock Star polisher used with water.
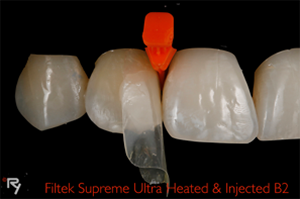


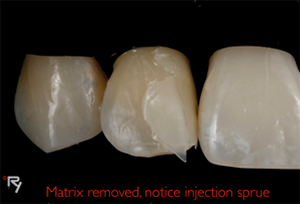
Fig. 12 Fig. 13
Fig. 14: The finished restoration is undetectable and has the anatomic contour in the interproximal that’s ideal. You also have a very high polish on the contact area due to the mylar matrix.

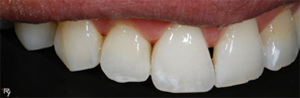

Fig. 14


