10 common direct dentistry mistakes to avoid
There are plenty of ways for something to go wrong, but a little friendly advice and practice can go a long way.
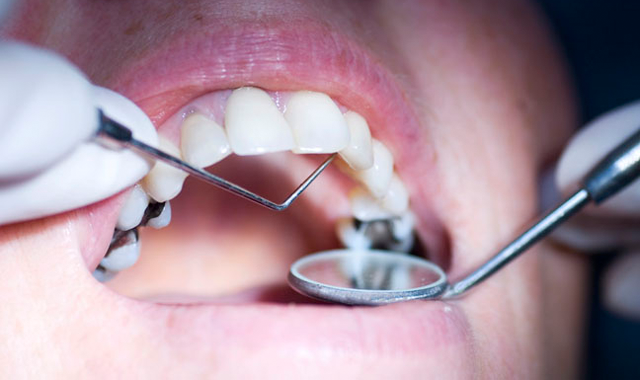
Dentistry is an amalgamation of two equally important disciplines: art and science. It’s not enough to simply slap some composite on a tooth and call it a day. Instead, the doctor must be able to skillfully prepare the tooth and shape the restorative material in such a way that it looks like the tooth never had a problem. But in the pursuit of those restorations, dentists must know the fine details of the materials they are using, use the right tools and hone their skills.


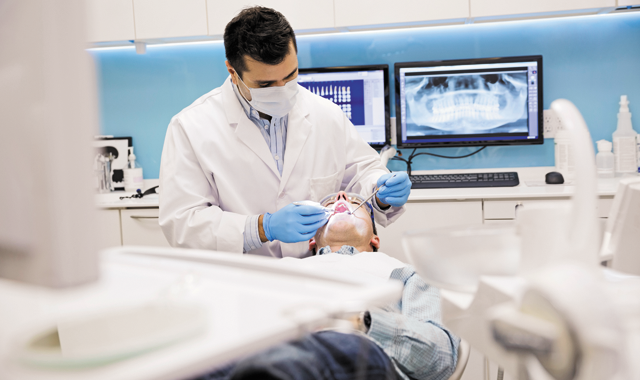
There are plenty of ways for something to go wrong, but a little friendly advice can go a long way. We spoke with doctors about common mistakes made in direct dentistry and how those mistakes can be avoided.
Trending article: Why the future looks bright for 3D printing
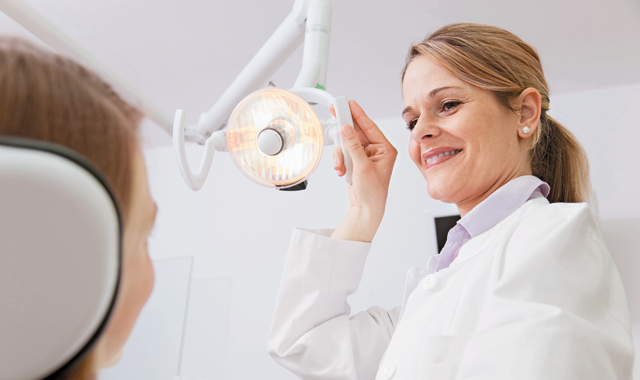
Click through the slides to read more.


Etching and sensitivity
Etching is an important part of adhesive procedures and bonding. It requires some skill and finesse, requiring the clinician to rely on solid technique. If not done properly, complications like sensitivity can arise.
More from the author: 10 easy ways to get CE credit
“When you’re doing a posterior composite and you’re using a universal adhesive, it’s best to just etch the enamel,” says Dr. Robert Margeas, DDS, adjunct professor in the department of operative dentistry at the University of Iowa. “The problem can be, when you’re using a universal adhesive, that over-etching the dentin can cause sensitivity – and that happens when you’re using a strictly universal adhesive, not an etch-and-rinse adhesive. When you’re using a universal adhesive and you over-etch the dentin, that can be a problem. You should just try to keep the etch on the enamel, if possible.”


Isolation
Contamination can lead to undesirable results like staining or even failure. Keeping the area isolated is a key step in contamination prevention.
“So many people are doing composites in adhesive dentistry,” says Dr. John Flucke, DDS, Technology Editor for Dental Products Report. “And one of the biggest mistakes people make when doing composites is isolation. Composites are very sensitive to any type of contamination of any type of biological material. So whether it’s saliva or crevicular fluid or blood or whatever, you have got to figure out a way to properly isolate the field so that you don’t end up with bonding problems down the road. There are a lot of different ways to do that, but if you don’t have a consistent way of maintaining isolation, you’re going to have problems.”
Dr. Flucke prefers rubber dams, especially those with flexible frames.
Related article: The most overlooked steps of direct restorations
“The thing about the rubber dam is that once you get the hang of it, it’s a very easy and good tool to use,” he says. “Most people have a problem with the rubber dam frame.”
Dr. Flucke says he uses Zirc’s Insti-Dam and Hygienic’s Flexi Dam.
“These dams actually have a flexible, plastic frame built into them,” he says. “So you don’t have to mess around with that ridiculous metal frame that makes everything so complicated.”
Another component of contamination prevention is double checking your equipment to make sure it is performing its job as intended. For instance, Dr. Emily Hobart, DMD, a general dentist in Phoenix, Ariz. says that a small, simple mechanical glitch can lead to big problems.
“It is important to make sure that your air/water syringe is not expelling water when you blow air to thin the bond,” Dr. Hobart says. “Mine was doing this for a while and I had to get it fixed.”

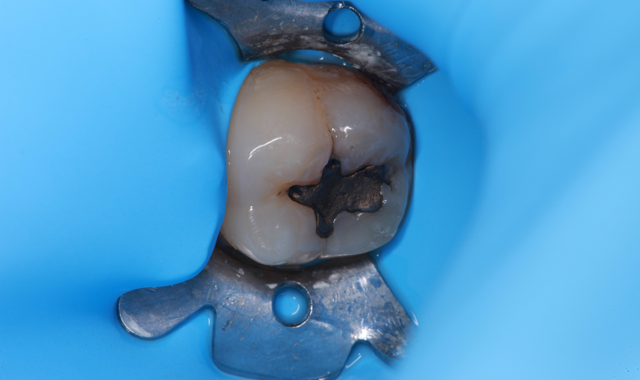
Overfilling bulk fills
Bulk fills are excellent materials for clinicians. They can be used to fill the void in one complete shot, and time is saved because the composite does not have to be laid down one millimeter at a time. However, this doesn’t mean that the size of the bulk fill is without limit.
“When you’re doing a bulk fill, filling it too high and trying to cure too deep (are issues),” Dr. Margeas says. “The increments are not small enough. Usually bulk fills are curable at about 4 millimeters. I see people who are building them up to 5 millimeters and thinking that they are going to cure the bottom, so they’re building them up too high.”
Trending research: Can chewing gum be used to detect gum inflammation?
There are some products, however, that can help when a deeper cure is needed.
“A product from Danville called Bulk EZ,” Dr. Margeas says. “It is a dual-cure bulk fill. So if you can’t get the light all the way down to the bottom, it’ll chemically cure.”
Dr. Flucke also mentions a product called Fill-Up! by Coltene.
“They’re both composites that are light-cure and dual-cure,” Dr. Flucke says. “So if you’ve got a really deep composite, you place these materials, you sculpt them a little bit and you set them with the light, and that sets the initial 2 millimeters or so that’s on the outside of the tooth. Shortly after that, you can go in and refine and polish and get your bite right, and, meanwhile, there’s a chemical reaction that causes the other parts of that material to set, whether the light hits it or not.”


The right light
For light-cured composites, precise lighting is necessary. Not just any curing light will do, and it is incumbent on the doctor to make sure that it is properly maintained.
“Make sure that you have a really good and reliable curing light,” Dr. Flucke says. “A lot of people don’t monitor their lights. You can use a radiometer to check its output. A lot of people in dentistry figure if they just point the curing light at a restoration, hit the button and the light turns on, that they think that they’re home free. But that isn’t always the case. There are a lot of lights coming in from China that are very inexpensive, but nobody knows anything about them. Nobody knows if the blue color is the right color because it’s a very specific wavelength of light that you need.”
More from the author: 7 ways poor infection control can endanger your practice
And the right curing light can also make your work more efficient.
“A good light with high intensity means that you can cure faster,” Dr. Flucke says. “And, depending on your situation from an isolation standpoint, sometimes when you’ve got somebody who really salivates a lot, being able to set the materials faster saves you the problems with contamination.”


Under-curing
Another common mistake, Dr. Margeas says, is not light-curing composites long enough, and there are a few reasons why a composite isn’t properly cured.
“Under curing composites is a problem,” Dr. Margeas says. “Not curing them long enough, not having a light right on top of the restoration, and having it too far away or at an angle can be a problem.”
Proper maintenance of equipment is especially important. It is a common source of problems, but also easy enough to ameliorate.
Related reading: 7 things you may not know about universal adhesives
“You need to check your lights because the output might not be high enough to cure the composites,” Dr. Margeas adds. “You may get debris on the end of the tip that will scatter the light, and that can be a problem.”
And, for some practitioners, taking a hands-on approach is a good way to ensure the restoration has been properly cured.
“I like to make sure that I cure my composites instead of my assistants to make sure that the curing light is directly on the restoration,” Dr. Hobart says. “Sometimes the assistant can't exactly see where they should be curing.”


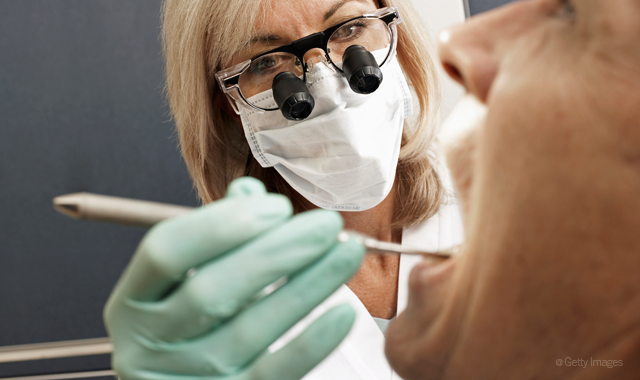
Magnification and lighting
It’s almost a no-brainer, but it needs to be said: To do the best job, doctors must be able to see what they’re working on. To that end, adequate light and magnification are critical.
“When you can see everything magnified, you can see the mistakes that you’re making and rectify them more easily,” Dr. Flucke says. “You can work faster because you can see so much better. And being more efficient is a great thing because nobody wants dentistry to take longer. Everybody wants it as quickly as possible because nobody likes being the patient, and I certainly don’t blame them for that. When you combine the magnification with the lights, make use of a headlight or a nose light, everywhere you look the light follows, so I never have to adjust the track light.”
Trending article: Best of Class Technology Award winners announced for 2017
Problems, such as contamination, are also easier to see and correct.
“The lights help to see so much better, and then the magnification – when you combine them – helps you see if there’s blood in the prep or saliva, which is harder to see,” he observes. “Those two components, working together, let you work faster. And, once again, when you’re trying to fight the contamination issue, being efficient in how we are working is just going to give you a better result.”

Over-drying
It may seem counterintuitive, but surfaces to be bonded require a small amount of moisture for best adhesion.
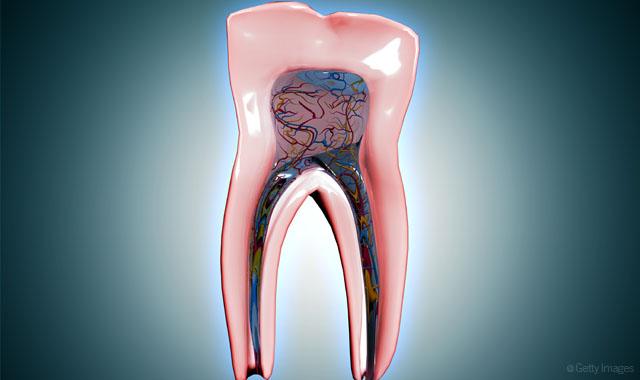
Etching provides a mechanism for bonding agents to adhere to tooth structure. On enamel, etching provides a microscopic pattern that allows mechanical retention to the tooth structure. On dentin, it removes the smear layer, opens dentinal tubules and exposes collagen fibers. But once the etchant has done its work, it must be rinsed off and suction dried to remove excess water. This allows the doctor to see the etch pattern in the enamel, but does not over-dry it. Care must be taken to ensure that the surface is still slightly moist. If the surface is too dry, then the bonding agent will not adhere properly to the dentin or the enamel.
Read more: Why better adhesion means happier patients
If the surface is over-dried, then other problems can occur.
“When you rinse the preparation and then you’re ready to put your adhesive on, if you’re over-drying it can cause sensitivity,” Dr. Margeas says.

Composite warmers
The ability to easily handle composites makes the job of restorative dentistry so much easier. One way to simplify the task is by using a composite warmer.
More from the author: 5 new workflows that are now possible
“Composite warmers hold your composites, whether it’s in a cartridge form or syringe form, and they warm them,” Dr. Flucke notes. “The nice thing about it is that a warm composite is easier and quicker to place. Some studies have been done that show that you get a better cure. The warm composites do a great service as far as making them easier to place, which allows you to work more efficiently. The other thing is that dentists with small hands or a weak grip sometimes have a hard time squeezing the composite gun. The composite warmers make a really big deal with that.”

Supplemental etching
One of self-etching’s biggest selling points is that it is an all-in-one etching solution. However, Dr. Flucke observes that for best results, additional etching actually is needed.
“Even if you are using a self-etching system, it is still necessary to etch the enamel with phosphoric acid,” Dr. Flucke says. “A lot of manufacturers came up with the self-etching systems and they said, ‘Oh, you just rub it on this tooth and you’ll be fine.’ Well, now they’ve kind of come out and said, ‘You know, it might not be a bad idea to squirt some of the phosphoric acid, just like you used to do, on the enamel because that probably provides you with a little bit better bond.’”
Trending research: Can a green tea extract help prevent cavities?
What happens, he says, is that manufacturers are eager to get products to market and discover even better results after the product has been in the field for a while.
“A lot of times, when manufacturers come in with things and give you the directions, the dentist will just say, ‘Okay, I’ll just do what the directions say.’ Then we all find out over time that, for instance, patients would come back in six months to a year and people were seeing staining around the margins. And the problem is the bond strength on these universal systems just aren’t as strong as the bond strengths if you do a total-etch and then bond fifth generation. The reason for that staining was the fact that the bond strength was pretty low and things could get down in the nooks and crannies at the margins.”

Technique
Ultimately, it comes down to the doctor’s skill and ability. A doctor could have the best products or tools in the world, but if his or her skills are subpar, so too will be the results.
Related article: 3 ways mishandling adhesives contributes to restorative failure
“It’s all about technique,” Dr. Margeas says. “Technique is really critical. I’ve always said, ‘The magic is not in the magic wand, it’s in the magician.’ If you have good technique, you can use a lot of products that will work, but if you have bad technique, it’s not going to overcome any of the products. It comes down to technique.”


