Technique: Placing multiple veneers at the same time with amazing esthetics
Dr. Ross Nash shows a technique to place multiple veneers simultaneously with excellent esthetics, using some products from Dentsply Sirona.
For many years, I have been using multiple placement techniques in placing porcelain veneers. I first saw it illustrated by the late Dr. Robert Ibsen in the early 1980s. I watched Dr. Larry Rosenthal demonstrate multiple veneer placement on patients during our Ultimate Esthetic Practice continuum in New York City in the early 1990s.


While placing veneers one or two at a time can be effective, I find that it takes me longer and involves more adjustment. It is possible to place up to 10 veneers at once. For veneers on the ten teeth from second premolar to second premolar, I usually place six, two and two simply because of the field of view.
Related: How to color match with porcelain laminates
The process
The placement process involves enamel etching, placement of a bonding agent, treating the internal etched surfaces of the veneer with a silane primer, placement of luting composite on the internal surfaces of the veneer, delivering the veneer to the tooth with cotton pliers or other instrument, lightly pressing the veneer to place with an instrument or finger, adding the other veneers one by one, removing excess resin with a brush where needed, tack curing, removing proximal and marginal excess where possible, final curing, removal of excess luting resin with carbide finishing burs and polishing.
Click the next button to go step-by-step ...


Fig. 1 Laminate veneers photographed on a mirror surface
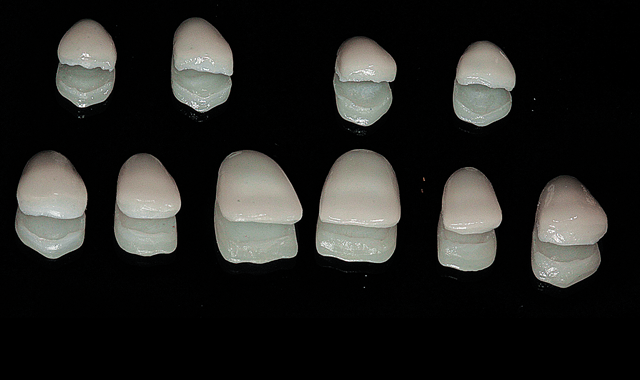
Fig. 1 Laminate veneers photographed on a mirror surface
A new technique for me
Recently, I watched a YouTube video where Dr. Michael Apa of New York City illustrated a multiple placement technique using a flowable composite as the luting agent and placing it directly on the teeth instead of inside the veneer. When I tried the technique, I found it to be more efficient than the technique I outlined above. The fact that the veneer can be carried to the mouth dry reduces the possibility of mishandling or dropping.
Step-by-step: How to create an esthetic smile with design principles
Not all composite resin cements are suited for this technique. Some are too viscous and some have too short a working time in ambient light. I found Calibra, by Dentsply Sirona, an ideal material for this process. Its viscosity is flowable in nature and it possesses a “stay-put” property that allows the restoration to stay in place for clean up before curing. Figure 1 shows ten ceramic laminate veneers ready for placement and photographed on a mirror surface.


Fig. 2 The prepared teeth, facial view
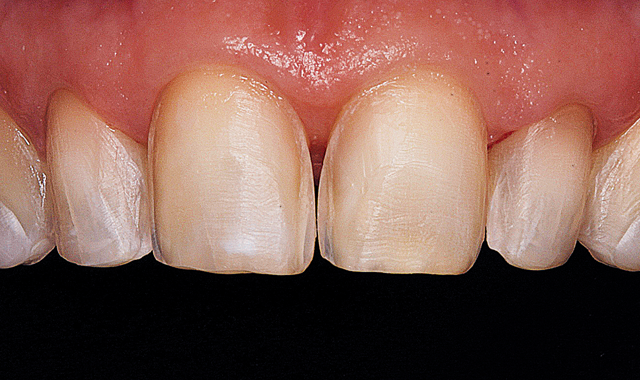
Fig. 2 The prepared teeth, facial view
The six prepared maxillary anterior teeth are shown from the facial view in Figure 2. All eight laminates were tried in using try-in paste (Calibra, Dentsply Sirona) and they were approved by the patient. The try-in paste was thoroughly rinsed out and a silane primer (Dentsply Sirona) was applied to the etched internal surfaces of the laminates.

Fig. 3 Etching gel placed with syringe
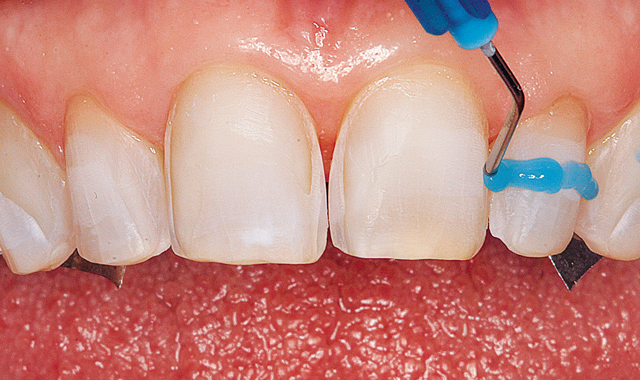
Fig. 3 Etching gel placed with syringe
It was decided to place the six anterior veneers at once and then the two premolar veneers together one side at a time. Metal inter-proximal matrixes were placed distal to both canine teeth to protect the adjacent premolars from the adhesive chemicals. A line of phosphoric acid etching gel (Dentsply Sirona) was placed on the prepared surfaces using a syringe (Fig. 3) and quickly brushed across the surfaces allowing it to dwell for ten seconds before thoroughly rinsing with water from an air/water syringe and lightly air drying.

Fig. 4 Bonding agent applied
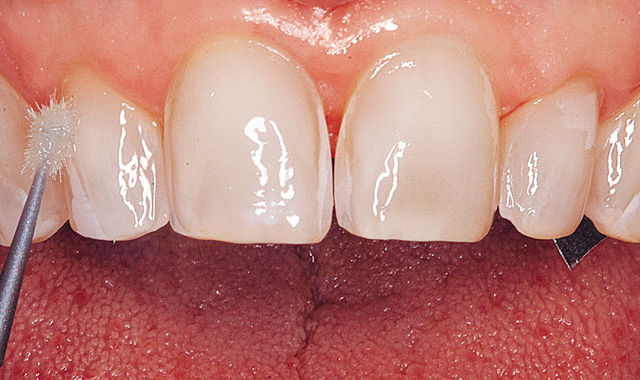
Fig. 4 Bonding agent applied
At this point, a bonding agent (Prime & Bond NT, Dentsply Sirona) was liberally applied to the prepared and etched surfaces (Fig. 4) and blown thin with air from an air/water syringe.

Fig. 5 Bonding agent light cured
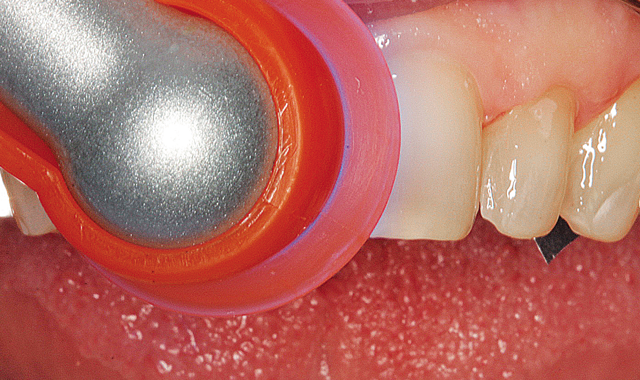
Fig. 5 Bonding agent light cured
The bonding agent was light cured with a LED curing light (SmartLite Focus, Dentsply Sirona) for ten seconds per tooth (Fig. 5).

Fig. 6 Calibra luting composite syringed onto tooth surfaces
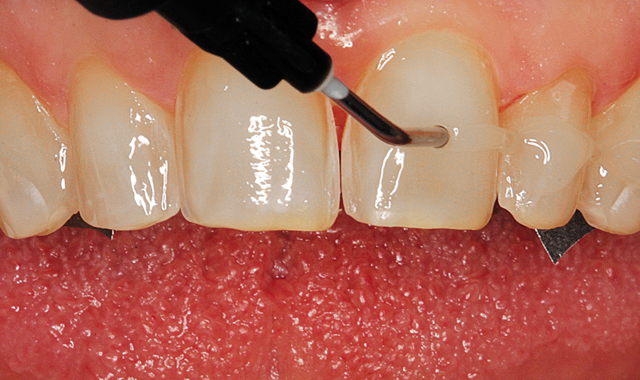
Fig. 6 Calibra luting composite syringed onto tooth surfaces
Calibra light cured luting composite was delivered to the prepared tooth surfaces with its syringe tip (Fig. 6).

Fig. 7 First laminate placed
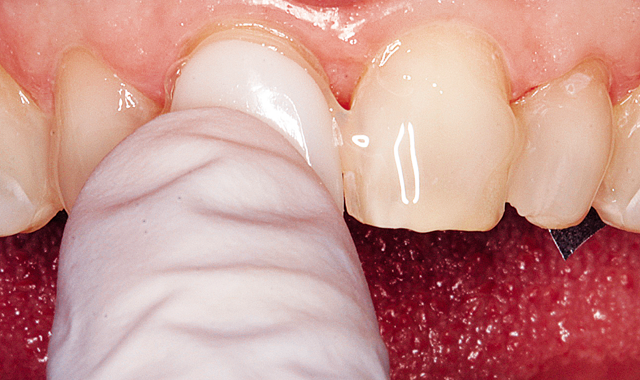
Fig. 7 First laminate placed
The right central incisor laminate was placed on the tooth surface (Fig. 7). Each additional laminate was placed (Figs 8 & 9).


Fig. 8 Additional laminates placed
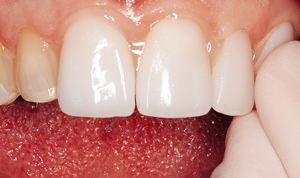

Fig. 9 Final of six laminates placed
An instrument was used to lightly press each veneer to place (Fig. 10). A brush was used to remove excess luting composite at the marginal areas (Fig. 11).

Fig. 10 Instrument used to seat laminates
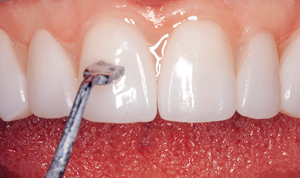

Fig. 11 Brush to remove excess resin cement at margins
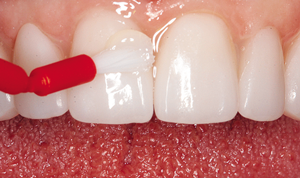

Fig. 12 Instrument used to verify seating
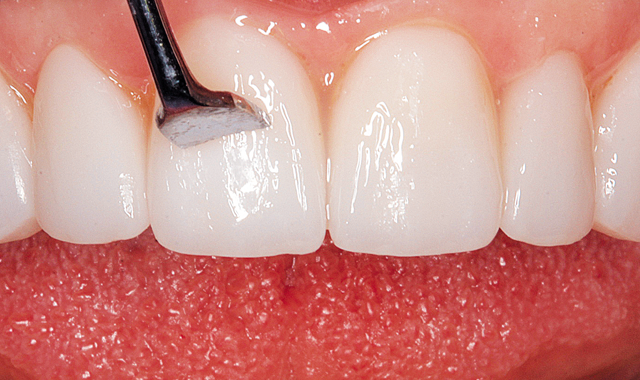
Fig. 12 Instrument used to verify seating
The metal matrix strips were removed from the inter-proximal areas distal the canines. The instrument was again used to verify the seat of each laminate veneer (Fig. 12). The “stay put” property of Calibra aids in the positioning.

Fig. 13

Fig. 13 "Tack" cure for two seconds
The LED curing light was used to “tack” the laminates to place with a quick two second burst of light (Fig. 13). Floss was used to remove excess proximal composite at this stage. A number 12 surgical blade was used to aid in removing inter-proximal excess.

Fig. 14 Finish light cure

Fig. 14 Finish light cure
Final light curing for 10 seconds on facial and lingual surfaces of each laminate finished the cure (Fig. 14). The premolar veneers were applied in the same fashion.

Fig. 24 Enhance cup polishes margins
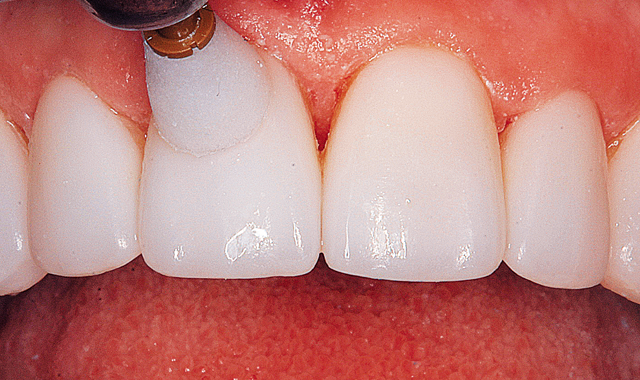
Fig. 15 Enhance cup polishes margins
A small carbide finishing bur was used to remove excess cured luting composite at the margins. An Enhance Cup (Dentsply Sirona) was then used to polish all margins (Fig. 15).

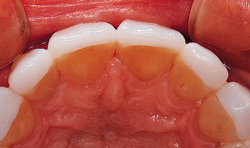
Fig. 16 Final result, incisal view

Fig. 16 Final result, incisal view
Figure 16 shows the incisal view of the six anterior laminate veneers in place. The facial view of the finished case can be seen in Figure 17, below.
Conclusion:
With this technique, I found that my delivery time and clean up was less than for my previous process. I found the Calibra kit with try-in pastes, multiple colors of luting composite, silane primer and phosphoric etching gel a complete system for placing laminate veneers. The viscosity allows for the above technique with direct placement on the prepared teeth. The material has a “stay put” property that assists in multiple placement.
Restorations provided by daVInci Dental Studios

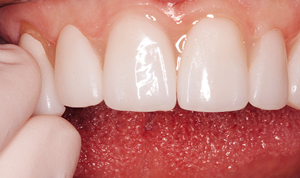
Fig. 17 Facial view of final result
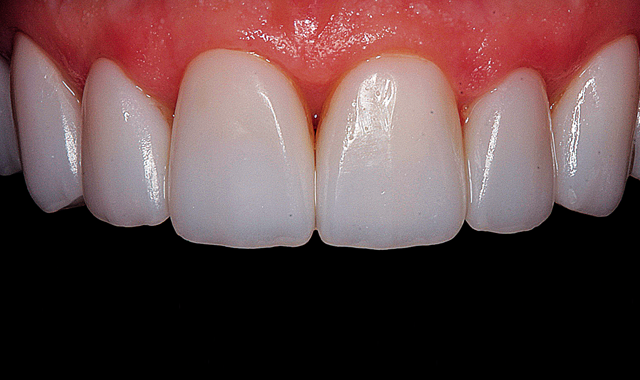
Fig. 17 Facial view of final result


