How to use the 3M™ True Definition Scanner for Invisalign® Treatment
A look at how how incorporating digital impressions can help streamline your Invisalign workflow.


In my restorative practice, I use Invisalign® to improve esthetics, occlusion and periodontal health. It sets the stage for optimal restorative design-improving arch form, tooth alignment, occlusal landmarks, inter-occlusal space and gingival tissue levels.
I also utilize digital impressions with the 3M™ True Definition Scanner, which provides many benefits leading to faster, easier and better outcomes.
Digital impressions are faster because they take less chair time (no waiting for materials to set, no retakes), cases are uploaded to Align the same day, and ClinCheck® and aligners are received sooner. The scans make the process easier by being more comfortable for patients, offering a simplified, fully digital workflow and requiring less staff time (no disinfecting impressions, no paperwork, no packing and shipping of cases).
Lastly, in my opinion, the results are just better for many reasons. My patients have an improved perception of our state-of-the-art practice. The process is ‘greener’ and less expensive with no impression materials, trays, adhesives, packaging materials and shipping costs. Digital impressions with the True Definition scanner are extremely accurate and more consistently accurate than with other scanner systems (especially when teeth are mobile, such as during orthodontic treatment). Put this all together, along with a Trusted Connection for Invisalign cases, and you have a more efficient process with less chair, doctor and staff time.
In my practice we use the True Definition scanner for initial Invisalign treatment, mid-course corrections, refinements and Vivera® retainers. It’s a simple process using digital impressions: just complete the True Definition scanner prescription to send the scans

Fig. 1
to Align, and then complete the Invisalign prescription with the uploaded scans. The following case illustrates the many benefits of using the True Definition scanner with Invisalign.
Case study
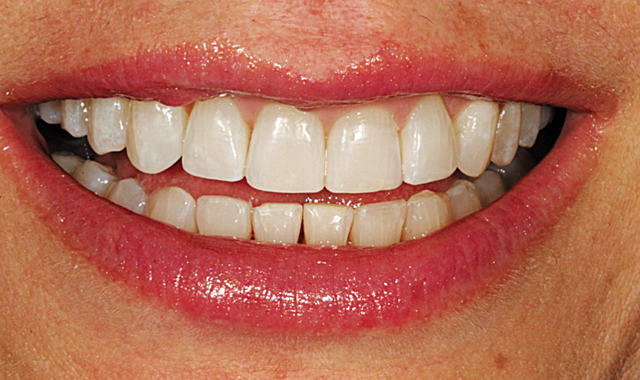
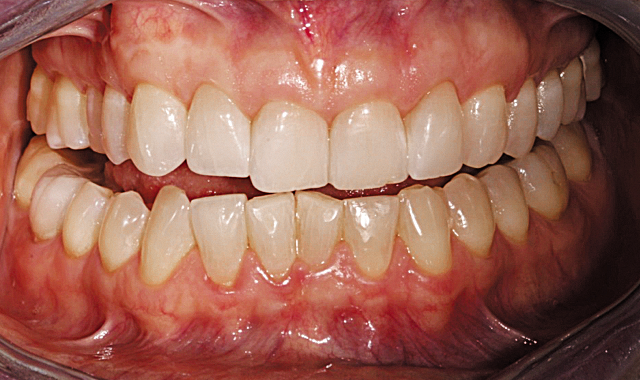
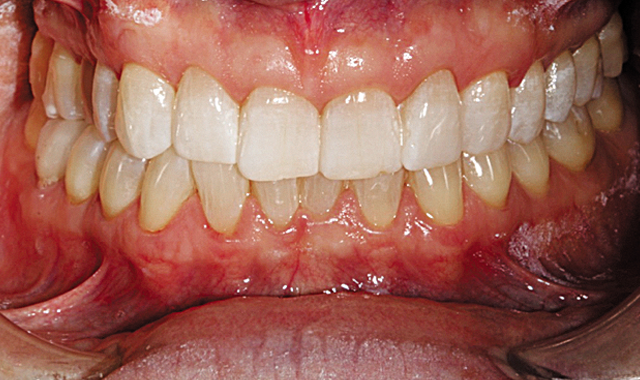
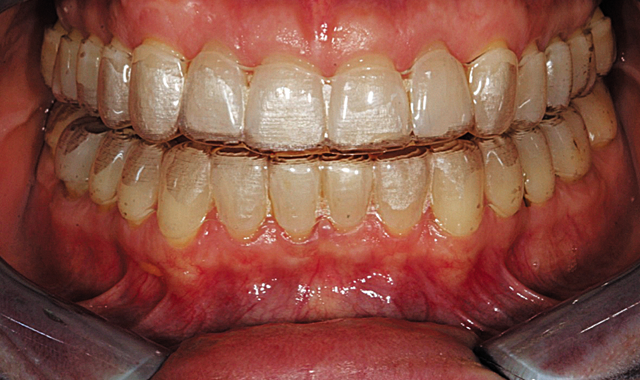
This patient presented with concerns over the esthetics of her smile due to the shifting of her teeth over time (Figs. 1-3). We diagnosed crowding and asymmetry of her teeth and gingival tissues. Our treatment plan included Invisalign treatment, occlusal equilibration after orthodontics and Vivera retainers.

Fig. 2
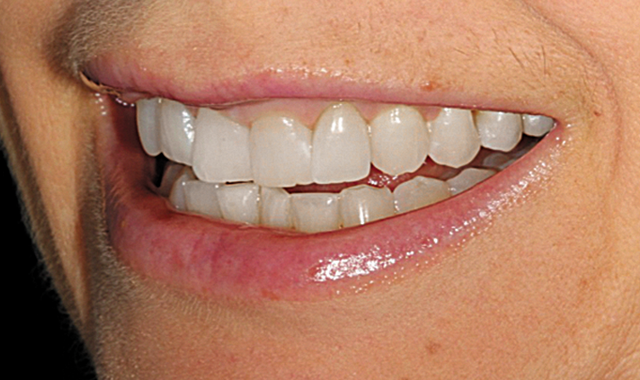

Fig. 3
The workflow for an Invisalign case using the 3M™ True Definition Scanner begins with the initial comprehensive exam, X-rays and photos. It’s important to take photos in occlusion as a reference point as Align uses the photos for the virtual articulation of the case.

Fig. 4
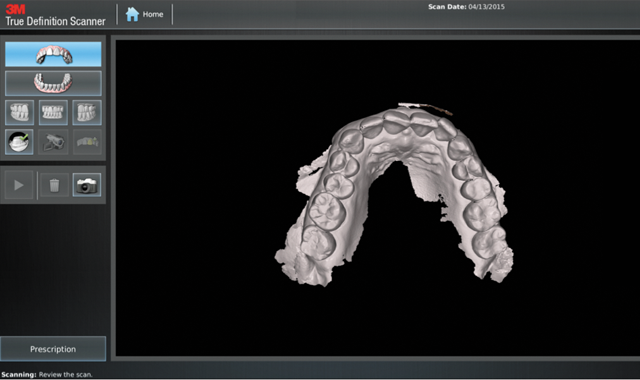

Fig. 5
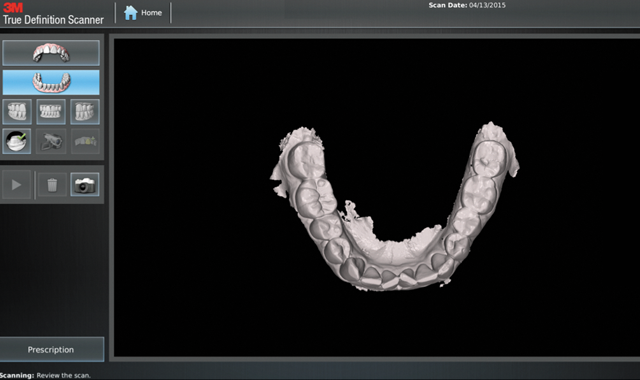
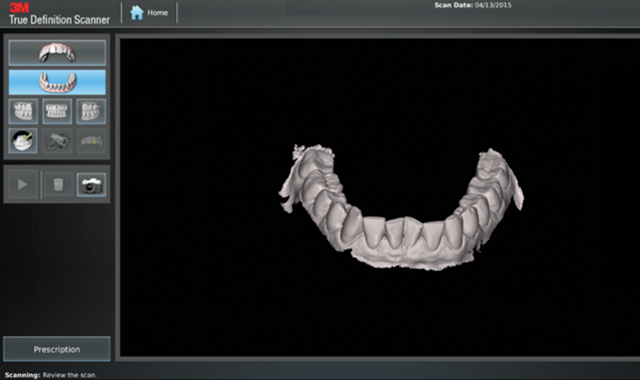
We scanned the upper and lower arches capturing all incisal edges, occlusal surfaces, interproximal embrasures, distals of terminal molars and 3 mm of gingival margins (Figs. 4-7). There was no need to scan the bite. We submitted the scans to Align by completing the prescription on the True Definition scanner (Fig. 8).

Fig. 6
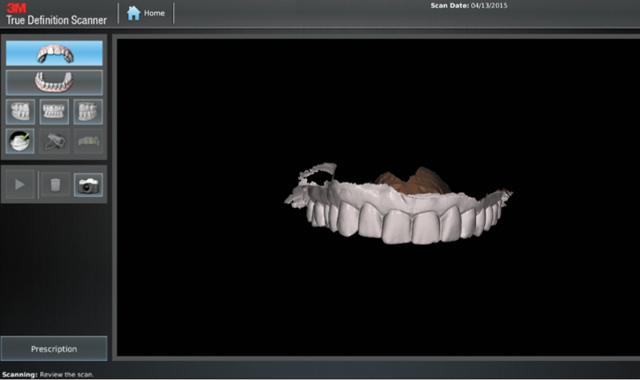

Fig. 7
We then completed the Invisalign prescription online via the usual process:
- Log on to www.Invisalign.com
- Begin prescription as usual
- Upload photos and X-rays

Fig. 8
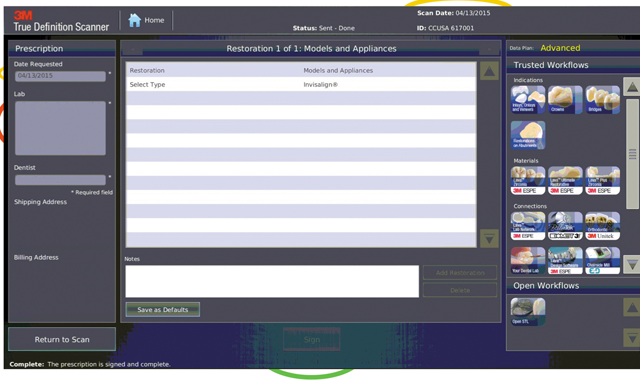
Of note, at this point in the procedure, is how much faster you can move the case along. Within 10 to 90 minutes of signing the True Definition prescription, the scans are uploaded into the Align system, and the Invisalign prescription can be completed as follows:
- Select “intraoral scans” on the impression page of the Invisalign prescription, and then select the patient’s scans once you see them on the screen (Fig. 9).
- Complete the Invisalign prescription
- Click “submit” to send prescription to Align
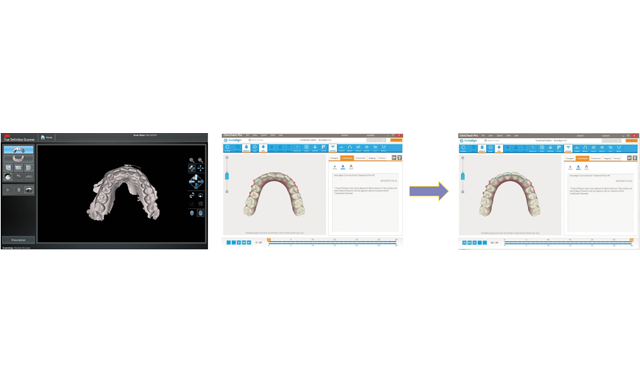
- Look for your ClinCheck® in a few days and continue with treatment as usual (Fig. 10)

Fig. 9
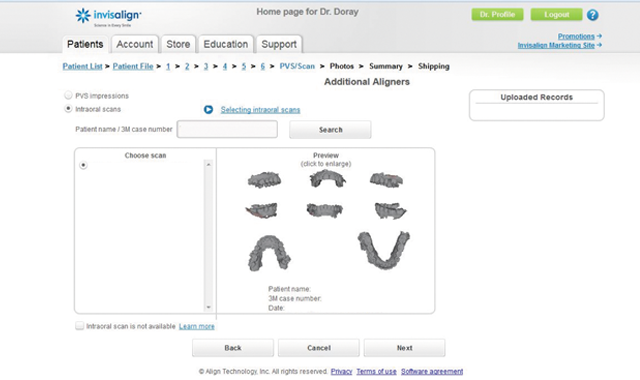

Fig. 10
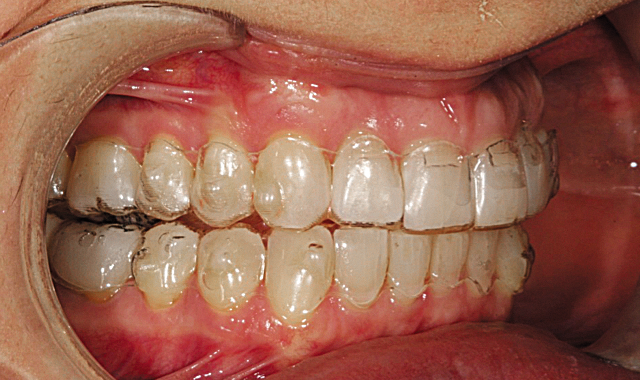
This particular case called for 29 upper and lower Aligners. Aligner fit was perfect and along with a very compliant patient the treatment progressed very smoothly. Pictured here are aligners #27 illustrating the accurate fit throughout treatment (Figs. 11-13).

Fig. 11
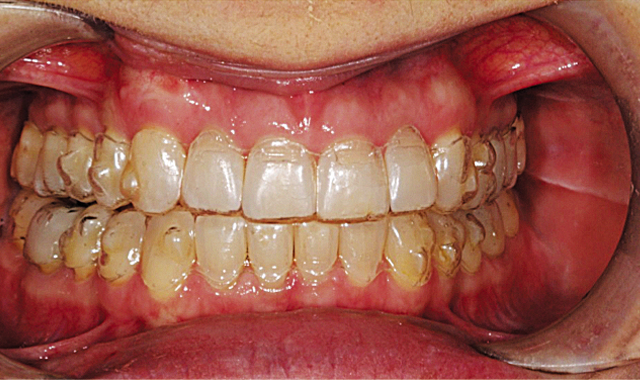

Fig. 12
Our Invisalign treatment led to a very successful clinical result. The crowding and the asymmetries of tooth position, arch form and gingival levels were beautifully corrected (Figs. 14-16).

Fig. 13
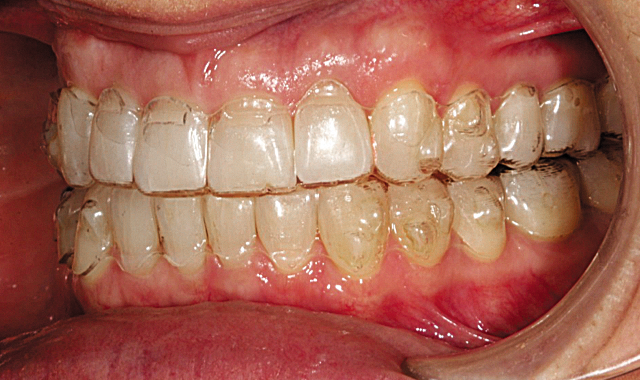

Fig. 14
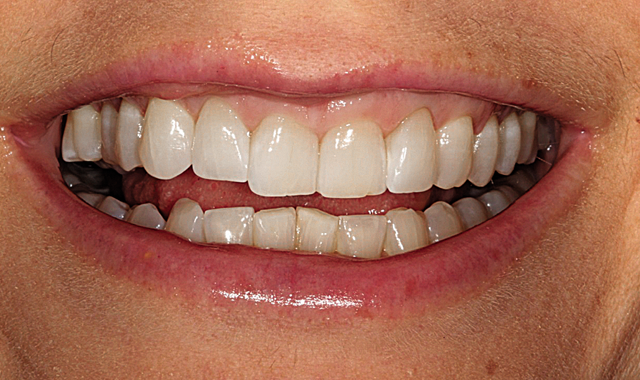
Fig. 15

Fig. 16
Once the initial Invisalign treatment was completed, we again took digital impressions of the upper and lower arches with the True Definition scanner and submitted the scans to Align, then completed an Invisalign prescription online for Vivera retainers. Within a week we received very accurate upper and lower Vivera retainers (Fig. 17).
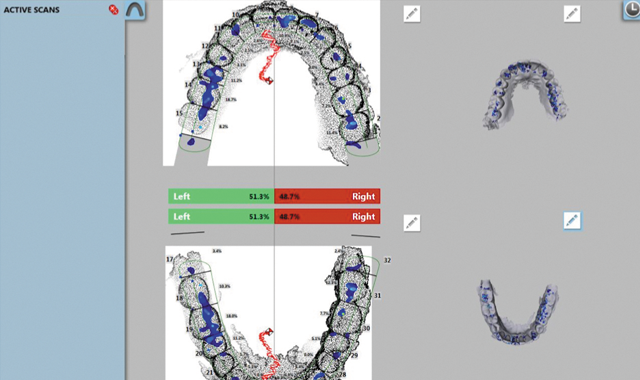
We also were able to import the same final True Definition scans into the patient’s file in our T-scan software. The T-scan® Computerized Occlusal Analysis System provides a measurable assessment of occlusal contacts, including the precise timing of contacts and the precise force data on contacts. It also provides a measurable assessment of disclusion time and excursive contacts. We find that T-scan is a valuable tool for reliably assessing occlusion and completing occlusal equilibration. We used the True Definition scanner to optimize this occlusal analysis by overlaying the True Definition scans over each arch in T-scan (Fig. 18). This allowed us to precisely adjust the tooth widths in the patient’s arches for a more accurate occlusal analysis and equilibration. We met our treatment goals for correcting the esthetics, crowding and asymmetry, and completed the equilibration and Vivera retainers to ensure stability of our beautiful result.

Fig. 17
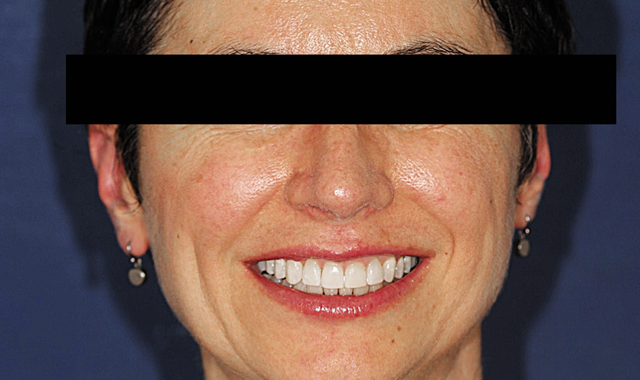

Fig. 18
Conclusion
In closing, dentistry is at such an exciting time right now. We have the opportunity to use many incredible technologies in our practices that help us achieve faster, easier and better dentistry. Intraoral scanning is one of the ways that a practice can easily enter into the arena of digital dentistry. The benefits I outlined at the beginning of this article, combined with affordability, portability (3M recently launched a mobile tablet-based version of the True Definition Scanner) and ease-of-use, make the adoption of this technology a simple decision. It fits your budget, your practice and now, even your hands.