How to simplify overdenture treatment for today’s patients
When it comes to dentures, function is just as important as form - so how do you make both happen?
As the population range from 50 to 70 (Baby Boomers) years of age increases, the number of edentulous and partially edentulous patients will increase, since tooth loss and age are related. There are several reasons for the necessity of needing extractions leading to full-mouth edentulation, including neglect, severe wear, rampant caries, medications and poor health.
Once converted to dentures, the effects of ill-fitting or non-retentive dentures become evident. Overdentures, utilizing small or traditional implants, offer one cost-effective solution that restores proper form and function to these patients.
A patient in her early 60s desired implants placed in her upper arch for denture stabilization, since she had already experienced the benefits of an overdenture in the lower arch. She was so pleased with her lower overdenture that was stabilized by two conventional sized implants that she was now financially ready to have implant treatment in the upper arch.
Case study
Palpation and radiographic examination revealed a moderately sized maxillary ridge in the anterior portion (Fig. 1) that would only provide sufficient height and width for small diameter implants. However, in the posterior sections there was insufficient bone due to the pneumatization of the sinus cavities. All risks, benefits and alternatives regarding various treatments were discussed with the patient. After a thorough discussion of treatment options, the patient decided she would like to have four dental implants placed in her premaxilla region that would retain a metal-reinforced, palate-free maxillary denture.


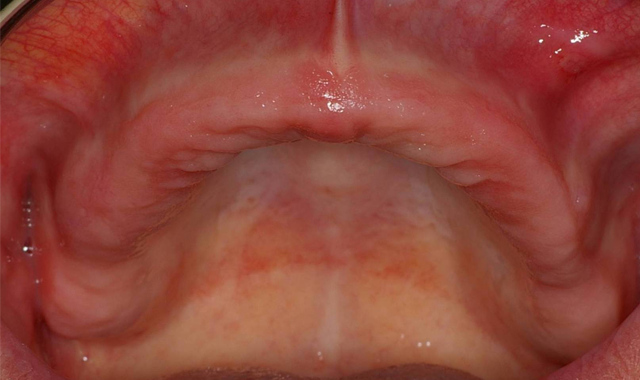
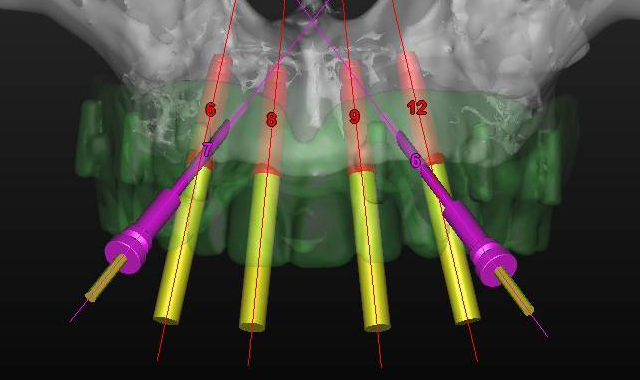

Fig. 1 Fig. 2
Using the CS 8100 3D (Carestream Dental), a CBCT scan was taken to accurately treatment plan this case to make certain that no complications would arise from the conservative non-flap approach of placing dental implants. Using 3DDX virtual assistance to precisely plan the placement of four 3.25-by-12 mm EngageTM (OCO Biomedical) dental implants in the anterior portion of the pre-maxilla area, a treatment plan was devised (Fig. 2).

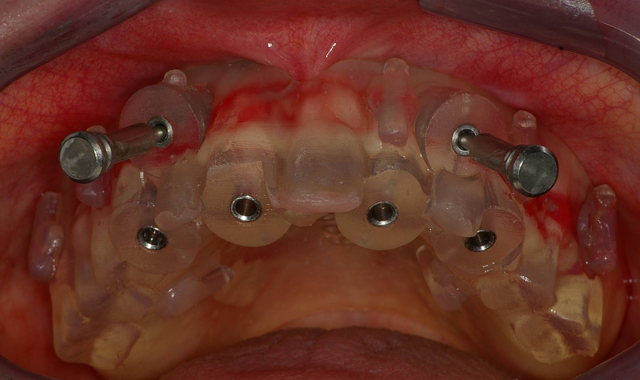

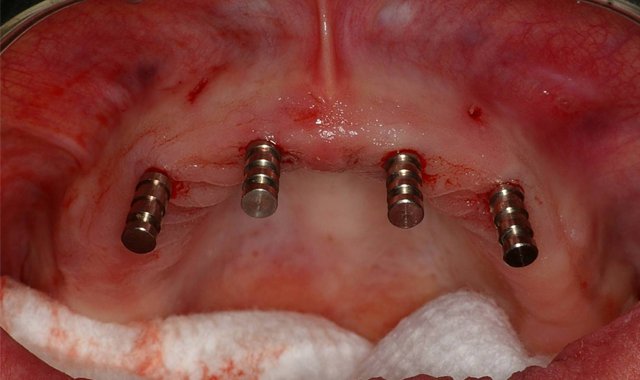
Fig. 3 Fig. 4
Within a couple weeks, the CT-based pilot surgical guide (3DDX) was received in our office and tried in for verification of proper fit. The area was anesthetized and the sites for the implants was initiated with a 1.95 mm pilot drill through the surgical guide (Fig. 3) utilizing the AEU-7000 surgical motor (Aseptico) at a speed of 1200 rpm with copious amounts of irrigation. Paralleling pins (Fig. 4) were then placed in the site of the osteotomies to confirm the accuracy of the surgical guide.

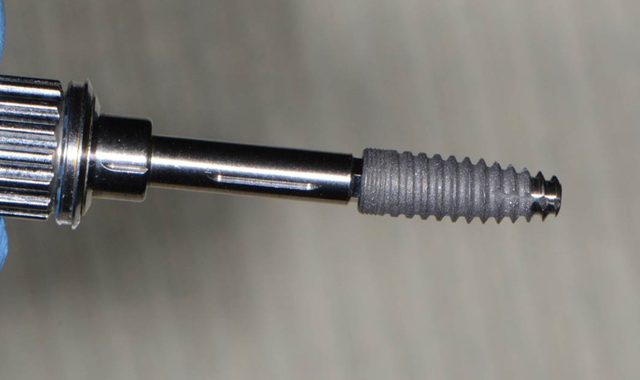

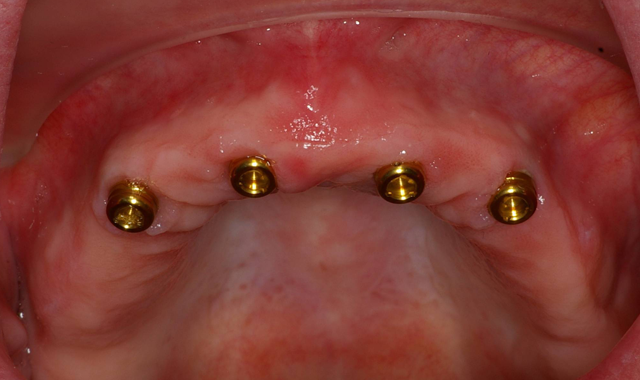
Fig. 5 Fig. 6
Using a rotary tissue punch (OCO Biomedical), an outline cut was created over the initial osteotomies and the tissue plugs were removed with a curette (Goldendent). Once the osteotomy sites were completed with sequential osteotomy formers, the dental implants were placed (Fig. 5) with the surgical handpiece at a speed of 25. The ratchet wrench was then connected in order to torque the dental implants to final depths reaching a torque level of about 25-30 Ncm.
A baseline ISQ reading was taken of these implants utilizing the Penguin RFA (Aseptico). Since the initial readings were all above 70, 3 mm height LOCATOR attachments (ZEST Dental Solutions) were tightened into the dental implants (Fig. 6).
The patient’s existing maxillary denture was relieved in the areas of the attachments (Fig. 7) to avoid putting direct pressure on the implants. The implants were allowed to heal for about four months, at which point impressions would be taken to start fabrication of the definitive prosthesis. Utilizing Panasil® monophase Medium (Kettenbach USA) body impression material in a thermoplastic tray (Fig. 8), a full-arch impression was taken of the maxillary arch picking up the LOCATOR Impression Copings (ZEST Dental Solutions).

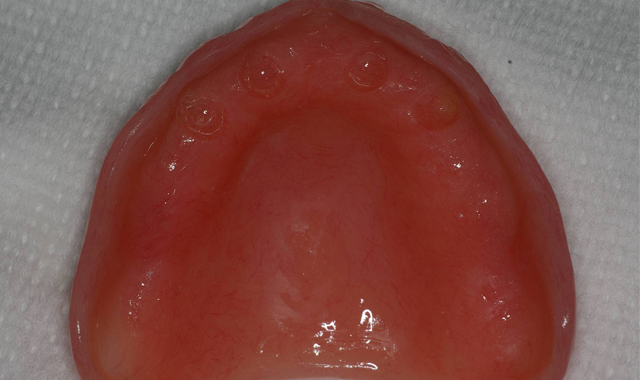
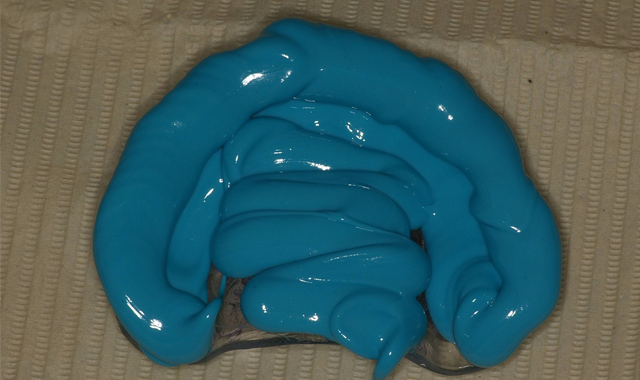

Fig. 7 Fig. 8
Once the impressions, relations, shade and opposing model were forwarded to the dental lab, the metal-reinforced, palate-free overdenture was initiated.
Approximately three to four months later, the previously made metal-reinforced overdenture with relieved areas for the housings was tried in to confirm comfort and fit. Any interference that was detected between the denture base, attachments and housings was checked and eliminated (Fig. 9).
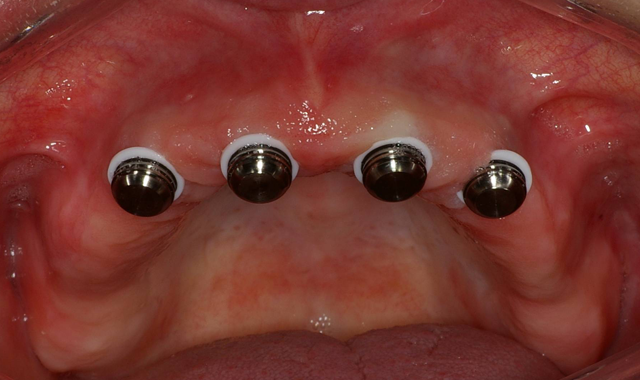

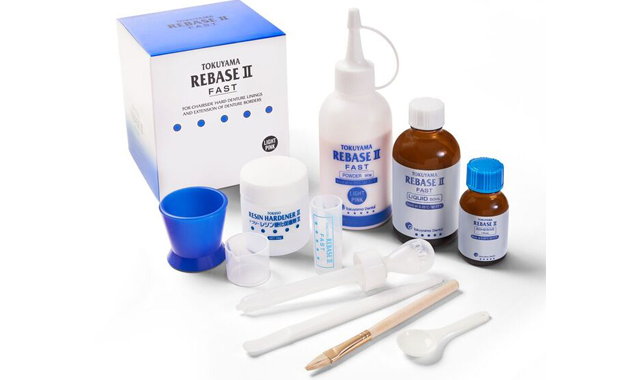

Fig. 9 Fig. 10
When relining dentures or picking up overdenture attachments directly within the mouth, the patient may experience heat generation that’s uncomfortable - in addition to a bad taste - when using methyl methacrylate. Since Tokuyama® Rebase II Hard Denture Chairside Reline (Fig. 10) is methyl methacrylate free, it doesn’t have a strong odor or taste and features minimal heat generation, making it a much better experience for the patient. Given this and its high durability and mechanical properties, I used Rebase II as a pickup material in implant procedures.

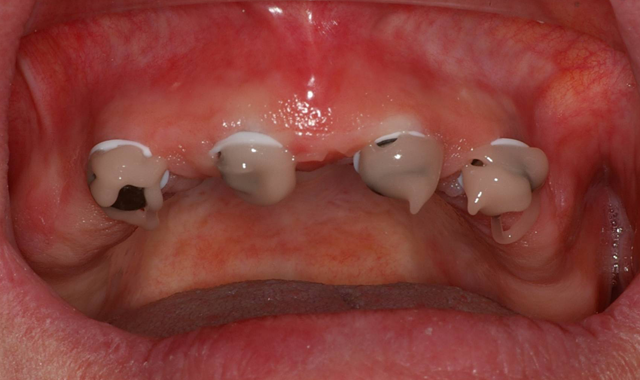

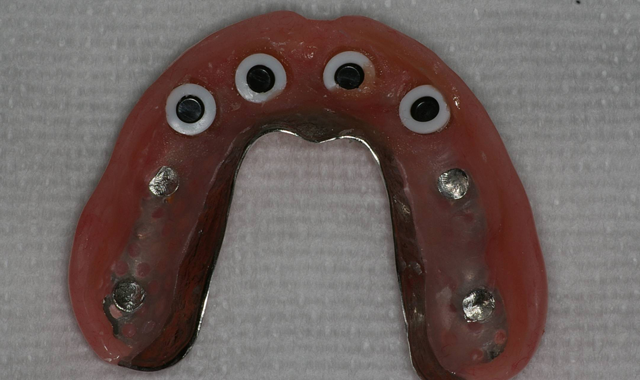
Fig. 11 Fig. 12
The first step was to brush a thin coat of adhesive into the overdenture recesses to enhance retention between the denture base and the hard reline. Petroleum jelly was applied to the surrounding surfaces of the denture to prevent unwanted adherence of excess material. Once mixed, the Tokuyama Rebase II material (Fig. 11) was placed into a plastic dispensing syringe and injected up to two-thirds the height of each recess as well as onto the attachments. During seating, the prosthesis was gently held in place by hand.
After a total of about three minutes, the overdenture with the incorporated retention caps was removed (Fig. 12). Any excess material was removed with a trimming bur (Fig. 13). At the completion of the prosthetic phase, the patient stated how pleased she was to be able to smile and function without the prosthesis wobbling or falling out (Fig. 14).

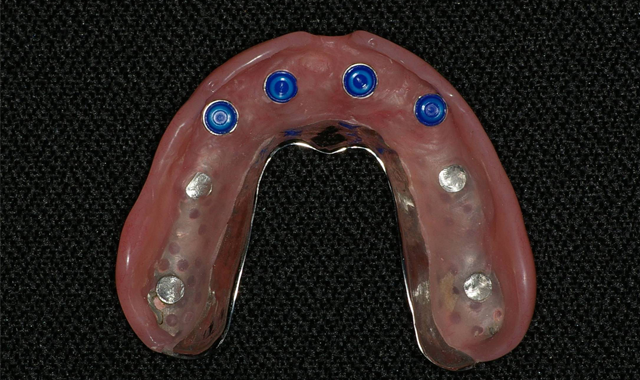
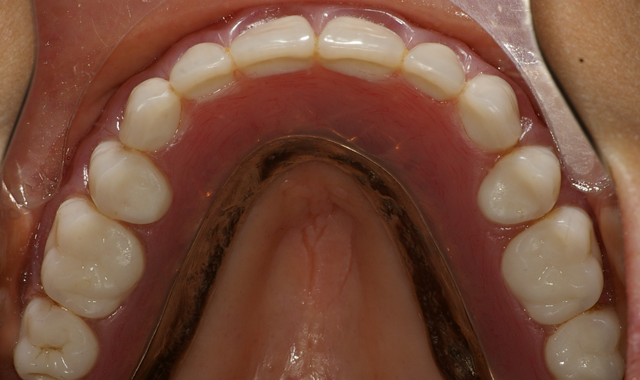

Fig. 13 Fig. 14
Today, we’re seeing more and more patients presenting to the dental practice with dentures that are unstable, loose and uncomfortable. By offering cost-effective treatment options - such as overdentures with dental implants when there’s minimal bone support - function and esthetics can be delivered efficiently and effectively.


