How to fabricate anterior provisionals
Dentists, expanded function dental auxillaries (EFDAs) and dental assistants traditionally harbor conflicting thoughts about fabricating anterior provisionals.
Dentists, expanded function dental auxillaries (EFDAs) and dental assistants traditionally harbor conflicting thoughts about fabricating anterior provisionals.
Although created and placed with the knowledge that they are not intended to be permanent, anterior provisionals still, in truth, reflect the skill of the clinician, and well-constructed provisionals are important for maintaining healthy soft tissues, acclimating the patient to the new tooth form and protecting underlying tooth structure.
Proper protocol and appropriate materials and instruments are the keys to fabricating anterior provisionals that, in addition to functioning well, make patients smile long before the final restorations are complete.
Diagnostic wax ups
The proper pre-operative steps set the tone for ideal temporization and superior finished restorations. During the treatment-planning phase, diagnostic casts should be made for all cases, even single-tooth procedures. For anterior cases, pre-waxing is essential, providing the patient with an idea of the desired outcome; it also allows the patient to participate in treatment planning and work toward the final result. In addition, lab technicians must receive ample information detailing the patient’s preferences, further underscoring the importance of maintaining the proper channels of communication, to efficiently wax up anterior restorative cases. Ultimately, the diagnostic wax up is an invaluable, three-dimensional communication tool for all members of the treatment team, and it serves as a guide for preparation and provisional design.
Photographic documentation
For all cases, photographs are imperative to the communication process among the clinician, the lab and the patient, and they provide a valuable addition to the practice’s record. Because the laboratory technicians must fully understand the proper shapes, sizes, and planes of anterior preparations to ensure the crowns or veneers suit the patient’s arch form and occlusion, it is important for the doctor to communicate this information in the most effective manner possible.
Material selection
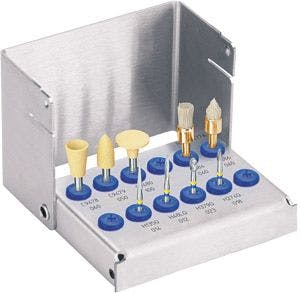
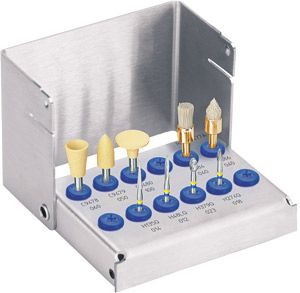
A range of materials is available for fabricating temporaries, and most clinicians have their favorites. Some prefer acrylic, which is generally stronger and longer-lasting for cases in which extended provisional time is required. Others favor bis acrylics, which offer enhanced, more-natural-looking esthetics. Ribbond® (Ribbond, Seattle, Wash.) bondable reinforcement ribbon can be considered with either material if extra strength is required. For improved esthetics, shades can be layered to create a natural color gradient between the gingival and incisal aspects of the teeth.
Check out the following video to view the step-by-step case:
Bonding protocol
Choices for bonding provisionals vary, depending on the case. For full-coverage restorations, non-eugenol cement is ideal. For added strength, a carboxylate luting cement can be used with a coating of chlorhexadine on the teeth prior to placement. For veneer temporaries, spot-bonding techniques work very well. Materials should be placed as they are for composite restorations, using a preferred etchant, bonding resin and flowable composite.
The following case outlines some simple steps to ensure restorative success by maintaining optimal communication among all members of the dental team.
Case presentation
Following completion of orthodontic therapy, the patient requested esthetic restorative treatment to address a range of concerns, including discolorations, unesthetic contours and poor length-to-width ratio due to congenitally missing laterals.
1. Following impressions, a diagnostic wax up was created and approved by all members of the restorative team.
2. The wax up was duplicated and used to create a vacuum-formed stent with a rigid, .080 material.
3. The teeth were prepared with the Komet® 834.FG.016 depth-marker diamond and the Komet® 5862.FG.012 feather-edge diamond. Photographs were taken to check the occlusal clearance at chairside and to allow the lab technician to view the dentin shade.
4. An alginate impression was taken of the finished preps, and a quick-setting stone was poured. This enabled the model to be viewed from several different angles and planes so corrections could be made prior to taking or scanning the final impression.
5. The stent was placed over the prepped teeth to gauge how much thickness and length would be gained in the provisionals and final restorations. Note: While gaining beautiful esthetic results with shape and shade is relatively simple, the case can easily fail if soft tissues are not considered during tooth preparations. Ideally, margins should be supra gingival. Although, for a variety of reasons, this is not always possible, respect must be given to biological width and the human body’s response to foreign materials in the mouth.
6. To prepare the stent for use of bis acrylic material, the Komet® 5862.FG.012 bur was used to create small holes in the incisal portion of each tooth in the stent.
7. The stent was filled with the bis acrylic and placed in the mouth. After the material set, the stent was removed and set aside.
8. An impression was taken while the bis acrylic completely hardened inside the stent. Note: Trimming is simplest when the material is at its most rigid.
9. Bulk trimming was accomplished with the Komet® H79EF.HP.040 fluted acrylic lab bur, and the Komet® FS6 and FS9 fluted finishers were used to adjust margins.
10. So the provisionals would look as natural as possible, the incisal embrasures were opened using the Komet® 943.HP.100 diamond disc.
11. The same disc was used to open gingival embrasures, allowing tissues to breathe as foreign material was introduced into the oral cavity.
12. Occlusal reduction of the anterior bis acrylic material was completed with a fluted football-shaped bur.

13. To further enhance esthetics, the provisional was polished with the Komet® AR9464 goat-hair wheel. Note: An array of materials and techniques is available for polishing, and the proper choice for any case depends on the fragility of the temporaries. If they are very fragile, they can be bonded into place and then polished with Komet USA’s composite polishing kit 4477A. For full-coverage crowns or very thick veneer provisionals, a fine- to medium-grit pumice can be used on a new saturated rag wheel. This technique buffs out any imperfections that may have occurred during trimming.
14. A baby-pea-size amount of etchant was placed in the center of each tooth and then rinsed.
15. Bonding agent was applied, air-thinned, and flowable composite placed. Provisionals were then seated.
16. Excess flowable composite was brushed away, and the provisionals were light cured. Note: Always double check facial and lingual margins for excess cement or bonding resins, as leftover particles can inflame tissue and compromise outcome.
Conclusion
Although patients typically don’t comprehend the rationale or procedures behind providing them with the best-possible temporary restorations, the dental team understands that esthetic, well-functioning provisionals are the first step toward a successful restorative case. By using these techniques and maintaining open lines of communication, the entire restorative team and the patient can work together to achieve an ideal final result, starting with a comfortable and esthetic set of provisionals.


