Why is this type of dental technology so underappreciated?
The curing light is as important to clinical success as a handpiece-so why is it so often overlooked?


Here's a clinical scenario: an anterior composite is about to be done on a Class IV fracture. When completed, it will be visible to others. Before starting, chances are you will take a couple of photos and spend at least a few minutes performing a shade match with you and your assistant, and evaluating the surrounding teeth to help you determine anatomical shape, etc.
Once all those steps are completed, you then prep, which could be affected by esthetics, and restore. When the procedure is complete you will proudly take a couple of after photos so that you have a record of your good work. Unfortunately, a few days later the patient calls to say the restoration has “come off.” You silently curse the dental gods knowing you’ll be doing the whole procedure again… only this time for free.
Here’s another clinical scenario: A posterior composite is done replacing an old occlusal amalgam restoration. You do everything by the book. You’re happy with the results. A week later, the patient calls saying they are having pain every time they bite on the tooth. The front desk tells them that it is most likely needing a bite adjustment, but at the follow-up appointment, the occlusion looks perfect. You decide to check it with a Tooth Slooth and it only responds to pressure on the restoration.
Both of those scenarios are ones that are seen in offices all over the world daily. When troubleshooting these types of problems, there are several things to consider as the single or contributory cause, but how many of you would consider your curing light?
More from the author: The top 10 tech trends that will define 2017
The physics
In my lectures, I often refer to curing as “the stepchild of adhesive dentistry.” That’s because even though it’s always around, no one pays it very much attention. However, if your restoration isn’t properly cured, it is doomed to fail.
An improperly cured composite can have more “give” along the pulpal floor which can cause pressure differentials along the dentinal tubules when occlusally loaded. This can cause (though it is not the only culprit) the dreaded “pain upon biting” problem. Improperly cured composites can also lead to marginal degradation and even fracture of the material.
There are several factors to take into consideration when thinking about how curing affects your restoration. It’s not just a matter of holding the light over the composite.
The first thing is your light intensity. Do you really know how strong your curing light is? Most lights currently on the market are very strong, putting out around 1000mw/cm2. However, that intensity can drop over time for a variety of reasons. If you are not monitoring your lights on a regular basis and checking their output, your curing is nothing better than a roll of the dice. Most manufacturers like to see a minimum of 800mw/cm2, but I’m a fan of the previously mentioned 1000mw/cm2.
The intensity of the beam allows for deeper penetration of the photons into the material. However, remember that darker colors absorb more so they must be placed in thinner layers and cured using more cycles. Conversely, lighter colors allow for greater depth of cure and can be placed in thicker layers.
Trending article: The huge mistake that could cripple your dental practice
Continue to page two for more...
Wielding the light saber
How the light is actually used in the curing process is also an important component of success.
The further away the light is from a restoration, the less curing takes place. The best way to cure is to get as close as possible to the restoration without coming into contact with it. Even a distance of 3-4 mm can cause a remarkable decrease in light intensity on the target.
However, when getting so close one also must bear in mind the possibility of getting composite or bonding agent on the delivery area of the light. To avoid this, it is imperative to make sure you shield your lights with some type of barrier. Most companies make clear plastic sleeves designed to cover their specific light, but you can also use plastic wrap or intraoral camera sleeves.
The important thing about this is the barrier will keep debris from being cured onto the delivery area. If no barrier is used, over time you will build up a layer of cured material which will begin to block the light and decrease its intensity. Having the barrier can allow the device to even come in contact with the tooth without concern for this buildup.
The last point about light usage cannot be overstated. These lights are incredibly bright and protecting your eyes is important. Using some type of orange shield, glasses, etc., is the best way to help prevent any type of eye injury.
Along with protecting your vision is also protecting the pulp. LEDs do not get as hot as older types of curing systems, but they do generate heat. To demonstrate, try holding your fingertip against the light and see how long it takes before the temperature becomes uncomfortable. Since it is not possible to over-cure a composite, many offices are curing in multiple increments during placement and then curing more once the rubber dam and matrices are removed. Curing from all directions to ensure the material is as set as possible is highly advised.
The problem with these multiple cures is that the tooth becomes a heat sink. Raising the temperature of the pulp five degrees Celcius can lead to inflammation and possible postop pain. Of course, heating the pulp even further can cause even greater problems. To prevent this from happening take a break between curing cycles and/or blow a stream of air over the tooth when the light is activated.
Trending article: Dr. Flucke's top 5 test drives of 2016
Device design
As stated in the previous section, getting as close as possible to the restoration ensures that as many photons as possible reach the target. In addition to the physical positioning of the device, there is also the actual physical design of the device that can allow for achieving better positioning.
Many manufacturers are doing away with glass “light guides” and instead moving the LEDs to the delivery end of the device. This increases intensity of the cure since even a pristine glass light guide loses some energy as the photons progress from one end to the other.
One of the other changes I’ve seen and like is the progression away from “gun”-style lights and the move toward “toothbrush”-style lights. I use that description as the design looks like a SoniCare to my eyes.
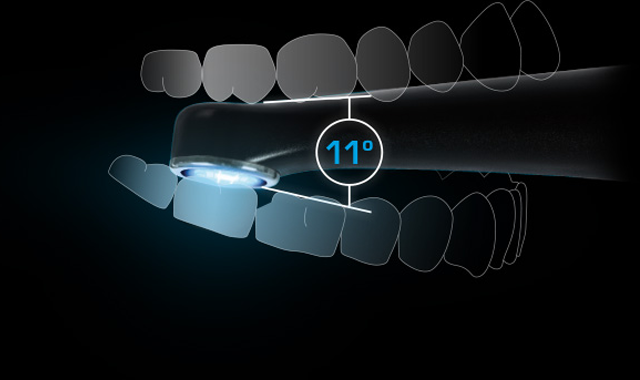
The “toothbrush” style is basically straight with the LED array at a right angle to the rest of the device. This low profile allows for several advantages. The first is that it is incredibly easy to get the LEDs as close to the restoration as possible. The second is that the patient does not need to open nearly as wide to allow access to the occlusal surfaces of posterior teeth. Some lights in the past have had such unusual angle of the light guide or LED’s to the handle that it required patients to open very, very wide. Some patients could not even open enough to accommodate this which meant the curing was performed a distance away from the restoration with all the resultant problems that occur when this happens.
LEDs also have low power requirements that allows for most of them to be battery operated which eliminates the “clutter of cords” all of us are now dealing with. Not being tied up or tangled with cords means procedures are completed in less time and with less stress.
I think it is also wise to purchase a broadband light. While most composites on the market use camphorquinone (CPQ) as the photoinitiator, some materials use a proprietary photoinitiator. Most of the lights will cure CPQ (output of 450-470 nm) but will perform less optimally with the proprietary materials. A broadband curing light is one with an LED array that emits light in a wider spectrum (395-480 nm) and will easily cure all materials on the market.
Trending article: How to simplify endodontics with technology
Wrapping up
In my office, every restorative appointment means curing. The curing light is a device that is as important to clinical success as anything else you touch and it’s used almost as frequently as the handpiece. This February, show some love for the curing light. It’s not just something that is effective as long as you push a button and blue light comes out. It can make a huge difference in your clinical outcomes and should be treated as the critical piece of restorative equipment that it is .


