Ultrasonic cleaner tips for effective instrument sterilization
Following these tips can help to ensure the safety of your patients.
After seating your 10 a.m. patient, reviewing his or her health history, taking vitals, taking any needed radiographs and perio charting, you open your wrapped or bagged instruments to begin scaling. Then you see it. Baked on, hardened crud on your supposedly sterile instruments.


Your eyes become wide. Did the patient see this? What if they did, and now they won’t trust that any instruments are sterile! You excuse yourself to grab another cassette of instruments. You’ve just wasted precious minutes of treatment time, not to mention you are grossed out and hoping your patient isn’t too. You know exactly what happened. Your instruments weren’t properly cleaned, then inspected, before they went into the sterilizer. But you know you put them in the ultrasonic cleaner, so what went wrong? Here are a few ultrasonic cleaner tips to help avoid this situation.
Trending article: A hygienist says: Stop cutting into my hygiene time!
Click through the slides to read more.


Don’t overload the ultrasonic cleaner
For contaminated instruments to be properly sterilized, they must be cleaned of debris, which includes the removal of organic and inorganic material3. Ultrasonic cleaning removes soil by cavitation and implosion in which waves of acoustic energy are propagated in aqueous solutions to disrupt the bonds that hold particulate matter to surfaces2. For this to work, instruments must be completely submerged and in contact with the solution to remove bioburden and debris. If you overload the ultrasonic cleaner and instruments are piled deeper than the fluid level, the initial cleaning of debris simply cannot happen. If instruments are above the fluid level, bioburden and debris are allowed to dry and harden as if you didn’t put them into the ultrasonic cleaner at all.


Read and follow the manufacturer’s instruction of the solution your office uses
How often should the solution be changed? How long should instruments be in the ultrasonic cleaner? What’s the correct dilution ratio?
All of these questions can be answered by reading the manufacturer’s instructions. The Centers for Disease Control and Prevention states, “Enzyme solutions should be used in accordance with manufacturer’s instructions, which include proper dilution of the enzymatic detergent and contact with equipment for the amount of time specified on the label.”2 If the instructions aren’t clear, don’t hesitate to contact the manufacturer directly. Most companies have customer service phone numbers and emails that can be readily found on their website.
Related reading: 5 things you should be doing NOW to improve infection control
Keep an eye on the solution level. Throughout the day, evaporation occurs. As you take instruments out, solution comes with it. Both can reduce solution levels that can affect the ultrasonic cleaner’s effectiveness.
Keep in mind there are factors that can affect manufacturer instructions. Depending on the amount of instruments being used, amount of debris on the instruments, or if the instruments have sat out dirty for a period of time, it may change the length of time the instruments need to be in the ultrasonic cleaner and how often the solution needs to be changed. If the solution is foggy or murky and the instruments seem to be coming out with debris still on them, this is an indication you may need to change the solution. To answer the question of the correct dilution ratio, beyond reading the manufacturer’s instructions, you’ll need to know the capacity of your ultrasonic cleaner tank.
Simply put, read and follow the directions.
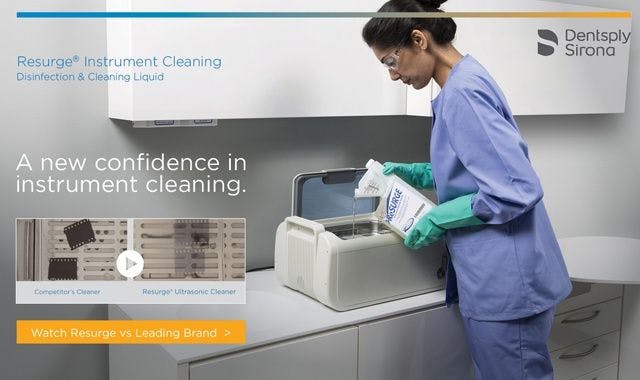
ADVERTISEMENT


Test your ultrasonic cleaner to make sure it’s functioning properly
You aren’t overloading your ultrasonic cleaner, the solution is fresh and to the correct fill level, you leave your instruments in for the manufacturer’s suggested amount of time, yet they aren’t coming out debris-free. Are you testing your ultrasonic cleaner unit itself? The unit should be tested at least once every three months; however, testing each month isn’t a bad idea. There are a few ways you can do this. You can buy testing kits, if your office has glass slides and you can do the glass slide test, or you can perform an aluminum foil test. There are many YouTube videos of how to perform these tests. Here’s a simplified summary of the aluminum foil test4:
- Cut a piece of lightweight aluminum foil about 1 inch shorter than the length of the chamber and an inch longer than the depth of the solution in the chamber.
Trending article: 11 things RDHs should do after graduation
- Insert the foil vertically into the filled chamber with the length of the foil running the length of the chamber and the bottom of the foil about 1 inch above the bottom. Do not let the foil touch the bottom of the chamber.
- Operate the unit for 20 seconds. Note: some resources say operate the unit anywhere from 20 seconds to 3 minutes. If there is a degas button, be sure to degas first.
- Remove the foil and observe for holes and pitting (pebbling). The pebbling should be distributed fairly even across the submerged part of the foil. If areas greater than 1/2 square inch have no pebbling, the unit may need servicing. Note: some ultrasonic unit manufacturers may use variations of this aluminum foil test, and one should follow their specific instructions.


A few more tips
- Always inspect your instruments for visible debris before sterilization.
- After running your instruments through an ultrasonic cleaner, remember to rinse them thoroughly and let dry before sterilization.
- Wear proper PPE (eye protection, utility gloves, mask and gown/lab coat) when moving instruments to and from the ultrasonic cleaner and when testing the unit itself. Enzyme cleaners aren’t necessarily disinfectants, so the solution is full of bacteria, blood, viruses, etc. that you don’t want to be splashed in your eye or contaminating your body.
Read more: 6 overlooked areas in your office that can improve infection control
- Keep the lid on the ultrasonic cleaner. Aerosols can be created and the solution, like mentioned above, is full of nastiness, which you don’t need to be inhaling.
- The use of cassettes is a good idea to reduce sharps injury risk instead of handling loose instruments.
- According to the CDC, “Do not use liquid chemical sterilants (i.e. glutaraldehyde/cold sterile) or high-level disinfectants for environmental surface disinfection (i.e. Cavicide) as holding solutions.” 3
Instrument sterilization is a key part of our job and keeping patients healthy and safe. By following these simple tips, you can ensure that you are properly cleaning your instruments before sterilization and avoid any awkward situations with patients during their appointment.
Resources
1. Centers for Disease Control and Prevention. (2016, March). Summary of Infection Prevention Practices in Dental Settings: Basic Expectations for Safe Care. Retrieved from http://www.cdc.gov/oralhealth/infectioncontrol/pdf/safe-care.pdf
2. Centers for Disease Control and Prevention. (2016, September). Guideline for Disinfection and Sterilization in Healthcare Facilities. Retrieved from https://www.cdc.gov/infectioncontrol/guidelines/disinfection/cleaning.html
3. Kohn, W.G., Collins, A.S., Cleveland, J.L., Harte, J.A., Eklunt, K.J., Malvitz, D.M. Center for Disease Control and Prevention. Guidelines for Infection Control in Dental Health-Care Settings – 2003. MMWR 2003; 52 (Report No. 17). Retrieved from http://www.cdc.gov/mmwr/PDF/rr/rr5217.pdf
4. Organization for Safety, Asepsis and Prevention (OSAP). (2013). FAQ – Instruments and Equipment. Retrieved from http://www.osap.org/page/FAQIE20135/FAQ---Instruments--Equipment---2013.htm


