Technique: Using new technology for old cases
A look at how an existing problems was fixed with new technologies to create a fantastic, esthetic result.


Our patient, a female in her 60s, had undergone a reconstructive dental process 15 years earlier with unfortunate issues involved with the work from the beginning. The porcelain popped off repeatedly, requiring frequent visits to the new dentist and numerous re-cementations.
She was frustrated and unhappy with the overall case esthetics and the work which had been completed by the previous dentist. She approached the new doctor about re-doing her case and he agreed to undertake the process for her.
Everything went well with the preparations and temporization process. She could not be happier with her improved bite, new shade and overall esthetics since her case was completed. We will discuss the streamlined process and the excellent outcome within our case discussion.
Hot topic: How is dental technology REALLY being used?
Up next: How to utilize the latest technology to achieve fantastic results
Case Study

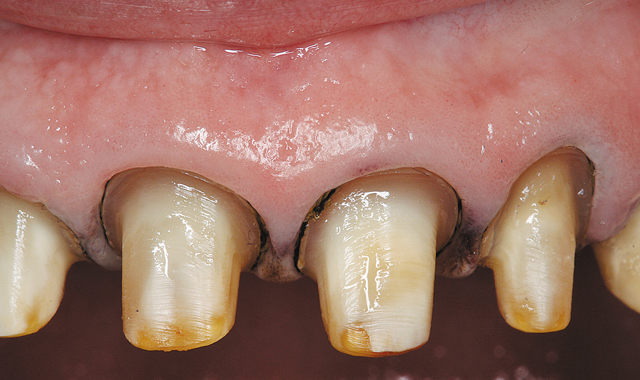
Fig. 1
In this pre-op view, we can see that the patient had definitely had some dental work completed prior to this appointment (Fig. 1). The patient was unhappy with the appearance of her teeth for several reasons, in the author’s opinion, although she may not have been able to specifically state them. In looking at Figure 1, we can see that tooth numbers 8 and 9 are not symmetrical and are short on the incisal length. Also, number 10 is longer than number 7, and there is a big variation in color between 6, 7, 8, 9, 10 and 11. Some of the restorations are veneers and some are crowns. Veneers, as we know, are thin and we are able to see completely through them. The material we use for veneers is either porcelain or lithium disilicate. Crowns, however, have a certain thickness and a different substructure and were fabricated with either porcelain or lithium disilicate. However, we can now use zirconia with different opacity and more translucency, which translates into a more natural appearance. We can also depend on greater longevity with this material.
From the photo, we can also see that there is a large color differentiation between the bridges included in the dental work-specifically numbers 3-5 and 11-13. The patient is a grinder, which is why there were problems with cracking and her crowns or veneers popping off. Composite bonding can patch the ceramic work but it is not the same sort of material. It will stain, leading to a mismatch in color.
For these reasons and more, material selection can prove to be a very important decision in the long-term. During the 15 years that had elapsed since her original dental work was completed, there were new options from which the dentist and technician could choose in order to improve the patient’s overall appearance and longevity with her case.
The clinician’s prep work and tissue management was excellent, in the author’s opinion (Fig. 2). There was a nice, deep chamfer for the author to work with (Fig. 2). In this view, we can also see the flat occlusion of the pre-molars and molars, indicating we would need to have a very strong restoration for this bruxing patient. We are next given a close-up view of tooth numbers 7, 8, 9 and 10 after preparation (Fig. 3).

Fig. 2
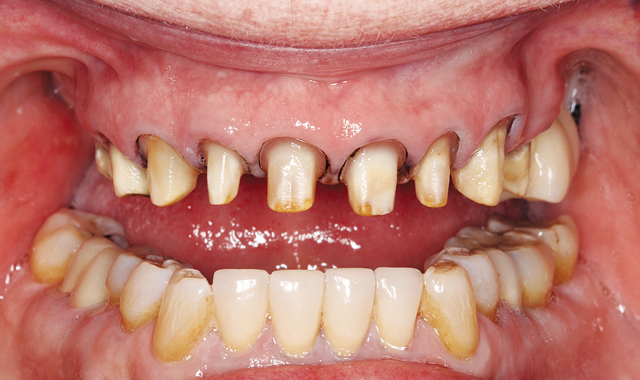

Fig. 3
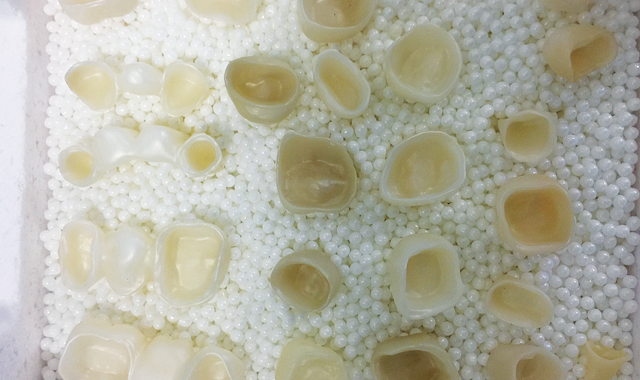
The author and the Digital Design Department were able to utilize the latest technology for scanning and designing our patient’s case with the Amann Girrbach Ceramill Map400 scanner (Fig. 4) after the lab received the case from the dentist. After milling the copings with the Ceramill Motion 2 milling machine, and after sintering for eight hours, this is the copings’ appearance before color application (Fig. 5).

Fig. 4
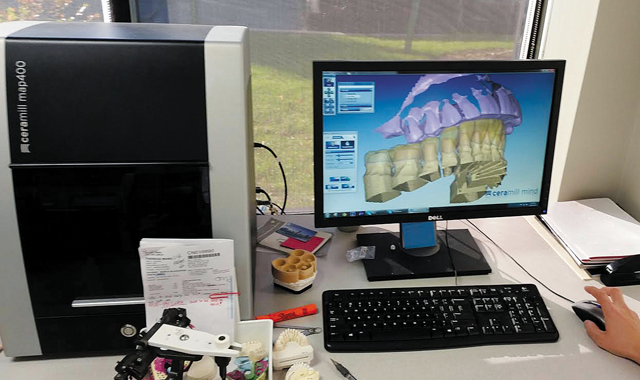

Fig. 5
For comparison purposes, the author placed the copings on the model below the upper arch prepped model (Fig. 6). Next, we are given a lingual view of the zirconia copings on the pinned model, after sintering, for a fit to model check (Fig. 7).

Fig. 6
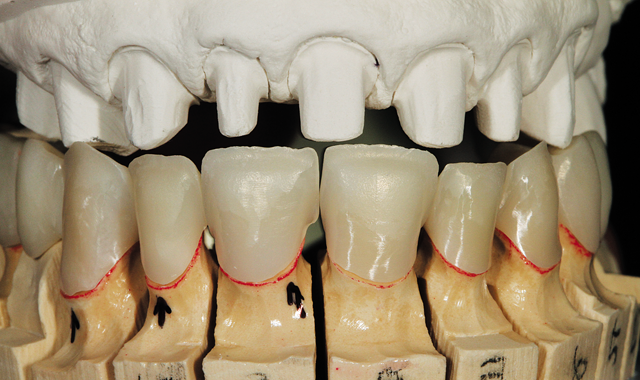

Fig. 7
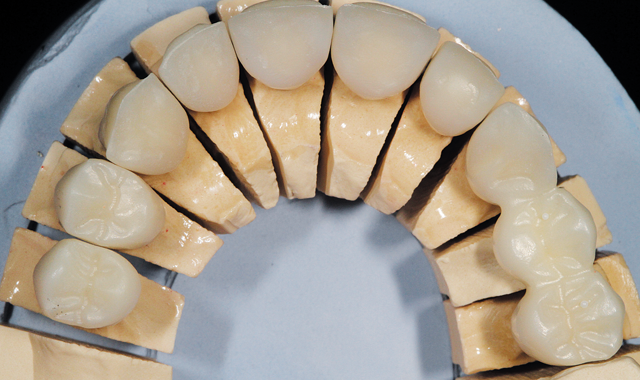

Fig. 8
Porcelain had not yet been applied, but the author would work toward maximum strength in order for the restorations to hold up under the patient’s grinding habit. Readers, please note that numbers 4 and 5 as well as 12 and 13 are full-contour zirconia restorations.
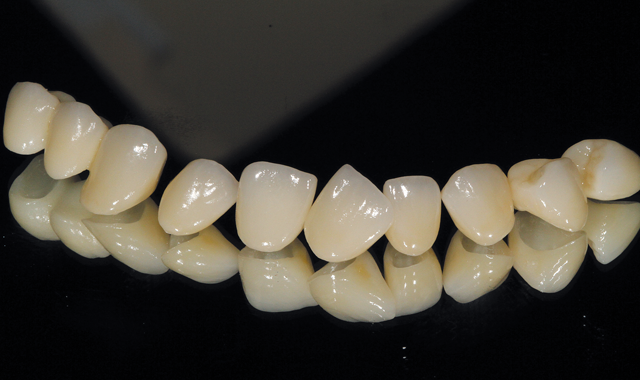
After porcelain application, glazing, polishing and baking, the restorations were placed on the model for an occlusion view
check (Fig. 8). Maximum patient protection and beauty were the author’s goal with the fabrication of these restorations and it had been achieved.
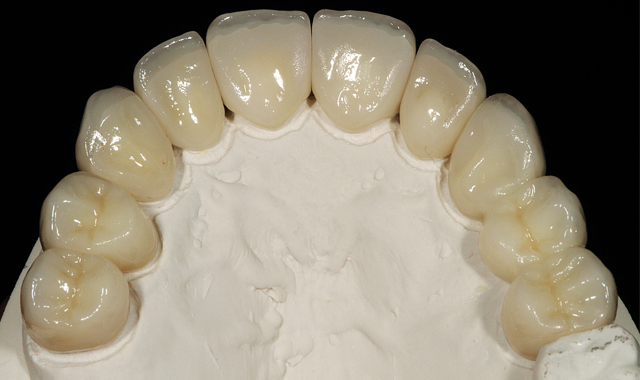
An opposite view from Figure 6 shows the final restorations on the model with the prepped model below for another comparison view (Fig. 9). The final restorations were placed on the solid model, with porcelain from the GC Initial Zirconia system (Fig. 10).

Fig. 9
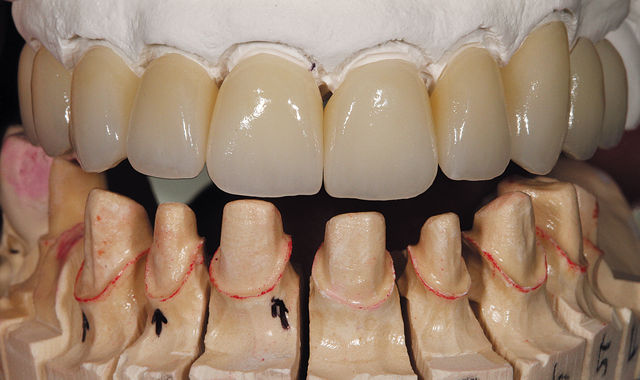

Fig. 10
A mirror image of the five single units and two multiple unit bridge restorations-based on color selection between A1 and A2 with translucency (Fig. 11)-follows. Looking at the protrusion view with the mandibular model and the restorations in
our immediate post-bonding image, we can see the color blending and harmony in the patient’s mouth, as well as the contour and shape of the teeth (Fig. 12).
Fig. 11

Fig. 12

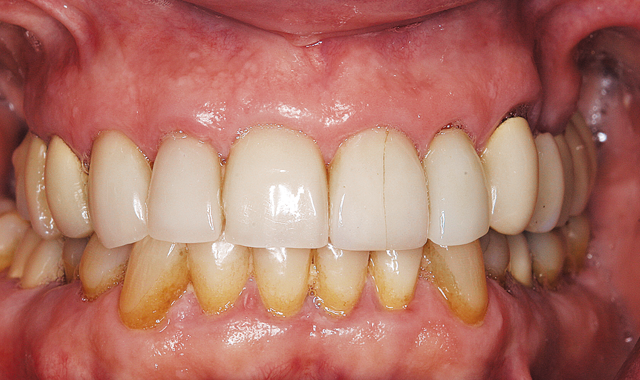
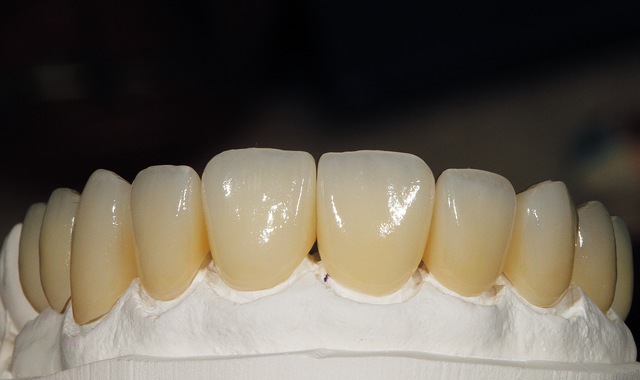
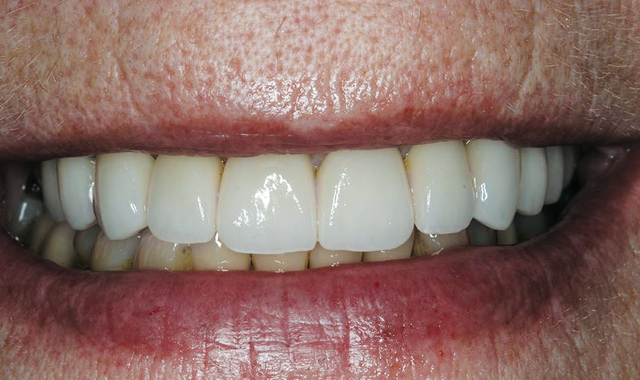
In the immediate view after cementation, the differences between pre- and post-treatment are obvious and the patient is gratified with the results (Fig. 13). In this last smile view, please note the final restorations, with the accomplished esthetics sought by the patient and the dentist. Numbers 8 and 9 are 2 mm longer than her original
restorations and narrower with room for freedom of occlusion. The tone of the restorations is actually two tones lighter than that of her natural dentition (Fig. 14).

Fig. 13
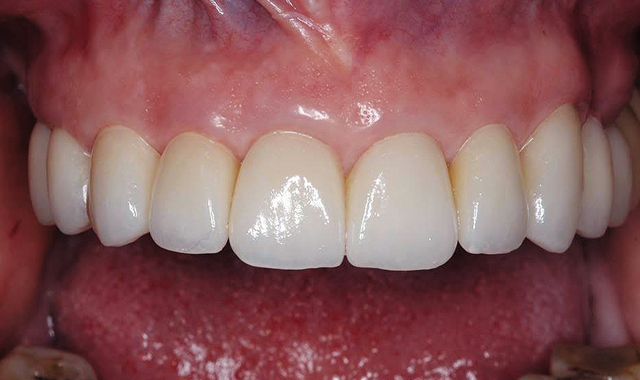

Fig. 14
Conclusion
As we can all attest, communication between the dentist and the laboratory is essential. From the lab’s standpoint, the author considers it his duty to help lead the dentist with questions to the very best result. A dentist has the right to expect
maximum esthetics from a well-experienced technician and will often ask questions when treatment planning a large case such as this one. Through either digital design or phone communication, everyone should have the same expectations going into the treatment stage, with great care taken regarding the reconstruction of the patient’s dentition. This was definitely the pattern that our case study took, and the results show just how well it paid off.