Technique Mastering removable partials
The first step is the first office visit at the first inkling that a CRP (cast removable partial) is necessary.
A step-by-step instruction to create excellent and esthetic partial dentures.

One of the most complex and demanding endeavors in restorative dentistry is the cast removable partial denture. Therefore, to achieve a positive outcome, it requires careful planning from the beginning.
Case study
The first step is the first office visit at the first inkling that a CRP (cast removable partial) is necessary. [Editor's note: All figures in video below]
01 At this point, we need several things: 1) Accurate study cast impressions or models. (Fig. 1); 2) Centric relation bite (Fig. 3). When contemplating the design of a CRP, we look at the whole arch-not just the gaps left by missing teeth. It is necessary to look for problems in the occlusion in the whole arch; 3) Some type of face bow registration-be it an actual face bow or a bite plane analyzer such as the one used with the Panadent system when using an average value mounting. (Fig. 2); and 4) The tooth mold and tooth shade.
02 When mixing the gypsum material for the model, it is important to observe instructions from the manufacturer. It is best to use a die stone (Class IV) vacuum mixer at this stage because it needs to stand up to manipulation on the articulator, and vacuum mixing ensures you won’t have any inconvenient bubbles or voids in the mix. The articulator needs to be anatomically sized-not a simple hinge (Fig. 4).
03 Studying the study models is best done by the doctor but often isn’t except by dentists who specialize in removable restoration. It’s also not unreasonable to get assistance from the local laboratory professional that is using his surveyor every day and can make suggestions to facilitate the dentist. This demands high caliber communication, and, make no mistake, at the end of the day, it is the dentist’s responsibility.
Related article: The IvoBase in action
So, to start with, the occlusion needs to be looked at, just as with any big restoration case, to see if equilibration is necessary. Once the casts have been equilibrated and marked, is there enough room to restore the missing teeth without compromising the partial? It is not uncommon to see super eruption of the opposing teeth (Fig. 5). This is the time to set some denture teeth on a base plate (Fig. 6). We do this now because we want to see if there are any esthetic concerns, determine how to handle them and look at how the denture teeth will function.
04 Now we get to the survey and design stage. Use a surveyor to mark the height of contour of all the abutting teeth (Figs 7, 8). Once this is accomplished, you can clearly see any path of insertion issues, and re-contouring is done on the model (Figs 9-11). It’s important to consider the undercuts on the mesials and distals of abutting teeth. When restored, will there be a large gap between the denture base and the abutting denture tooth? If so, it needs to be re-contoured as much as possible to prevent food traps. Is the height of contour near the occlusal? If we are going to have a reciprocal clasp arm, we need to re-contour to keep it away from the occlusal. Is the height of contour too high on the buccal or too low? Will you need to add undercut for retention? Will you need to re-contour to keep the clasp arm near the cervical? Do it on the model and mark it for reference chairside (Fig. 12). You need to determine how the partial will handle occlusal forces during function (Fig. 13).
05 The rests must be designed to taper toward the center of the tooth-not angle away from the tooth (Fig. 8). They need to support the frame without being inclined to push the tooth away from the frame. When designing clasps and rests, they need to support the partial and the teeth you are clasping. They should keep the partial from moving away from the clasped teeth and the teeth from moving away from the partial when force is applied. With this in mind, what clasping will be used? (Fig. 14)
06 Place the denture teeth you set up earlier on the model and see how the partial interacts with them.
07 Make a matrix of the teeth so that when you design the mesh retention, you won’t interfere with the denture teeth. The mesh areas should provide enough surface area for the acrylic to wrap around but not so much that it weakens the acrylic.
08 On the maxillary, the major connectors provide support and stability, especially in distal extension cases. They disperse the forces generated during mastication over a greater area and can keep the forces from focusing in any one place, which can be damaging. When I design major connectors, I design for maximum support. If the dentist I’m working with feels that the patient won’t tolerate a palatal strap, they can indicate it; it’s the doctor’s discretion not the labs.
On mandibular designs, it’s much more difficult to get the support with a distal extension; it may be necessary to separate the clasping on the opposite side of the arch to counter the fulcrum of a unilateral distal extension. It’s also very important the impressions for mandibular distal extensions include the retro molar pad and the buccal shelf for support.
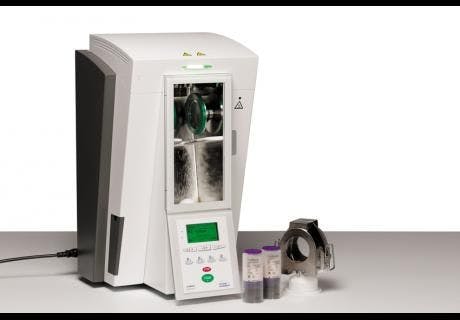
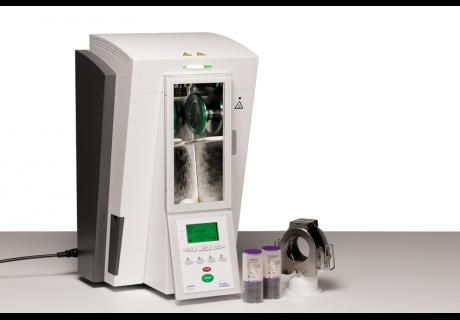
Real-time ROI: The IvoBase Injector from Ivoclar Vivadent
Minor connectors, In general, connect the major connector to the clasp assemblies and rests. They should be designed in such a way as to be strong yet unobtrusive, covering as little soft tissue as possible. Now you have equilibrated casts, tooth setup, partial design with tooth reductions and rest preparations indicated.
09 Pour up the models using type IV stone, mount casts on anatomically sized articulator, inspect for possible issues, then survey and execute the design as outlined on the prescription and the study casts. Use the matrices to design the mesh that will retain the teeth on the partial. Once you have a finished and polished partial, you can attach the teeth with denture wax and return it to the dentist for try-in.
10 Processing the partial should be straightforward as well, again because of all the advance planning. I like to process my partials in an IvoBase injector because the acrylic is very dense and I get a consistent, high quality result. I like to use custom staining on the denture base and teeth so it will blend in with the natural dentition. These little touches are part of what sets you apart from other labs and should be a part of your marketing. I use Nexco composite by Ivoclar Vivadent for this purpose.
Must-read: The evolution of dental materials
11 Insert the case and make final adjustments. Be prepared to use a soft liner, especially with distal extension situations. Using a soft liner will make sure the denture base is the best possible fit, and the patient can use the partial overnight and then send it back to the lab to reprocess.
Conclusion
Cast removable partials are not a throwaway appliance, a stop-gap measure or easy. They can be an engineering masterpiece or a manufacturing nightmare. To the clinician, open communication is paramount along with a willingness to take the time it deserves to get it right. To the technician: Educate yourself beyond the process of manufacture. Learn about the things that effect the positive outcome you are trying to achieve, learn to set teeth, go to an insertion and stand chairside to see the result of your hard work. Introduce your dentist clients to the improved outcome this approach makes possible. With proper planning and a team approach, we can better address the challenges that cast removable partials represent and have happy, well served patients.
IvoBase injector
Features
- “All-in-one” injector, quick and easy setting into operation possible
- Controlled polymerization shrinkage for optimal accuracy of fit
- OSD indicator: current operating status visible from a great distance
- Versatile injector with various Ivoclar Vivadent and reserve programs
For more information, contact Ivoclar Vivadent by visiting ivoclarvivadent.com or by calling 800-533-6825.


