Step-by-step: Acryl-Marvel
January 2010 | Dental Lab Products Step-by-step: Acryl-Marvel Pumice-free polishAcryl-Marvel removes scratches and polishes in one simultaneous operation.Information provided by Dental Ve
January 2010 | Dental Lab Products
Step-by-step: Acryl-Marvel
Pumice-free polish
Acryl-Marvel removes scratches and polishes in one simultaneous operation.
Information provided by Dental Ventures of America Inc.
Click here to see slideshow for figures
Acryl-Marvel


Features
- Removes finishing scratches and high-shines in one operation in a dry environment
- Eliminates the use of pumice and pumice substitutes
- Enhances the appearance of finished dentures
- Simplifies finishing and polishing procedures
- Separate Repair-Bit Kit simplifies repair procedures and eliminates risk of cross-contamination
Dental Ventures of America Inc. www.dentalventures.com
800-228-6696
Acryl-Marvel polishing compound simultaneously removes scratches and applies a high-luster to acrylic full and partial dentures as well as orthodontic and clear appliances. Finishing and polishing in a dry atmosphere-without the use of wet, pumice-like materials-it provides optimal control with small brushes and wheels at the sit-down working area.
Following are steps for using Acryl-Marvel to polish and shine a full denture.
01 Shape and finish all broad areas with a carbide bur or an arbor band (Fig. A).
02 Smooth any carbide bur scratches and cut areas with a silicone point (Fig. B) prior to applying Acryl-Marvel to produce a highly shined surface (Fig. C).
03 For bulk scratch removal and to polish broad areas, apply the bar compound to a rag-type finishing wheel (Figs. D and E). Re-apply as necessary.
04 Use a medium brush or a wool wheel to maintain any intricate anatomical shapes and effects of the labial and buccal surfaces. Apply Acryl-Marvel to a small brush or cloth wheel and use a lathe or an electric handpiece (Fig. F) to attain a high luster (Fig. G).
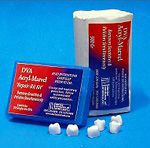
05 Use the small, tooth-shaped nuggets for finishing and polishing repairs without cross-contamination in individual cases (Fig. H).
06 Apply the material to either a rag wheel or small brush or wheel (Fig. I) and apply to the repair case for finishing and polishing.
07 Discard the unused material to eliminate the risk of cross-contamination.


Related articles
- Step-by-step: Single central solution
- Investing in quality
- Step-by-step: Veneer esthetics


