Preps: Preparing for success with your composite restorations
Experts share some significant insights that help prepare your restorations for the best possible outcome.


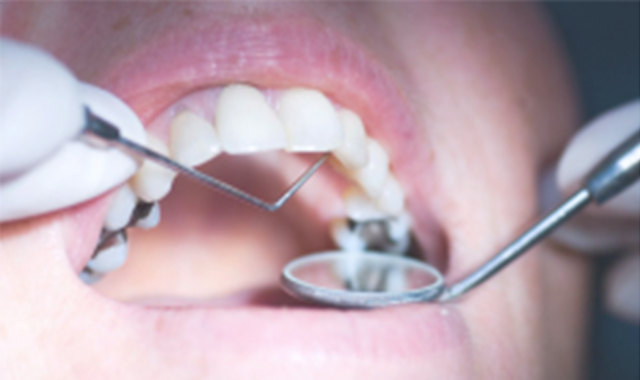
Composite restorations rely on sufficient and proper preparations. They are, in a literal and figurative sense, your preparation for success. Let’s take a closer look at what the experts have to say about preparations for your composite restorations.
How you prep for composite resin restorations varies depending on the purpose of the restoration. For example, anterior preparations for cosmetic purposes have a much different prep than a posterior Class II.
However, the idea that the prep alters the tooth to receive restorative material is universal, no matter what type of restoration you are doing. The prep should also facilitate your ability to return the tooth to the correct anatomical form and function. Furthermore, it should help deliver proper esthetics.
So, what should you remember when you are preparing for composite resin restorations, and how are they different? Also, what should you avoid that can contribute to failure? Here’s what the experts had to say.
Related reading: Break out of your restorative rut
Important considerations for composite resin preparations
When you are preparing for composite restorations, some essential universal concepts help set your restoration up for success. One of the most significant determining factors of your prep for the composite is the decay present. Where and how extensive it is has enormous influence on how you prep.
Per Pocketdentistry.com, the type of prep you have depends on how much of the tooth substrate remains after the decay and previous restoration is removed1 It is preferable to keep as much of the tooth structure as possible, making intracoronal preps the favorite over extracoronal when possible.2 The exception is unsupported enamel, which you should remove even if it is healthy to preserve the integrity and predictability of your restoration. Although enamel is hard, without the dentin to support enamel, it is easy to break.3 .
You should also review the enamel at the gingival margins. Dental Learning, a peer-reviewed publication by the American Dental Association (ADA) and their Continuing Education Recognition Program, says when you finish the prep for a Class II cavity, if the enamel at the gingival margin is too thin or gone, the area needs protection from marginal leakage that can lead to secondary decay and other complications over time. One recommendation to achieve this is to apply glass ionomer to that area.4
Also, using composite changes how you prep the tooth when compared with other materials like amalgam. Per Nathaniel Lawson, DMD, Ph.D., assistant professor and director of the division of biomaterials at UAB School of Dentistry, there are two things to remember when preparing for composite resin restorations. First, Dr. Lawson says because the preparation does not need to focus on mechanical retention like an amalgam preparation, the tooth structure should not be removed just for preparation to converge occlusally.
“Additionally, the internal angles of a composite restoration should be smooth so as not to create stress risers within the tooth,” Dr. Lawson says.
Other factors are also crucial to note when prepping for composite restorations. Some other areas to consider are smooth line angles, avoiding unnecessary tooth structure removal, whether or not to use beveled margins, using liners to protect deeper cavities, and selective caries removal.
Continue reading on page two...
Smooth line angles and smooth margins
When Dr. Lawson graduated from dental school, he decided the 330 and 257 carbides were a waste of time. He wanted to improve efficiency with a 557 carbide. However, he learned that what he had not considered was that a 557 has sharp angles, which meant his preps all had sharp line angles.
“That may look nice on a typodont tooth, but there is no reason to do that to a tooth. Smooth line angles help prevent stress risers and allow the composite to better adapt to the preparation,” Dr. Lawson explains.
Dr. Lawson has started using diamonds for operative procedures. He says they not only provide smooth line angles and increased efficiency, but they also allow him to improve how he smooths the margins of his preparations. Also, the smooth margin allows him to adapt composite better.
The ADA shares Dr. Lawson’s sentiment on taking care of the line angles in the prep to reduce stress in the restoration. For Class II preparations, Dental Learning recommends internal line angles should be rounded to avoid stress concentration. The rounded line angles also reduce the risk of voids in the composite placement stage.5
Related reading: Polishing: The finishing touch on anterior composite restorations
Avoiding unnecessary tooth structure removal
Class II restorations are a frequent and technically sensitive composite restoration. However, as Dr. Lawson pointed out, they are different than the preps used for amalgam.
Amalgam preps require undercuts to keep the material in the filling, which requires removing more than only decayed tissue. However, composite resin does not require undercuts, which allows clinicians to be more conservative in their healthy tooth structure removal.6 The ADA’s Dental Learning suggests some vital cavity preparation principles, including skipping the removal of healthy tooth tissue to retain the filling.7
Composite restoration failure is a situation everyone wants to avoid. Dr. Lawson says while he prefers to be conservative with tooth structure removal, he is a little more aggressive at the margins of his restorations.
“I have watched too many composites fail when I have left a small piece of amalgam stain or previous restoration at the enamel margin of my preparation,” Dr. Lawson says. “One great trick for cleaning preparations prior to adhesive bonding is the use of air abrasion.”
Whether or not to use beveled margins
Jeff Lineberry, DDS, a general and cosmetic dentist who practices in Mooresville, N.C. says one of the keys for preparation success in an anterior restoration is the ability to blend the resin into the tooth. When you are trying to create an invisible restoration, it is essential to have a beveled margin. In some ways it is also good to have an irregular margin, too. Dr. Lineberry says it can help blend it in.
“In other words, nature doesn't have a lot of straight lines in it. So, when we put things in there that have an irregular edge, it mimics nature a lot better,” Dr. Lineberry explains.
Dr. Lineberry says there is an additional benefit to the blending with a beveled or irregular margin; it exposes more enamel rods, which provides for a better bond between the tooth and the restoration.
“Be mindful of the bevels and the finish line as far as where those are placed,” Dr. Lineberry says. “That’s a huge thing to consider.”
Continue reading on page three...
For Class II preps, bevels can also be helpful to restoration success by providing more surface area for bonding to enamel. However, the ADA’s Dental Learning states that beveled margins are not indicated for occlusal cavosurface margins. The thin layer of composite that would result from the bevel in that area would be too thin to resist fracture when the patient is chewing with it later.
Using liners to protect deeper cavities
Class II cavity preps in the posterior can sometimes be challenging to isolate and cure properly. To combat the issues that can result, dentists can line the deeper cavity preps with flowable or glass ionomers. Dr. Lineberry uses a bulk fill resin flowable in his preps for Class IIs.
“We usually place bulk fill resin in the areas where we are doing posterior restorations that are deeper and more difficult to gain access to preps as far as with your curing light,” Dr. Lineberry says.
Selective caries removal
The ADA’s Dental Learning suggests two alternative and technique sensitive preps for restoring interproximal caries. First is the Sandwich (open or closed) and the second is the Tunnel. Although few dentists use these regularly, they could have applications for specific composite restorations.
The Sandwich technique uses either a flowable composite or a glass ionomer cement that is placed under the load-bearing composite. Dental Learning suggests that it is faster and allows for fewer layers of incremental composite in the next stage. In the closed Sandwich, the load-bearing composite covers all of the other material used; in the open Sandwich, the liner is exposed at the margins of the prep. Per Dental Learning, when the material in the open Sandwich prep is glass ionomer cement, the additional benefit of fluoride release and its hydrophilic nature make it ideal for preps where complete isolation is difficult or impossible.
To review the ADA’s Dental Learning pdf, please click here.
The Tunnel technique is a conservative prep introduced in the 1960s that preserves the marginal ridge and decreases how much healthy tooth substructure t you need to remove.8 In this conservative cavity design, you approach the approximal carious lesions by using the instruments beneath the marginal ridge and, since their introduction in the 1970s, restoring with glass ionomer cements.9 The Tunnel is used when the patient has negligible proximal dentinal caries and no occlusal decay at the isthmus.10 However, the British Dental Journal only recommends this prep for patients with low caries activity because it has a limited life expectancy and secondary caries is a problem after three years.11
To read more about the Tunnel restoration from the British Dental Journal, please click here.
Proper preparations are vital to the success of your composite restorations. While many variables come into play for what type of prep you are creating to restore the tooth, one universal truth about preps is they must ensure that your patient’s tooth has the correct form and can function. All of these considerations for your preps can help you achieve these goals while ensuring that the final product looks like all the patient’s other teeth in the process.
References
1“29 Choice of Extracoronal Restorations.” Pocketdentistry.com. Web. 5 August 2019. < https://pocketdentistry.com/29-choice-of-extracoronal-restorations/.
2 Ibid.
3Ibid.
4 Graham, DDS, Lou; John W. Strange, BDS. “The Art and Science of Class II Composite Restorations.” www.dentallearning.net. Web. 5 August 2019. https://www.dentallearning.net/files/Art%20and%20Science%20Web4.pdf
5 Ibid.
6Graham, DDS, Lou; John W. Strange, BDS. “The Art and Science of Class II Composite Restorations.” www.dentallearning.net. Web. 5 August 2019. https://www.dentallearning.net/files/Art%20and%20Science%20Web4.pdf
7Ibid.
8K Ratledge, D & A M Kidd, E & Treasure, Elizabeth. (2002). The tunnel restoration. British Dental Journal. 193. 501-6. 10.1038/sj.bdj.4801609. Accessed via Web. 5 August 2019: https://www.researchgate.net/publication/10912448_The_tunnel_restoration
9Ibid.
10 Graham, DDS, Lou; John W. Strange, BDS. “The Art and Science of Class II Composite Restorations.” www.dentallearning.net. Web. 5 August 2019. https://www.dentallearning.net/files/Art%20and%20Science%20Web4.pdf
11 K Ratledge, D & A M Kidd, E & Treasure, Elizabeth. (2002). The tunnel restoration. British dental journal. 193. 501-6. 10.1038/sj.bdj.4801609. Accessed via Web. 5 August 2019: https://www.researchgate.net/publication/10912448_The_tunnel_restoration


