How to perfect the plane truth process
How one laboratory technician uses consistent communication steps to equate to consistent results in the fabrication of removable prosthetics.


ONE OF THE MOST IMPORTANT laboratory steps in the fabrication of removable prosthetics is the transference of clinical information to the laboratory so they can provide an accurate, translatable form to an articulator for setting clinically prescribed tooth positions. As we know, this information is supplied with an occlusal rim.
A clinical checklist taught in dental and technical schools consists of basic information which enables the laboratory to accurately articulate and set the teeth based on specified markings and trimmed dimensions of the rim. This article will address how my laboratory uses and maintains an easy, tractable, guided way to stay within the parameters of the trimmed rim during set-up and how I illustrate to my clinical partners the importance of taking time to rim trim.
In order to maintain and translate the rim dimensions to a repeatable position, this author has relied heavily on fixed occlusal platforms (Fig. 1) in conjunction with several articulator systems. These articulators offer the fixed platform as a purchasable feature. Over the years I have realized this feature allows me to: 1) use a rim tracing to keep tooth positions within the horizontal width boundaries, 2) maintain a parallel plane anteriorly and posteriorly established by clinical rim trim to the Campers line as a baseline for tooth arranging (Fig. 2), and 3) A documentation tool to communicate prescription fulfillment.
Because many clients rely on laboratories to use non-adjustable articulators which don’t have the platform feature or can be expensive, I had to establish a way to accessorize my non-adjustable articulators with an interchangeable fixed platform feature which I will illustrate (Fig. 3).
Consistent with either manufacturer supplied or handmade platform is the need to center, mount, and rim trace the maxillary arch. I cover the platform with painters’ tape for easy tracing and removal at case conclusion. I have recently found the yellow version works even better (Fig. 4). I also use landmark extension lines to allow for centering on platform.
Once the maxillary arch is mounted the mandibular arch is affixed and mounted, you have a photo documentable depiction of the rim mounted on the platform and an outline of the rim that guides the set up. Because the platform is fixed, a baseline to begin a Curve of Spee or lengthen anterior teeth, you never lose angle orientation of the plane (Fig. 5).
The Steps
STEP 01 Take a polystyrene sheet, trace a mounting platform shape of your choice, and cut out using a Komet H219 cutter. Finish edges with preferred smooth cut carbide (Fig. 6).
STEP 02 Select the mounting plate for the articulator system you prefer. Box the base with painters’ tape to contain plaster within the plate boundary. Fill base to a level that coincides nearly with the vertical sweet spot on the articulator (Fig. 7).
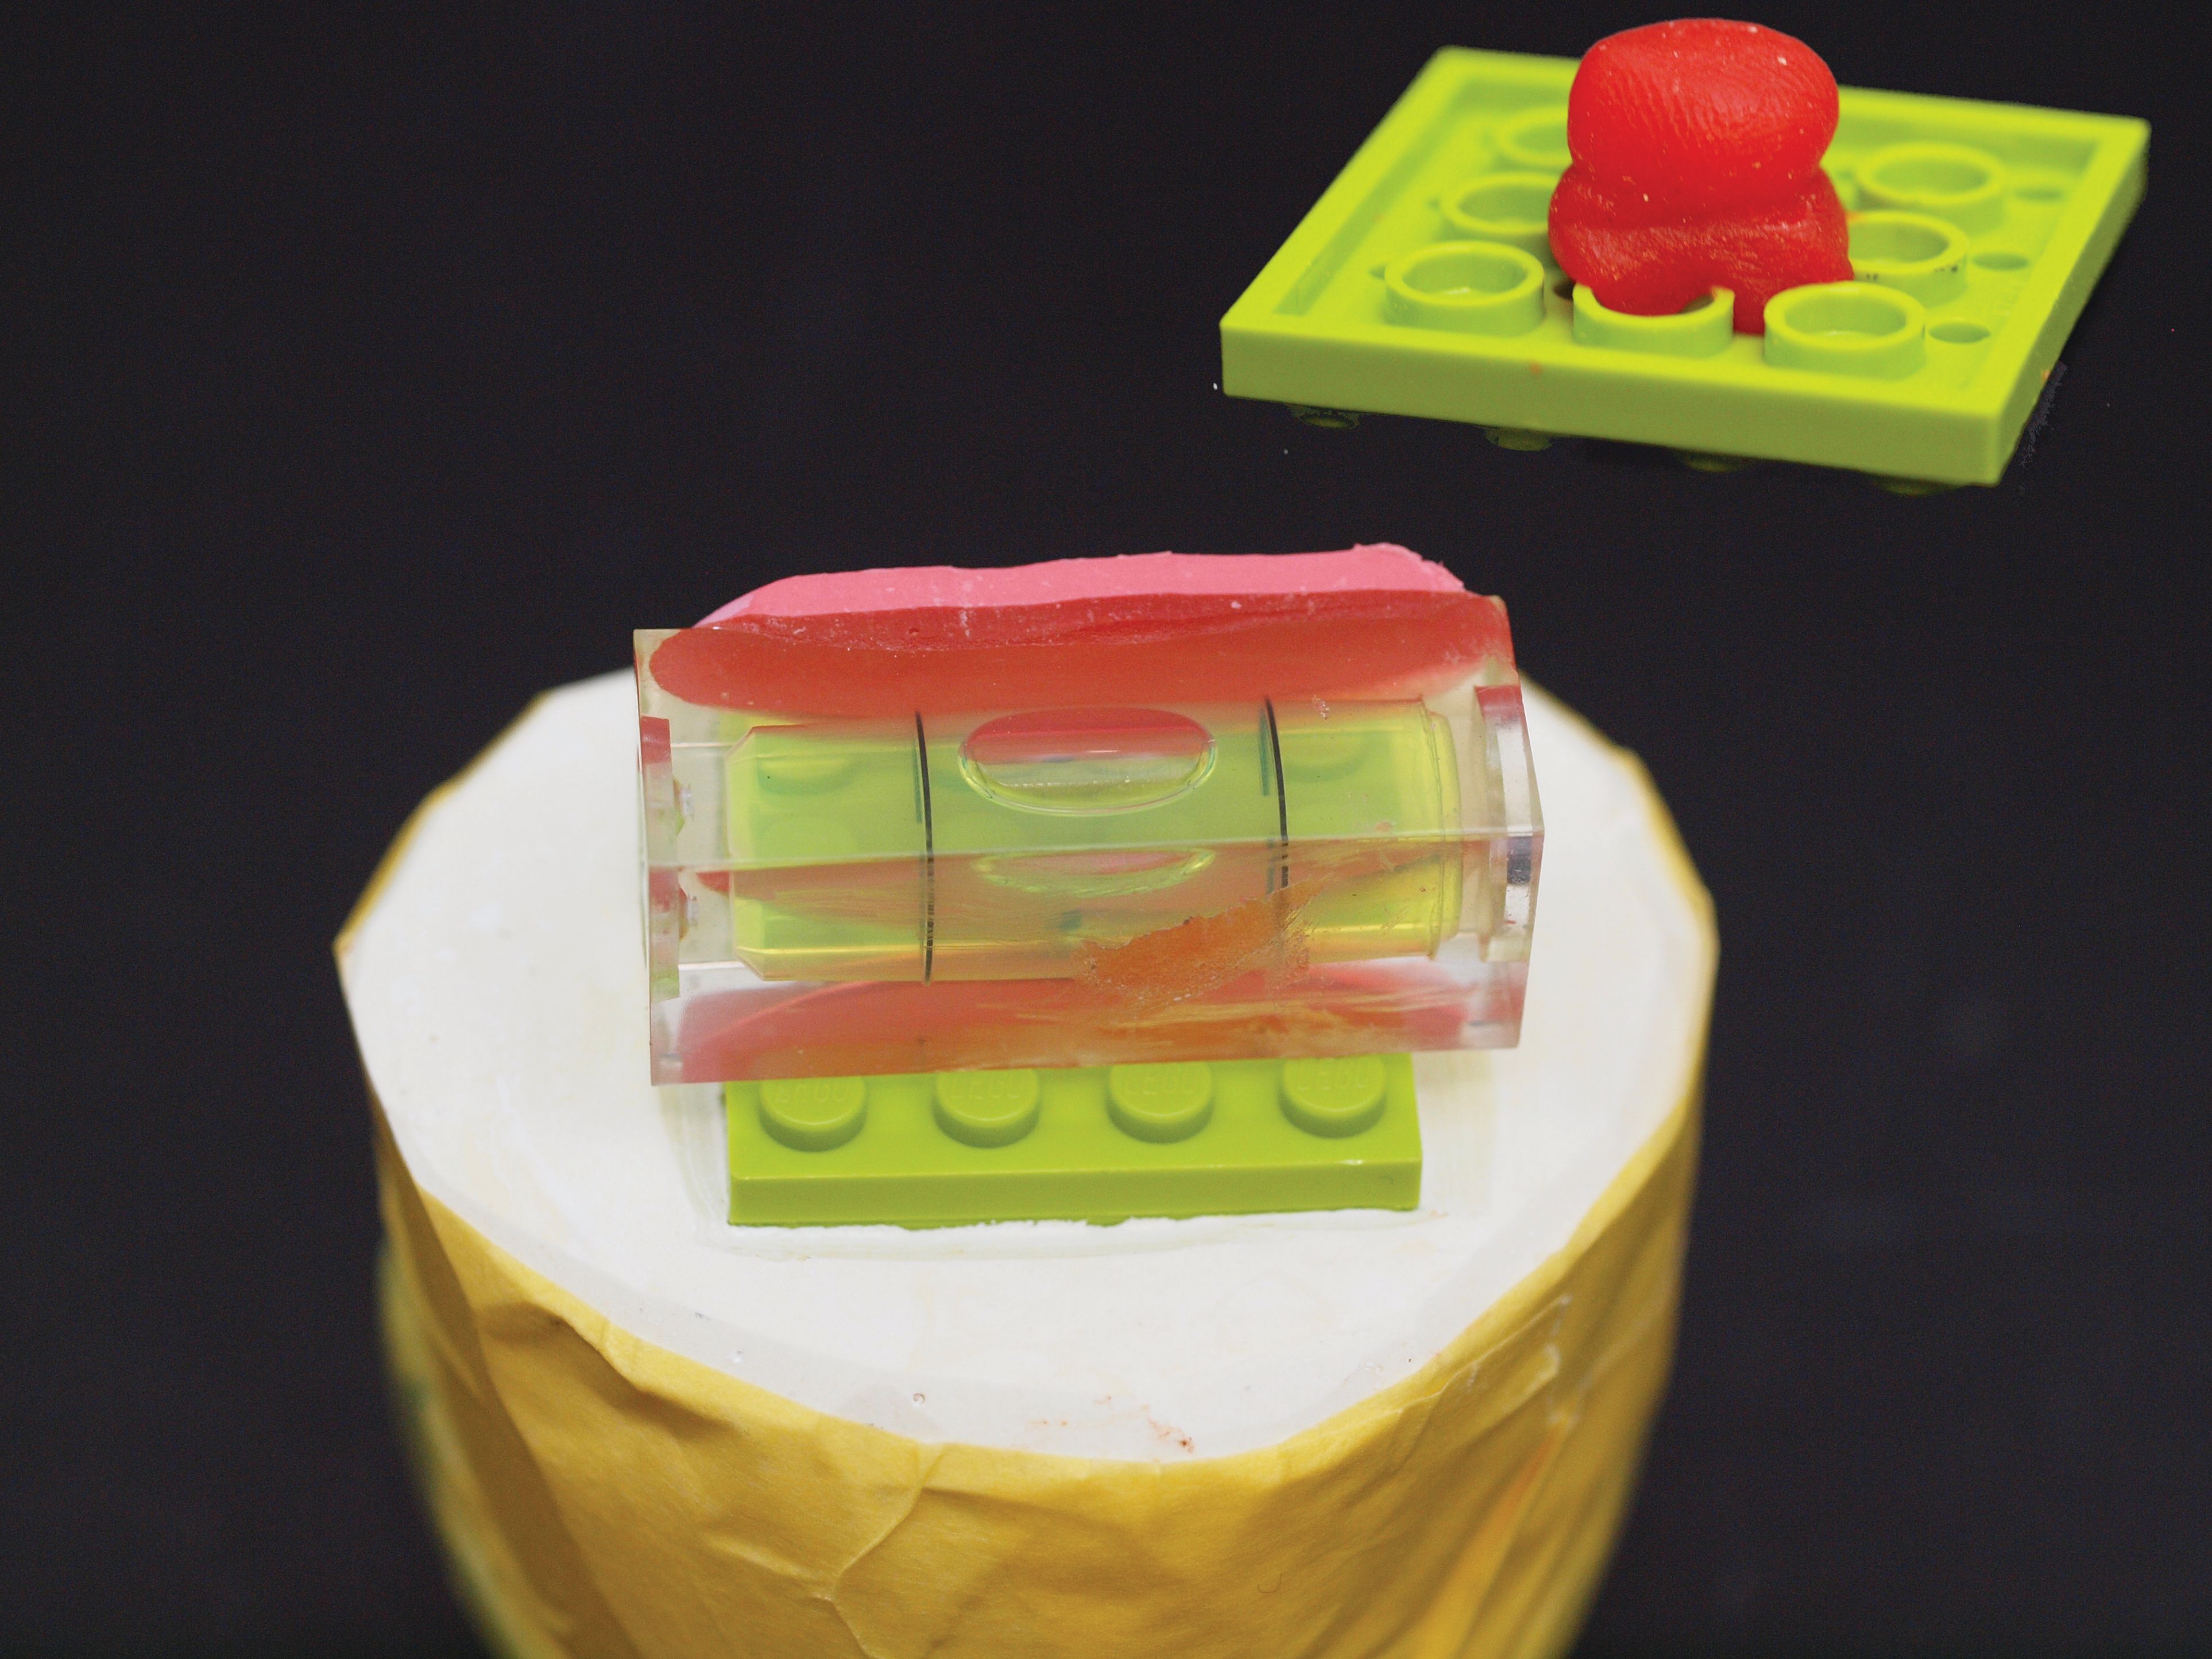
STEP 03 While it’s setting up, place an interlocking construction toy piece modified with a ball of pattern resin on top along with a small bubble level to establish a plane parallel to the floor during the setting of plaster. It helps to use a stiff mix of plaster to avoid pieces from sinking (Fig. 8).
STEP 04 Once set, interlock a secondary piece and apply hot glue on top. Immediately center and place occlusal plate along with small bubble level on top of cooling glue. Use the level to adjust plate with a centered bubble. Glue is pliable while cooling so move quickly. Once cool remove plate and inspect (Fig. 9).
STEP 05 You now have a removable plate with a base that has been constructed for that particular articulator. You can work on several cases on the same articulator if desired by making several plates as described using the same base (Figs. 10 and 11).
Conclusion
Again, when it comes to the fabrication of removable prosthetics, it’s very important for the laboratory to take the necessary steps in the transference of clinical information to the laboratory so they can provide an accurate, translatable form to an articulator for setting clinically prescribed tooth positions.
Here, the author addresses how his laboratory uses and maintains an easy, tractable, guided way to stay within the parameters of the trimmed rim during set-up, as well as how he illustrates to clinical partners the importance of taking time to rim trim.