How to simplify alignment and bonding for smile enhancement
How to use the Inman Aligner for alignment corrections in anterior teeth.


Mary presented with a desire to enhance her smile. Her main concern was the malalignment of her maxillary and mandibular anterior teeth. She was comfortable with the color of her teeth. Clinical and radiographic examination revealed excellent dental health, free of periodontal disease or caries.
While full orthodontic treatment or clear aligner treatment was discussed, she was particularly interested in the Inman Aligner because of its speed of treatment and removable design.
Read more from Dr. Nash: How to efficiently place a cemented implant crown
The Inman Aligner
The Inman Aligner was invented by Don Inman of Inman Orthodontic Laboratories in Coral Springs, Florida. It was designed specifically to correct alignment for the six anterior teeth when there is crowding of 3 mm or less.
Most cases can be completed in six to 18 weeks. It requires some interproximal stripping (IPR) and sometimes minor reshaping of the teeth. Small spheres of composite bonded to the tooth (buttons) are sometimes needed to stabilize the bows during tooth movement. The device is a single appliance that is removable. It must be worn 16 to 20 hours a day and adjustments are made to the teeth every two to three weeks. Permanent retention is necessary, and can be accomplished with a clear removable retainer or a bonded fixed wire retainer.
Case study
Mary’s smile as she presented is shown in Figure 1. In the retracted view (Fig. 2) the malalignment is obvious. She was not concerned about the tipped maxillary premolars, but rather wanted to focus on the six anterior teeth.

Fig. 1
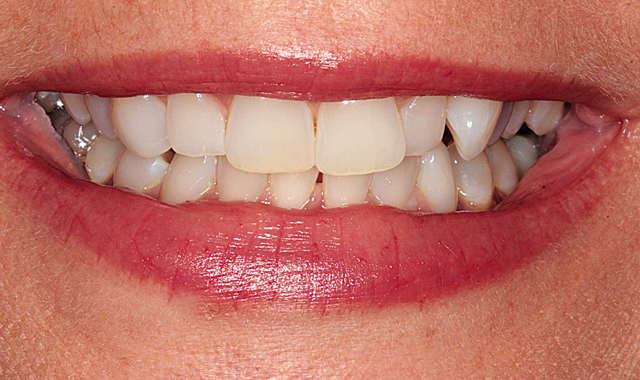

Fig. 2
Up next: How the problem was fixed


In the incisal view of the maxillary teeth, you can see that the mal-alignment was almost completely confined to the left central and lateral incisor and canine (Fig. 3). The mandibular anterior had the opposite problem with most of the crowding being in the area of the right central, lateral and canine as can be seen in Figure 4. Mary decided that she wanted to have Inman Aligners to straighten her anterior teeth.

Fig. 3


Fig. 4

Full maxillary and mandibular PVS impressions were taken, as well as PVS bite registration. These were sent to the Inman Orthodontic Laboratory for fabrication of maxillary and mandibular Inman Aligners.
They were returned with a printed model of the end result. Also included were preoperative study models with button locations marked and with a prescription designating the amount and location of interproximal stripping with precision diamond coated strips or discing with diamond discs.
The illustration in Figure 5 shows the action of the Inman Aligner. The facial bow is powered by springs pulling it lingually and lingual bow is powered by springs pushing the teeth facially. Rarely is it necessary to adjust the appliance itself. The adjustments are made to interproximal areas of the teeth.

Fig. 5
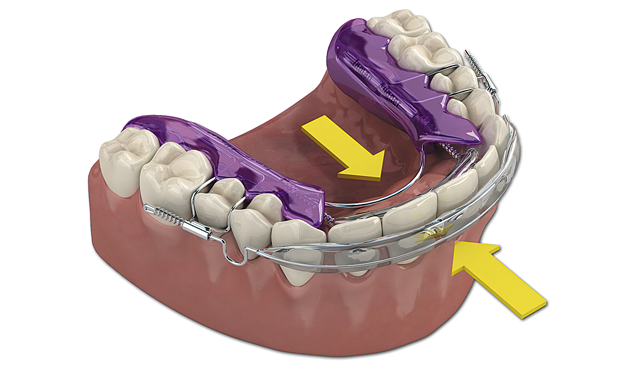

Fig. 6

When treating both arches, as in this case, it is sometimes necessary to align one arch at a time. This particular case lent itself to the patient wearing both appliances at once and Mary chose to do this. IPR was accomplished as prescribed and the appliances were delivered.
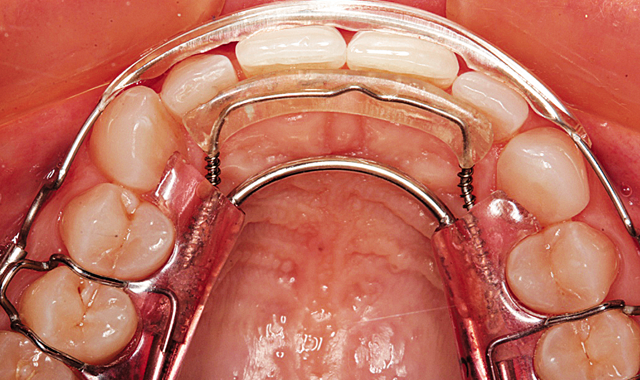
Figure 6 shows the aligners in place from the retracted facial view. The maxillary aligner at placement is shown from the incisal view in Figure 7. In Figure 8, the mandibular aligner is shown in place also from the incisal view.

Fig. 7


Fig. 8

During the next twelve weeks, Mary wore the two Inman Aligners for at least sixteen hours a day. She presented to the office for additional IPR every two weeks. The Inman Aligner can be seen in place from the incisal view on the maxillary arch after twelve weeks in Figure 9.

Fig. 9


The mandibular aligner is shown in place after 12 weeks in Figure 10. Figure 11 demonstrates the maxillary incisal view showing the aligner removed.

Fig. 10
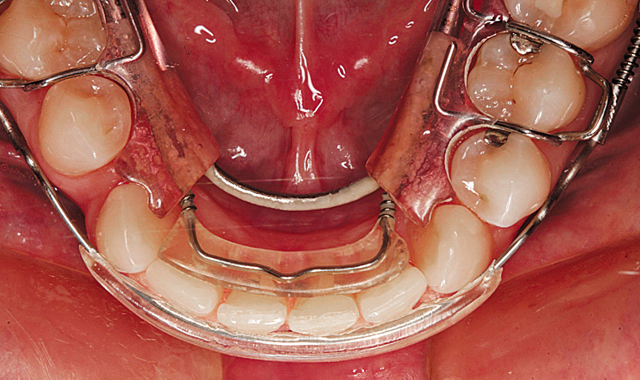

Fig. 11
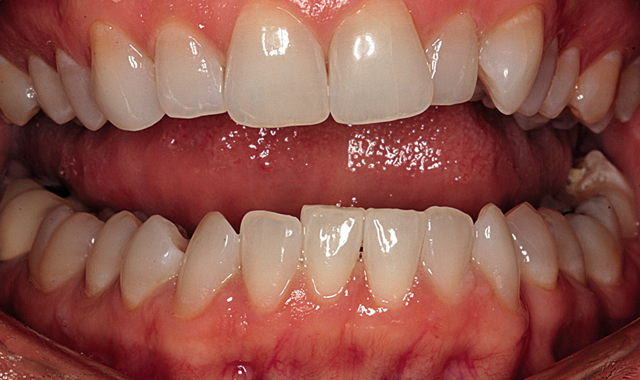
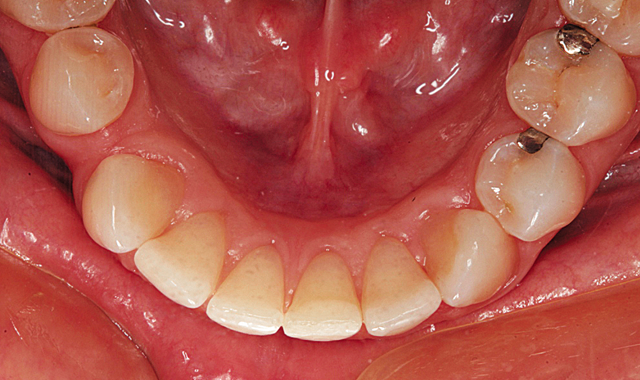
Note that the left canine is still slightly rotated and a small diastema exists between the right lateral and central incisors. In Figure 12, you can see that the mandibular incisors are well aligned with only a slight diastema remaining between the right lateral and central incisors. In the retracted facial view in Figure 13, you can see that a much improved alignment has been achieved.
Fig. 12

Fig. 13
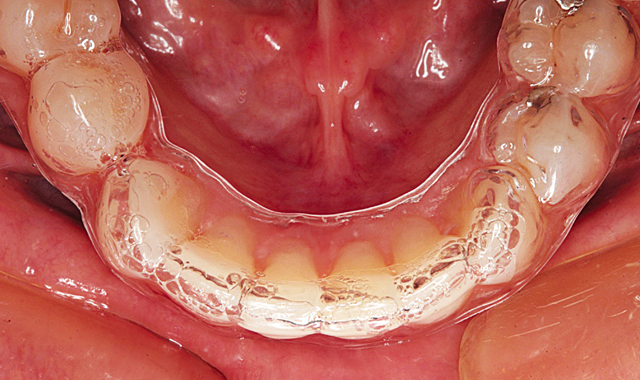
An impression of the mandibular arch was made with a PVS impression material and it was sent to the Inman Lab requesting a clear aligner to finish the lower arch. The clear aligner is shown in place from the facial view in Figure 14 and the incisal view in Figure 15.

Fig. 14
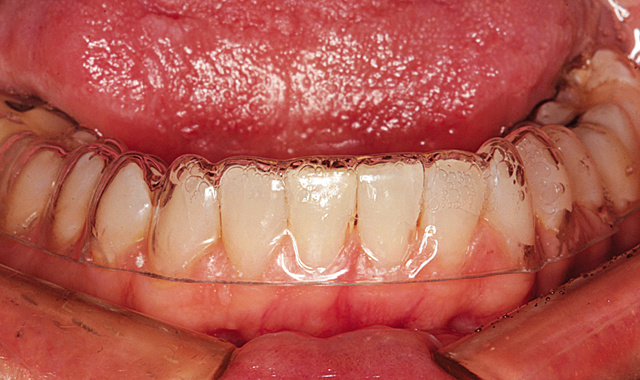

Fig. 15
In only one week, the mandibular teeth were perfectly aligned. The small diastema between the maxillary left central and lateral incisors was closed using a direct composite resin addition (NanoCeram Bright, DMP).
Fig. 16

Fig. 17
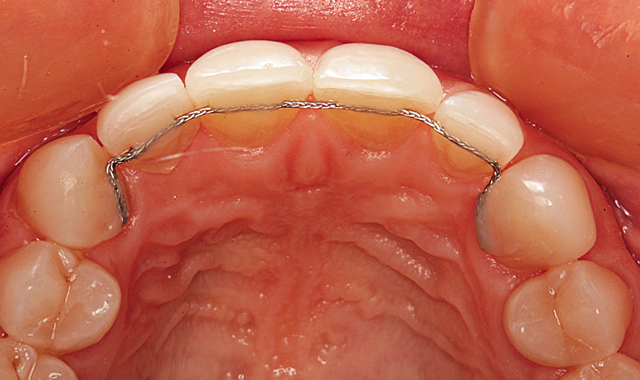
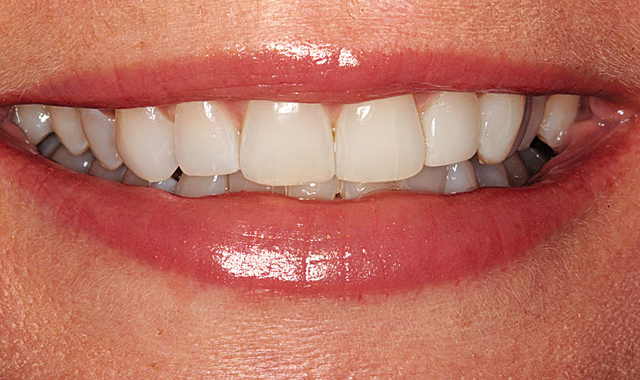
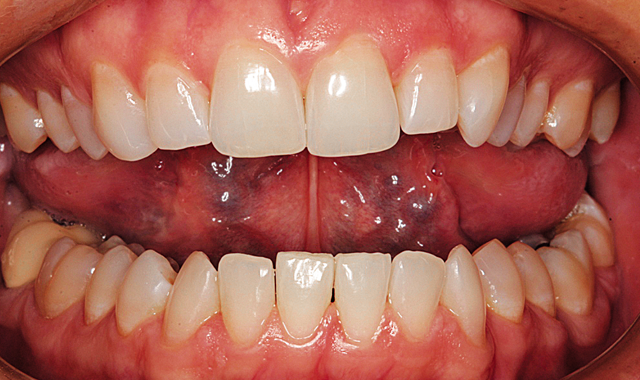
The final result can be seen from the retracted facial view in Figure 16. Bonded wire retainers were fabricated and placed. Figure 17 shows the bonded wire retainer in place for the maxillary arch and Figure 18 shows the mandibular bonded wire retainer. Mary’s new smile can be seen in Figure 19.

Fig. 18
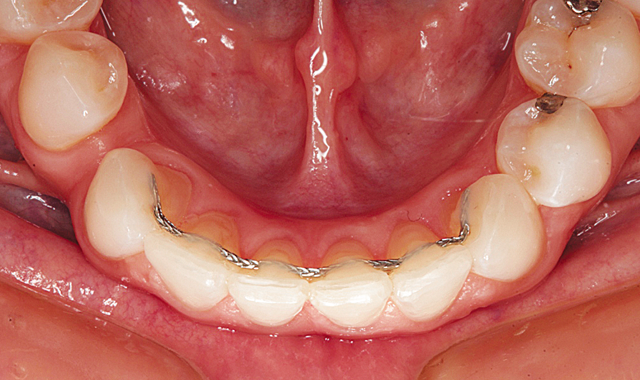
Fig. 19
Conclusion
In this article, I illustrated the use of a removable orthodontic appliance to quickly align the patient’s anterior teeth and followed with one clear aligner for the mandibular arch and composite bonding to close the small remaining diastema between the maxillary left lateral and central incisors. By using minimally invasive techniques of alignment and bonding, I was able to enhance the smile for this patient.


