How to Efficiently Place a Cemented Implant Crown
A guide for how to use TAUB Products’ new implant cementation system to place an implant abutment and crown efficiently and quickly.


For placing cemented implant crowns in the past, I would place a cotton pellet over the implant screw, add temporary cement over the cotton pellet and cement the implant crown with either temporary cement or a final cement.
Recently, I have discovered a more efficient technique. By using chlorhexidine gel (Go-Chx-Gel), Liquid Magic Resin Barrier and Zero G Bio implant cement by TAUB Products, I can achieve a clean and well-sealed cemented implant crown.
Case study
The patient in Figure 1 was ready for implant crown placement at tooth #14. In Figure 2, you can see the zirconia oxide implant abutment, the retaining screw and the IPS e.max crown ready for placement.
After the healing abutment was removed, Go-Chx-Gel was used to clean and disinfect the implant site. The gel was delivered using the applicator supplied (Fig. 3). After the leaving the gel in place for 30 seconds (Fig. 4), it was thoroughly rinsed and dried (Fig. 5).
The zirconia oxide abutment was placed and torqued (Fig. 6) and Liquid Magic Resin Barrier was applied (Fig. 7) and light cured for 20 seconds with an LED curing light (Fig. 8). Liquid Magic sets in a “rubbery” state. No cotton pellet is needed over the screw head and the resin barrier can be easily removed when needed. It can be seen in Figure 9 after light curing.
Zero-G Bio Implant Cement was placed into the IPS e.max crown (Fig. 10) and placed on the abutment (Fig. 11). Zero-G has a one-minute and 45-second working time with a full set at two minutes and 30 seconds. An LED curing light can be used to accelerate the set. Excess cement can be visualized around the crown and tissue (Fig. 11). It is also radiopaque so it can be seen on a radiograph.
Excess cured Zero-G was easily removed with a scaler (Fig. 12). Floss was worked into the interproximal areas to remove cured cement there (Fig. 13).
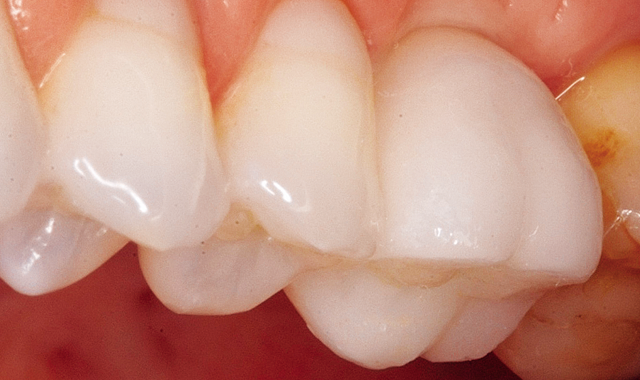
The final restoration can be seen from the occlusal view (Fig. 14) and the facial view (Fig. 15).
Conclusion
By using TAUB Products’ new implant cementation system, I was able to place an implant abutment and crown efficiently and quickly.
Up next: Detailed, step-by-step images allow you to become an implant expert too!

Fig.1 Integrated implant with healing cap at tooth #14
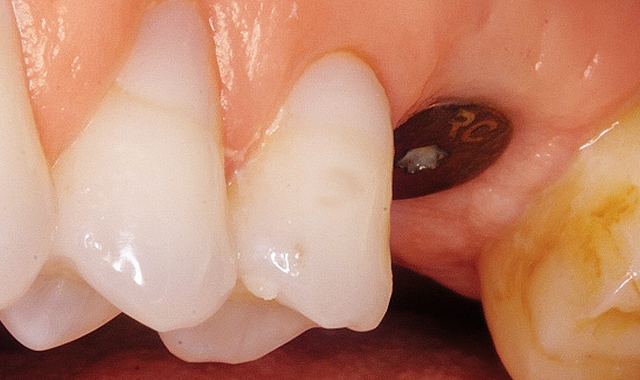

Fig. 2 Implant abutment, retaining screw and crown ready to place


Fig. 3 Applying Go-Chx-Gel in implant site
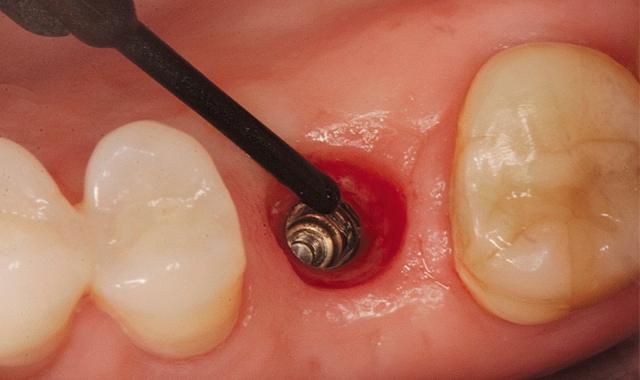

Fig. 4 Go-Chx-Gel in place
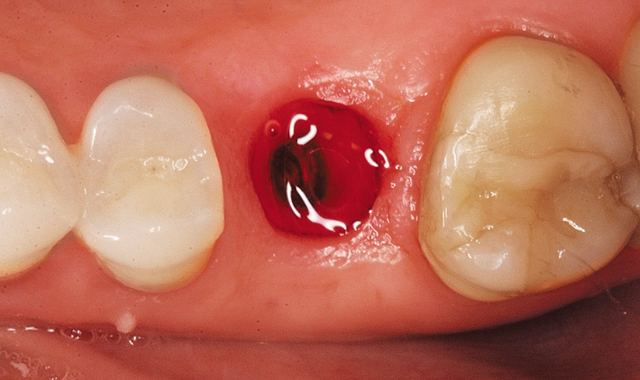

Fig. 5 Implant site cleaned


Fig. 6 Zirconia oxide abutment in place
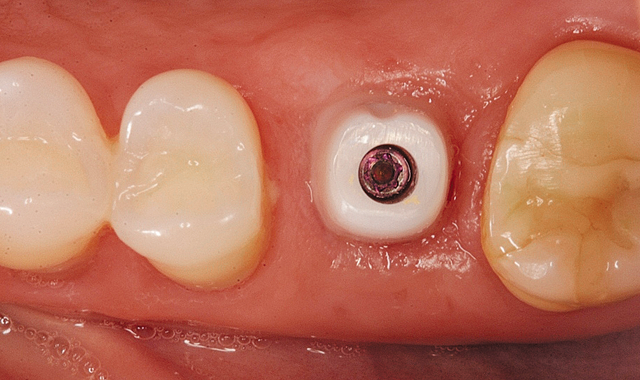

Fig. 7 Liquid Magic Resin Barrier applied
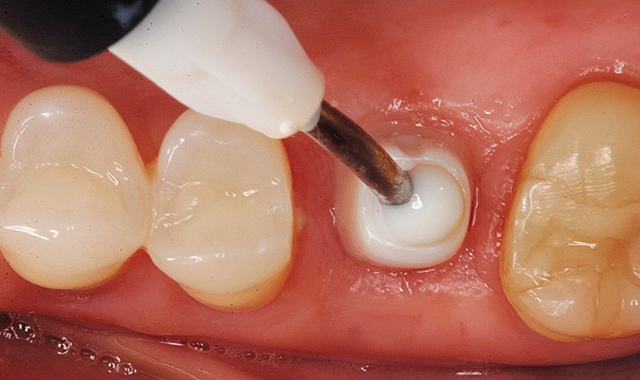

Fig. 8 Liquid Magic light cured
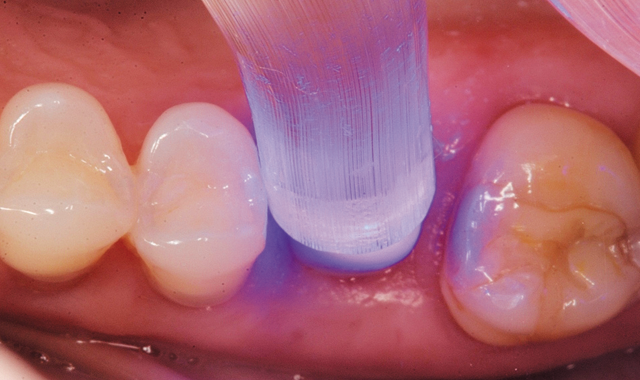

Fig. 9 Liquid Magic in place
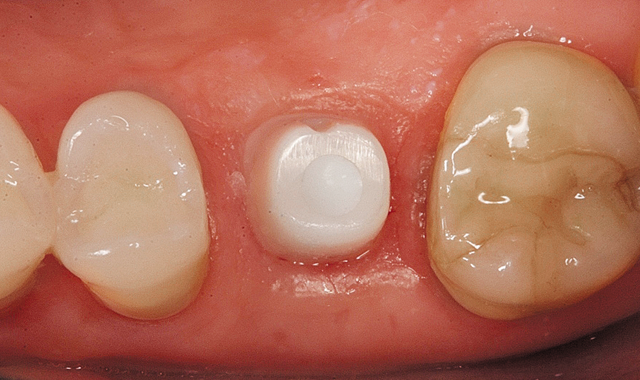

Fig. 10 Zero G Bio Implant Cement applied to internal surface of crown


Fig. 11 IPS e.max crown placed on implant abutment
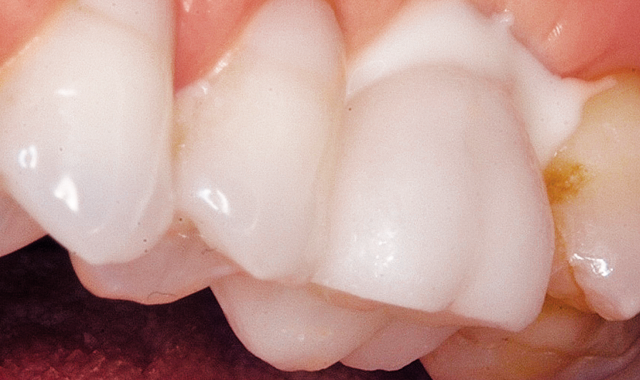

Fig. 12 Excess Zero G removed with scaler
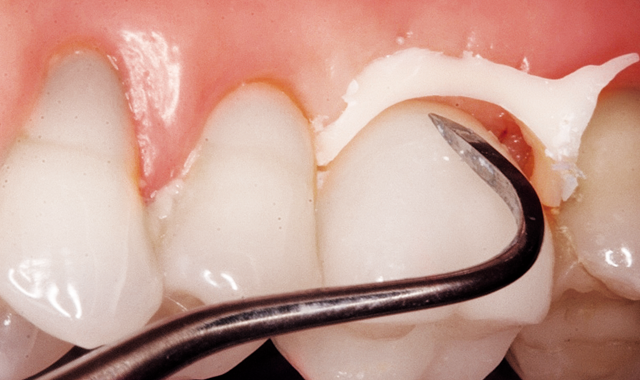

Fig. 13 Floss removes excess interproximal cement
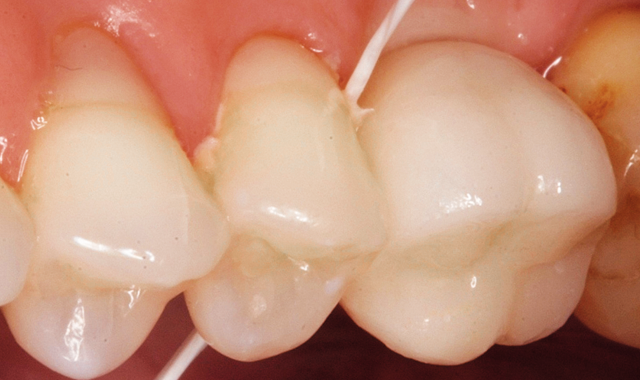

Fig. 14 Final result, occlusal view
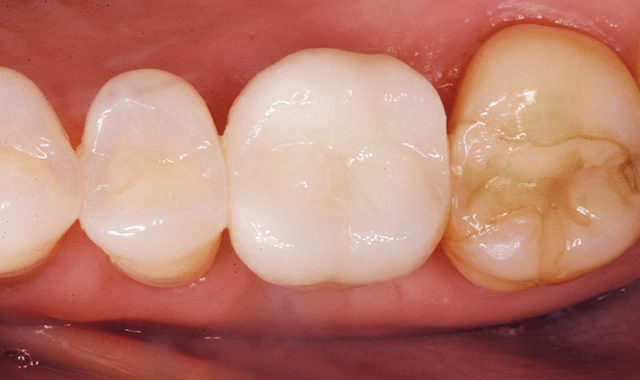
Fig. 15 Final result, facial view


