How to Create Strong Restorations With Excellent Esthetics
One clinician’s perspective on Celtra Press.
Dentistry is fortunate enough to have access to a wide selection of chairside CAD/CAM monolithic blocks, ranging from the first feldspathic block introduced back in 1991 to more recent advances in zirconia chairside milling technologies.


As dental professionals, we have witnessed a general increase in chairside monolithic block mPa strength over the years yet, many times, at the expense of esthetics. For example, we have an extremely strong material like zirconia but with less than desirable esthetics, or sometimes even more disappointing, an esthetically-pleasing restoration with low to moderate strength.
Fortunately, industry professionals have been working hard to address these issues and over the years have made significant improvements by marrying strength and esthetics. The best example of this that I’ve seen to date has been with Celtra® Press (Dentsply Sirona), a pressable material offered exclusively to dental labs that satisfies both strength and esthetics while clinically displaying a beautiful blending effect with surrounding teeth known as the “chameleon effect,” as seen by its natural opalescence, translucency and fluorescence.
I had been milling chairside with Celtra DUO for most cases for approximately two years before I recently requested Celtra Press from my lab partner. What a pleasant surprise! Celtra Press provides a natural vibrancy while reducing the “greying effect” often seen in similar materials due to high translucency without enough opacity. Celtra Press uniquely brings together the best of both worlds: strength and esthetics, and not having to compromise a bit on either.
Celtra Press also has a natural vitality that I haven’t seen before in other materials. The two areas that always concerned me when using comparable materials were marginal chipping and, as mentioned, the greying effect in anterior restorations. With Celtra Press I can polish or re-contour the margins without chipping the restoration, and its chameleon effect assures a natural looking restoration. Moreover, Celtra Press can be either bonded or cemented. Celtra Press fills a definite void in my restorative cases that’s been there for years: it’s a highly esthetic material with exceptional strength.
Case Presentation: by Dr. William Claytor
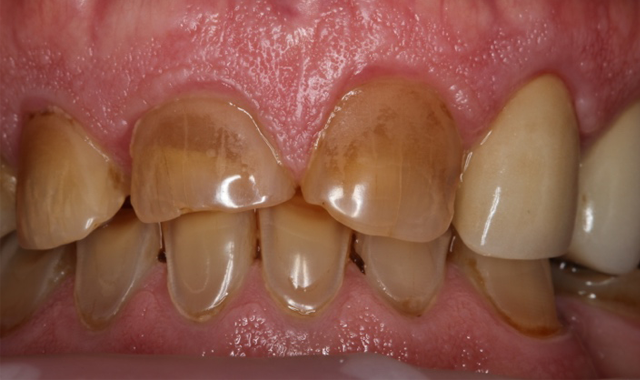
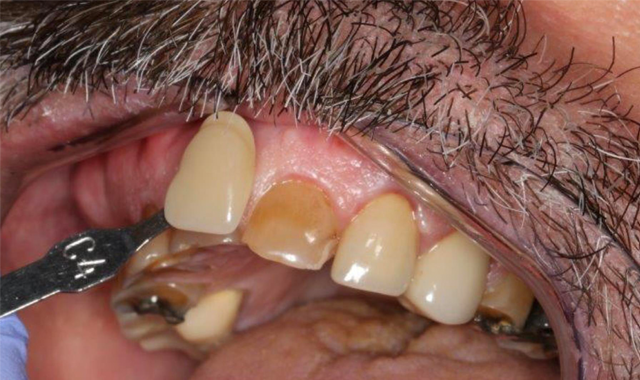
Patient presented with chipped, worn and discolored teeth #8 and #9. Teeth #10 and #11 had PFM crowns placed approximately 15 years prior. The challenge we faced was to not only match the fifteen-year-old crowns on #10 and #11, but to blend #8 and #9 as far as shape, hue, value and saturation (Figs. 1-2).

Fig. 1
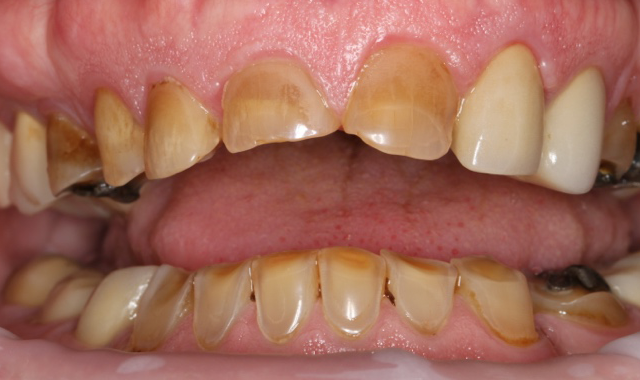

Fig. 2
Due to these esthetic and strength challenges (i.e., dark stump shade, tight inter-occlusal space, retention) that this case presented, my plan was to place two Celtra Press crowns ordered, designed and created from my lab.

Fig. 3
Using my CEREC® Omnicam (Dentsply Sirona) I created a digital impression of the case and then sent the image over to my lab partner directly through Sirona Connect. Using a digital communication system as opposed to sending a physical model provides so many advantages: superior accuracy and stability of the impression, immediate feedback from my dental lab technician and, moreover, I am able to make any preparation adjustments while the patient is still in the chair.
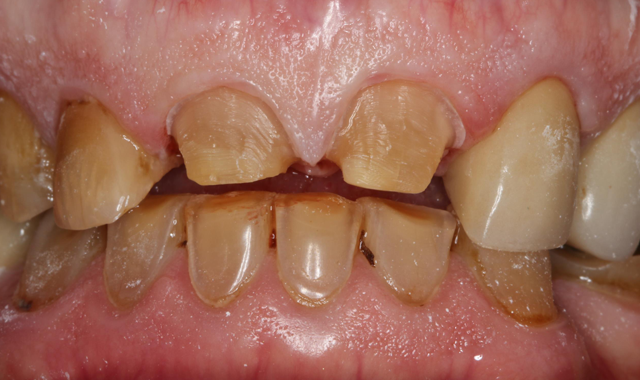
I used a shoulder preparation, preserving as much enamel as possible for retention (Fig. 3).
I also sent pre-op photos of the un-prepped and prepped teeth along with the corresponding shade tabs for enamel and stump abutment shades to help my dental lab technician evaluate the case pre-operatively in order to lessen potential issues such as the restorations being too translucent or too opaque (Figs. 4-5).

Fig. 4
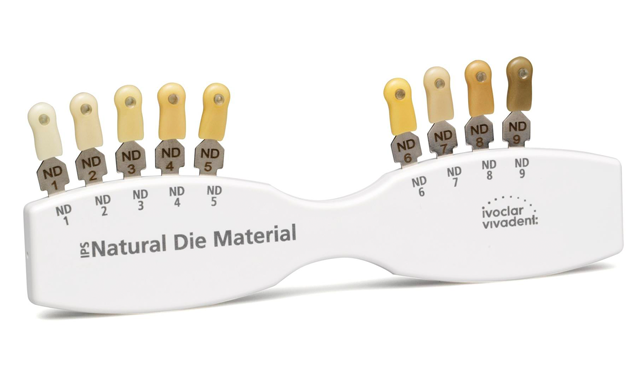

Fig. 5
From the Lab: by Bill Atkission

Fig. 6
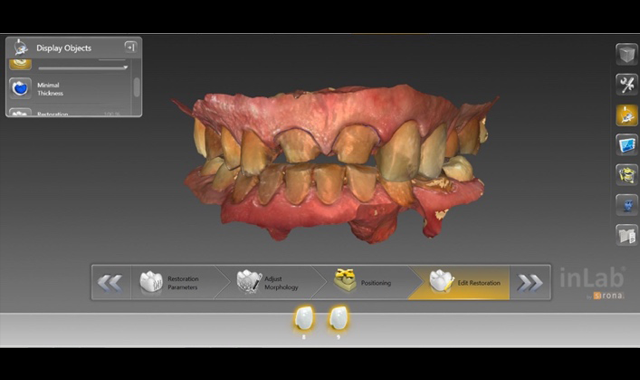

Fig. 7
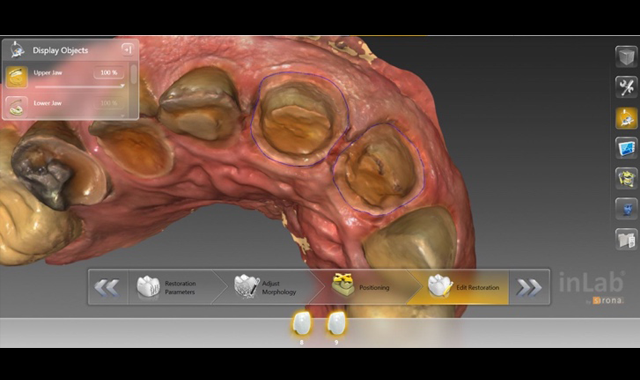
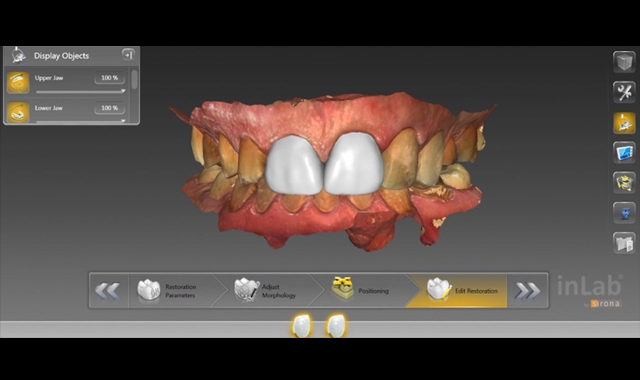
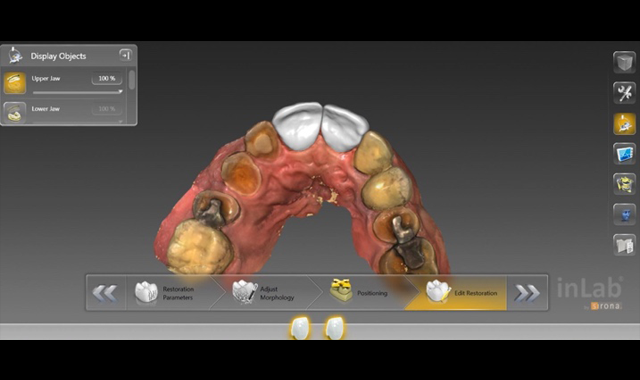
Here is the beautiful crisp, clear image sent over that shows the case that we received at the lab. The image was sent through the Sirona Connect portal, and was scanned with Dentsply Sirona’s OmniCam by the doctor. Using my inLab (Dentsply Sirona) software, I was able to view the image and start to work on designing the restoration with the “edit restoration” function. This particular image shows the complete facial view with all upper and lower opposing contacts, and in occlusion (Figs. 6-7).

Fig. 8
Once the design of the restorations was complete, I was able to send an image of the final proposal in complete facial occlusion view to the doctor for approval (Fig. 8).
An up-close image of the final restorations ready to mill can be seen in Figure 9, and a lingual and incisal view of the restorations can be seen in Figure 10.
Here at the lab, I was able to do a model-free pressing of full contour, monolithic restorations due to the fact I had a great scanned image. The restorations were designed using my inLab software, and then I was able to mill the wax puck on my inLab MC X5. I then sprued and invested the restorations with Celtra Press investment and then pressed using Celtra Press ingots.

Fig. 9
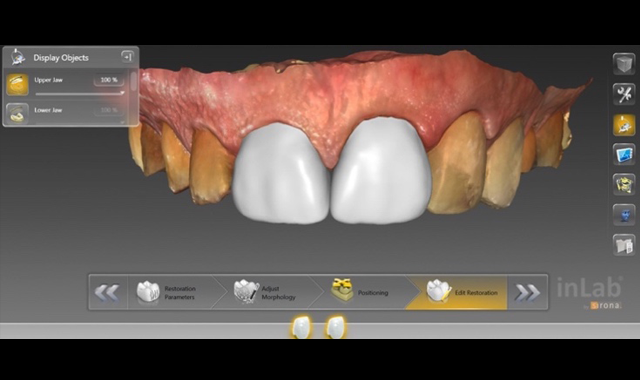

Fig. 10
Back at the Office:
Once I received the restoration back, I bonded the restorations with Calibra Ceram Adhesive Resin Cement and Prime&Bond Elect® universal dental adhesive (Dentsply Sirona).
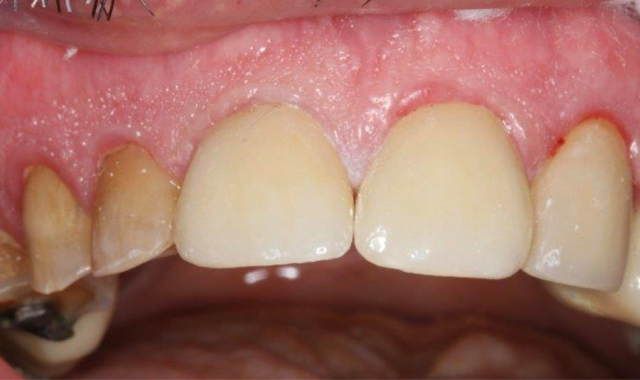
The fit was extremely accurate and I had minimal adjustments. The chameleon effect was readily apparent and mimicked the surrounding teeth. The new crowns on #8 and #9 blended extremely well with their surroundings (Figs. 11-12).

Fig. 11
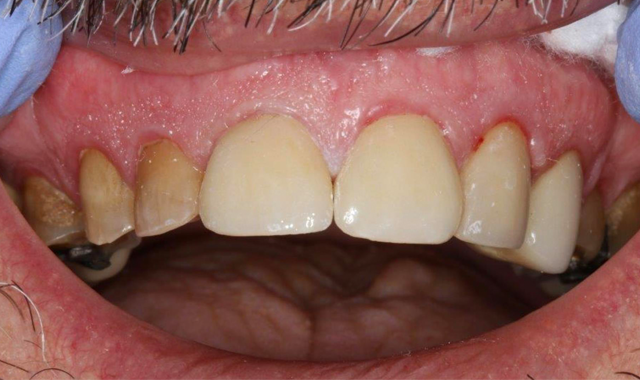
Fig. 12
Conclusion
The patient was extremely pleased with the results. He was happy with the fit, feel and the look of his new smile. The nicest compliment a dentist can receive is when the patient is completely satisfied. The natural opalescence, translucency and fluorescence that Celtra Press offers are what make a tooth appear natural in the mouth. Celtra Press is a revolutionary material that provides consistent, reproducible and predictable outcomes as far as esthetics, strength, handling and vitality. Using Celtra Press results in a “win-win-win” situation for the patient, dental lab technician and dentist.


