How to close a midline diastema using the front wing technique
Why this method is easier and more precise than using a palatal silicone index.


×
Partner Perspectives allows marketers to connect directly with the DPR audience by enabling them to share their content. This content does not necessarily reflect the views of Dental Products Report editorial staff or MMH.
Learn more
Become a partner
A 35-year-old female patient presented in our dental office. She expressed the desire to optimize the existing composite restorations on her maxillary central incisors. We had placed them 15 years ago to close her diastema.
We had originally used a silicone key for guidance when closing the diastema between the patient’s maxillary central incisors. No tooth preparation was carried out; the composite was merely bonded to the tooth structure. When the patient returned now, the restorations’ surface showed only slight discolorations, which were removable by polishing. The shape of the teeth were okay, but not perfect.
We decided to retreat her in a nonprep, single-shade approach. The main goal was to create a more natural shape. This time, we used the front wing technique invented by the StyleItaliano team. This approach involves free-hand modelling of the vestibular part of the tooth, which is easily accessible. Afterward material is added to the palatal side and anatomical matrices are employed for shape optimization.
The described technique is a suitable method of closing a diastema. Despite freehand modelling, it’s much easier and more precise than methods involving a palatal silicone index.
Fig. 1: Clinical situation 15 years ago with a diastema between the maxillary central incisors.
Fig. 2: Close-up view of the central incisors. Midline diastema closure was desired for esthetic reasons.

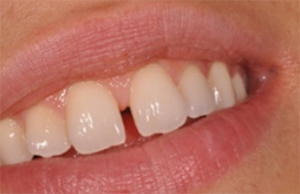

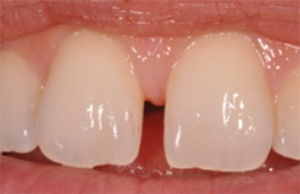

Fig. 1 Fig. 2
Fig. 3: Situation 15 years after the initial nonprep treatment with composite. The restorations are still intact, but there’s room for improvement with regard to the shape, especially in the vestibular area.
Fig. 4: Roughening of the surfaces as well as removal of discoloration and debris with 3M™ Sof-Lex™ Extra-Thin Contouring and Polishing Discs. This measure is required for two reasons: to ensure esthetic results and to create favorable conditions for bonding.


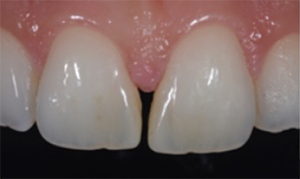


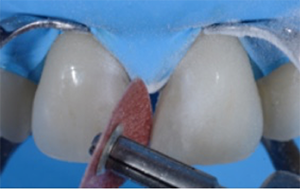
Fig. 3 Fig. 4
Fig. 5: Cleaned and slightly roughened surface ready for etching and bonding. Again, the selected treatment approach works without tooth preparation. There’s no reason for a replacement of the existing restorations.
Fig. 6: Etching of the enamel with 3M™ Scotchbond™ Universal Etchant for 15 seconds. Afterward the etchant was removed by rinsing with water, and 3M™ Scotchbond™ Universal Adhesive was applied according to the instructions for use.


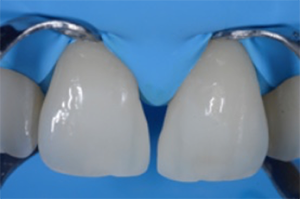


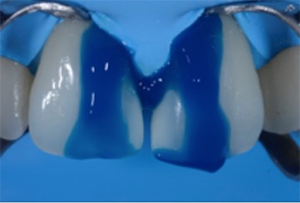
Fig. 5 Fig. 6
Fig. 7: Material selection. The preferred material for the single-shade technique is 3M™ Filtek™ Universal Restorative in the shade A1. The composite is available in a universal opacity and shows a beneficial chameleon effect.
Fig. 8: Appearance after the application of the first layer of composite. The idea is to close the diastema from the vestibular surface, and then to fill up the vestibular wing cured from the palatal side. Stability during modeling is an important material property.

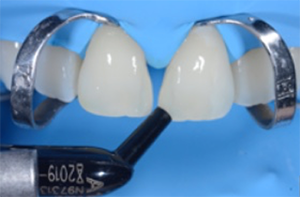


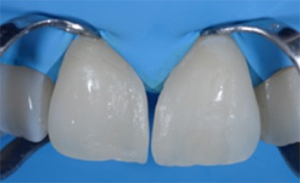
Fig. 7 Fig. 8
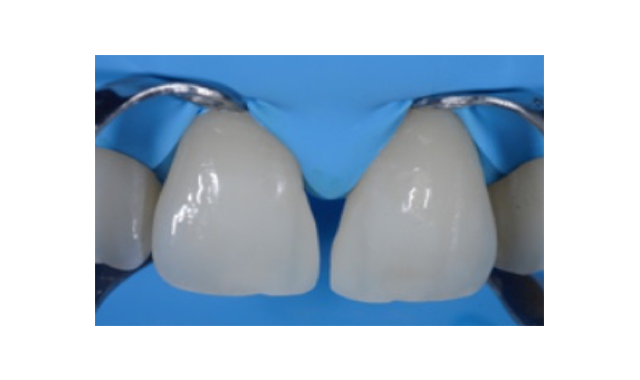
Fig. 9: Palatal view after placement of two anatomical matrices (Lumicontrast, Kit MyCustomRings, Polydentia). They’re used to completely close the diastema, create a natural shape and ensure a tight contact between the central incisors.
Fig. 10: Frontal view of the two anatomical matrices. It’s generally advisable to utilize a matrix with a contrasting color. A small drop of uncured flowable composite between each matrix and tooth may help to hold the matrix in place.

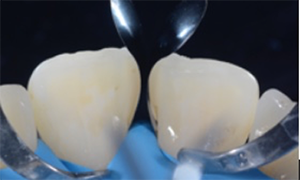


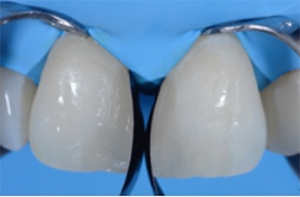
Fig. 9 Fig. 10
Fig. 11: Lateral view. Composite material is applied to fill the space between each central incisor and the adjacent matrix. The shape of the matrix facilitates the establishing of a tight contact point and the desired anatomical form.
Fig. 12: Situation after light curing. The addition of composite from the palatal side and removal of the first matrix on the right central incisor.

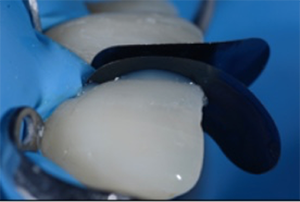


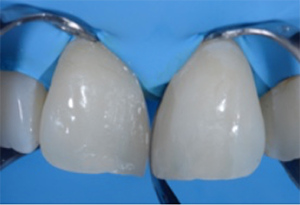

Fig. 11 Fig. 12
Fig. 13: Clinical situation after removal of the second matrix. A natural shape is obtained. Some composite excess is mainly located in the area of the incisal edge where removal is easy.
Fig. 14: Polishing of the restoration surface with the beige 3M™ Sof-Lex™ Pre-Polishing Spiral of the 3M™ Sof-Lex™ Diamond Polishing System.
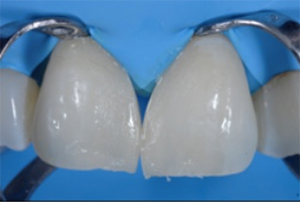


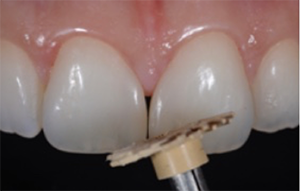

Fig. 13 Fig. 14
Fig. 15: Polishing of the restoration surface with the pink 3M™ Sof-Lex™ Diamond Polishing Spiral of the 3M™ Sof-Lex™ Diamond Polishing System.
Fig. 16: Natural surface texture of the central incisors, including the new composite restorations.
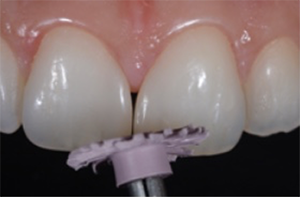

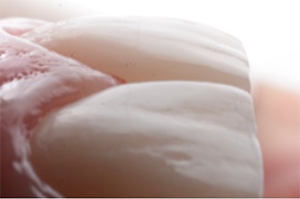

Fig. 15 Fig. 16
Fig. 17: Close-up view of the maxillary incisors. The restorations are virtually indistinguishable from the natural tooth structure. As expected, the composite blends in perfectly with the color of the surrounding teeth.
Fig. 18: Post-treatment smile of the patient with naturally shaped anterior restorations.

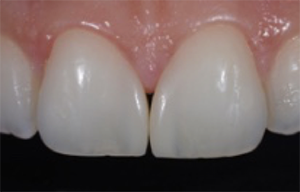


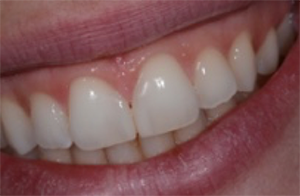
Fig. 17 Fig. 18


