Getting the most out of your impression materials
From technique improvements to tray selection options and inventory management and procurement tips and tricks, we take a look at how to optimize the use of your impression materials to get the most out of your investment.


Now, perhaps more than ever before, overhead costs are a significant concern to a dental practice. Getting the most out of your investment in materials is crucial to your bottom line. Impression materials are a staple of your inventory closet and your materials budget. So maximizing your ROI on impression materials can help optimize this crucial practice management area. Here are a few ways you can get the most out of your impression materials.
Don’t Waste Material with Bad Technique.
When you take a bad impression and have to retake it, you have to throw out impression material. Improving your technique can make your inventory go further, and cost less per impression. More importantly, better impressions lead to better restorations.
Marc Geissberger, DDS, MA, has a private practice in Greenbrae, Calif., and is also a speaker with Catapult Education. His free continuing education webinar, “Clinical Techniques to Master the Final Impression Using a Modern Impression Material,” is available online at vivalearning.com (Sponsored by VOCO America). He shared that a study printed in JADA said that of 1,157 impressions evaluated, there was at least one error in 86 percent of them, and over half of them (55 percent) had critical errors related to the finish line.1
“That’s shocking,” Dr. Geissberger says in the video. “Because we know if we have an error around our finish line that the restoration is destined for early demise.”
Some of the other common errors were:
- Tissue over a margin (49%)
- Pressure on the soft tissue (25%)
- Voids at the finish line (24%)
Investing in products that can prevent mistakes in your technique is another way to protect your bottom-line with impression material costs. One suggestion Dr. Geissberger said could help improve impressions is to use a product called DAMit Impression Tray Membrane from TinMan Dental. DAMit is a tape in a dispenser that prevents material from coming out of the back of your impression tray. Dr. Geissberger uses it on the distal aspect of the tray for his upper and lower impressions.
Tissue management and isolation is another crucial area for making a better impression, per Dr. Geissberger. The three primary strategies for tissue management include laser troughing, mechanical retraction and hemostasis (cord), and hydraulic retraction. Dr. Geissberger covers two techniques in the webinar, laser troughing and mechanical retraction. For lasers, he recommends using low wattage with a diode laser to trough the area to be exposed carefully. For mechanical retraction and hemostasis, Dr. Geissberger favors the two-cord technique. The first cord should be the smallest cord that goes in and fits below the margin. Then he places the second cord to allow for lateral distention for the tissue. He also uses a hemostatic agent, ViscoStat™, from Ultradent Products, Inc., which contains 20 percent ferric sulfate. Dr. Geissberger likes it because it is not only an effective hemostatic agent, but it also desiccates the tissue.
“Keep in mind that those minor salivary glands inside our gums constantly release fluid into the impression site,” Dr. Geissberger explains. “So, by leaching that out ahead of time, we get rid of a lot of the excess moisture.”
Dr. Geissberger also says that with patients that don’t have as much bleeding and with thin gingival biotypes, retraction pastes are useful for tissue management. He uses 3M’s Astringent Retraction Paste for cases where minimal retraction is needed. It uses 15 percent aluminum chloride, a good hemostatic agent.
He also offers additional advice for taking impressions, which he calls Geissberger’s Rules for Impressioning:
- After placing the cotton rolls, instruct patients not to swallow and remind them throughout. This strategy is more effective at keeping the tongue immobile then telling them not to move their tongue.
- Work distal to mesial.
- Start on the lingual.
- Concentrate on capturing the sulcus, not the finish line.
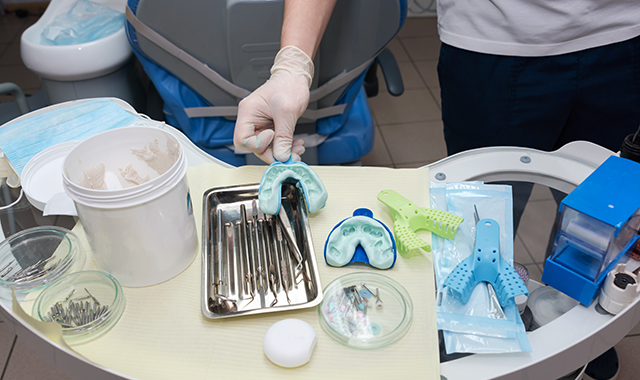
Choose the Proper Tray in the Correct Size.
A good impression is the result of a technique that gives you the perfect negative impression of the teeth, the gums, and the sulcus. The tray you use is also essential. Using the proper tray helps you capture the detail without distortion and eliminates the need to retake the impression.
Choosing the proper tray size is essential. Using an ill-fitting or low-quality tray leads to problems with conventional impressions. Per Glidewell’s Chairside Magazine, the tray should be large enough to include all the teeth and should not touch the soft tissues.2 If your completed impression has show-throughs, the tray was likely too small (or improperly positioned).2 If the tray touches a tooth, hits a tori, or is too small or narrow, it adds variability to the impression.
Having an assortment of stock tray sizes on hand will help you avoid problems with your impressions due to tray size issues. However, when it comes to stock trays, the sizes can vary by brand. In other words, all “adult trays size small” are not the same size. To ensure you have the right size for your patient, stocking many different brand trays in each size can give you more options to make the right fit.
Continue reading on next page
Often, stock trays require modification.3 Dentists can modify the tray using wax, tracing stick impression compound, or heavy-bodied silicone, but whichever material you choose, the modifications you make to the tray must be rigid.3Furthermore, if the patient has a high palatal vault, you can use tracing stick compound in the center of the maxillary tray to reduce the amount of material you need to use to get the details you need.3
Custom trays can help you avoid multiple retakes that use more impression material and lead to a poor patient experience. Custom trays help you exert the maximum pressure on the material to push it inside of the sulcus. Custom trays also have the advantage of providing uniform thickness for your impression materials.4 The uniform thickness offers several benefits for your dental impressions, including curtailing distortion, reducing material waste, and providing a more comfortable patient experience. Custom trays are particularly useful when replacing multiple teeth, or if the arch does not conform to stock tray sizes.4 Furthermore, the time needed to take a preliminary impression and then customize the tray also gives the patient’s soft tissue time to heal, which, in turn, means the tissue won’t bleed as much when you take the final impression.
However, it is essential to use different types of materials for your preliminary impression and the final impression with the custom tray. The preliminary impression should be light-body so it can flow to the surface of the teeth and control the bubbles within the material. The final impression, by contrast, should be a heavy-body impression material that the customer tray can push into the sulcus and capture that detail.
Dual-arch impression trays are another way to optimize the use of your impression materials. First introduced in the 1980s, the closed-mouth technique allows you to capture the impression in a single-step that is faster and uses less material than other trays.4 Dual-arch impression trays come in a variety of sizes and types of material fabrication. Choosing which one depends on your clinical use and the restoration you want to place.4
Manage Your Inventory.
Overhead costs are an area that nearly every dental practice would like to trim. Who hasn’t had to throw out material because you didn’t use it before the expiration date, and watched hundreds if not thousands of dollars of profit get thrown out with it?
One way to avoid this waste of material and money is to have a systematic inventory management system in place in your practice. If you don’t know what you have, how do you know what you need? And, perhaps more importantly, how do you know if you already have it, but it’s just in the wrong place?
Having a system of organization is an excellent way to get the most out of your impression material. Dental City, a dental supply distributor, offers the following five tips to manage inventory in your practice.5
- Appoint one person to be in charge of it. If someone owns it, then they can control what is coming in and out of the office. Moreover, it ensures that two people don’t order the same thing or that someone ordered new stuff when the old stuff was on a different shelf. One person in charge will help alleviate this well-intentioned but sometimes expensive activity.
- Create a process protocol. Whether you have it on paper, or keep a digital file, have the ordering process spelled out. This way, if the person you put in charge of it is out of the office, their substitute can follow established ordering protocol. Dental City recommends getting granular with the details in this write-up to leave fewer variables up to chance.
- Have a periodic review of inventory. Doing a summary of what you have and need should be part of the practice management routine. This check will not only serve as an opportunity to restock, but it will also reveal what you use the most and how much. Ensure that this review occurs on a regular interval, so you have useful data to analyze when it comes time to adjust your order.
- Keep a list of everything you order and from where. Having a record to refer to when you need to order something, mainly if you don’t order it all the time, will save time and frustration. Over time, this list will also reveal any patterns for products, suppliers, seasonal needs, or opportunities for cost savings.
- Set a budget and stick to it. Budgets are vital to keeping operating costs low. Also, when you are going over, it can be a red flag to help you spot pricing inconsistencies or opportunities to save on materials you stock regularly by buying in bulk.
Some dental suppliers have systems that help you manage your inventory for efficiency and cost savings.
The Color Method system from Zirc assigns a color to a procedure.
Then, every material, instrument, and tool you need for the treatment goes in the corresponding color-specific treatment tub. The idea is that you have everything you need for that patient's treatment in the color-coded container when you go into the treatment room. One of the significant benefits is that you no longer need to fill all your treatment rooms with the same materials. The procedure tub moves from room to room, and you can see at a glance what you have, which prevents over-ordering.
The American Dental Association (ADA) also has recommendations for inventory and supply management. Their book Basic Training III: For Dental and Administrative Personnel, suggests using supplies in the order you bought them, using the oldest first or the “First in, first-out” method. The ADA also recommends a centralized storage system with similar items next to each other and the most frequently used items in easy-to-see locations. Another suggestion from the ADA is a “wish list” for the team to request materials so that when it is time to order, there is some guidance for whomever handles ordering.6
Also, new technology can help with managing inventory costs. Supply Clinic is an online marketplace where dental suppliers compete for dentists’ business. The idea is that dentists use the collective bargaining power to get the best possible price for supplies, including impression materials. Net32.com is another online marketplace where vendors compete for your business. The site aggregates vendor catalogs into their site. Dentists can then compare individual product pricing from all the vendors automatically.
Impression materials are a staple in your practice. Ensuring that you use them efficiently is an excellent way to optimize your overhead costs and improve your bottom line. By improving your technique, choosing the proper impression tray, and managing your inventory and procurement for optimal turnover and competitive pricing, you can get the most out of your impression material.
References
1. Rau, Clayton T. et al. “The quality of fixed prosthodontic impressions.” The Journal of the American Dental Association, Volume 148, Issue 9, 654 – 660. Accessed via web. 9 April 2020. <https://jada.ada.org/action/showCitFormats?pii=S0002-8177%2817%2930406-3&doi=10.1016%2Fj.adaj.2017.04.038>.
2. Kurtzman, DDS, Gregori M., Strassler, DMD, Howard E. “Indentification and Correction of Common Impression Problems.” Glidewelldental.com. 17 April 2008. Web. 9 April 2020. < https://glidewelldental.com/education/chairside-dental-magazine/volume-3-issue-1/identification-and-correction-of-common-impression-problems/>.
3. Nandini, V Vidyashree et al. “Alginate impressions: A practical perspective.” Journal of conservative dentistry : JCD vol. 11,1 (2008): 37-41. doi:10.4103/0972-0707.43416. Accessed via web. 9 April 2020. <https://www.ncbi.nlm.nih.gov/pmc/articles/PMC2813082/>.
4. Punj, Amit & Bompolaki, Despoina & Garaicoa, Jorge. (2017). Dental Impression Materials and Techniques. Dental Clinics of North America. 61. 779-796. 10.1016/j.cden.2017.06.004. Accessed via web. 9 April 2020. < https://www.researchgate.net/publication/320046633_Dental_Impression_Materials_and_Techniques>.
5. “5 Tips for Effectively Managing Your Dental Practice Supply Inventory.” Blog.dentalcity.com. 3 November 2017. Web. 9 April 2020. < https://blog.dentalcity.com/5-tips-for-effectively-managing-your-dental-practice-supply-inventory/>.
6. Basic Training III. American Dental Association, 2003, p. 107. Accessed Via Web. 9 April 2020. <https://books.google.com/books?id=NqjJyTjJ1WEC&pg=PA107&lpg=PA107&dq=Arranging+dental+materials+by+expiration+date&source=bl&ots=h9ICLLCz_O&sig=ACfU3U1wm0MLI8hjrg_aEqNA4HZwyLbtMw&hl=en&sa=X&ved=2ahUKEwjfy86bytzoAhULGTQIHeuuAL0Q6AEwDXoECA0QMQ#v=onepage&q=Arranging%20dental%20materials%20by%20expiration%20date&f=false>.


