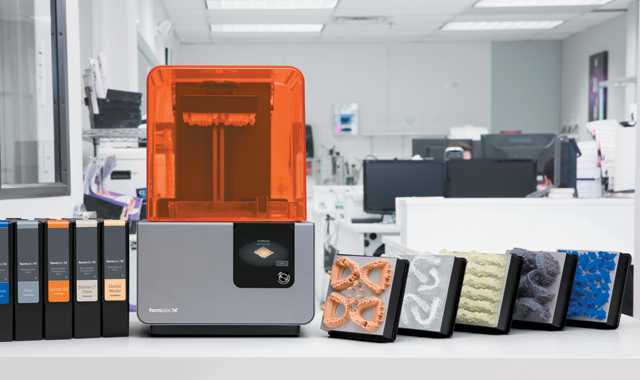
Achieving printing perfection with the Form 2
Why one doctor uses this 3D printer to create his surgical guides.


Like any implant dentist, Dr. Ken Kim, DMD, from Plainview, New York, wants the best results from his surgeries. While some doctors place their implants freehand, Dr. Kim prefers the reliable, accurate outcomes achieved from using surgical guides. And the best quality surgical guidance, he says, are achieved when using his Formlabs Form 2 3D printer.
Prior to his Form 2 printer, he used a milling machine to create his guides. And the two fabrication methods are quite different.
“Milling is a little bit different than 3D printing,” he observes. “With milling, you’re cutting something down from a block of material. But with 3D printing, you’re creating something from nothing.”
Related reading: Formlabs announces faster biocompatible materials for long-term use
Best tool for the job
The reason for the switch in technologies is because while the milling machine got the job done, it wasn’t ideally suited for the task, Kim explains.
“That was a little bit messy and it was taking a toll on my milling machine,” he says. “That was really designed to mill a crown. I found a better way to print my surgical guides, which was to use the Form 2 printer.
“The reason why I got into this whole 3D business is because I didn’t like the way my implants were going,” he continues. “I’m pretty sure a lot of dentists out there probably share a similar frustration because you’re trying to deliver a 3D object in a patient’s jaw, and you want to do a good job every time. It’s very difficult because we are only human. You can’t draw a perfect circle every time.”
His efforts to find the perfect system first led him to a milling machine.
“It was through my quest to actually figure out the way to do it perfect every time that I came to milling of the surgical guide,” Dr. Kim says. “That was the first thing that I was introduced to. And it was good for a while, but the only problem was it was taking a toll on my very expensive milling unit, which was like $70,000-$80,000. Afterward, it used to leave a big mess in my milling unit.”
Milling, while getting the job done, turned out to be expensive and create less-than-perfect results.
“Milling was $60 or $70 for a surgical guide,” Dr. Kim explains. “The fit wasn’t all that great either; it was a little bit rocky in the mouth. The ultimate reason for changing to a 3D printer was that the milling only allowed me to do one implant at a time. If I wanted to do two implants in a row, I would have to mill two different surgical guides, and that was not really what I was looking for. I was dealing with that for a while, and then eventually I found out about the Form 2. And with the Form 2, I can do any number of surgical guides at a very low cost, which is somewhere between $20 and $25. So, it’s a no-brainer that you should be doing it this way.”
And while doctors can place implants without surgical guides, Dr. Kim believes that they ensure consistent reliability and success.
“I do see this as the standard of care,” he explains. “I tell doctors in my lectures, ‘This is the standard of care, you just don’t know it yet.’ Look at it from the patient’s perspective: You need an implant and you have Doctor A, who can do it perfect, and Doctor B who has 20 years of experience but can’t guarantee that it will go in straight. What’s the right thing to do? Now that we have the technology, I think it’s kind of wrong to place it freehanded.”
The process
Optimally placing dental implants is greatly aided by use of a surgical guide. That guide, when placed in the patient’s mouth, allows the doctor to locate the ideal position, angle and depth for a successful outcome.
Dr. Kim describes the method for designing an implant and surgical guide.
“The first thing I do is run you through a CBCT scanner,” he explains. “As compared to a regular X-ray, this is a 3D image of your jawbone. We need that because in order to design a treatment plan for an implant case, we need a 3D jawbone where you are actually going to place the implant.
More from the author: Top 10 worst states to be a dentist
“Then, I use an intraoral scanner and scan your edentulous area,” Dr. Kim continues. “Wherever you are missing a tooth, I scan that area, along with some other adjacent teeth, maybe two or three other teeth. The reason why I use a digital scanner is because the cone beam scan alone is not accurate enough for a surgical guide to fit on.”
From there, he uses specialized software to merge the two scans.
“Then, we overlay that on top of the CT scan, and the software I use allows me to do that,” he continues. “They have implant treatment planning software that allows you to put the two together in the same place they belong in the 3D space. And then, using that software, I can actually design a surgical guide, and that file gets exported out of the software and into a Form 2. Then, I can print it.”
Being able to do all of this in his office allows for a fast turnaround time.
“All this happens within the first hour the patient comes in,” Dr. Kim says. “By the time you leave, I am pressing ‘print’ on my computer.”
Continue to page two to read more...
Benefits of the Form 2
There are many 3D printers on the market, but the Form 2’s affordability was one of the biggest attractors for Dr. Kim.
“I was constantly looking for answers to do things better because I wasn’t happy with what was happening in my office,” he says. “It was working, but it wasn’t quite satisfying. I went to a 3D digital implant surgical guide lecture, and that’s where I got introduced to the Form 2 printer.
Trending article: How Amazon Business is shaking up the dental industry
“The Form 2 printer is not all that expensive, first of all, because it’s not actually a ‘dental’ printer,” he continues. “If they put ‘dental’ next to ‘Form 2,’ it’s going to be another zero. Instead of $3,500, it’s going to be $35,000. It was very easy to get in to; there was no risk involved. The fact that you can just print anything you want, like multiple implant cases, you can do with the Form 2.”
The price of the machine wasn’t the only factor for Dr. Kim. The cost to print the devices was also a consideration.
“The cost is like $20-$25 per surgical guide,” he says. “And that’s not actually the cost to make it. The cost of the materials to make each surgical guide is like $1 or $2, but when factoring in CAD software used to make the model, scanning for fit, etc., it comes out to $20-$25.
“But it’s not like you’re getting something cheap,” Dr. Kim continues. “The surgical guide that I get from the Form 2 is actually more accurate than ones I used to mill on my expensive milling unit. In every case, it wins in every category.”
Formlabs utilizes its proprietary resin specifically for surgical guides.
“There’s a special resin that is designed for dental surgical guides,” Dr. Kim says. “Form 2 has a Dental SG resin that’s designed and approved specifically for surgical guide material.”
Practitioners have found uses for 3D printing in many different areas of dentistry. Some use them for applications like clear aligners, bite guards and splints. At this point, Dr. Kim only uses it to print surgical guides. However, if the right application presented itself, he would consider it.
“Certainly, in the future, if I feel it is worth my time, I will use the printer for that,” he says. “Just printing surgical guides alone is saving me a lot of money. Before I milled my own surgical guides, I used to send it to another lab and that used to cost me $400 for one implant case. Now, I’ve got it down to about $25. At the end of the month, I was paying $4,000 or $5,000 for surgical guides. Not that the cost is the No. 1 priority, but why waste all that money if you don’t have to? You don’t have to sacrifice the quality of your patient care, and why waste all that money?”
Read more: Making 3D printing more convenient
Printing surgical guides in house is also much faster than Dr. Kim’s previous method.
“It used to take two or three weeks because I used to send my cases out to Germany,” he explains. “But now, I get it literally the same day.”
Surgical guides used to take a long time to make and were expensive. But now, Dr. Kim says he sees no reason why surgical guides aren’t a common part of implant surgeries, and he looks to the Form 2 as an effective, reliable way to achieve that goal.
“I highly recommend the Form 2 for any type of 3D printing of a surgical guide for implant placement,” Dr. Kim says. “I think the Form 2 will be a great asset to any dental office out there. I think 3D printing will become the standard of care.”


