5 ways to design a better infection control workflow
Effective infection control workflows require forethought and an adherence to a well-designed strategy.


It’s easy to become overwhelmed with all the details involved with good infection prevention. Getting lost in the minutiae is common, but having good workflows in place can minimize the opportunity to miss important elements.
Instrument processing
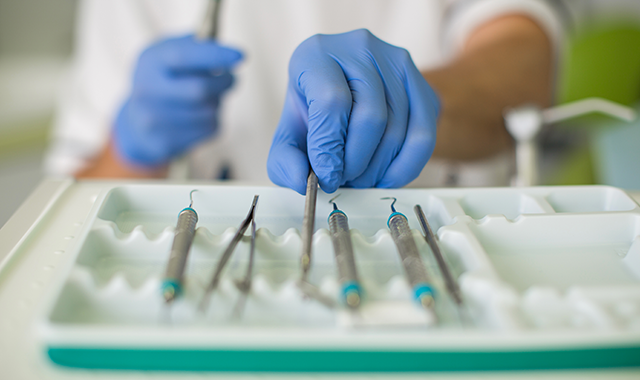
It should come as no surprise that how instruments are processed is one of the most important infection control workflows.
“Whether it happens to be all within one room or two rooms, with the idea that you move from receiving, cleaning, packaging and sterilization, and then you want your items to be stored in sterile packs in clean, dry storage,” says Kathy Eklund, RDH, director of occupational health and safety at The Forsyth Institute. “That instrument processing flow is extremely important to prevent contamination and to have good order and having adequate space to prevent percutaneous injuries during the process." That workflow starts in the operatory once instruments have been used.
“You have to think of it as starting at chairside because you have to pick up and transport your contaminated instruments in an appropriate transport container using puncture-resistant gloves and take them to the central processing area,” Eklund says. “A safety concept is you have sharps out first.
“In the processing area, that’s where you have to have things organized in a way that you have ample space for receiving the instruments, cleaning and then appropriately packaging,” she continues. “You always want to move from dirty to clean and not backtrack. It’s like a one-way street.”
When it comes to infection prevention, attention to detail matters. And one often-missed detail is the outside of the sterilizer.
“Sometimes we don’t pay attention to whether the outside of the sterilizer is clean or dirty,” says consultant and speaker Leslie Canham, CDA, RDA. “I say that because some people will wear the same gloves they used for processing instruments to open, load, close and start their sterilizer. The gloves that touched the contaminated instruments have transferred contamination to the sterilizer door. Now, the sterilizer door is contaminated. Unless the sterilizer door is disinfected, whoever opens the door at the end of the cycle with a bare hand or a clean glove is going to touch contamination and potentially transfer it to the sterile instrument pouches or cassettes. Dental practices should decide whether the sterilizer door is going to be clean or dirty. I recommend that the sterilizer door is always ‘clean’ and never touched with contaminated gloves. Then, everybody has to follow that same rule so that there are no missteps.”
Once sterilized, instruments must be appropriately stored. Where those instruments are stored depends on the practice, its size and the available facilities.
“Once they’re sterilized, they have to be removed from the sterilizer, checking internal indicators to ensure everything has been processed properly, and then they are put into appropriate storage,” Eklund says. “You may have even a central storage area, a clean dry closet where you store all your sterile packs. If they are stored in the operatory, they should be stored only with other sterile packs, not mixed in with other cleaning supplies or items. If you have drawers that are designated for clean, sterile packs, they should go in those drawers.”
Lighting
The ability to adequately see what’s being worked on seems like a given, but several factors can affect that.
"You need to have good lighting in your sterilization room,” Canham says. “You’ve got to be able to see everything.”
While there aren’t specific types of recommended lighting in terms of wattage or light bulb type (incandescent, halogen, or florescent), the important thing is to have the work area properly illuminated.
“If you don’t have good lighting, you can’t see if there is still leftover debris on the instruments after cleaning,” Canham explains. “If the lighting is poor, you might have to add more lighting. If the ceiling light is poor, consider changing the direction of the bulb or changing the fixture entirely. Or you can get under-the-cupboard lights. It doesn’t really matter what type of light as long as there’s enough of it.”
The ability to see properly isn’t just limited to environmental lighting-personal vanity can also affect one’s ability to see well.
“As we get older, we may not see as well. I have met a number of dental assistants who have been reluctant to admit that they need glasses,” Canham says. “If you need reading glasses, you should probably put on a pair of reading glasses to check your instruments before you package or wrap them. The pitfall to not seeing leftover debris is that when instruments have debris on them, they might not achieve sterilization. Even the smallest amount of debris, bioburden, dental cement, resin, or other materials left on instruments can be a protective cover that prevents the heat, steam, or chemical vapor of the sterilizer from actually touching the instruments to sterilize them.”
Dose uniting
Instruments aren’t the only necessities used with patients. Supplies such as cotton balls and gauze are necessary, and it’s essential to have enough supplies ready when planning and preparing for treatment.
“If you understand what you’re anticipating, what you’re going to need for your procedures, dose uniting those items appropriately saves both time as well as the potential to open drawers and reach in and contaminate things,” Eklund says.
Every patient and each procedure is different, but experience is the best indicator of how many supplies should be on hand.
“With experience, and the procedure you’re performing, you pretty much know how many cotton rolls you’ll need or all those things that you would anticipate in advance that you could dose unit and have ready to go,” Eklund says.
“That concept of dose uniting is used a lot with portable, mobile dentistry as well because you don’t want people reaching into containers while they’re practicing when they’re out of the field. You have everything prepackaged, put together for that particular procedure, in terms of patient care items. Obviously, your instruments should remain packaged until the point of use, but you can preset and prepackage together some items that you would be needing, such as cotton rolls, gauze, whatever the procedure would anticipate.”
It would be nice to precisely anticipate supply needs. That, of course, is rare. Leftover supplies should just be thrown away, never returned to stock. But what do you do if you run out of supplies?
“That’s where you have options,” Eklund says. “Let’s say you’re in the practice and they have a roving assistant. You can request a roving assistant with clean, gloved hands bring it to you. If you don’t, then the assistant, the hygienist, or the dentist would have to get up, remove their gloves, perform hand hygiene, retrieve the item, perform hand hygiene, and put on new gloves. You really don’t want to risk contaminating your clean supplies.”
Counter space
Not having enough room to work is also a major hindrance to proper and effective instrument processing.
“You have to have enough counter space to be able to stage your instrument trays,” Canham says. “When you’re processing contaminated instruments, you want to have enough space to be able to break down your tray, prepare the instruments for cleaning, and dispose of your trash. I have visited dental practices where the counter space is cluttered in the sterilization room.”
A cluttered work area affects not only the flow of the workspace but also overall sterilization efforts.
“If you don’t have the room to stage your instruments, if you’re having to stack things on top of each other, or if you have to use the edge of the counter or sink, it’s not safe,” Canham says. “Some dental practices have limited space due to a poorly designed sterilization area. In the case where there’s not much counter space, I recommend that you try to work ‘vertically,’ or using vertical real estate. For example, you can buy racks that you can place your treatment trays on. There are also racks that screw into the wall, leaving counter space open. This way, if you have a backlog of contaminated treatment trays, instead of stacking them one on top of the other, you could put them on the rack. If you can find yourself more real estate, it makes instrument processing safer and more efficient.”
Cassettes
An effective way to transport- and, ultimately, process-instruments is to use cassettes.
“You can transport your contaminated instruments more safely from the treatment rooms to the sterilization room in a closed cassette,” Canham says. “It keeps the instruments organized, so you don’t have to waste time sorting and organizing instruments that are loose.”
Investing in cassettes is expensive; however, the practice recuperates that investment in several ways.
“I would hope that more practices would embrace cassettes,” Canham says. “To me, the ROI of using cassettes is you save time by having instruments organized. Using cassettes is safer and it’s less likely that employees will get poked by contaminated instruments because the instruments are enclosed in the cassette. And the best ROI of all is because the instruments are not jumbling around in an ultrasonic tank, cassettes actually extend the life of the instruments.”
Effective infection control workflows require forethought and an adherence to a well-designed strategy.
“When it comes to an infection control workflow, a lot of it is about planning, having appropriate storage and having appropriate space to work safely,” Eklund says.


