3 tips for overcoming common challenges of shade matching
Shade matching can be difficult for clinicians, but with experience and improvements in restorative materials, you can produce excellent outcomes.


Shade matching is an area with no shortage of difficulties for clinicians. Mimicking nature with a manufactured material is challenging. However, with experience and the continued improvement of restorative materials, you can prevail with excellent outcomes.
The problem(s)
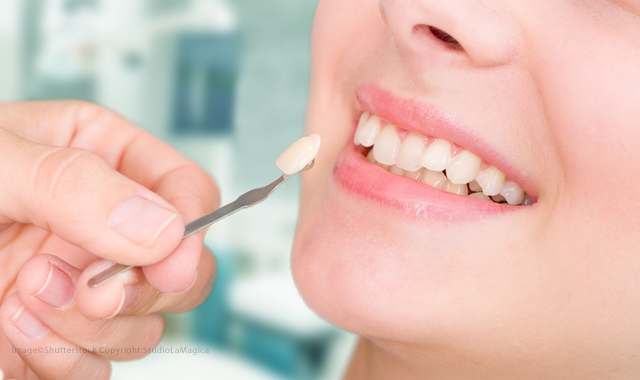
Shade matching natural teeth is complicated. There are dimensions of color that every dentist needs to consider in the shade matching process. They include hue (color), chroma (intensity) and value (brightness).1 These dimensions can be subjective and influenced by outside factors.
Also, natural teeth have properties of translucency, fluorescence and opalescence. Translucency is how much light the tooth allows through it, while fluorescence is how teeth absorb and radiate light back at the observer. Opalescence describes how teeth can appear to display varying colors.2 Materials must be able to mimic these qualities while also providing strength and durability to the restoration - a tall order.
In addition, outside factors play a role in shade matching outcomes. Spear Education suggests that there are frequent contributors to shade matching problems. Among them are:
- Poor lighting that doesn’t allow you to make an accurate match
- Oversaturated backgrounds that alter your perception of the shade of the tooth
- Faded shade guides that have been cleaned one too many times
- Taking too long to decide on a shade and allowing the eyes to fatigue
- Matching shade at the end of an appointment when a tooth is more dehydrated
Dental professionals must consider all of these color and light factors while avoiding the everyday challenges presented by the shade matching process. Moreover, they have pressure to do it quickly and flawlessly to provide an excellent patient experience while keeping productivity where it needs to be.
It’s no surprise dentists describe shade matching as challenging and time-consuming. Materials manufacturers strive to simplify and streamline the shade matching process.
Nonetheless, shade matching is a consumer-facing concern, and therefore, a significant one. Patients don’t know anything about marginal gap widths, polymerization shrinkage percentage, or whether you used a flowable bulk fill composite versus a full-bodied one. What they can tell is when their composite restoration doesn’t look quite right - and you can too.
The solutions
Shade matching is an art. We researched and spoke to experts (i.e., fellow shade matching artists) for their advice to overcome the challenges of shade matching with composites. Here’s what they had to say.
Tip #1: Use new levels of translucency to leverage the chameleon effect
“When I think of matching color with direct restorations, one trend that I’ve seen is making direct composite resins more translucent,” says Nathaniel Lawson, DMD, an assistant professor in UAB’s School of Dentistry’s division of biomaterials.
When composite materials are high in translucency, they have what some people call the “chameleon effect.” Dr. Lawson describes the chameleon effect as a blending effect. It means the observer’s perception is that the two juxtaposed colors are closer in hue than when separated. In terms of composites, the chameleon effect means that the composite will blend in with the surrounding teeth.
Higher translucency could cause some clinicians to worry that the material contained a lower filler content and therefore possess a reduced strength. However, there are other ways to increase translucency besides taking out some of the filler. Manufacturers can instead better match the way resin and fillers refract light without reducing filler content.
But there’s a drawback to higher translucency, Dr. Lawson says. When you place translucent composite over tooth preparations that are dark, it will discolor what you see. In these cases, an opaquer should be used. The same thing can happen when you place a Class IV restoration in a tooth without a lingual wall behind it. The absence of light in the oral cavity will make a restoration look grey.
The more a composite can blend, the easier it is to shade match, Dr. Lawson explains. It also means you don’t have to have as many shades in inventory, which is another trend in materials, according to Dr. Lawson.
“That’s a trend that manufacturers are going for - shade clouds. So, instead of having everything different in a series, they take the A, B, or C shades and put them in a ‘shade cloud’ instead. They make it easier to shade match for posterior restorations,” Dr. Lawson explains.
The transition between the composite and the natural tooth can be a critical area for the esthetic outcome of the restoration, particularly in the anterior. Dr. Lawson suggests that clinicians aren’t shy about using a long bevel in their direct composite restoration preps to help blend the material into the natural tooth shade.
He also says you should shade match prior to isolating the tooth. As the tooth dehydrates, it will look lighter, he says. If the doctor waits to shade match later in the appointment, he or she won’t have the correct shade. It’s also why you shouldn’t panic upon completion of a restoration and it appears that it doesn’t match.
“Don’t be surprised if you have finished a 45-minute Class IV composite restoration and your restoration looks a little bit darker than the tooth. It could be because the tooth is dehydrated,” Dr. Lawson says.
Tip #2: Work with your patient to explain your composite blending process
Les Crawford, DDS, practices in Maumee, OH, just outside of Toledo, with Namay Dentistry. He says meeting the patient's expectations is one of the difficulties of shade matching. Many patients don’t understand that a tooth isn’t one uniform color; rather, it’s a gradient of colors, not to mention the white spots, staining, and grooves that affect the appearance of a tooth.
With porcelain, Dr. Crawford explains, you can stain and glaze to make a restoration look a lot more natural. However, composites are one shade, and staining and glazing aren’t an option, so it’s difficult to do. To achieve the best possible esthetic on extensive anterior restorations, he’ll blend several composites.
“Depending on the size of the restoration, we use several different layers of composite to try and mimic the different shades the tooth has in it naturally,” Dr. Crawford says.
The Namay Dentistry team believes it should treat everyone the way he or she would treat his or her own family. So, when it comes to adjusting patient expectations, Dr. Crawford says you must be honest. He has the patient hold a mirror and together they’ll assess the shade. Dr. Crawford will point out some things to the patient.
“I'll say, ‘Here's your natural tooth. See how it's got a different color here than it has here? See these little spots here on your natural tooth? All of that is missing on this tooth you've chipped. We're going to try and rebuild it,’” Dr. Crawford says.
Blending shades can be time-consuming. Dr. Crawford says in a best-case scenario, the patient’s tooth has a uniform shade and it’s obvious which shade to use. However, when the restoration is substantial and the color is inconsistent, you might use as many as three or four composites to make the match.
Dr. Crawford uses 3M™ Filtek™ Supreme. He likes how when he’s layering composite there are dentin shades and then enamel shades that are more translucent. When you’re layering them, the different types of composite for the tooth structure make the restoration look more natural.
The process begins by holding the shade guide next to the teeth. Sometimes, Dr. Crawford says, a more yellow-toned shade matches the area near the gums, and the white shades can be better at the edge of the tooth.
“If you have a lot to replace, you have to blend shades together and try to smooth them out at the end when you polish and make it look natural,” Dr. Crawford says.
How flat or rounded you shape the tooth can change the perception of shade as well. The shape of the tooth can trick your eye with how the light reflects off of it. Dr. Crawford explains that when the tooth is flattened, it’s going to reflect more light, and when it’s rounder, it won’t reflect as much.
Like Dr. Lawson, Dr. Crawford also recommends using a bevel in the preparation. The gradual transition eliminates the line between the natural tooth and restoration that can draw attention.
“You still have to pick the right shade, but at least when you bevel, there's not that abrupt transition from the filling to the tooth,” Dr. Crawford says. “As you are finishing and polishing, you can get the light out and see if you need to make any adjustments.”
Tip #3: Mind your surroundings for shade matching
Many factors can affect how you interpret the shade. Managing your environment is key to accomplishing the best possible match.
Per the Dental Academy of Continuing Education, the type of light you use to match the shade of your patient’s teeth can affect which shade you choose. Dr. Lowe recommends shade matching in natural daylight, preferably at midday (and with the sun to the north, to be specific). Also, he suggests matching under a second light source, to ensure you get the same result. He also discourages shade matching in operatory lights, as it could lead to poor results.3
In addition to choosing the best possible light source, Dr. Lowe has the following tips for managing elements that could influence shade selection:
- Have patients remove lipstick.
- Use a neutral bib to cover the patient’s clothing.
- Remove staining on adjacent teeth, if any, first before matching shade.
- Keep the shade guide at arm’s length.
- Check the shade guide against surrounding teeth as well.
- Study the shade guide for short bursts rather than extended studies to avoid eye fatigue.
Finally, Dr. Lowe says for doctors to ensure that whoever is taking the shade doesn’t suffer from color blindness or any other sight deficiencies that could affect the shade selection. They must be able to see the colors of the Munsell hue range, which include red, green, blue, yellow,and purple. If there are any difficulties in the perception of these colors, it will hurt the outcome of the shade match.
References
1. Fondriest, James. (2003). Shade matching in restorative dentistry: The science and strategies. The International journal of periodontics & restorative dentistry. 23. 467-79. 10.1016/j.prosdent.2004.03.015. From PDF: Web 26 February 2019. < https://www.researchgate.net/publication/9006870_Shade_matching_in_restorative_dentistry_The_science_and_strategies>.
2. Ibid.
3. Lowe, DDS. FAGD, FICD, FADI, FACD DIADFE, Robert A. “Composite Restorations: Subtleties in Shade and Technique.” Web. PennWell. dentalacademyofce.com. October 2010. Web. 2 January 2019. https://www.dentalacademyofce.com/courses/1972/PDF/1011cei_nuance_web2.pdf.


