Technique: Using digital impressions for better implants
Dr. Paresh Patel, DDS, explores how combining digital imaging and digital impressions creates beautiful restorative possibilities.
A female patient in her early 20s presented for initial consultation with a congenitally missing maxillary lateral incisor. She had been wearing a flipper appliance for much of her life and desired an implant restoration for her missing tooth now that her dental development was complete.


The patient had been saving money for treatment but was told by another doctor that, as a result of bone loss that had occurred over the years, her ridge was too thin to receive an implant without extensive grafting.
Product roundup: Dental implant options
The initial patient examination, including measurements of bone volume with ridge calipers, determined that, although the ridge was thin, there was sufficient facial-palatal bone volume and mesial-distal space to accommodate a 3.0 mm Hahn™ Tapered Implant, which excels at fitting within tight anatomical spaces.
Click the next button to see how the case was solved ...


Fig. 1 The patient presented for treatment with a flipper appliance in the area of her maxillary right lateral incisor.

Fig. 1 The patient presented for treatment with a flipper appliance in the area of her maxillary right lateral incisor.
This implant would also prove advantageous because it could be restored using a custom zirconia hybrid abutment, which was important because of the restoration’s location in the esthetic zone.


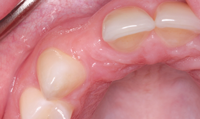

Fig. 2 Initial condition of edentulous space.
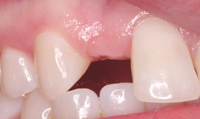
Fig. 2 Initial condition of edentulous space.

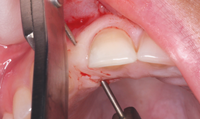
Fig. 4 Caliper measurements indicated ridge width of approximately 5.5 mm, which was sufficient for the placement of a 3.0-mm-diameter Hahn Tapered Implant.


Fig. 5 A surgical flap was reflected to visualize the bone crest.
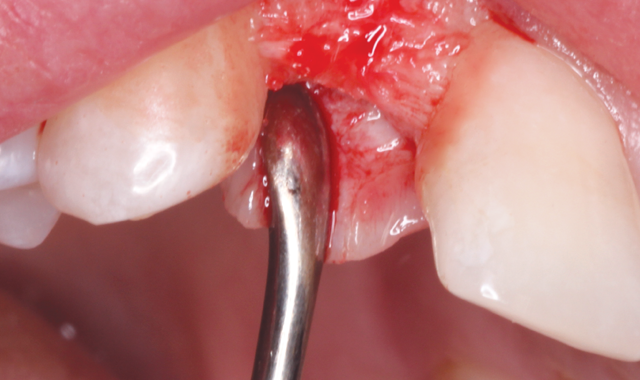
Fig. 5 A surgical flap was reflected to visualize the bone crest.
The patient agreed to the treatment plan and returned for the implant placement appointment. After anesthetizing the area of treatment, an envelope flap was reflected just palatal to the crestal ridge so the bone volume and osteotomy trajectory could be visualized.

Fig. 6 Proper positioning of the initial osteotomy was confirmed radiographically with a parallel pin in place.
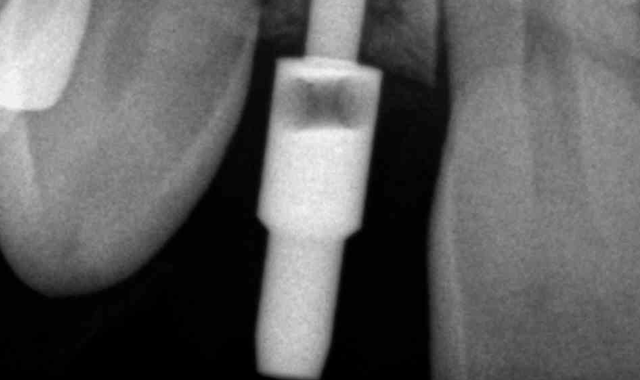
Fig. 6 Proper positioning of the initial osteotomy was confirmed radiographically with a parallel pin in place.

Fig. 7 The 3.0 mm x 16 mm Hahn Tapered Implant was initially inserted with a handpiece and threaded into final position with a torque wrench.
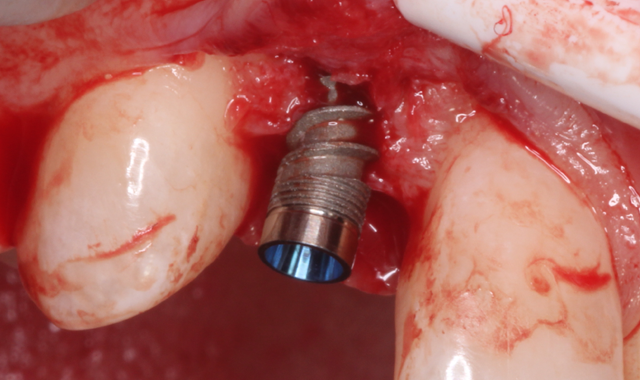
Fig. 7 The 3.0 mm x 16 mm Hahn Tapered Implant was initially inserted with a handpiece and threaded into final position with a torque wrench.
The osteotomy was created following a simplified drilling protocol, with periodic X-rays taken to verify proper positioning and alignment with the long axis of the adjacent roots. After placing the Hahn Tapered Implant to depth, a cover screw was inserted and the implant site sutured.

Fig. 8 Treatment area after full seating of the implant.
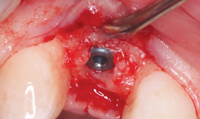

Fig. 9 Post-operative radiograph verified that the implant was fully seated and didn't impinge upon the periodontal ligament spaces of the adjacent teeth.
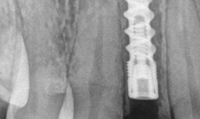
Fig. 9 Post-operative radiograph verified that the implant was fully seated and didn't impinge upon the periodontal ligament spaces of the adjacent teeth.

Fig. 10 Condition of patient after 17 weeks of healing.
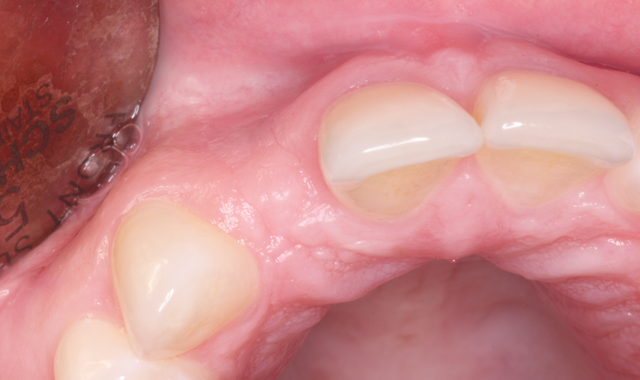
Fig. 10 Condition of patient after 17 weeks of healing.
After healing for 17 weeks, the patient returned for final impressions. An intraoral scanner was used in order to provide the patient with a highly accurate implant crown in as little time as possible.

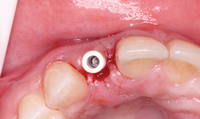

Fig. 11 A tissue punch was used to expose the implant.
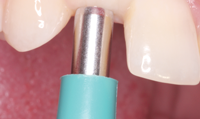
Fig. 11 A tissue punch was used to expose the implant.

Fig. 13 Radiography verified complete seating of the scanning abutment.
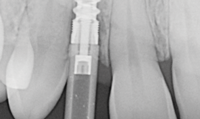

Fig. 14 The iTero intraoral scanner was used to create the final digital impression and submit the case to the lab for restoration.
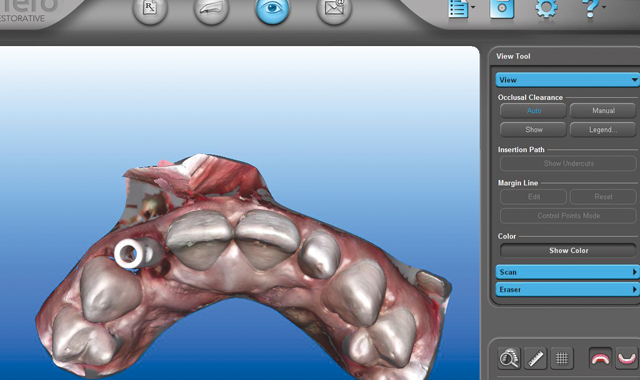
Fig. 14 The iTero intraoral scanner was used to create the final digital impression and submit the case to the lab for restoration.
The final digital impression was taken with the iTero® intraoral scanner (Align Technology, Inc., San Jose, California) and submitted to the lab along with the parameters for the restoration, without the need for physical paperwork or shipping.

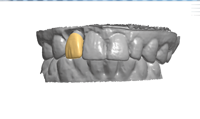

Fig. 15 The lab digitally designed the Inclusive Custom Abutment without having to wait for a physical impression or pour a stone model.
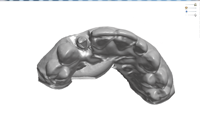
Fig. 15 The lab digitally designed the Inclusive Custom Abutment without having to wait for a physical impression or pour a stone model.

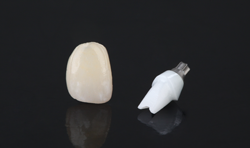
Fig. 17 To maximize esthetics in the smile zone, the final restoration consisted of a BruxZir Anterior crown over an Inclusive Custom Zirconia Abutment with titanium base.


Fig. 18 Complete seating of the custom abutment was confirmed with a periapical X-ray.
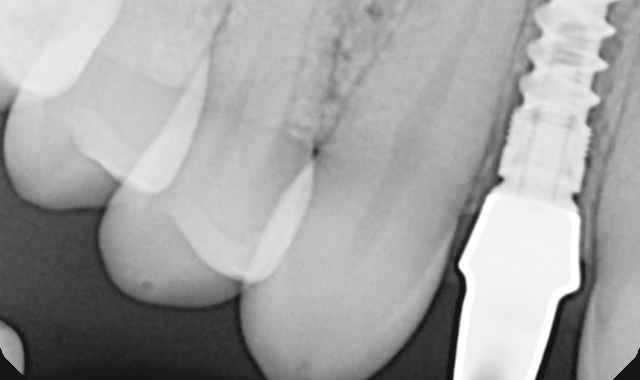
Fig. 18 Complete seating of the custom abutment was confirmed with a periapical X-ray.
Using the virtual model generated by the digital impression, an Inclusive® Custom Abutment was designed with CAD software to optimize the emergence profile and esthetics of the BruxZir® Anterior restoration.

Fig. 19 The custom abutment fit perfectly, establishing margins just below the soft tissue. Teflon tape was placed over the fixation screw.
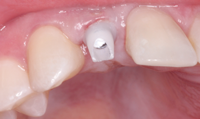

Fig. 20 The final crown was cemented over the custom abutment.
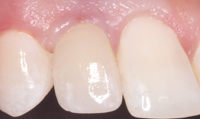

Fig. 21 The patient was very happy with the final restoration, which exhibited a lifelike appearance among the patient's natural teeth.
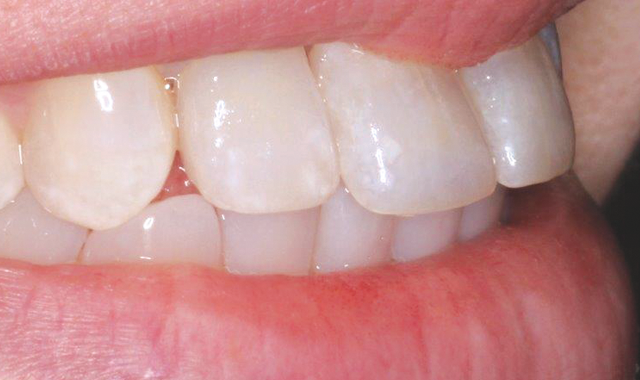
Fig. 21 The patient was very happy with the final restoration, which exhibited a lifelike appearance among the patient's natural teeth.
At the final restoration appointment, the custom abutment and implant crown were seated and established the desired form, function and esthetics without the need for any chairside adjustments.
Reprinted with permission from Inclusive™ magazine (inclusivemagazine.com). Copyright © 2015. All rights reserved.


