Light curing: What you can't afford to be in the dark about
We share what experts recommend to enhance the curing step of the restorative process with composite-resin materials.

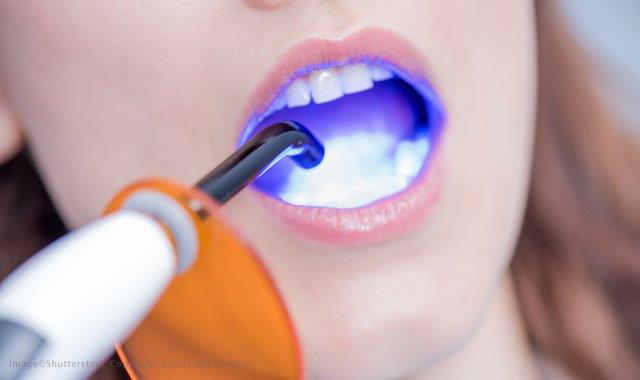

Composite-resin materials require light curing to achieve the physical properties necessary to restore function to the tooth and durability for restorations. The technical aspect of light curing composite is an area every clinician should remain diligent about to ensure the success of their composite restorations.
Tim Bizga, DDS, FAGD, a private practice general dentist in Cleveland, OH says all the steps of setting up a composite resin restoration are interconnected, like a web. When one step is handled poorly, then it causes problems to the entire restoration.
For example, composite direct restoration success starts with adequate isolation. Then, after you have sufficient isolation, Dr. Bizga says curing the materials in the tooth are reliant upon receiving precise amounts of light energy for a specific period of time.
“Everything hinges on that curing light and how well it works,” Dr. Bizga says.
We researched light curing and spoke to experts about how they successfully cure their composite restorations. Here are a few tips they had for curing.
Related reading: How to avoid restorative Class II blues
Start with the basics
The University of Iowa’s College of Dentistry and Dental Clinics published a list of Operative Best Practices for Clinical Care, including the following tips for success1 :
Invest in quality equipment and keep up on maintenance.
The Operative Best Practices for Clinical Care included a consensus statement from the 2014 Symposium on Light Curing in Dentistry. The experts agreed that all curing lights are not the same quality and do not deliver the same results. The article recommends only using lights from a manufacturer that includes:
- Contact information
- User manuals for the curing light
- Service for the unit
Dr. Ed Kusek, a private-practice dentist in Sioux Falls, SD, agrees clinicians would be wise not to buy cheap lights. He uses the VALO™ curing light from Ultadent, an LED curing light with a broad-spectrum LED pack and a wavelength range of 385 to 515nm. Dr. Kusek chose it because of the wide width of its output and he says the depth of penetration is better than other lights on the market.
Dr. Kusek and the team also check to ensure the VALO rechargeable batteries are fully charged before use. A full charge ensures the most efficient use of the curing light.
Trending: The top 10 best cities for dentists in 2019
“It’s not very conducive to getting a good cure if all of the sudden the batteries burn out midstream, Dr. Kusek says.
The Operative Best Practices for Clinical Care guidelines also recommend that you know the key performance parameters of your curing light out of the box. These include the light output (mW/cm2), the beam uniformity and output across the light tip and the diameter of the light beam.
Dr. Bizga says regular maintenance of the light is essential to ensure your light is functioning correctly. Manufacturers also recommend periodic evaluation of the light output using a radiometer. Dr. Bizga recommends checking once a week with the same measurement device to ensure your light is still functioning correctly, especially if you are using an inexpensive light.
Continue to page two...
“Some of these lights may not cure the material or may require longer than you think,” Dr. Bizga says. “That’s why testing is important.”
At Dr. Kusek’s practice, they have five curing lights in rotation. They send each of them in annually to the manufacturer for maintenance and recalibration.
“We keep track of when it was last sent in and then send them into the company one at a time,” Dr. Kusek says.
Skipping curing light maintenance is not a good idea. Dr. Bizga compares it to buying a new car and then never changing the oil.
“To keep your car running, you need to make sure your oil is changed regularly and your fluids are topped off,” Dr. Bizga says. “With your light, you buy it, and you know it should perform great. However, like anything, you have to check it and make sure the bulbs are still putting out the same intensity.”
Train your staff well
Operative Best Practices for Clinical Care provides guidelines for practitioners regarding light curing. The light tip should deliver a uniform output covering as much of the surface of the material as possible. You should also cure each surface of the restoration independently.
The guidelines also say to position the light as close and as stable as possible over the surface and parallel to it. Also, when curing, avoid positioning the light in ways that decrease the amount of light delivered to the resincomposite. Some examples of poor positions are:
- Having the light tip several millimeters away from the area
- Positioning the light at an angle to the surface you are curing
However, Dr. Bizga says dentists are often not curing the composite themselves; instead, the assistant is curing the material. He recommends proper education for the assistant to ensure they cure the material in the right direction.
Trending: Seeing dentistry's future in the Best of Class Winners
Dr. Kusek also says the attention to detail from your assistant is vital to your curing success. He advises dentists to ensure t their assistant is taking care to have the light in the right area. If the assistant does not know where to aim the light for the cure, spots in the material might remain uncured.
“It doesn't work by osmosis,” Dr. Kusek says.” You have to place it into the area.”
“You want to have your light directed straight down, perpendicular to the material at a 90-degree angle, preferably,” Dr. Bizga says. “It's a good idea to cure from multiple directions on the tooth and spread the light energy to make sure you're curing it evenly.”
Protect the lens from debris
Operative Best Practices for Clinical Care dictates the curing light should not have anything inhibiting the beam delivery and encourages inspecting and cleaning the light unit before using it. Shielding the lens during use keeps the light clear of debris. It ensures the proper amount of light will cure the material, Dr. Kusek says.
“We always use a clear sleeve over the light so we won’t damage the illuminating part,” Dr. Kusek says.
Protecting the lens of the curing light is essential, but so is protecting your eyes. Operative Best Practices for Clinical Care indicates you should wear “blue-blocking” glasses or other eye protection when using a curing light. Also, never shine the curing light into the eyes and avoid looking into the reflected light when you are not wearing eye protection.
Related reading: Why dentists should take a fresh look at new restorative innovations
Time your cure based on the depth of the restoration
Every curing light and composite resin material has light exposure times that are recommended by the manufacturer. However, it would be best to extend those times if the distance is further or the shade of the composite is on the darker end of the spectrum or if the material is opaque.
If you are mixing and matching materials and curing lights, Operative Best Practices for Clinical Care recommends allowing for the differences between the two as necessary. Also, you should ensure the curing light’s settings are on the correct mode and time for the resin composite type and shade.
Dr. Bizga also wants dentists to allow for enough time to cure the material based on the depth of the restoration. Assuming you know the light is performing up to its specifications, cure the material for the time indicated by the thickness of the composite layer.
Continue to page three...
Usually, when your isolation is excellent, timing isn’t a problem. Dr. Bizga says he sees dentists getting into trouble when they rush their cure because they have not isolated the area well enough.
“They are trying to rush through it so they may cut a few seconds here and there off their cure times,” Dr. Bizga explains. “Incrementally, they’re undermining the material because it is not curing to the full physical property that is required, and that leads to microleakage and other problems.”
Remember, you can’t over cure composite material
You should always follow the manufacturer’s instructions for exposure times related to incremental material thickness amounts. However, Dr. Bizga always reminds himself and others you can never over cure the materials, but you can under cure them. Therefore, if you feel like extending the curing time for whatever reason, he says you should do so.
“Before you send the patient out the door, you can throw one more good pulse of energy at it. You can't over cure, so cure away,” Dr. Bizga says.
Operative Best Practices for Clinical Care also advises clinicians to consider additional light exposure when the area has limited access to light. Examples could be interceding tooth structures or restorative material, or shadows cast over the curing surface from the matrix bands.
Related reading: Solve my problem: Covering a large area in one cure
Another factor to consider with longer or additional curing times is some high-intensity curing lights will put out a little bit of heat. Curing for long periods could be hazardous to the pulp or soft tissues in those cases. Operative Best Practices for Clinical Care suggests air cooling the tooth during this process to prevent any thermal damage. Also, Dr. Bizga says many manufacturers that make these lights have a time-delay feature which allows the tooth to recover so you cannot damage the pulp.
“A lot of the manufacturers have built in these fail-safes to try to help that,” Dr. Bizga says.
Composite restorations do not last as long as amalgam fillings. Furthermore, composite restorations in real life sometimes fail much sooner than they did in testing. Dr. Bizga says it all comes down to the technique of the clinician.
“If you read what these materials are capable of doing in lab testing, you wonder why we see more failures and so much sooner,” Dr. Bizga says. “What it comes back to is the technicians and their understanding of what's important. With each of the steps, they need to make sure they do everything as perfectly as they can."
Reference
https://www.dentistry.uiowa.edu/operative-light-curing
1.Operative Dentistry - Best Practices
Light Curing (last modified February 19, 2017)
Dalhousie Light Curing Symposium May 2014 comments published in Journal of Adhesive Dentistry, Dental Materials, Operative Dentistry, and the Journal of the Canadian Dental Association. Blanket copyright license is given for the table and figures below to be freely used, in whole or in part, for all derivative works without permission from the copyright holder.


