How to use digital technology to make cases easier
Treatment planning doesn't have to be a headache for practitioners - or for patients.
CAD/CAM technology, both lab and chairside, impacts a dental practice for both the patient and the practitioner. For the practitioner, CAD/CAM helps us become better clinicians because we see our work in a whole new way.
I’ve found it humbling to see our crown preps magnified on the computer screen so that you can see every detail and every imperfection. By getting instant feedback with margins, retraction and prep clearance, you can make corrections or refinements live. This prevents repeat appointments or having to send a case back to a lab.
As a dental professional, CAD/CAM technology has given me better control of the outcome, especially pertaining to margins, treatment design and final product. Impressions taken traditionally with impression material and stone models leave room for human error, while chairside restorations and lab-fabricated restorations manufactured using digital impressions provide better accuracy.


There are also additional benefits to my bottom line, created by reducing my costs on shipping and materials. There’s also an unexpected perk of increasing staff satisfaction because of the staff involvement. My chairside assistants love the opportunity to really be in the middle of the action of care for the patient. For them, scanning, designing and restoration characterization has made their jobs fun.
Related article: How CAD/CAM dentistry makes me a better dentist
For my patients, it’s a more comfortable experience. During the early days of my career, I can’t tell you how many times traditional impressions made my patients gag, while they patiently waited (and drooled) through the excruciating three to five minutes for the impression material to set and then repeat the process all over again if there were any flaws. Now with CAD/CAM, it’s like a live video stream in the mouth. My patients’ experiences and feedback have been great.
In our practice, we use Planmeca products to provide our patients with the highest quality care and a more comfortable, fun experience. With an open platform, our treatment options are limitless and we’re providing better dentistry combined with a better patient experience.
The following case exhibits the power of an open digital platform. The advantage of using an open platform is best demonstrated with digital impressions for same-day, in-office crowns, collaboration with certified dental lab technicians (for more technical cases for fixed and removable prosthodontics), with CT scans to plan surgeries, and diagnostics for highly esthetic smile designs and orthodontic aligner treatments.
Continue to page 2 to see CAD/CAM in action...
Case study
The patient had congenitally missing laterals and canines were substituted into lateral incisor positions and primary canines were retained in a treatment performed over 25 years ago. Due to large failing composites and loose primary teeth, the patient was ready for functional and esthetic improvements (Figs. 1-2). My plan was to use an all-digital workflow for this complex case to quickly and efficiently create a new smile using lab collaboration. Teeth #5, #6 and #7 would be a 3-unit bridge, #8 and #9 full crowns, #10, #11 and #12 also a 3-unit bridge, and surgical extraction of primary teeth C and H.
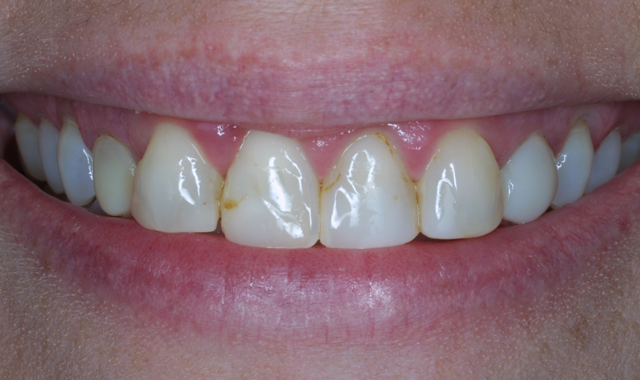

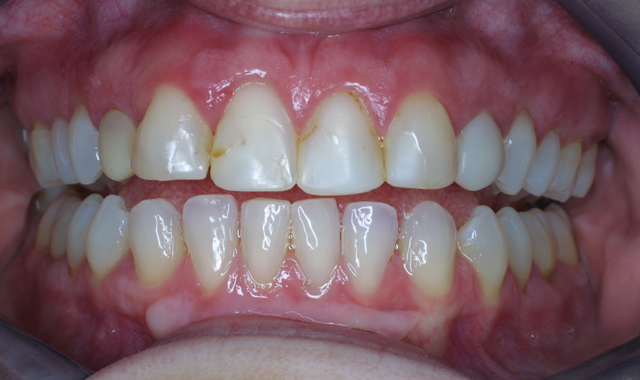

Fig. 1 Fig. 2
I scanned pre-operatively using my Planmeca Emerald™ scanner to create a digital impression of the case (Figs. 3-4). Teeth #5,7, 8, 9, 10 and 12 were then prepped (Figs. 5-6).
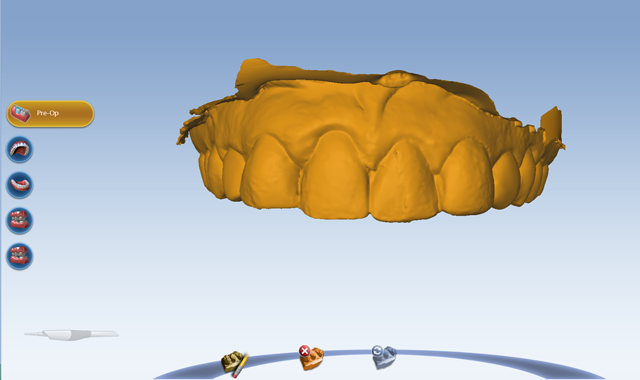


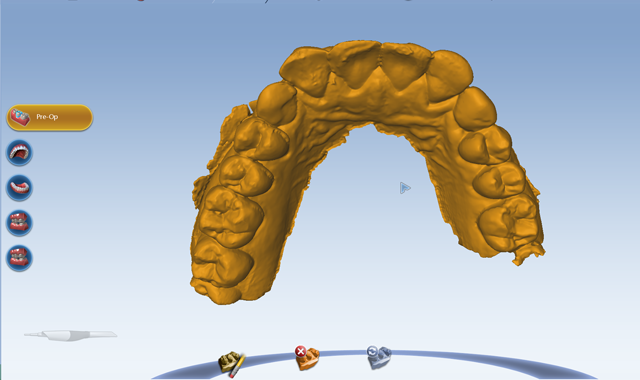
Fig. 3 Fig. 4

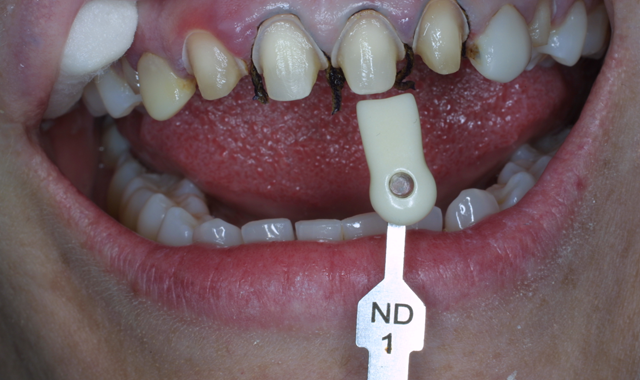

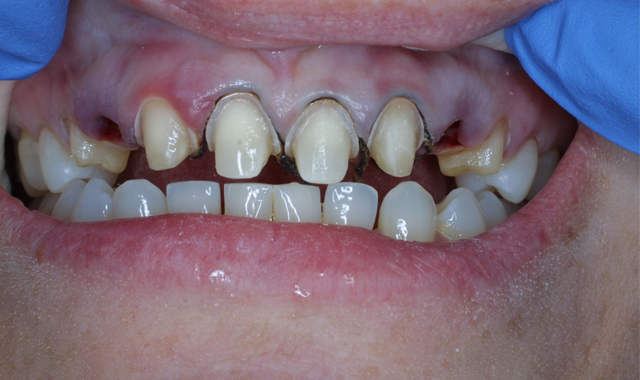
Fig. 5 Fig. 6
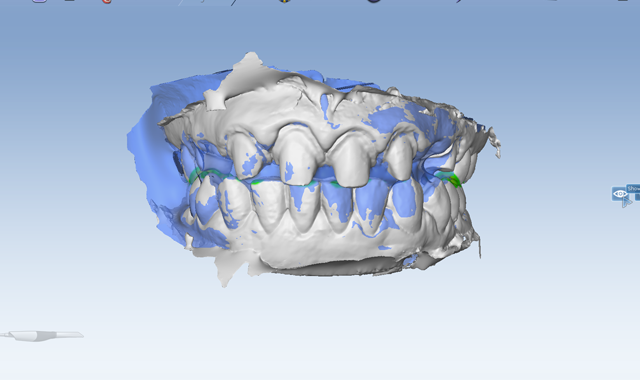
Using the Planmeca Emerald, a scan of the preps was taken (Figs. 7 -8).

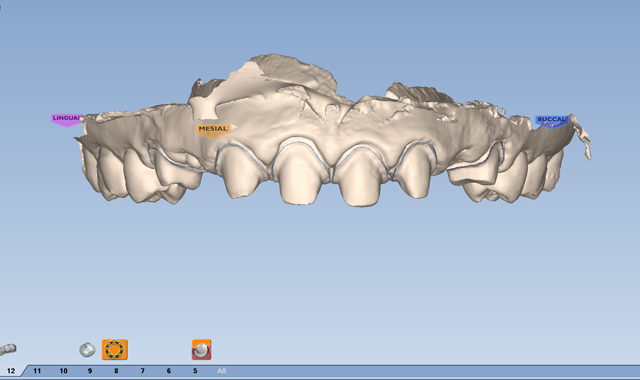
Fig. 7 Fig. 8
Utilizing PlanCAD® Easy software, I marked the margins and ditched the model (Fig. 9) to upload the case via Henry Schein Digital Dental Exchange (DDX) online platform to Digital Dental Leaders.
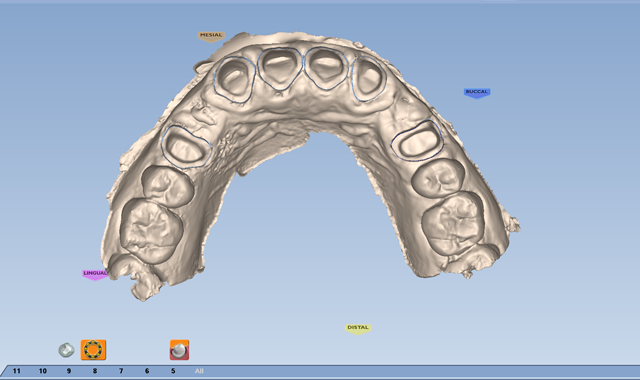

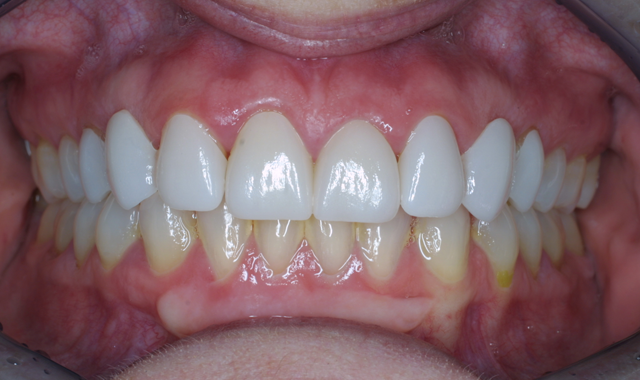

Fig. 9 Fig. 10
The lab received the files and created a design for the treatment plan. The lab then sent the completed zirconia restorations, which were seated back in the office (Figs. 10-12).

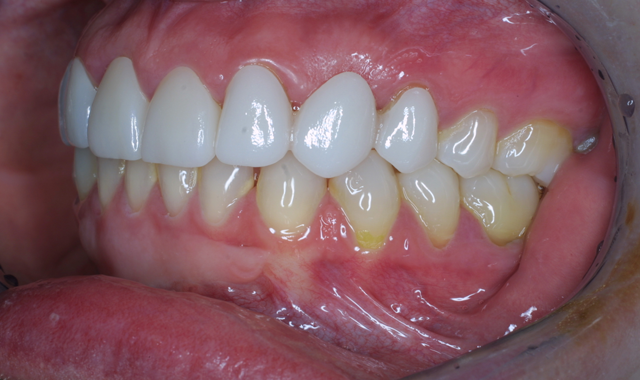
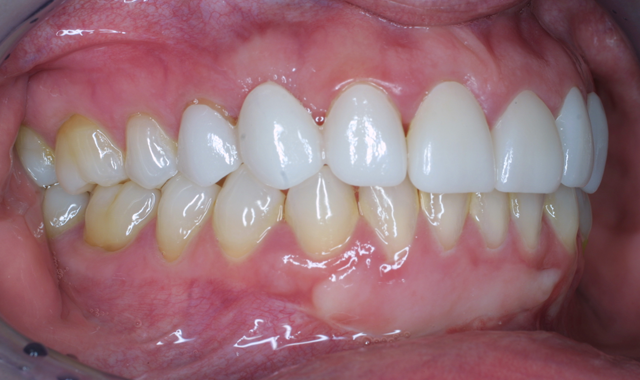

Fig. 11 Fig. 12


Fig. 13
Conclusion
Once the restorations were properly seated, the patient was extremely pleased with the results of her new smile (Fig. 13). Using different image capture equipment such as CBCT and intraoral scanners gives me the ability to perform a complex case in-office. The Planmeca full-office solutions in our office increase the safety of our patients by providing a clear picture of the oral environment. There’s nothing more empowering than knowing that the treatment plan that you’ve developed is the best option for that patient.


