How to place porcelain veneers with minimal preparation
Dr. Ross Nash outlines how he enhanced one patient’s smile with a minimally invasive technique.


A young woman presented with a desire to enhance her smile.
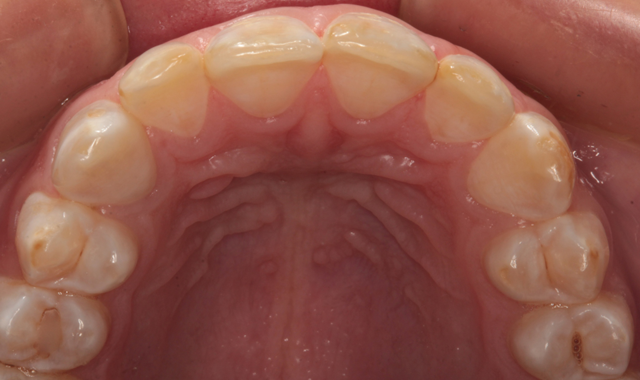
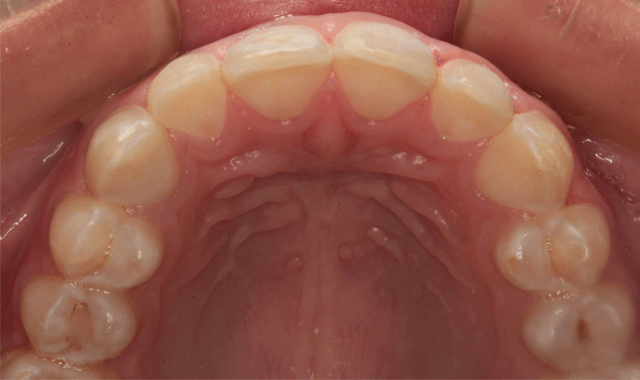
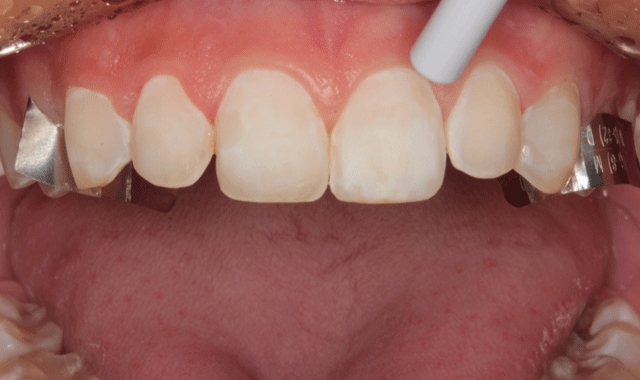
Figure 1 shows her smile before treatment. A retracted view illustrates that she had developmental enamel defects that resulted in decalcified surfaces (Fig. 2). Some areas had white spot lesions and others had brown areas where the white spots had incorporated stain over time. The incisal view in Figure 3 shows well-aligned teeth. Clinical and radiographic examination revealed excellent dental health with no periodontal disease or caries.

Fig. 1
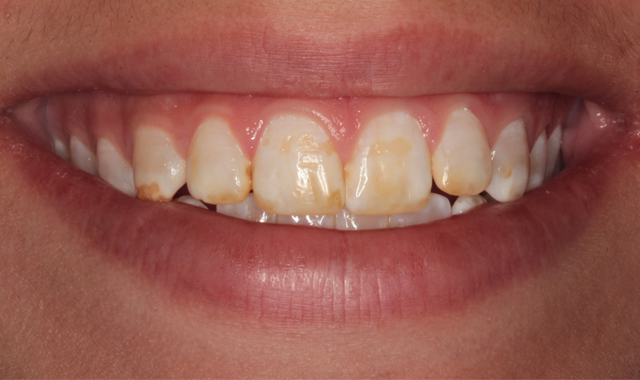

Fig. 2
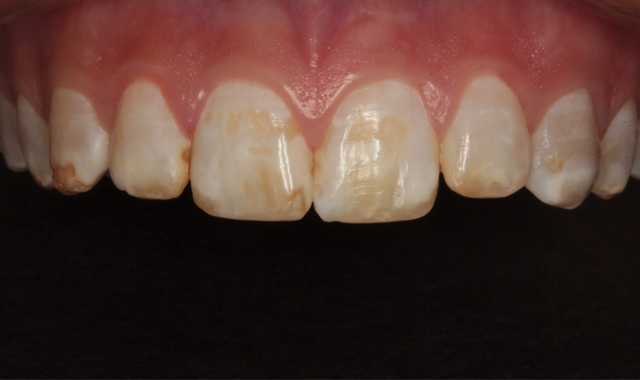
The patient communicated that whitening procedures she had tried were not successful and actually made the appearance worse by causing the white spots to stand out more. My experience tells me that white spot lesions such as these are often near the surface of the enamel and enameloplasty can sometimes remove them. However, the teeth actually appear a darker color due to less coverage of the underlying dentin. Resurfacing of the tooth surface is desired in many of these cases. It can be accomplished with direct composite resin veneers

Fig. 3
or indirect composite or ceramic laminates.
While direct restorations can usually be accomplished at a lower cost to the patient, it requires the clinician to have artistic abilities. By using an indirect process, an artist can be chosen by the dentist. I have found that a ceramic laminate routinely outlasts my direct or indirect composite veneers by a factor of two and resists stain better. Preparation for these thin veneers can be minimally invasive and usually does not require temporary restorations.
The patient chose 10 porcelain laminates for her smile makeover.
The process
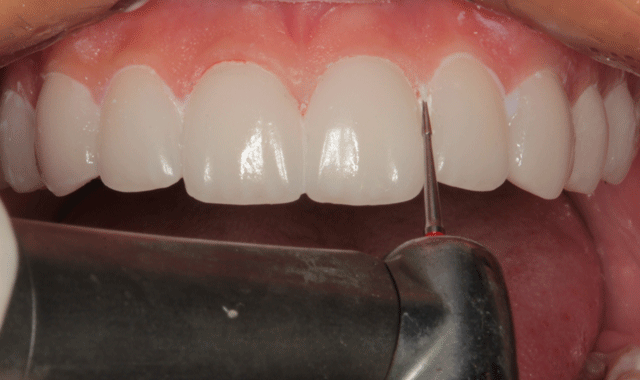
No anesthetic was necessary and the tooth surface was refined using a fine finishing diamond bur with water spray. Preparation involved removing the defective enamel and providing draw.
Figure 4 shows the final preparations. The patient was happy with the improved appearance after this minimal enamel removal and was excited about having a bright new smile after her veneers were placed. In Figure 4, you can see the prepared teeth from the retracted facial view. Figure 5 shows the prepared teeth from the incisal view.

Fig. 4
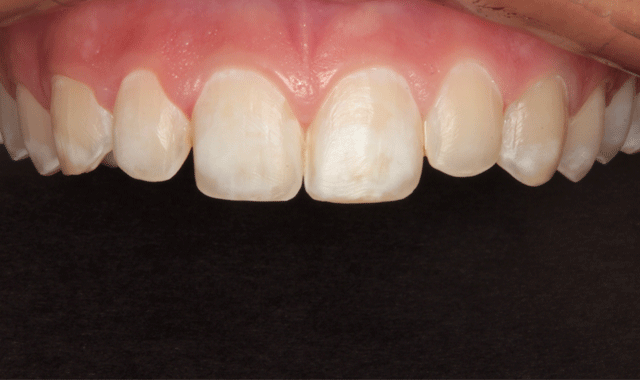

Fig. 5
Final impressions were taken with a PVS impression material and an opposing impression and bite registration were taken. No provisional restorations were needed as the patient was happy with her new smile after preparation (Fig. 6).
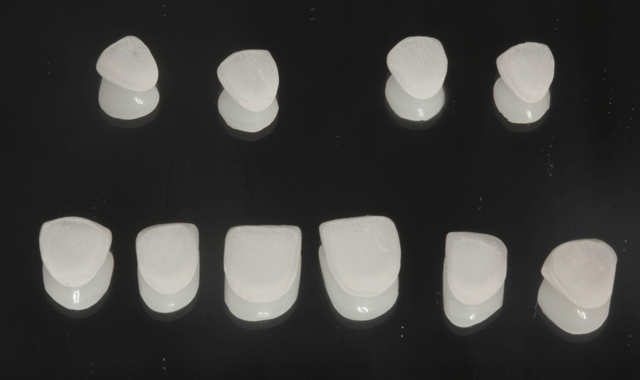
The final impressions and bite registration along with photographic images of the patient were sent to the dental laboratory (daVinci Laboratory) with the request to fabricate thin veneers with lithium disylicate (e.Max, Ivoclar). Shade OM2 (Vita 3D shade guide) was chosen by the patient. The veneers can be seen photographed on a mirror surface in Figure 7. The internal etched surfaces are shown in Figure 8.

Fig. 6
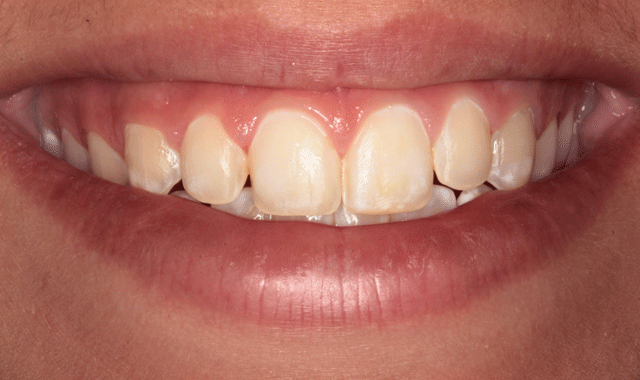

Fig. 7
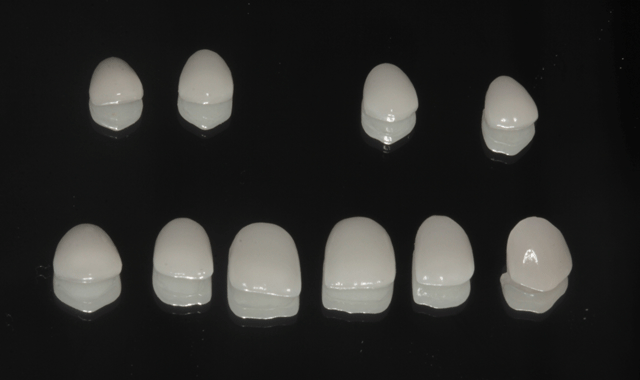

Fig. 8
Again, no anesthetic was required for placement. The six anterior teeth were isolated using thin metal strips and enamel etch was applied (Fig. 9). The etching gel was left in place for ten seconds (Fig. 10) and thoroughly rinsed (Fig. 11) and the etched surfaces were dried with oil-free air from an air/water syringe (Fig. 12).

Fig. 9
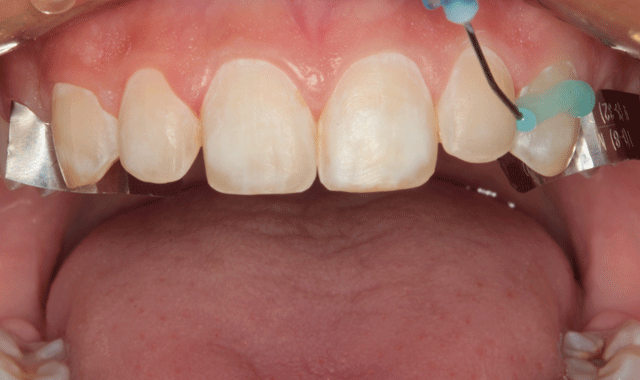

Fig. 10
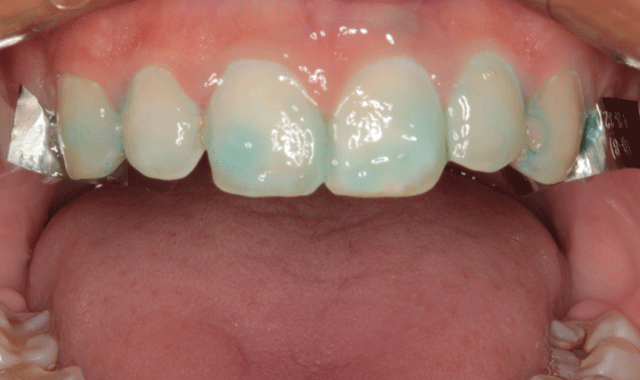

Fig. 11
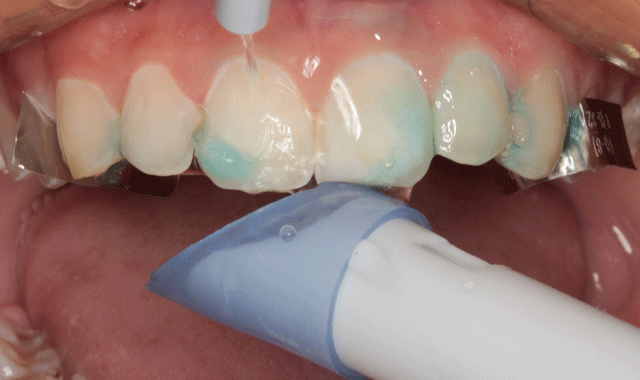

Fig. 12
A self-adhesive light-cured resin cement, FUSION-Zr Multi-purpose Veneer Cement (Taub Products), was applied directly to the etched surfaces. The right central incisor veneer was placed using a cotton plier.
The first veneer can be seen in place in Figure 13. The other five veneers were placed (Fig. 14) and excess veneer cement was teased away from the margins with an applicator tip (Fig. 15).

Fig. 13


Fig. 14
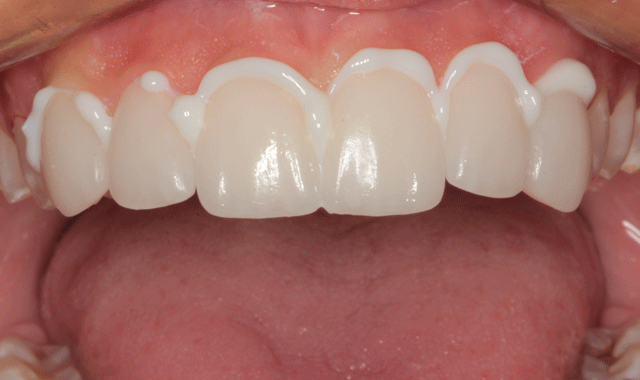

Fig. 15
The veneer cement was cured with an LED curing light (Fig. 16). A #12 surgical blade was used to removes excess cured cement in the interproximal areas (Fig. 17) and floss was worked into the contact areas where possible (Fig. 18).

Fig. 16


Fig. 17
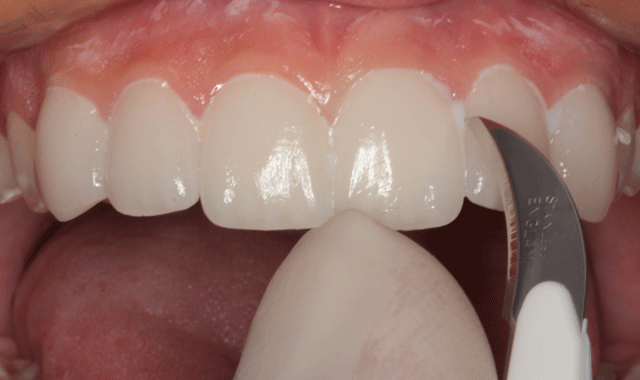

Fig. 18
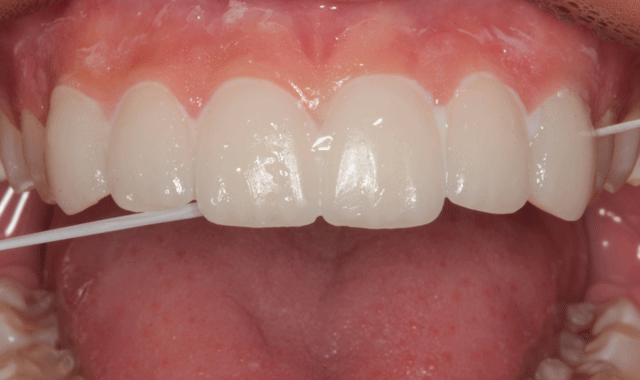

Fig. 19
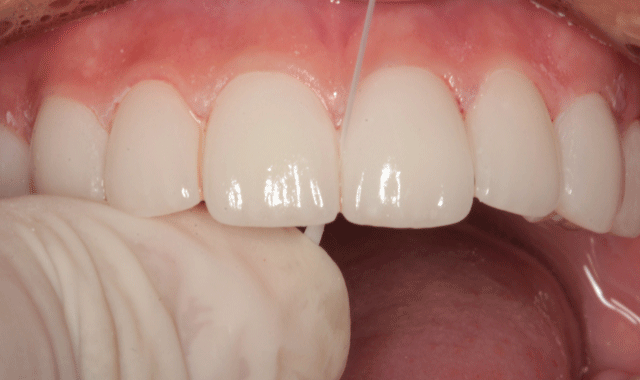
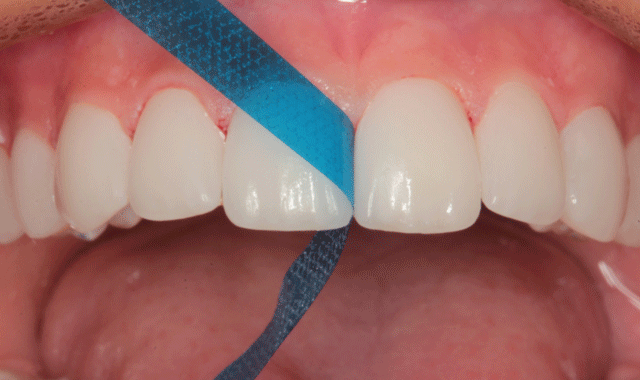
The premolar veneers were placed in the same fashion. A carbide finishing bur (ET2 bur, Brasseler) was used to remove excess cured resin at the margins of each veneer (Fig. 19). Where floss could not be worked into the interpoximals, a separating strip was used to remove excess composite cement (Fig. 20). After all interproximal areas were cleared, they were checked with floss (Fig. 21).

Fig. 20
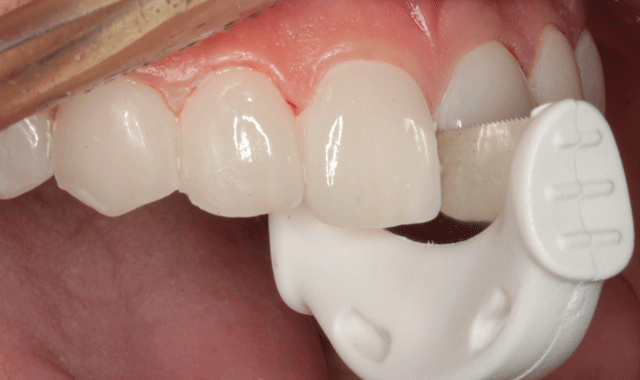

Fig. 21
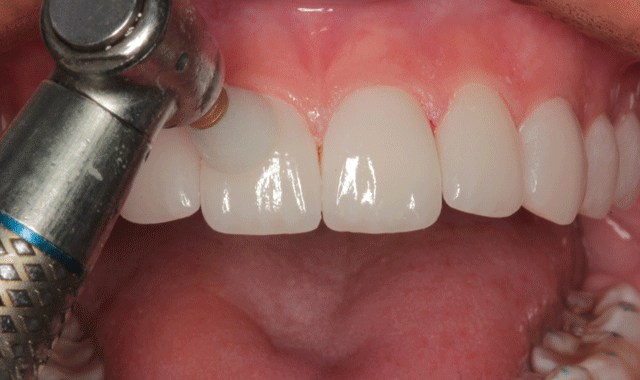
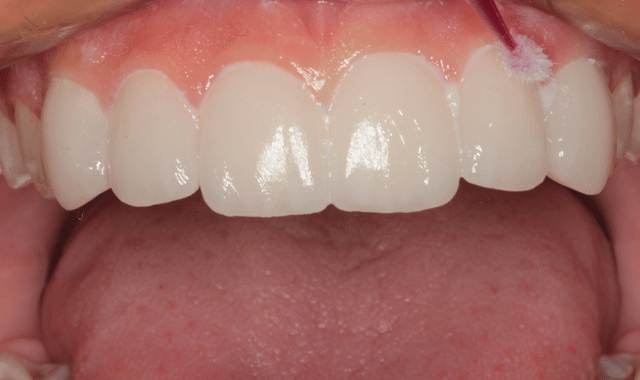
Final polishing was accomplished with an Enhance cup (Dentsply/Sirona) as shown in Figure 22. Interproximal areas were polished with aluminum oxide strips (Epitex, GC) as seen in Figure 23.
Fig. 22

Fig. 23
The final result
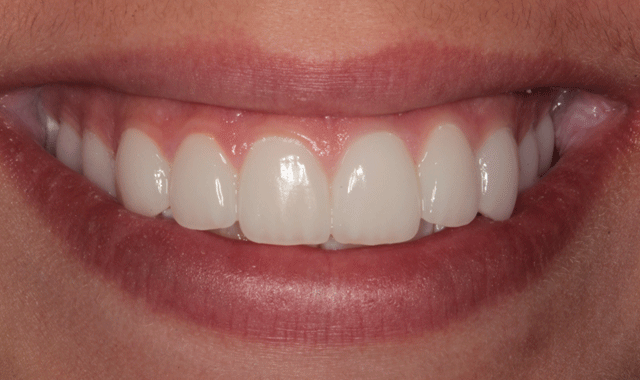
Figure 24 shows the final result from the retracted facial view and from the incisal view in Figure 25. In Figure 26, you can see the patient’s new smile.

Fig. 24
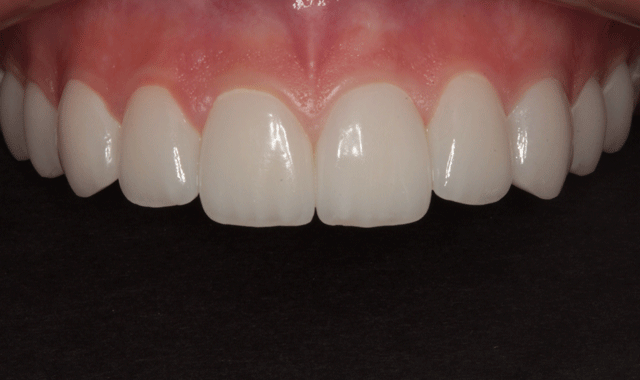

Fig. 25
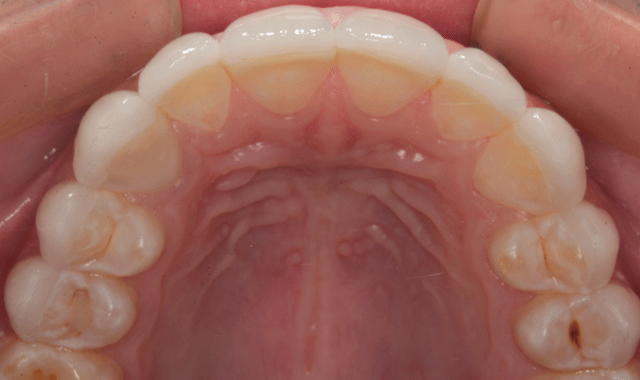

Fig. 26
Conclusion
By using a minimally invasive technique, I was able to enhance this patient’s smile by removing affected enamel and replacing it with thin ceramic veneers. A self-adhesive resin cement was used to further simplify the technique.


