


- Best Practices New Normal
- Digital Dentistry
- Data Security
- Implants
- Catapult Education
- COVID-19
- Digital Imaging
- Laser Dentistry
- Restorative Dentistry
- Cosmetic Dentistry
- Periodontics
- Oral Care
- Evaluating Dental Materials
- Cement and Adhesives
- Equipment & Supplies
- Ergonomics
- Products
- Dentures
- Infection Control
- Orthodontics
- Technology
- Techniques
- Materials
- Emerging Research
- Pediatric Dentistry
- Endodontics
- Oral-Systemic Health
How to provide full-mouth reconstruction with dentures and overdentures
Why overdenture treatment is a good option for patients who may be anatomically or financially compromised.


Advances in clinical techniques and materials continue to revolutionize dentistry, enabling clinicians to practice with a greater degree of predictability and confidence than ever before.
Also, with increasingly affordable dental implants, more and more patients are opting for some form of implant therapy, whether fixed or removable. Utilizing not only the savings in dental implants, but also advancements in dental materials, clinicians are reporting reduced chair time and increased patient satisfaction when reconstructing patients’ smiles. This case study focuses on the sequences involved in the edentulation of the affected dentition, grafting these areas to build the foundation and final implant overdenture reconstruction.
Case description
A patient presented to my practice for a consultation, wanting to restore her dentition to proper form and function. She complained of generalized discomfort in these teeth due to the gross caries and periodontal disease that were readily apparent (Fig. 1). There were several teeth in both arches that were already removed due to gross decay and/or periodontal disease.


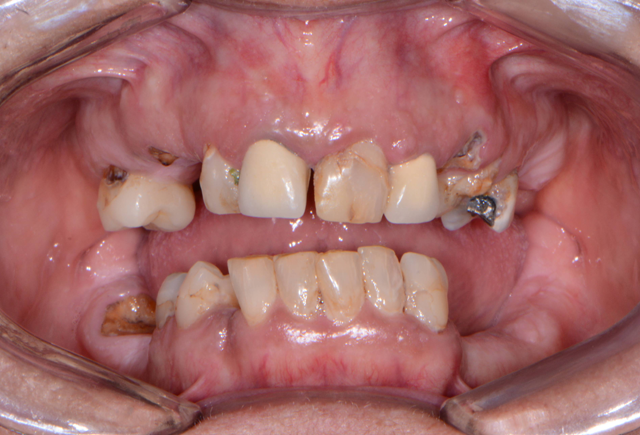


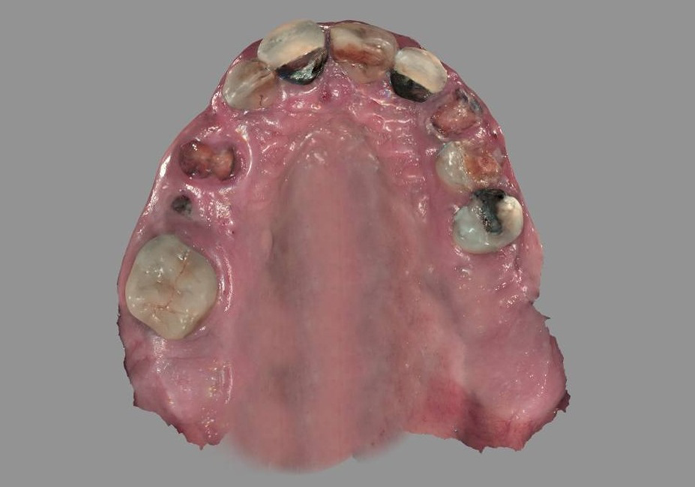
Fig. 1 Fig. 2
Planning
A CBCT scan using the CS 8100 3D (Carestream Dental) was taken to accurately capture the information needed to properly create a treatment plan for this case, ensuring the most ideal outcome since the patient discussed her frustration with previous treatment.
To further develop a treatment plan, digital impressions and bite registration were captured using the CS 3600 (Carestream Dental) intraoral scanner (Figs. 2 & 3). In addition to illustrating the current condition to the patient during her case presentation, the digital images were used for further analysis of tooth position, tooth size and arch form for the proposed treatment of full mouth edentulation, leveling and grafting. Immediate dentures for both arches would be delivered on the day of surgery; however, in the lower archfour dental implants would be placed to support an overdenture.

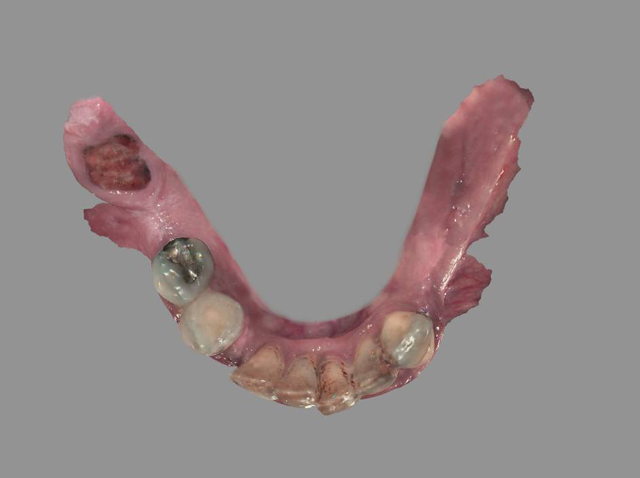


Fig. 3 Fig. 4
Financing options using a third-party payment option (Lending Club) were discussed with the patient. This discussion was a very important part of facilitating acceptance of her care since it made the cost of treatment more feasible.
Starting in the maxillary arch, the teeth were extracted using the Physics Forceps (GoldenDent). The Physics Forceps act simply like a Class I lever, where only one force is applied with the beak on the lingual aspect of the tooth. Once the beak is placed at the lingual cervical portion, the soft bumper is placed on the buccal alveolar ridge at the approximate location of the muco-gingival junction to balance the beak. The beak grasps the tooth, while the bumper is the fulcrum to provide leverage and stability for the beak. Extraction is accomplished with wrist movement rotation in a buccal direction, which is usually accomplished within 30 to 60 seconds depending on the tooth morphology.
Once the teeth in the maxillary arch were removed, any granulation tissue remaining within the sockets were removed using a curette and any sharp areas of the alveolar crest were leveled with a bone bur (Komet USA) and smoothed with a bone file (GoldenDent) (Fig. 4).
Immediately after the extractions, carious lesions, remnants of periodontal ligament (PDL) and calculus were removed with a bur so that the teeth could be used in the Smart Dentin Grinder (KometaBio) as an autologous graft. Once cleaned, the teeth were dried and placed into the sterile chamber (Fig. 5) of the Smart Dentin Grinder for grinding, sorting and collecting particles from 300 um and 1200 um.


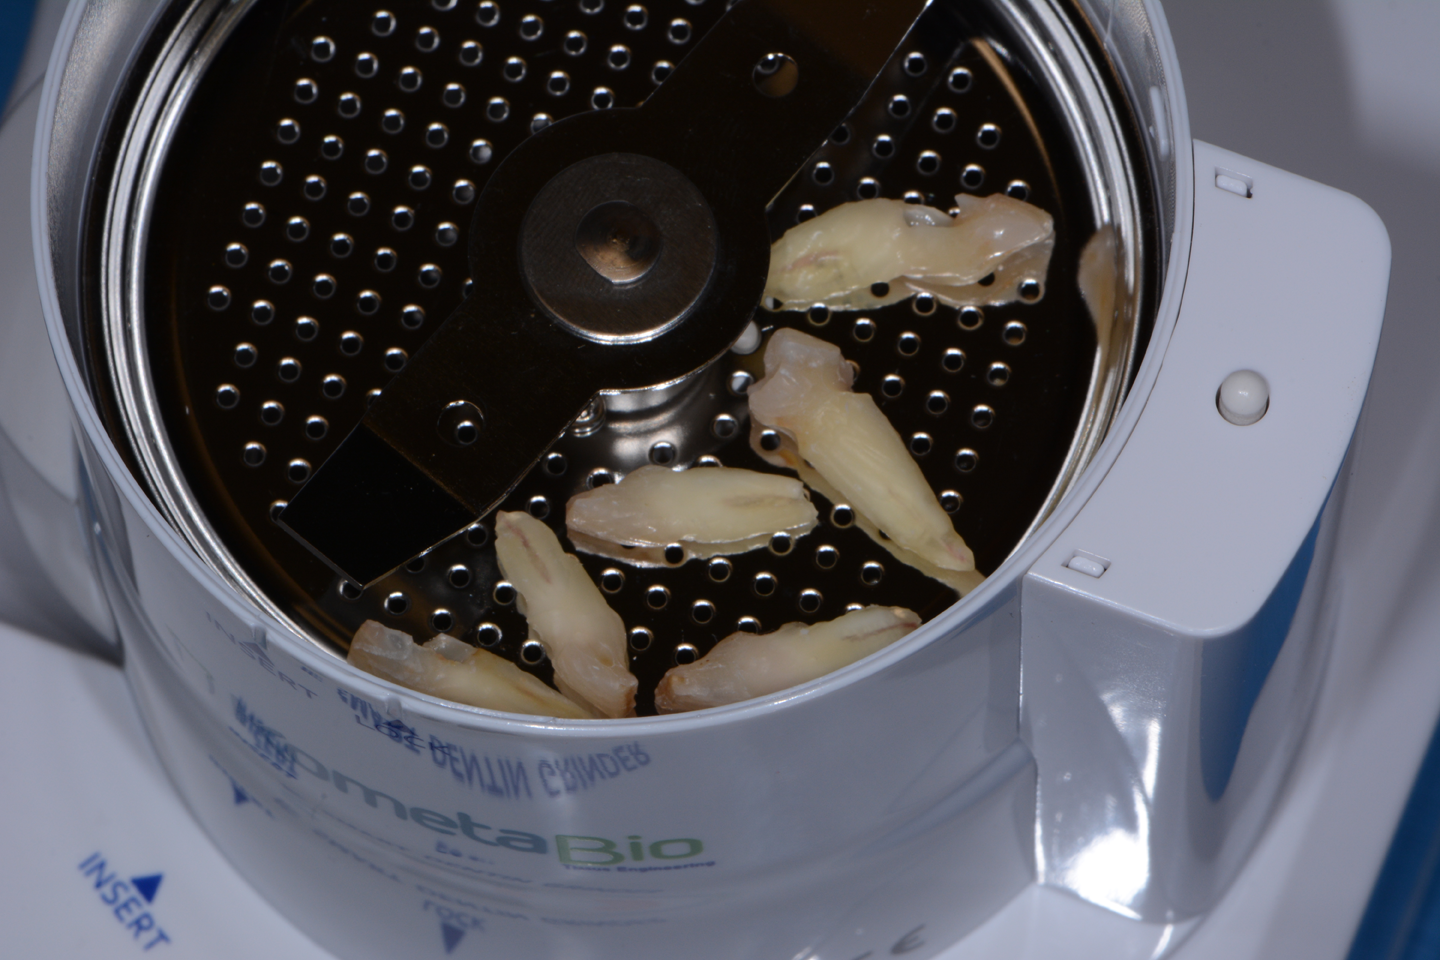


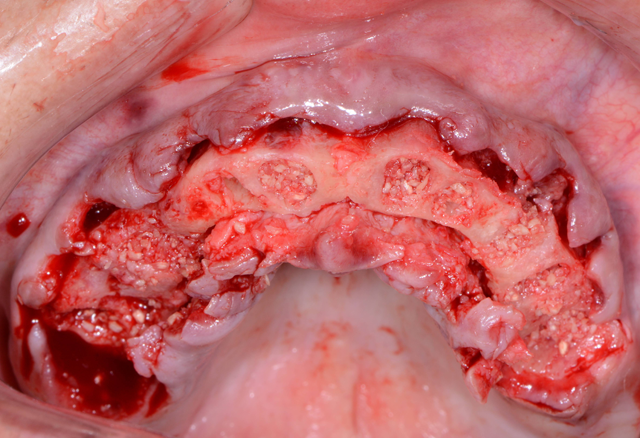
Fig. 5 Fig. 6
The particulate dentin from the drawer was then immersed in basic alcohol for 10 minutes, using a small, sterile glass container included with the kit. The basic alcohol cleanser consists of 0.5 M of NaOH and 30% alcohol (v/v), which are used for defatting and dissolving all organic debris, bacteria and toxins of the dentin particulate. After decanting the basic alcohol cleanser, the particulate was washed twice in sterile phosphate-buffered saline (PBS).
The PBS was decanted, leaving wet particulate dentin that was placed into freshly extracted sockets and any alveolar bone defects (Fig. 6).

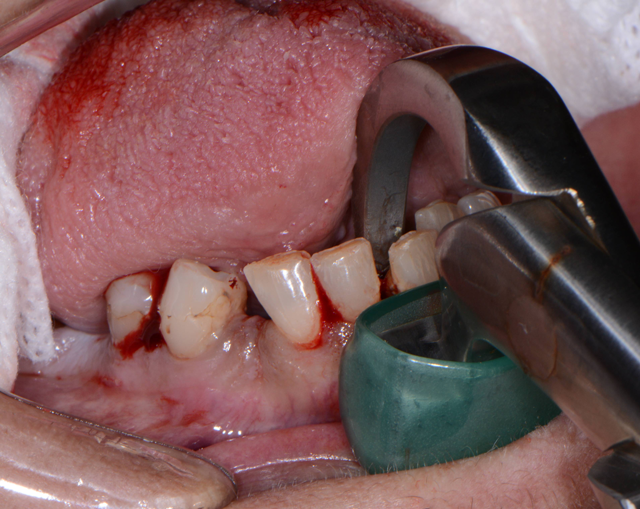


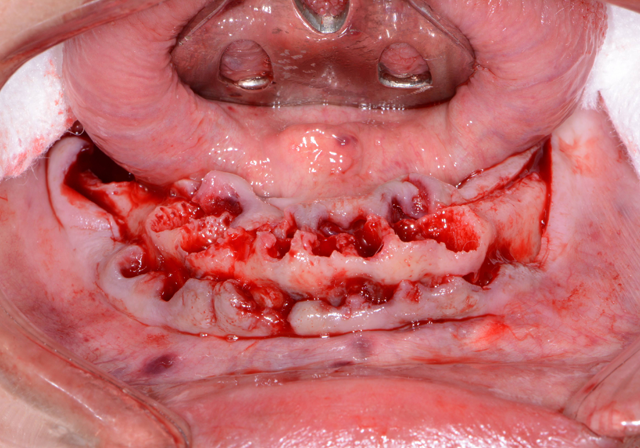
Fig. 7 Fig. 8
After extracting the mandibular teeth (Figs. 7 & 8), the ridge was leveled in the same manner as the maxillary arch. However, four 4x12 mm Engage™ (OCO Biomedical) dental implants (Fig. 9) were placed in key positions to support overdenture prosthesis. These implants were used because their design offers high initial stability for selective loading options due to their patented Bull Nose Auger™ tip and Mini Cortic-O Thread™. Tall healing caps of 5 mm (OCO Biomedical) were placed onto the dental implants so that they would extend through the tissue once sutured and aid in supporting the lower immediate denture.


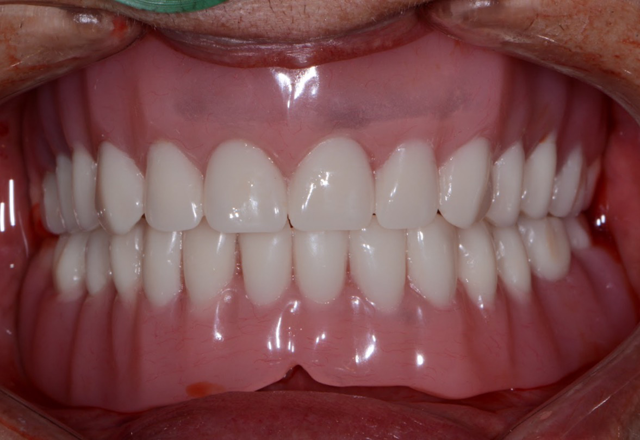

Fig. 9 Fig. 10
Any residual areas around the implants or in remaining sockets were grafted with dentin autogenous grafting material from the freshly extracted teeth. Primary closure was achieved by suturing the tissue with resorbable sutures.
The upper and lower immediate dentures were tried in to ensure there were no areas binding (Fig. 10). Once confirmed, a self-cured silicone based soft reline material (Sofreliner Tough Medium, Tokuyama Dental) was used to line the inner aspects of the immediate dentures (Fig. 11). This material was chosen for its durability and the greater level of comfort it offers the patient throughout their recovery period.


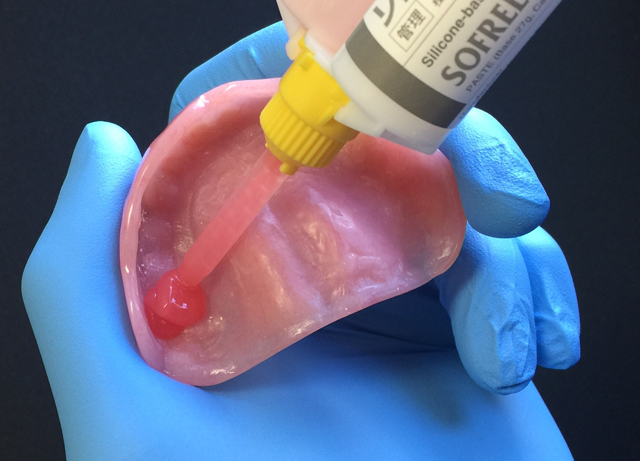

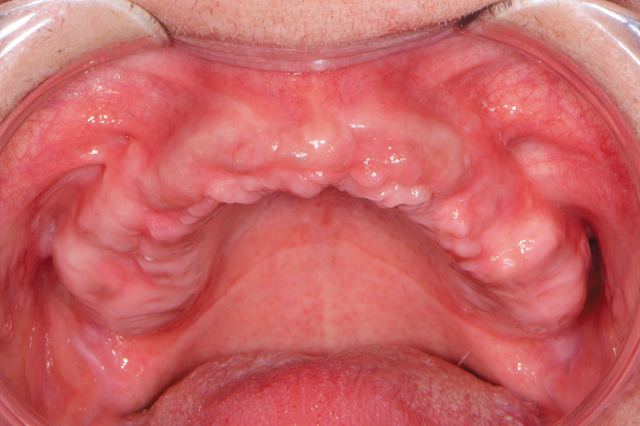

Fig. 11 Fig. 12
Approximately three to four months later (Fig. 12), the healing caps were removed from the Engage (OCO Biomedical) dental implants in the mandibular ridge and LOCATOR R-Tx (Zest Anchors) overdenture attachments placed (Fig. 13) and tightened to 30 Ncm. Free-standing attachments like the LOCATOR R-Tx used to retain overdentures provide numerous advantages, including enhanced esthetics and phonetics as well as ease of maintenance and simplified hygiene.


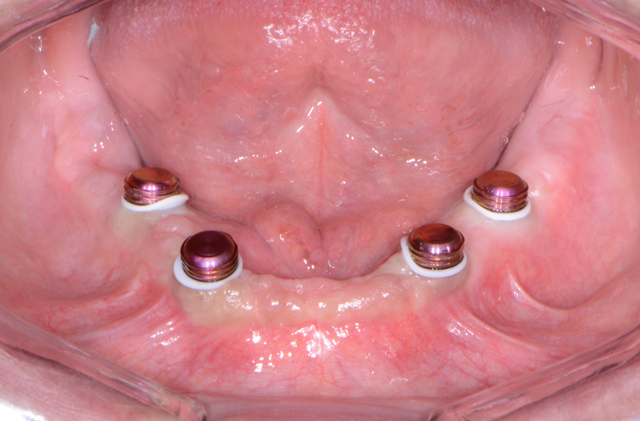

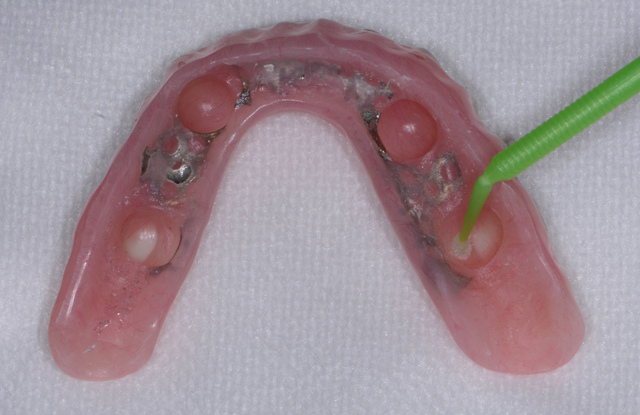

Fig. 13 Fig. 14
A previously made, metal-reinforced overdenture with relieved areas for the housings was tried in to confirm comfort and fit. Any interference that was detected between the denture base and attachments and housings was checked and eliminated.
When relining dentures or picking up overdenture attachments directly within the mouth, the patient may experience heat generation that is uncomfortable in addition to a bad taste when using methyl methacrylate-based pickup materials. Since Rebase II, a chairside hard denture reline material (Tokuyama Dental), is methyl methacrylate free, it doesn’t have a strong odor or taste, and it has minimal heat generation, making it a much better experience for the patient. Rebase II’s mechanical strength also makes it a suitable option for pickup applications.
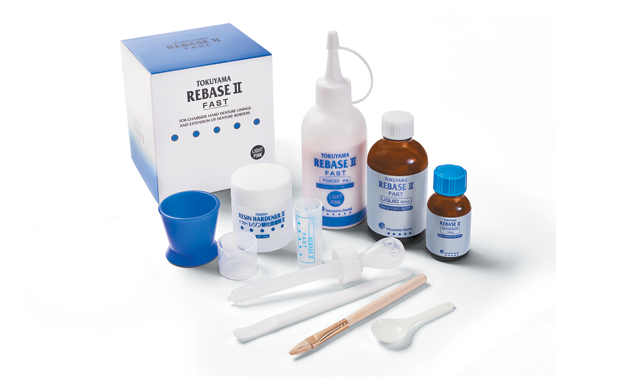


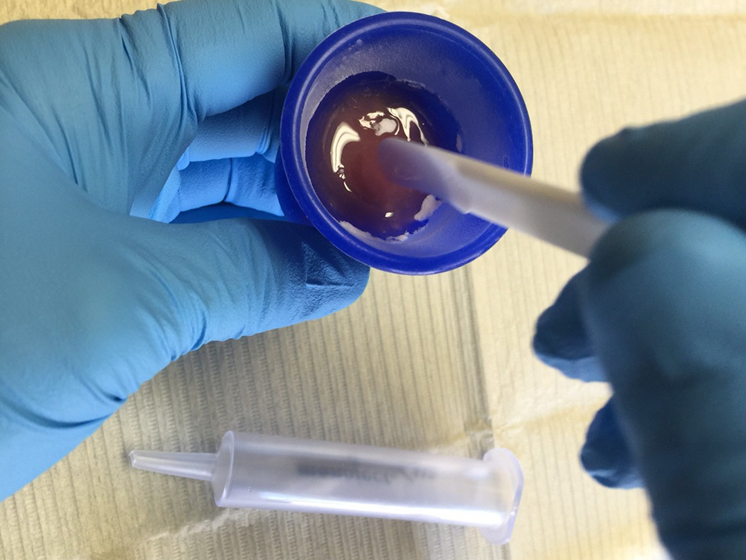
Fig. 15 Fig. 16
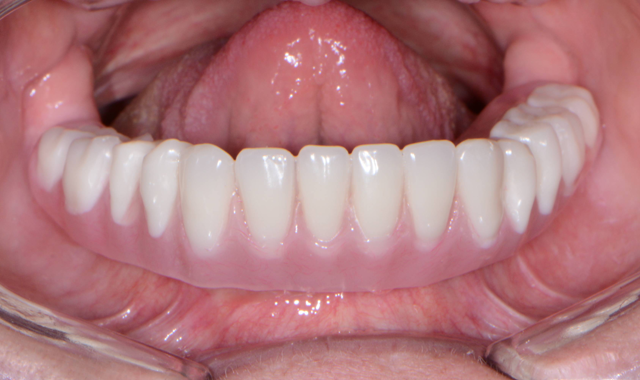
The first step was to brush a thin coat of adhesive into the overdenture recesses (Fig. 14) to enhance retention between the denture base and the hard reline material. Petroleum jelly was applied to the surrounding surfaces of the denture to prevent unwanted adherence of excess material. Once mixed, the Rebase II material (Figs. 15 & 16) was placed into a plastic dispensing syringe and injected up to two-thirds the height of each recess as well as on to the attachments. During seating, the prosthesis was gently held in place by hand. After a total of about three minutes, the overdenture with the incorporated retention caps was removed. Any excess material was removed with a trimming bur (Fig. 17). At the completion of the prosthetic phase, the patient stated how pleased she was to be able to smile and function without the prosthesis wobbling or falling out (Fig. 18). Most importantly from a clinical standpoint, we were pleased to see the areas in the upper and lower arches healthy and infection-free.


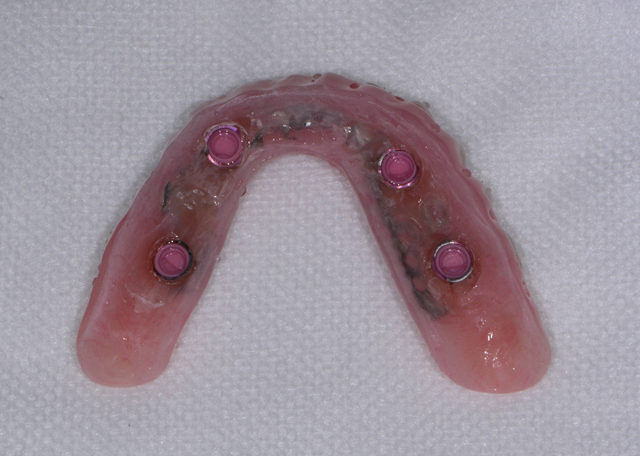

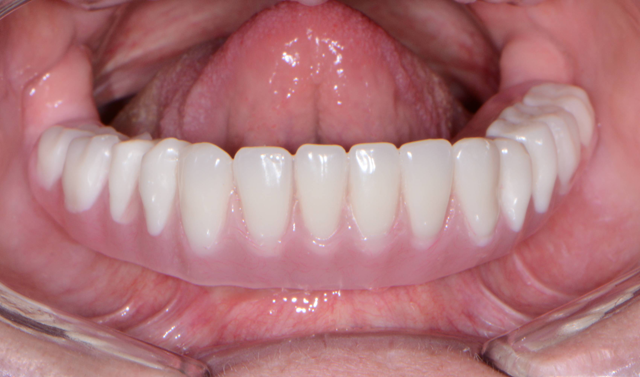

Fig. 17 Fig. 18
Conclusion
More and more patients are presenting to dental practices with terminal dentitions requiring full-mouth extractions. Overdenture treatment is a very good option for those individuals who may be anatomically, financially or medically compromised. Having the proper armamentarium that allows the dental practitioners the ability to provide efficient yet effective treatment benefits the patient in several ways.


Nexa3D Announces A Pair of Distribution Partners and Compatibility With a Trio of Pac-Dent Resins
February 27th 20243D printer manufacturer Nexa3D recently announce new distribution partnerships with CAD-Ray and Harris Discount Dental Supply, along with compatibility with 3 of Pac-Dent’s Rodin resins.


